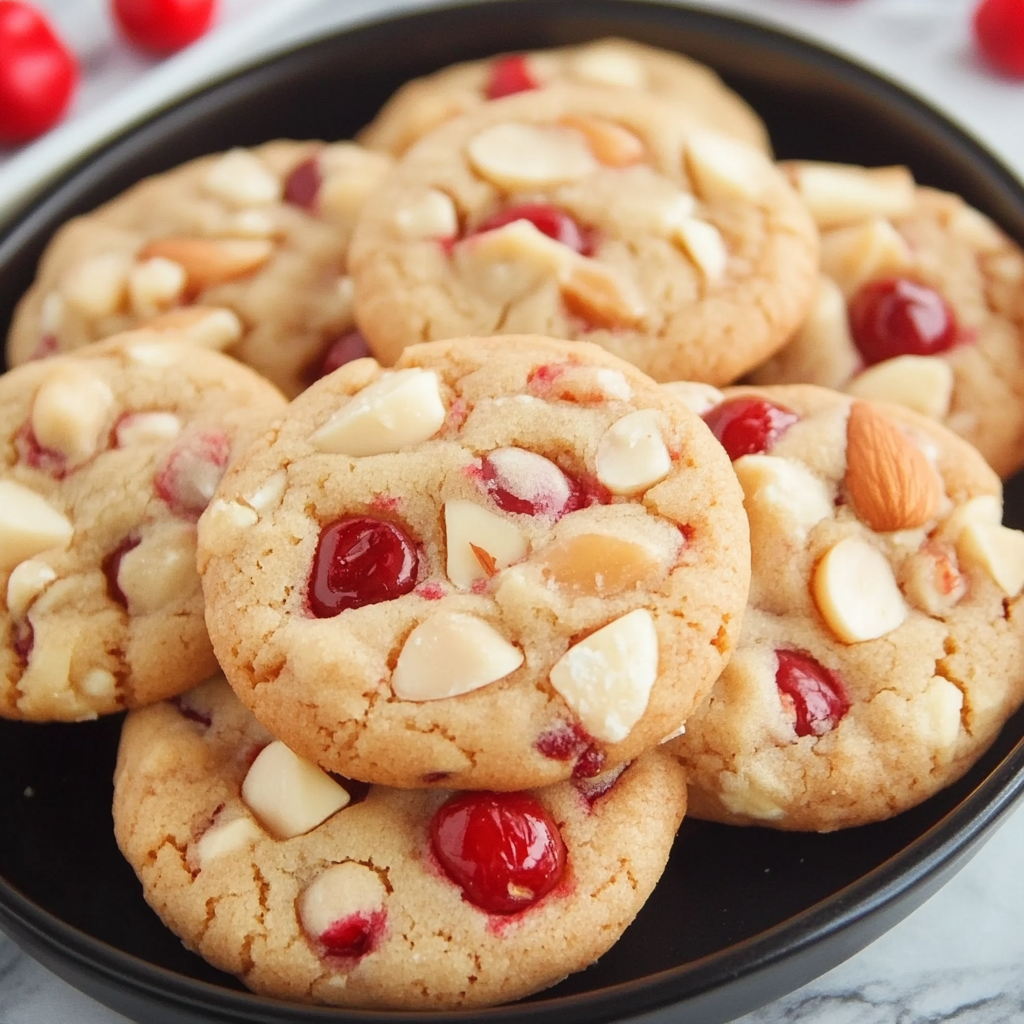
Almond Cherry Cookies
There’s something truly magical about cookies that transport you back to fond memories, isn’t there? Every bite of these Almond Cherry Cookies is like a warm hug from the past, whispering sweet secrets of family gatherings and laughter shared over dessert. The soft, buttery texture combined with the unexpected burst of flavor from the maraschino cherries creates an experience that is both nostalgic and refreshingly new. I promise you, once you take a bite, you’ll feel like you’ve uncovered a hidden treasure that deserves to be celebrated time and again. These delightful cookies are not merely a treat; they are an invitation to gather, to reminisce, and to indulge in life’s sweetest moments.
What makes these cookies even more special is their rich blend of flavors—the nutty essence of almonds harmonizing beautifully with the bright notes of cherry. It’s a symphony of tastes that captures the heart of American baking while offering a twist that keeps everyone coming back for more. Whether you’re making them for a holiday gathering, a bake sale, or just because your heart craves something sweet, these cookies will undoubtedly light up any occasion. Trust me, there’s nothing quite like pulling a batch of freshly baked Almond Cherry Cookies out of the oven and watching as they vanish before your eyes!
Almond Cherry Cookies: A Sweet Surprise in Every Bite
Let’s embark on this delightful culinary adventure together! Making Almond Cherry Cookies is not only straightforward but also incredibly rewarding. You’ll find yourself eagerly anticipating each step as the aroma fills your kitchen and brings everyone flocking to see what deliciousness is in store. This recipe yields 36 delightful cookies, perfect for sharing—if you can resist keeping them all to yourself!

Ingredients:
As we dive into creating these luscious cookies, it’s essential to appreciate each ingredient’s role in crafting this delightful treat. Each component contributes its own unique flavor and texture, ensuring that every bite is an experience in itself.
- ¾ cup silvered almonds (ground). These almonds are crucial for adding a beautiful nuttiness to our cookies, elevating them from ordinary to extraordinary! Ground almonds provide moisture and tenderness thanks to their healthy fats, while silvered almonds offer a lovely crunch when sprinkled on top. When purchasing, look for fresh almonds—if they smell rancid or off in any way, it’s best to skip them. If you’re looking for alternatives due to allergies or preference, finely chopped walnuts or pecans can work beautifully while still delivering that nutty flavor.
- 1 cup butter (softened). This is absolutely paramount for achieving the perfect cookie texture! Softened butter allows for proper creaming with sugar, which incorporates air into the dough and creates those tender edges we all adore. If your butter is too cold, it won’t cream well; if it’s melted or too warm, your cookies may spread too much when baking. I always opt for high-quality butter because it really does make a difference—in flavor and richness!
- ¾ cup powdered sugar (divided). Powdered sugar adds sweetness without the graininess that granulated sugar can sometimes impart when not fully dissolved. Dividing this ingredient helps us sweeten the dough while also creating that glorious glaze later on—it’s like getting the best of both worlds! Make sure you sift it before using; this ensures we have no lumps interfering with our silky-smooth frosting.
- 1 teaspoon vanilla extract. Oh my goodness—this magical liquid gold adds depth and warmth to our cookies! Vanilla enhances all other flavors and lends an inviting aroma that makes your heart sing as they bake. Always choose pure vanilla extract over imitation; trust me on this one—it’s non-negotiable if you want truly extraordinary results.
- 2 ¼ cups all-purpose flour. Flour acts as the backbone of our cookie dough—it gives structure while allowing those dreamy textures we crave! Be sure to measure accurately; spooning flour into your measuring cup rather than scooping will prevent packing it down too much, which could lead to dense cookies instead of soft ones.
- ¼ teaspoon salt. Salt might seem minor in this sweet treat but believe me—it plays a vital role in balancing flavors! It enhances sweetness while providing contrast—a little pinch goes a long way toward elevating your cookie game.
- 8 ounces maraschino cherries (halved). These little gems are where our surprise element comes into play! Their sweetness paired with their juicy nature creates bursts of flavor within each cookie that will have everyone guessing at just what makes these so special! Make sure to reserve some cherry juice as we’ll need it later—it’s like liquid magic!
- 1 teaspoon maraschino cherry juice. This concentrated splash adds color and flavor to our icing without overpowering it—just enough cherry essence shines through without taking center stage away from our almond base.
- Red decorating sugar. Not just for looks—this sugary shimmer adds an extra layer of delight when sprinkled atop our finished cookies! It catches the light beautifully and invites everyone in for just one more taste.
- 2 cups powdered sugar (for icing). Again, we’ll use powdered sugar here since it dissolves seamlessly into smooth frosting—a crucial feature when trying to create that glossy finish we’re after!
- 1 Tablespoon maraschino cherry juice, plus additional milk (2-3 Tablespoons) for consistency—this dynamic duo ensures our glaze reaches that perfect dipping texture without becoming runny or overly thick.
Now that we’ve gathered everything we need let’s ensure we have all the right tools at hand!
Equipment You’ll Need:
Having the right equipment not only streamlines your baking process but also enhances your overall experience in the kitchen! Think of these tools as trusty companions on our journey toward cookie bliss.
- Mixing bowls – A good set of mixing bowls is essential for combining ingredients effectively without mess or fuss. Opt for glass or stainless steel; they’re sturdy and won’t absorb odors from previous batches (trust me—you don’t want garlic-flavored cookies!).
- Electric mixer – While whisking by hand has its charm (and arm workout!), an electric mixer saves time and energy when creaming butter with sugar—a vital step for achieving lightness in our Almond Cherry Cookies!
- Parchment paper – Lining your baking sheets with parchment paper ensures easy removal after baking while preventing sticking—no one wants their beloved creations torn apart during transfer!
- Cookie scoop – A small cookie scoop helps make uniform-sized balls every time—which means even baking and consistent results across all those delectable treats!
- Wire rack – Cooling racks allow air circulation around freshly baked cookies so they don’t steam themselves soggy—a non-negotiable step if you want crisp edges alongside soft centers!
With all our ingredients prepped and tools ready at hand let’s dive into making those charming Almond Cherry Cookies!
Step 1: Preheat Your Oven for Perfect Baking
First things first: preheat your oven to 375 degrees Fahrenheit because starting with a hot oven is absolutely crucial here! This ensures immediate heat exposure when we place those precious cookies inside so they’ll puff up beautifully instead of flattening out into sad little disks. As you wait for it to reach temperature—take a moment to breathe deeply—the scent of melting butter mingling with sweet vanilla will soon fill your kitchen!
Step 2: Cream Together Butter & Sugar
In a large mixing bowl, combine softened butter with ½ cup powdered sugar along with the vanilla extract before grabbing your electric mixer or whisk (if feeling adventurous!). This process known as creaming incorporates air into our mixture which leads us towards achieving those perfectly tender cookie textures we’re after—so don’t rush this step! Mix until everything is lightened in color and fluffy—about two minutes should do the trick—but keep an eye out; you want it pale yellow rather than white since over-mixing here could lead us down a path toward dry results later on.
Step 3: Combine Dry Ingredients
In another bowl whisk together flour, salt, and ground almonds until evenly distributed—this step may seem minor but trust me; it helps avoid clumps forming during incorporation later on which could result in uneven textures throughout each cookie! Once combined add this dry mixture gradually into wet ingredients stirring gently until just combined—we’re looking for no dry streaks remaining but be careful not to overmix either; gluten formation can ruin softness here!
Step 4: Shape Cookie Balls Around Cherries
Now comes one of my favorite parts—the fun shaping stage where magic happens! Take approximately one tablespoonful worth of dough in palm then press gently down creating an indent using fingers before placing half-a-marashino-cherry right inside there like finding hidden treasure within each ball—you’ll fold dough over carefully sealing cherry inside completely before rolling back into shape gently again between palms until smooth once more—all part of ensuring even distribution throughout batches ahead too! Place on parchment-lined sheets leaving space between each ball allowing room needed during baking—they’ll expand slightly but shouldn’t touch.
As you can see thus far—from selecting quality ingredients through methodical preparation steps—we’ve already laid groundwork necessary towards achieving outstanding results together today with these Almond Cherry Cookies! Stay tuned as we wrap up baking process shortly leading us towards final touches involving glaze perfection next…
Step 5: The Art of Baking – Creating Golden Edges
Once your cookie dough is ready and each delightful ball has been carefully crafted around a cherry half, it’s time to share them with the heat of the oven. This is where the magic begins! Preheat your oven to a warm 375 degrees Fahrenheit, ensuring it reaches that perfect baking temperature to create beautifully golden edges while keeping the center soft and chewy. Trust me on this—getting the oven hot enough before you bake is crucial because it sets off a chain reaction of transformation. As the cookies bake, the butter melts and creates those irresistibly tender bites filled with cherry sweetness.
Now, arrange your cookie balls on a baking sheet lined with parchment paper, giving them enough space to spread out as they bake. You want about two inches apart; this allows for even air circulation and prevents any sticky situations where cookies might merge into one another. Flatten each cookie slightly with your fingers—this not only helps them bake evenly but also creates a lovely surface area for that extravagant cherry glaze we’ll be adding later. Bake these little beauties in your preheated oven for about 8 to 9 minutes, but keep an eye on them! The edges should just start turning golden brown while the centers remain puffed up and soft. If you notice any browning too early, crank that oven down a notch; every oven behaves differently, and yours might just have its own personality! Once they’re done, remove them from the oven and let them cool on a wire rack. This cooling step isn’t just about making sure they’re safe to eat; it allows the flavors to settle and enhances their overall texture.
Step 6: Whipping Up Cherry Frosting – The Sweet Finale
While your cookies are cooling down, let’s dive into creating that utterly divine cherry frosting that will crown these Almond Cherry Cookies like royalty! In a mixing bowl, combine two cups of powdered sugar with one tablespoon of maraschino cherry juice and one teaspoon of almond extract. You’ll want to blend these together until they form a thick, pasty consistency—think of it as luxurious liquid gold waiting to adorn your treats. Now here’s where patience comes into play; add milk gradually—start with just two tablespoons—until you achieve that ideal dipping consistency. It shouldn’t be too runny or thick; rather, it should effortlessly coat the tops of your cookies without dripping down the sides too much.
This frosting is not just an aesthetic touch; it’s absolutely paramount in elevating each bite into an experience filled with layers of flavor. The sweet cherry note perfectly complements the nutty undertones from the almonds, creating a symphony of tastes that dances on your palate. Plus, the addition of almond extract adds depth to the frosting that will leave your friends asking for more! As you mix everything together, take a moment to savor that intoxicating aroma wafting up—it’s truly extraordinary! If you find it’s still too thick after adding milk, don’t hesitate to incorporate another tablespoon at a time until you reach perfection.
Step 7: Dipping Delight – Glazing Your Cookies
Now comes one of my favorite parts—the actual glazing process! Grab those beautifully cooled cookies and prepare for some serious decoration magic. One by one, dip just the tops into your luscious cherry frosting mixture. Make sure each cookie gets an even coat; this isn’t just about looks—it’s about infusing every bite with that sweet cherry flavor we’ve been working so hard to create! After dipping each cookie in frosting, gently flip it over so excess icing can drip back into the bowl rather than pooling underneath; this ensures every cookie maintains its delightful shape while still getting all that wonderful glaze.
As you place each frosted cookie onto your wire rack once again, don’t forget to sprinkle them generously with red decorating sugar while they’re still wet from the glaze! This sparkling touch not only enhances their visual appeal but also adds an extra layer of crunch and sweetness that complements those soft cookies beautifully. It’s like dressing up for a special occasion—it makes everything feel festive and deliciously inviting! I promise you; when friends see these on display at any gathering, they’ll be captivated by their vibrant look before they’ve even taken their first bite!
Step 8: The Final Countdown – Cooling and Storing
After glazing all your cookies (and indulging in more than one taste test—you know I won’t judge!), it’s essential to let them set completely before serving or storing them away. Allow these gorgeous Almond Cherry Cookies to sit at room temperature for about 30 minutes or until the glaze has firmed up nicely—this step ensures that every bite remains intact when they make their grand entrance at dessert time! During this time, try not to rush things; allow yourself some moments of anticipation as those heavenly scents fill your kitchen.
When it comes time to store leftovers (if there are any!), keep in mind that these cookies maintain their best texture when placed in an airtight container at room temperature for up to five days—although I doubt they’ll last that long in most households! If you’d like them fresh for longer periods (and who wouldn’t?), consider freezing them without glaze for up to three months; just thaw them out before adding that beautiful cherry frosting right before serving again. Trust me on this one—you’ll want guests begging for seconds!
Final Thoughts on Your Almond Cherry Cookies
And there you have it—a comprehensive guide filled with love and passion towards crafting delicious Almond Cherry Cookies! Each step was designed not only to walk you through this beloved recipe but also to share why every detail is so important in creating something truly special. These cookies are more than just sweets; they’re memories waiting to happen—filled with laughter around tables laden with joy or quiet moments savored alone with a cup of tea.
I hope you’re as excited as I am about baking these delightful morsels! So roll up those sleeves and let yourself get immersed in this beautiful culinary adventure—you won’t regret it! Enjoy every moment in this process because cooking is all about love—and trust me when I say these cookies will carry plenty of warmth right into your heart! Happy baking!
Storage and Enjoyment Tips for Your Almond Cherry Cookies
Now that your kitchen is filled with the enchanting aroma of freshly baked Almond Cherry Cookies, it’s time to relish every moment of this delightful creation! The journey from mixing the ingredients to watching them transform in the oven is truly magical, and I promise you, these cookies taste even better when shared with loved ones. But what happens if you find yourself with a few leftover cookies? Worry not! I’m here to ensure your sweet treasures remain just as scrumptious later on.
Storing Leftover Almond Cherry Cookies
To keep your Almond Cherry Cookies in their prime, store them in an airtight container at room temperature. This method helps maintain their soft texture and delightful flavor for about 4-5 days—if they last that long! To enhance freshness, consider placing a slice of bread inside the container; it works wonders by keeping moisture levels balanced. Trust me, this little trick ensures that each cookie is still profoundly satisfying even after a few days. As for how they taste post-storage, you’ll find that the flavors meld beautifully over time, creating an even more harmonious symphony of almond and cherry essence. If you want to enjoy them warm again, a quick pop in the microwave for just a few seconds will revive their cookie charm!
Freezing Almond Cherry Cookies for Later
If you’re thinking ahead or simply want to save some cookies for a special occasion (because let’s face it, these are worth saving!), freezing them is an incredibly convenient option. To freeze your cookies properly, place them in a single layer on a baking sheet until solid, then transfer them to a freezer-safe bag or container—this prevents any sticking together. They’ll keep beautifully frozen for up to three months! When you’re ready to indulge again, simply take out however many you desire and allow them to thaw at room temperature or warm them directly in the oven or microwave. This approach not only saves time but also means you can enjoy those delicious cookies whenever the craving strikes. Isn’t it fantastic how easy it is to have a batch of these delectable treats always on hand?
Almond Cherry Cookies
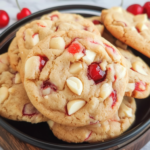
Indulge in the delightful experience of Almond Cherry Cookies, a treat that combines the nutty richness of almonds with the sweet burst of maraschino cherries. Each cookie is soft and buttery, topped with a glossy cherry glaze that adds an irresistible finish. These cookies are perfect for any occasion, whether it’s a festive gathering, a bake sale, or simply a moment to enjoy something sweet at home. The balanced flavors and tender texture create an inviting dessert that will surely evoke cherished memories and inspire new ones around your table.
- Prep Time: 20 minutes
- Cook Time: 9 minutes
- Total Time: 29 minutes
- Yield: Approximately 36 cookies 1x
- Category: Dessert
- Method: Baking
- Cuisine: American
Ingredients
- ¾ cup ground silvered almonds
- 1 cup softened butter
- ¾ cup powdered sugar (divided)
- 1 teaspoon vanilla extract
- 2 ¼ cups all-purpose flour
- ¼ teaspoon salt
- 8 ounces maraschino cherries (halved)
- 1 teaspoon maraschino cherry juice (for frosting)
- Red decorating sugar
- Additional milk for frosting consistency
Instructions
- Preheat your oven to 375°F (190°C).
- In a large bowl, cream together softened butter and ½ cup powdered sugar until light and fluffy. Mix in vanilla extract.
- In another bowl, whisk together flour, salt, and ground almonds. Gradually add this mixture into the wet ingredients until just combined.
- Shape cookie dough around halved cherries, ensuring they are sealed inside.
- Place on parchment-lined baking sheets, flatten slightly, and bake for about 8 to 9 minutes until edges are golden.
- Allow cookies to cool on a wire rack before glazing.
- For the frosting, mix remaining powdered sugar with maraschino cherry juice and milk until reaching desired consistency. Dip cooled cookies in frosting and sprinkle with red decorating sugar.
Nutrition
- Serving Size: 1 cookie (30g)
- Calories: 150
- Sugar: 10g
- Sodium: 50mg
- Fat: 8g
- Saturated Fat: 5g
- Unsaturated Fat: 3g
- Trans Fat: 0g
- Carbohydrates: 18g
- Fiber: <1g
- Protein: 2g
- Cholesterol: 20mg