Vegan Slutty Brownies
When it comes to dessert, there are few things that evoke as much warmth and nostalgia as a rich, fudgy brownie. Now, imagine layering that classic decadence with the sweet embrace of chocolate chip cookie dough and the delightful crunch of chocolate sandwich cookies. This isn’t just a dessert; it’s an experience, a celebration of flavors that dance together in perfect harmony. These Vegan Slutty Brownies are not merely about satisfying your sweet tooth; they embody the spirit of indulgence and joy, creating a bridge between tradition and modern dietary choices. With each bite, you encounter layers that offer both texture and taste—each mouthful is like a cozy hug on a cold day, enveloping you in gooey goodness and bringing back memories of baking with loved ones.
As you embark on this culinary adventure, let me assure you there’s nothing intimidating about making these delightful brownies. In fact, I promise they will become a cherished recipe in your kitchen repertoire—a go-to for gatherings, weekend treats, or even those quiet evenings when you just want to reward yourself after a long day. The beauty of these Vegan Slutty Brownies lies not only in their rich flavor profile but also in how simple they are to create! Trust me when I say that once you’ve taken this plunge into baking bliss, you’ll find yourself dreaming up reasons to whip them up time and again.
Vegan Slutty Brownies: A Triumphant Treat
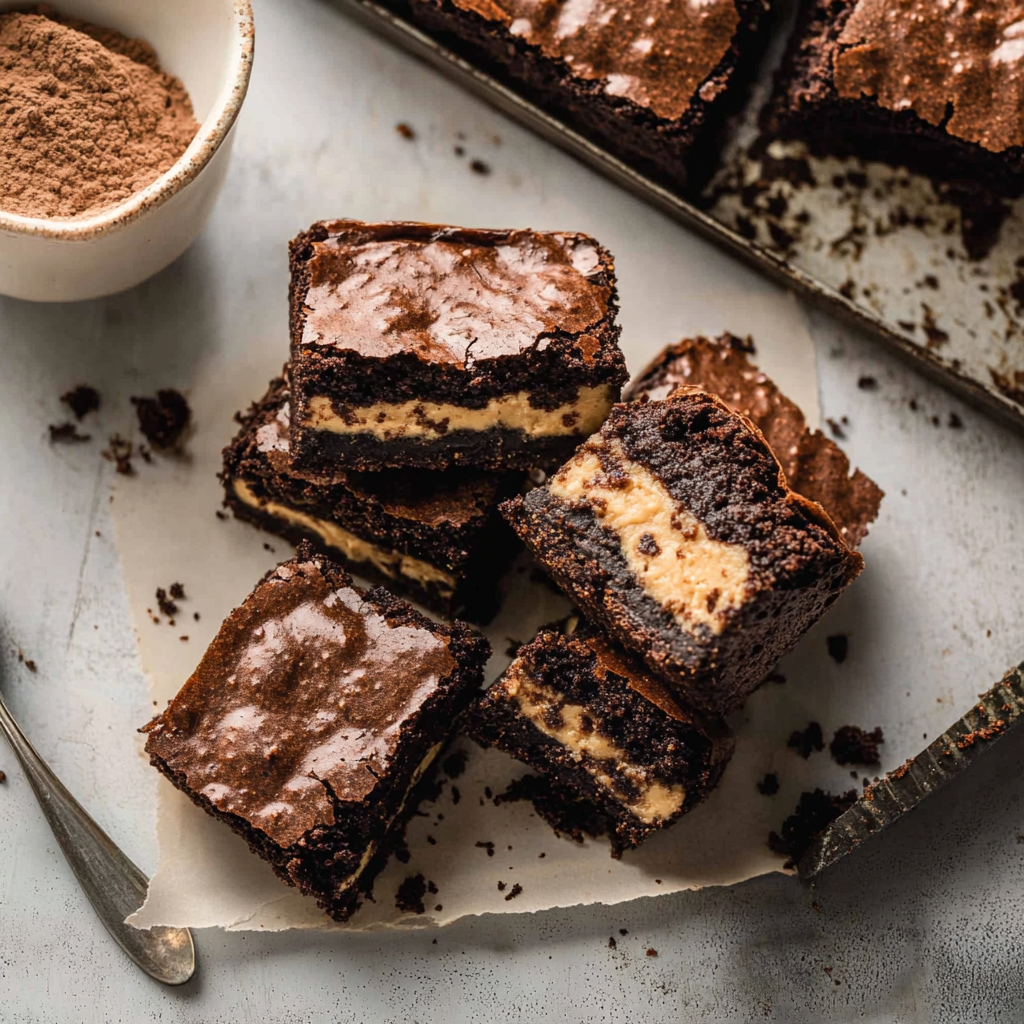
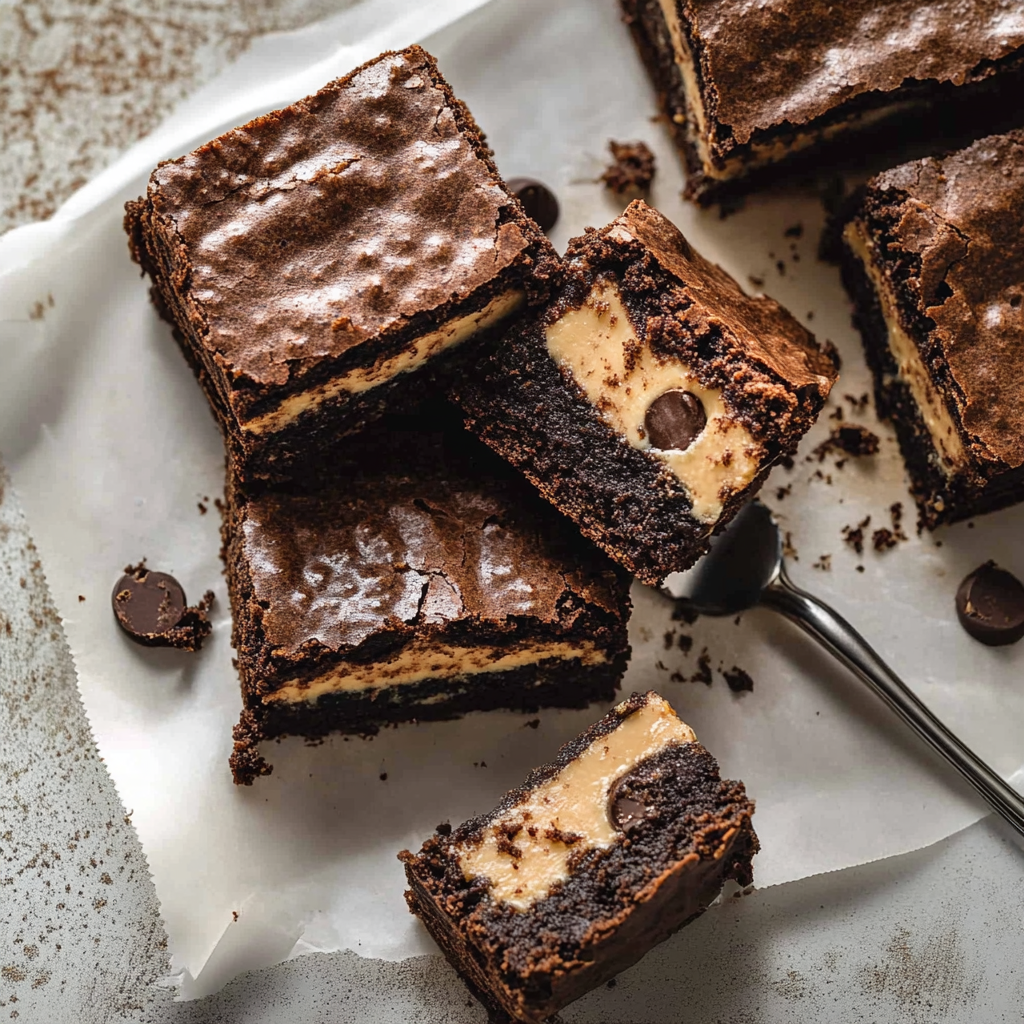
This recipe for Vegan Slutty Brownies brings together three decadent layers: an indulgent chocolate chip cookie base, an irresistible layer of chocolate sandwich cookies, and a fudgy brownie topped off with mini vegan chocolate chips. Whether you’re hosting friends or simply seeking a comforting dessert at home, this treat is sure to impress everyone who takes a bite.
Ingredients:
As we gather our ingredients for these incredible brownies, remember that each one plays a vital role in crafting this delicious masterpiece. Let’s take a closer look at what you’ll need:
- 1 tbsp ground flax meal: This humble ingredient is the star of our egg replacement game! Ground flax meal mixed with water creates a gel-like consistency that mimics the binding properties of eggs without any animal products. Not only does it help hold the brownies together beautifully, but it also adds fiber and healthy omega-3 fatty acids to your treat. When shopping for flax meal, opt for fresh or refrigerated varieties if possible; this ensures maximum nutritional benefits and flavor.
- 3 tbsp water: This simple addition works hand-in-hand with the flax meal to create our egg substitute. It’s crucial for achieving that perfect texture in our brownies—you want just enough moisture to bind everything without making the batter too runny.
- 1/2 cup vegan butter (soft): Softened vegan butter is essential for achieving that light and fluffy texture we’re aiming for in our brownie base. Creaming the butter with sugar incorporates air into the mixture—this step is non-negotiable as it helps create that heavenly rise we all love in baked goods. Look for high-quality vegan butters made from plant oils or coconut oil; they lend richness without compromising on flavor.
- 1/2 cup brown sugar (packed): Packed brown sugar adds depth to our brownies with its caramel notes while contributing moisture due to its molasses content. This balance is absolutely paramount—without it, the brownies could end up dry and crumbly instead of fudgy and luscious! Always choose organic options if available; they often have richer flavors.
- 5 tbsp cane sugar (organic): This organic cane sugar provides sweetness while complementing the deeper notes from the brown sugar. It also aids in achieving that lovely crust on top of your brownies as they bake!
- 1 tsp vanilla extract: The aroma of vanilla wafting through your kitchen is nothing short of magical! Vanilla extract enhances all the other flavors present in our brownies—it’s like adding a warm hug to every bite. Always use pure vanilla extract if possible; artificial varieties can sometimes leave an aftertaste that’s less than desirable.
- 1 1/2 cups gluten-free all-purpose flour: Choosing gluten-free flour makes these brownies accessible for everyone while allowing us to maintain that desired structure. Look for blends that contain xanthan gum or have been specifically formulated for baking; this ensures our brownies don’t turn out dense or gummy!
- 1 tsp baking powder: This leavening agent helps create lift within our brownie batter—a crucial element when working with vegan recipes where traditional eggs aren’t used! Baking powder releases carbon dioxide bubbles during baking which contributes to a lighter texture.
- 1/2 tsp baking soda: Paired with an acid (in this case, brown sugar), baking soda helps achieve that beautifully tender crumb we adore in brownies while also enhancing browning during cooking.
- 1/8 tsp salt: A small pinch of salt goes far; it amplifies flavors throughout your dish while helping balance sweetness perfectly—never underestimate its power!
- 1/2 cup vegan mini chocolate chips: Tiny bursts of chocolate throughout our cookie layer ensure every bite feels indulgent! Feel free to use dark or semi-sweet options based on your preference—just double-check they’re dairy-free!
- 8 Oreos (or gluten-free chocolate sandwich cookies): These iconic cookies bring additional layers of flavor and texture—not only do they add crunch but also their signature creaminess which pairs wonderfully against rich brownie batter!
- 3/4 cup gluten-free all-purpose flour (for the brownie layer): Yes, another round of gluten-free flour—but rest assured it’s worth it! This extra flour will help keep our brownie structure intact while still allowing for gooeyness at its core.
- 1/4 cup Organic Cocoa Powder Saco Pantry: Cocoa powder gives us that deep chocolate flavor we crave! Choose high-quality brands like Saco Pantry which provide robust taste without excess bitterness.
- 1/2 tsp baking soda (for brownie layer): Just as before—this magical ingredient ensures lightness amidst all those rich flavors!
- 1/2 tsp instant espresso (optional): While optional, adding espresso elevates chocolate’s richness by enhancing its depth—a truly extraordinary secret many chocolatiers swear by!
- 1/8 tsp salt (for brownie layer): Again—salt amplifies sweetness! A tiny pinch works wonders here too.
- 1/3 cup vegan chocolate chips: More chocolate? Yes please! Stirring these into your brownie batter creates pockets oozing with melted goodness throughout each slice!
- 1/2 cup full-fat coconut milk (from the can): The creamy richness from coconut milk contributes moisture as well as fat content necessary for optimal fudginess—we want every bite melting away deliciously on your palate!
- 1/4 cup vegan butter (melted): Just like before—the melted version allows us ultimate control over blending textures within our batters while keeping everything wonderfully rich!
- 1 tsp vanilla extract (again): Because why not? It’ll add another dimension across flavors we’re building upon here!
- 1/2 cup brown sugar (packed) (for brownie layer): And once more—the packing process ensures full sweetness shines through!
Equipment You’ll Need:
Before diving into making these Vegan Slutty Brownies, let’s gather some tools together—it’s amazing how having the right equipment can make your baking experience smoother and more enjoyable! Here’s what you’ll need:
- Mixing bowls – Essential partners in crime for combining ingredients effectively! Choose various sizes depending on whether you’re mixing wet or dry components—glass or stainless-steel bowls retain heat wonderfully during mixing processes.
- Handheld mixer – This trusty gadget saves time by easily beating together ingredients until fluffy perfection arises! If you don’t have one handy though—don’t fret; elbow grease works just fine too!
- Measuring cups & spoons – Precision matters greatly when measuring out ingredients—especially when dealing with flours versus sugars versus liquids! Invest in good quality dry measuring cups alongside liquid ones; accuracy leads directly toward success here!
- Rubber spatula – Often overlooked yet indispensable during mixing stages! A sturdy spatula allows easy folding motions without deflating batters—it’s crucial when incorporating those delicate chocolate chips into doughs seamlessly!
Now that we’ve gathered our ingredients and equipment together successfully let’s jump into preparing those absolutely fabulous Vegan Slutty Brownies…
Step 1: Prepping Your Foundation
First things first—preheating your oven is key! Set it to 350°F so it’s nice and ready when it’s time to bake those beauties later on. While that’s heating up, grab an 8×8 inch pan lined perfectly with parchment paper ensuring easy removal after baking—that little touch makes clean-up a breeze too! As we prepare ourselves mentally let’s start by crafting what will serve as our cookie dough layer. Begin by placing ground flax meal along with water into one bowl; stir gently then set aside allowing them ample time to gel together nicely—it should resemble egg whites after resting briefly.
Step 2: Creaming Together
In another mixing bowl now equipped with either handheld mixer or some good old-fashioned elbow grease we’ll combine softened vegan butter alongside both packed brown sugar along with cane sugar until light fluffy perfection emerges over about 1–2 minutes’ worth of enthusiastic mixing efforts! Adding vanilla extract alongside flax mixture leads us further toward ultimate incorporation journey ahead—all blended well over another short burst lasting around thirty seconds should suffice here too before moving onto dry elements next…
Step 3: Bringing It All Together
Once creamed beautifully together it’s time—we’ll introduce gluten-free flour along baking powder/soda plus salt into this mix slowly until dough starts forming cohesively without any stray bits lingering behind remaining unincorporated… Fold those delightful mini chocolate chips gently right into dough afterwards ensuring every spoonful contains something heavenly awaiting discovery once baked properly later down road ahead!
Step 4: Baking Our Cookie Base
Press dough evenly across bottom surface area inside prepared pan gently using fingertips spreading outwardswards evenly throughout entire expanse before sliding tray inside preheated oven hot enough now achieving golden perfection within roughly five minutes’ duration… Remove carefully afterwards letting cool briefly whilst moving onto assembling next layers shortly thereafter…
Stay tuned as we delve deeper into creating delectable layers atop this tantalizing foundation!
Step 5: The Decadent Brownie Batter
Now that your cookie layer has baked for a tantalizing five minutes, it’s time to create that utterly intoxicating brownie batter that will crown this masterpiece. Start by blending together the dry ingredients in a mixing bowl: the gluten-free flour, organic cocoa powder, optional instant espresso, baking soda, and a hint of salt. This step is crucial because it ensures even distribution of all the leavening agents and flavor enhancers throughout the batter. Mixing these elements together first helps prevent any clumps in your final product—nobody wants a rogue scoop of baking soda ruining their chocolatey experience!
Next, let’s warm up some full-fat coconut milk in a microwave-safe bowl until it is scalding hot—this usually takes about 30 seconds to a minute. Why do we heat the coconut milk? The warmth helps to melt those beautiful vegan chocolate chips you’ll be adding shortly, creating a smooth, luscious chocolate mixture that will become the heart of your brownies. Once the milk is hot, pour in the chocolate chips and allow them to sit undisturbed for about five minutes. Trust me on this; patience is key! This resting period allows the chocolate to soften beautifully before you stir it into an irresistible silky liquid gold. After five minutes have passed, whisk everything together until you achieve a velvety consistency—this is where the magic truly happens!
Step 6: Marrying Flavors and Textures
With your cocoa mixture smooth and inviting, it’s time to add in the melted vegan butter, vanilla extract, and packed brown sugar. This combination creates layers of flavor that are both rich and profound; each ingredient plays its part in elevating your brownies from ordinary to extraordinary! The melted butter adds moisture while also enriching the taste profile with its creamy goodness. Mix everything together until well combined; this should only take about 30 seconds with a handheld mixer or a sturdy spatula if you prefer some arm workout.
Now comes another important step: gently fold in your pre-measured dry ingredients from earlier. It’s essential not to overmix here; instead, use a spatula to carefully combine these elements until just blended. Overmixing can lead to tougher brownies rather than the soft fudgy texture we crave! You want to see a few streaks of flour remaining; it’s perfectly normal and actually beneficial for achieving that dreamy fudgy consistency. Once combined but slightly lumpy (trust me on this!), spread this decadent brownie batter evenly over the Oreo layer you prepared earlier with love.
Step 7: Baking Bliss
Now comes one of the most rewarding moments—the bake! Carefully place your pan in the preheated oven set at 350°F (175°C). You’ll want to set a timer for around 17-20 minutes but keep an eye on things after around 15 minutes just in case; every oven has its quirks! How will you know when they’re done? Look for edges that have set but a center that still appears slightly underbaked—it should jiggle ever so gently when you give it a little shake. Remember, we are going for fudgy brownies here! If they look completely baked through, you might end up with disappointing cakey results instead of those gooey delights we all desire.
While they bake, let yourself be enveloped by that heavenly aroma wafting through your kitchen—it’s an experience unlike any other! Just give yourself permission to savor that moment because soon enough you’ll be indulging in these layered wonders. When they come out of the oven, allow them to cool completely on a wire rack—this cooling period is essential as it allows everything to settle into place beautifully.
Step 8: The Cooling & Chilling Phase
Ahh, now we arrive at one of my favorite steps—the patience game of cooling and chilling! After allowing your brownies to cool at room temperature for about 30 minutes (or longer if you can resist), it’s time for them to take a delightful trip into the refrigerator for at least two hours—or better yet, overnight if you’re feeling ambitious! This chilling phase does wonders for their texture; it firms up those fudgy layers while enhancing their flavors as they meld together harmoniously. I promise you this step is non-negotiable!
Why chill? Well, besides solidifying those layers into something sliceable and easy-to-handle, refrigeration also makes each bite feel like pure bliss as all those flavors fully develop over time. When ready to serve after refrigerating (or once you’ve managed not to devour them all!), simply lift them out using the parchment paper edges—what an effortless joy! Then cut into squares (16 servings ideally) using a sharp knife dipped in hot water for clean cuts—it makes all the difference visually!
Final Touches: Serving Your Vegan Slutty Brownies
Step 9: The Grand Unveiling
Now comes my favorite part—the big reveal when these Vegan Slutty Brownies finally grace your table! Once sliced into perfect squares, don’t forget about presenting them beautifully. Consider serving them warm with an optional drizzle of melted vegan chocolate or even alongside some coconut whipped cream for an added indulgence—because why not elevate perfection just a bit more?
Feel free to garnish with sprinkles or crushed nuts if desired—there’s no limit on how creative you can get here! Each bite promises layers upon layers of satisfaction—a symphony of flavors that dances delightfully across your palate: from rich chocolate brownie goodness down through creamy cookies leading back up again into sweet cookie dough bliss.
So gather around with friends or family (or keep them all for yourself—it’s your secret!), and enjoy every luscious bite as laughter fills the air alongside stories shared over dessert. These Vegan Slutty Brownies aren’t just food—they’re memories waiting to happen! And trust me when I say this—you’ll be making them again and again because once you’ve tasted what true comfort feels like wrapped in chocolatey goodness… there’s no turning back!
Happy baking, my dear friend—I can’t wait for you to experience this joy firsthand!
Storage and Enjoyment Tips for Your Vegan Slutty Brownies
Oh, the moment has finally arrived! You’ve followed each step, your kitchen is filled with the intoxicating aroma of baked goodness, and now it’s time to indulge in these decadent Vegan Slutty Brownies. I can hardly contain my excitement as I imagine the first bite—each layer melding together into a delightful symphony of flavors that will dance on your taste buds. But what about those inevitable leftovers? Fear not, my friend! I’ve got you covered with some storage tips to keep your brownies as scrumptious as the moment they came out of the oven.
Storing Leftover Vegan Slutty Brownies
To ensure your Vegan Slutty Brownies remain fresh and irresistible, store them in an airtight container at room temperature. This method helps maintain their beautifully fudgy texture while keeping those chocolate chips perfectly melty. If you ever find yourself with leftover brownies (although I can’t imagine that happening too often!), they should stay delicious for about 4-5 days. For an extra trick to keep them moist, try placing a slice of bread in the container; it works wonders by absorbing any excess air moisture! The flavors of these brownies deepen over time, creating a truly rich experience, so don’t hesitate to savor them a day or two later. When you’re ready to enjoy another piece, simply let it sit at room temperature for a little while or pop it in the microwave for about 10-15 seconds to bring back that gooey goodness.
Freezing for Later
Now, if you find yourself with a bounty of these delightful treats—or perhaps you want to prepare for a future craving—freezing is an excellent option! To freeze your Vegan Slutty Brownies properly, slice them into individual portions and wrap each piece tightly in plastic wrap before placing them in a freezer-safe bag or container. Make sure to label them with the date so you can keep track of their shelf life. They’ll hold up beautifully in the freezer for up to 3 months without losing flavor or texture—how’s that for convenience? When you’re ready for a sweet treat again, simply take out a brownie and let it thaw at room temperature or heat it gently in the microwave. This way, you’ll always have a slice of heaven on hand whenever those cravings strike!
So there you have it—your journey doesn’t end with baking; it continues with enjoying every last crumb, whether fresh from the oven or savored later!
Vegan Slutty Brownies
Indulge in the ultimate dessert experience with these Vegan Slutty Brownies, where three layers of delightful flavors come together in perfect harmony. Imagine a rich chocolate chip cookie base, a crunchy layer of chocolate sandwich cookies, and a fudgy brownie top, all coming together to create a treat that’s as comforting as it is delicious. Perfect for gatherings or cozy nights in, these brownies offer a nostalgic twist on classic flavors while accommodating modern dietary choices. With simple ingredients and straightforward instructions, you’ll find yourself whipping up this indulgent dessert again and again. Get ready to impress friends and family with these decadent treats that are sure to satisfy any sweet tooth!
- Prep Time: 20 minutes
- Cook Time: 20 minutes
- Total Time: 40 minutes
- Yield: Approximately 16 servings 1x
- Category: Dessert
- Method: Baking
- Cuisine: Vegan
Ingredients
- 1 tbsp ground flax meal
- 3 tbsp water
- 1/2 cup vegan butter (softened)
- 1/2 cup brown sugar (packed)
- 5 tbsp cane sugar (organic)
- 1 tsp vanilla extract
- 1 1/2 cups gluten-free all-purpose flour
- 1 tsp baking powder
- 1/2 tsp baking soda
- 1/8 tsp salt
- 1/2 cup vegan mini chocolate chips
- 8 gluten-free chocolate sandwich cookies
- 3/4 cup gluten-free all-purpose flour (for brownie layer)
- 1/4 cup Organic Cocoa Powder
- 1/2 tsp baking soda (for brownie layer)
- 1/2 tsp instant espresso (optional)
- 1/8 tsp salt (for brownie layer)
- 1/3 cup vegan chocolate chips
- 1/2 cup full-fat coconut milk (from the can)
- 1/4 cup vegan butter (melted)
- 1 tsp vanilla extract (again)
- 1/2 cup brown sugar (packed) (for brownie layer)
Instructions
- Preheat your oven to 350°F (175°C) and line an 8×8 inch pan with parchment paper.
- In a bowl, mix ground flax meal with water and set aside.
- In another bowl, cream softened vegan butter with brown sugar and cane sugar until fluffy. Add the vanilla extract and flax mixture; mix well.
- Gradually add gluten-free flour, baking powder, baking soda, and salt; blend until just combined.
- Fold in mini chocolate chips and press this cookie dough into the prepared pan.
- Layer chocolate sandwich cookies evenly over the cookie dough.
- For the brownie batter, whisk together gluten-free flour, cocoa powder, baking soda, and salt in a separate bowl.
- Warm coconut milk in the microwave until hot; stir in vegan chocolate chips until melted and smooth.
- Mix melted chocolate mixture with melted vegan butter and brown sugar until combined; add dry ingredients gently until just mixed.
- Spread brownie batter over the sandwich cookie layer.
- Bake for 17-20 minutes or until edges are set but center is slightly jiggly. Allow to cool completely before slicing.
Nutrition
- Serving Size: 1 square - approximately 45g
- Calories: 200
- Sugar: 16g
- Sodium: 180mg
- Fat: 9g
- Saturated Fat: 5g
- Unsaturated Fat: 4g
- Trans Fat: 0g
- Carbohydrates: 27g
- Fiber: 2g
- Protein: 3g
- Cholesterol: 0mg