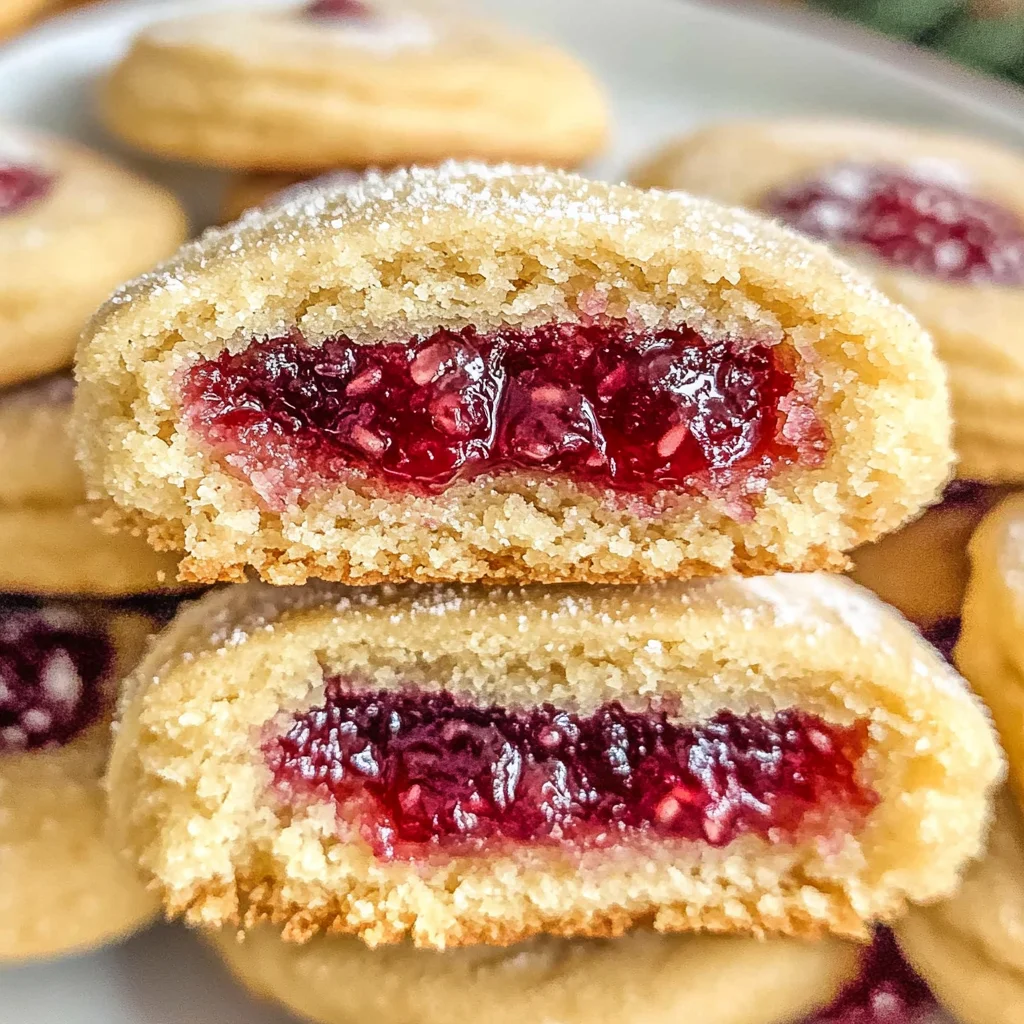
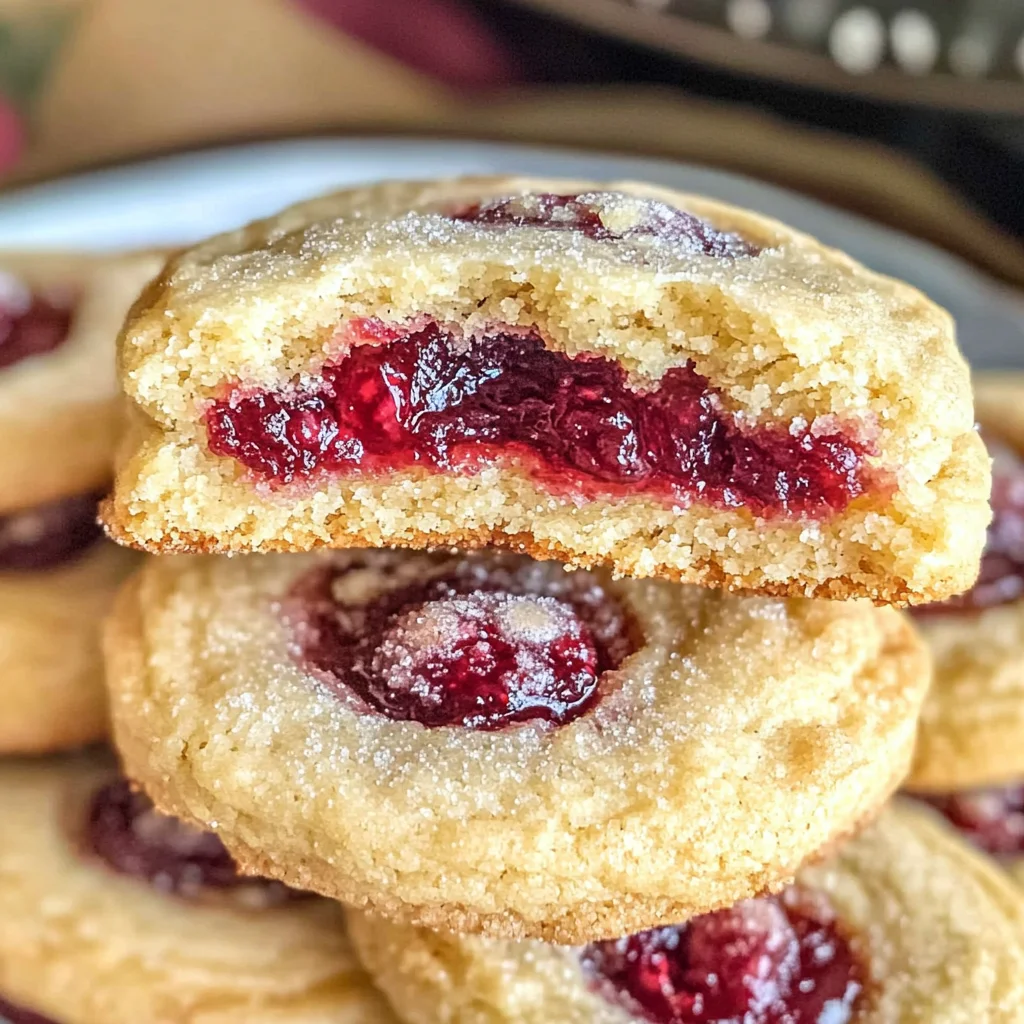
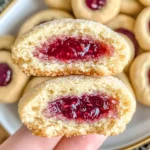
Sweet Raspberry Filled Cookies
There’s something truly magical about baking cookies. It’s not just about mixing ingredients and popping them in the oven; it’s about creating joy, evoking memories, and bringing people together. When I think of Sweet Raspberry Filled Cookies, I’m transported to a warm kitchen filled with laughter, the sweet aroma of butter and sugar wafting through the air, mingling with that delightful tang of fresh raspberries. Each bite is a revelation—the tender cookie giving way to a luscious raspberry preserve center that dances on your palate. This isn’t just a recipe; it’s an experience that transcends generations, connecting us through shared moments and sweet indulgences.
With every cookie I bake, I find myself immersed in the process—measuring flour as if it were a cherished treasure, creaming butter until it’s light and fluffy like clouds in the sky. These Sweet Raspberry Filled Cookies are more than just a delightful treat; they embody comfort and warmth, perfect for holiday gatherings or cozy weekends at home. The combination of rich buttery dough with vibrant raspberry preserves creates a symphony of flavors that delights both young and old alike. So grab your apron and join me on this wonderful baking adventure!
Sweet Raspberry Filled Cookies: A Delicious Hug in Cookie Form
These Sweet Raspberry Filled Cookies are not only easy to make but also profoundly satisfying to eat. Whether you’re preparing for a festive gathering or simply indulging yourself on a quiet afternoon, this recipe is bound to create smiles all around. Trust me when I say that each bite will remind you why we love cookies so much: they have the power to transport us back to simpler times when life was a little sweeter.
Ingredients:
Embarking on this culinary journey requires only a handful of simple yet essential ingredients that come together beautifully. Let’s break down what each one brings to our Sweet Raspberry Filled Cookies.
- 1/2 cup (1 stick or 113g) unsalted butter, at room temperature. Using unsalted butter is crucial because it allows you to control the amount of salt in your cookies, ensuring they don’t turn out overly salty. Room temperature butter is key here—it should be soft enough to easily cream but not melted. This step is non-negotiable! When butter is creamed properly with sugars, it incorporates air into the mixture which results in cookies that are tender and melt-in-your-mouth delicious.
- 2 tablespoons white sugar. This ingredient contributes sweetness but also plays an important role in texture by helping to create that lovely crisp edge we all adore in cookies. White sugar caramelizes during baking, adding depth while keeping the interior soft. It balances perfectly with the fruitiness of the raspberry preserves, enhancing their flavor without overwhelming it.
- 3 tablespoons confectioners’ sugar. Also known as powdered sugar, this ingredient adds sweetness with a silky texture that helps create tenderness in our cookie dough. It dissolves quickly into the batter, allowing for an even distribution of sweetness without any grittiness—a vital aspect when achieving that luxurious mouthfeel we crave.
- 1/4 teaspoon vanilla extract (optional). While optional, vanilla extract adds a warm depth of flavor that complements both the buttery notes and tartness of raspberry preserves beautifully. It’s like an aromatic hug for your taste buds! If you can find pure vanilla extract rather than imitation, you’ll be rewarded with richer flavor profiles—trust me on this!
- 1/4 teaspoon almond extract (optional). Almond extract brings an enchanting nuttiness to our cookies; it pairs magnificently with raspberries by enhancing their natural sweetness and tartness without overpowering them. If you’re unsure about incorporating almond flavoring due to allergies or preferences, feel free to skip it—it won’t detract from the overall delight of these cookies!
- 1 1/3 cups all-purpose flour. Flour provides structure; it’s essential for holding everything together while still allowing those beautiful pockets of raspberry preserves to shine through! Make sure to spoon and level your flour when measuring—too much flour can lead to dry cookies instead of the tender ones we desire.
- 1/8 teaspoon salt. Salt is often overlooked but plays an integral role in balancing sweetness—it enhances flavors rather than making things taste salty! Just a pinch does wonders; it elevates every other ingredient by bringing out their best characteristics.
- 1/3 cup raspberry preserves. Ahh, this is where magic happens! The star of our show—the sweet-tart filling—adds both moisture and excitement within each cookie bite. Look for high-quality preserves made from real fruit without artificial additives for maximum flavor impact! If you prefer something different or seasonal fruits are available like strawberry or blueberry preserves, feel free to experiment!
Equipment You’ll Need:
As we prepare our Sweet Raspberry Filled Cookies together, having the right tools by your side makes all the difference in creating something truly wonderful—and enjoyable! These pieces may not be ingredients themselves but they are essential partners in our baking adventure.
- Mixing bowls – A good set of mixing bowls allows you flexibility when mixing different components together without causing chaos in your kitchen! Opt for medium-sized bowls that fit comfortably under your mixer if you’re using one; glass or stainless steel works beautifully since they’re sturdy and easy to clean.
- Electric mixer or whisk – An electric mixer can save time when creaming butter and sugars together since it efficiently incorporates air into your mixture—resulting in fluffier cookies! However, if you prefer a workout (and some quality time thinking), using a whisk is equally effective; just be prepared for some arm work!
- Baking sheet – A sturdy baking sheet creates an even surface for cookies during baking while allowing heat circulation around them which leads to uniform cooking—no one wants half-baked treats! Line yours with parchment paper for effortless cleanup and perfectly baked bottoms.
- Cookie scoop – This handy tool takes away guesswork about portion sizes while ensuring uniformity across each cookie shape—you want them all baked evenly after all! A medium-size scoop works well for these cookies; aim for about two tablespoons per scoop.
Now that we’ve gathered all our essential ingredients and equipment let’s dive into making these delectable Sweet Raspberry Filled Cookies!
Step 1: Creaming Butter and Sugars Together
Begin by placing your room-temperature unsalted butter into a mixing bowl along with both white sugar and confectioners’ sugar. This process, known as creaming, is absolutely paramount because it combines these ingredients until they’re light and fluffy—creating tiny air pockets essential for achieving that delicate texture we adore in cookies! Beat them together on medium speed until pale golden color develops; you’ll know it’s ready when it’s visibly lighter in color and has nearly doubled in volume (about 2–3 minutes). Don’t rush this step—inadequate creaming can lead to dense cookies instead of airy delights!
Step 2: Adding Flavorful Extracts
Once you’ve achieved that glorious creamy consistency from Step 1, it’s time to add those optional extracts: vanilla and almond (if using). Add them directly into your creamed mixture along with salt as well—this ensures they’re evenly distributed throughout your dough rather than concentrated only at certain points! Mix again briefly until just combined—not too long here; otherwise your dough may become tough instead of tender!
Step 3: Incorporating Flour
Now comes the fun part—adding flour! Gradually sift in the all-purpose flour while mixing at low speed until combined (this prevents any flour clouds from forming!). Mixing just until incorporated helps keep gluten development minimal—which leads us toward softer cookie perfection later on—but watch closely here; over-mixing could lead us astray into tougher territory! Once everything has come together smoothly without visible streaks remaining means we’re ready for our fruity filling moment!
Step 4: Filling Your Cookies
To assemble these beauties now involves scooping out portions of dough onto prepared baking sheets spaced sufficiently apart so they’ll have room during their oven transformation (about two inches apart should do). Use either your hands or cookie scoop depending on preference size-wise—aiming again towards two tablespoons per mound should yield wonderful results! Press down gently at center before adding approximately one teaspoon raspberry preserves right atop each flattened mound—we want some ooey-gooey goodness hidden inside once baked—but avoid overfilling since spills happen easily during baking if too much jam sneaks out!
Stay tuned as we continue through this delightful journey toward baking perfection…
The Journey to Cookie Perfection: Sweet Raspberry Filled Cookies
Finding the perfect cookie recipe for holiday gatherings or weekend baking sessions can feel like searching for a needle in a haystack. Between juggling family favorites and experimenting with new flavors, it’s easy to feel overwhelmed. But let me tell you, my friends, these Sweet Raspberry Filled Cookies are a true treasure that will not only satisfy your sweet tooth but also become a cherished staple in your baking repertoire. As we dive into this delightful journey of flavors and textures, I promise you’ll understand why these cookies have earned their place among my all-time favorite treats!
Step 5: Creaming Together for Success
First things first, let’s talk about the heart of any great cookie: the creaming process. In a large mixing bowl, grab your room-temperature unsalted butter—this is crucial because cold butter won’t incorporate air properly, leading to dense cookies. Using either a hand mixer or a sturdy wooden spoon (if you’re feeling nostalgic), beat together the butter, white sugar, and confectioners’ sugar until the mixture becomes light and fluffy. You’re aiming for that airy texture because it’s during this step that we’re introducing air into the dough, which is what gives our cookies that lovely lift when they bake. This should take about 2-3 minutes of vigorous mixing.
While you’re creaming away, you might notice how the sugars begin to dissolve into the butter, creating a glossy and smooth texture—it’s practically liquid gold! Don’t rush through this step; it’s absolutely paramount to achieving cookies that rise beautifully and have a tender crumb. Once you’ve reached that ideal consistency—think fluffy clouds—you can gently add in your vanilla and almond extracts if you’re using them. These flavor enhancers are not just optional; they add depth and warmth to each bite, making your Sweet Raspberry Filled Cookies truly extraordinary.
Step 6: The Art of Incorporating Flour
Now that you’ve got that luscious butter-sugar mixture ready, it’s time to fold in the dry ingredients. In a separate bowl, whisk together your all-purpose flour and salt—this is vital for even distribution. Salt enhances sweetness while balancing flavors; it’s like a secret ingredient that elevates everything! Gradually add the flour mixture to your creamy butter blend, using a spatula or wooden spoon to mix until just combined. Be gentle here! Overmixing can lead to tough cookies due to gluten formation.
As you mix, observe how the dough begins to come together—it should form a soft yet slightly sticky consistency. If it feels too wet or loose at this point, don’t panic; simply sprinkle in an extra tablespoon of flour at a time until it reaches that perfect doughy texture. Trust me on this: you want something manageable but still pliable enough to scoop out later. Once combined, give yourself a moment to appreciate how good this dough smells—sweet and buttery with hints of almond wafting through the air is nothing short of intoxicating.
Step 7: Chilling – A Non-Negotiable Step
Now comes one of the most crucial steps in achieving cookie perfection: chilling the dough. This is where patience really pays off! Wrap your freshly mixed dough tightly in plastic wrap or place it in an airtight container and pop it into the fridge for at least 30 minutes or up to an hour if you’ve got time on your hands. Why chill? Well, cooling allows the fats within the dough to solidify again after being creamed with sugar; this results in cookies that hold their shape better as they bake. It also intensifies those beautiful flavors we’ve built up so far.
While you wait (and I know waiting can be hard!), think about how excited you’ll be when you finally bite into these heavenly treats! As they chill, those flavors meld together beautifully, resulting in an even more profound taste experience once baked. When you remove them from the fridge after their little spa treatment, they should feel firmer and easier to handle—like they’ve been rejuvenated!
Step 8: Forming Your Cookie Dough Balls
Once your dough has chilled appropriately, it’s time for one of my favorite parts: shaping those adorable cookie balls! Preheat your oven to 350°F (175°C) while you’re at it—this ensures that when we place our cookies inside, they’ll start baking right away at just the right temperature for optimal rising and browning. Line two baking sheets with parchment paper; this non-stick surface will allow our cookies to slide off effortlessly after baking.
Using a cookie scoop or just your hands (which I personally love because it adds a touch of warmth), portion out about one tablespoon of dough per cookie onto your prepared sheets, leaving enough space between each ball—about two inches apart—to allow them room to spread as they bake. At this point, don’t forget about those vibrant raspberry preserves! Gently use your thumb or index finger to create an indentation in each ball before adding about half a teaspoon of preserves right into that little well you’ve made. This is essential as it allows those sweet raspberry flavors to seep into every corner of your cookie while baking without overflowing!
Watching them transform while baking is genuinely magical; expect them to puff up slightly but still remain soft in the center—a perfect balance between chewy and tender! Bake them for around 12-15 minutes until they turn lightly golden on the edges but still appear soft in the middle—the visual cue indicating their doneness.
Conclusion:
What a journey we’ve taken together through this delightful recipe! From the moment we mixed our ingredients to the first heavenly bite of those soft cookies filled with sweet raspberry goodness, there’s something utterly enchanting about creating such treats from scratch. It’s not just about baking; it’s about crafting memories—whether it’s sharing with friends during a cozy gathering or enjoying them solo with a cup of tea. The way each cookie melts in your mouth while that tangy-sweet raspberry filling bursts forth is truly extraordinary. It encapsulates everything wonderful about homemade treats!
These Sweet Raspberry Filled Cookies are a must-try not only because they’re delicious but also because they bring joy into the kitchen—something magical happens when you bake! Their versatility shines through as well—they’re perfect for holiday platters, tea parties, or even as gifts wrapped up in pretty boxes tied with ribbons. Imagine pulling these beauties out of the oven and watching everyone gather around, drawn by that intoxicating scent—it’s an experience worth sharing!
For serving suggestions, envision savoring one alongside a cup of freshly brewed coffee or perhaps with some creamy vanilla ice cream melting over the warm cookie—heavenly! For an afternoon pick-me-up, pair it with herbal tea or even blend it into yogurt parfaits layered beautifully with fresh fruits. And for those moments when you’re looking to impress? Picture drizzling melted dark chocolate over each cookie for an indulgent twist that elevates them beyond ordinary.
Feeling adventurous? This recipe is wonderfully adaptable! Swap out raspberry preserves for tart cherry or luscious apricot—each variation transforms these cookies into something uniquely delightful while keeping their soul intact. You could even add chopped nuts like almonds or walnuts into the dough for an added crunch or sprinkle coconut flakes on top before baking for a tropical twist! I encourage you to take this base recipe and make it yours; experiment and create new traditions around these cookies. Share your experiences with me; I’d love to hear how you put your own spin on this cherished recipe!
Sweet Raspberry Filled Cookies
Sweet Raspberry Filled Cookies are a delightful treat that captures the essence of comfort and nostalgia in every bite. With their tender, buttery exterior and a gooey center filled with vibrant raspberry preserves, these cookies are perfect for any occasion—be it a family gathering, an afternoon snack, or simply indulging your sweet tooth. The easy-to-follow recipe allows bakers of all skill levels to create these delectable morsels, promising smiles and joy with each cookie shared. Experience the magic of baking as you fill your kitchen with the irresistible aroma of freshly baked cookies!
- Prep Time: 20 minutes
- Cook Time: 15 minutes
- Total Time: 35 minutes
- Yield: Approximately 24 cookies 1x
- Category: Dessert
- Method: Baking
- Cuisine: American
Ingredients
- 1/2 cup unsalted butter (113g), at room temperature
- 2 tablespoons white sugar
- 3 tablespoons confectioners' sugar
- 1/4 teaspoon vanilla extract (optional)
- 1/4 teaspoon almond extract (optional)
- 1 1/3 cups all-purpose flour
- 1/8 teaspoon salt
- 1/3 cup raspberry preserves
Instructions
- Preheat your oven to 350°F (175°C) and line two baking sheets with parchment paper.
- In a mixing bowl, cream the room-temperature butter with white sugar and confectioners' sugar until light and fluffy (about 2-3 minutes).
- Add vanilla and almond extracts, along with salt; mix until just combined.
- Gradually sift in the flour while mixing on low speed until fully incorporated; avoid overmixing.
- Scoop out portions of dough (about one tablespoon each) onto prepared baking sheets, leaving space between them.
- Press down slightly in the center of each mound and add about half a teaspoon of raspberry preserves.
- Bake for 12-15 minutes until edges are golden but centers remain soft. Cool on baking sheets for five minutes before transferring to wire racks.
Nutrition
- Serving Size: 1 cookie (25g)
- Calories: 107
- Sugar: 5g
- Sodium: 35mg
- Fat: 5g
- Saturated Fat: 3g
- Unsaturated Fat: 2g
- Trans Fat: 0g
- Carbohydrates: 14g
- Fiber: <1g
- Protein: <1g
- Cholesterol: 15mg