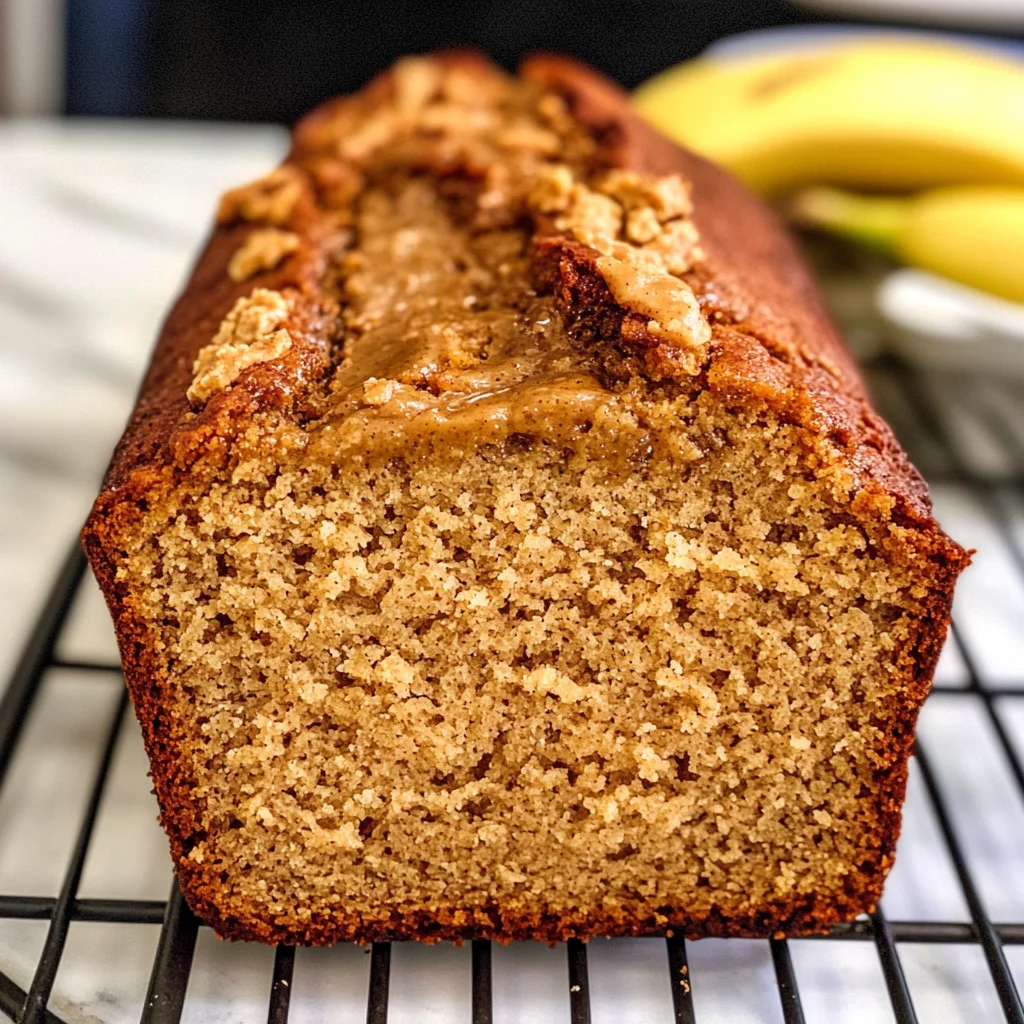
Biscoff Banana Bread Recipe
There’s something undeniably magical about the smell of warm banana bread wafting through your kitchen, isn’t there? It feels like a cozy embrace, a gentle reminder of home, tradition, and love. And when you blend that comforting classic with the utterly delightful taste of Biscoff cookie butter, you’re not just baking; you’re crafting an experience that transcends mere food. The Biscoff Banana Bread Recipe is more than a collection of ingredients; it’s a symphony of flavors that dances on your palate, leaving behind a trail of warmth and nostalgia. With each bite, you’ll find the rich notes of caramelized sugar from the Biscoff mingling blissfully with the natural sweetness of perfectly overripe bananas. I promise you, this is one recipe you’ll want to keep close to your heart.
What makes this recipe so special, you might wonder? Well, it’s the perfect marriage of simplicity and indulgence. Banana bread has always held a cherished place in kitchens around the world, often made with just a few staple ingredients. But add in that creamy, spiced goodness of Biscoff spread, and you’re elevating a timeless classic into something truly extraordinary. This bread is ideal for breakfast with a steaming cup of coffee or as an afternoon treat when you’re seeking a little pick-me-up. It gives you that comforting hug when life feels overwhelming or serves as a delightful centerpiece at gatherings—perfect for sharing with friends and family.
Biscoff Banana Bread Recipe: A Sweet Twist on Tradition
This Biscoff Banana Bread Recipe holds a special place in my heart because it’s so easy to make yet tastes like you’ve spent hours in the kitchen crafting it! The combination of ripe bananas and luscious Biscoff cookie butter creates an incredibly moist loaf that’s irresistible. Trust me when I say each slice is worth savoring—it’s truly a love letter to anyone who enjoys baking at home.
Ingredients:
As we embark on this delightful culinary journey together, let’s take some time to appreciate each ingredient. Every single element plays its part in creating the magic of this recipe.
- 2 cups (248g) all-purpose flour: This essential ingredient serves as the backbone of our banana bread. All-purpose flour provides structure while ensuring our bread rises beautifully without becoming overly dense or crumbly. When selecting flour, look for brands that are finely milled; they will yield better results in terms of texture. If you’re feeling adventurous and want to experiment with whole wheat flour for added nutrition or gluten-free blends for dietary needs, feel free! Just remember that adjustments might be needed for moisture levels.
- 1 teaspoon baking soda: Baking soda is our trusty leavening agent here; it reacts with the acidity from our other ingredients (like bananas and vinegar) to create those lovely air pockets that give our bread its lightness. Make sure your baking soda is fresh—nothing’s worse than reaching for an expired box! An old batch won’t activate properly and could lead to a flat loaf.
- ¼ teaspoon salt: While it may seem small, salt is absolutely paramount in balancing flavors and enhancing sweetness in baked goods. It creates depth and rounds out all those beautiful flavors we’re building with our other ingredients. Always use fine sea salt for even distribution—coarse salt can sometimes leave gritty pockets if not mixed well.
- ½ cup (118ml) vegetable oil: Using vegetable oil instead of butter keeps our banana bread ultra-moist without overshadowing the other flavors. Oil integrates seamlessly into the batter while allowing it to remain tender—a crucial quality you want in any quick bread! If you prefer more flavor or are looking for alternatives, melted coconut oil or even applesauce can work beautifully here too.
- ½ cup (100g) granulated sugar: Ah, sugar—the sweet essence that binds everything together! Granulated sugar not only provides sweetness but also contributes to browning via caramelization during baking, giving us that gorgeous golden crust we all love. For those looking to reduce refined sugars, consider substituting half with brown sugar or coconut sugar for added depth and complexity.
- ½ cup (140g) Biscoff spread or Cookie Butter: This is where the magic truly happens! That deliciously spiced cookie butter adds both flavor and moisture to our banana bread while creating an intoxicating aroma as it bakes. Opt for creamy varieties for smooth integration into your batter. You could also use other nut butters like almond or sunflower if you wish—but they won’t quite replicate that unique taste!
- 2 overripe bananas (mashed): The stars of our show! Ripe bananas are sweeter and softer than their firmer counterparts—they bring natural sweetness along with moisture that helps keep our bread soft and tender. Don’t be afraid to use bananas that are heavily speckled or even brown—they’re bursting with flavor!
- 2 large eggs: Eggs provide richness and act as binders in our recipe—helping hold everything together while also contributing to that lovely rise we crave in baked goods. Room temperature eggs mix more easily into batters; if yours are chilled from the fridge, simply place them in warm water for about 10 minutes before using.
- 7 tablespoons milk (any kind): Milk enriches our batter while adding moisture necessary for achieving that perfect consistency. Whether you choose dairy milk or any nondairy alternative like almond or oat milk depends entirely on your preference—it all works beautifully here!
- ½ teaspoon vinegar or lemon juice: A dash of acidity from vinegar or lemon juice serves two purposes: it reacts with baking soda to enhance leavening power while also helping tenderize the gluten in flour for an ultra-soft texture. Trust me on this step—it’s non-negotiable!
Equipment You’ll Need:
Now that we’ve gathered our ingredients, let’s talk about the tools we’ll need to bring this recipe to life! Having the right equipment makes everything smoother—you wouldn’t want to attempt painting without brushes or colors!
- 8×4 or 9×5-inch loaf pan: Your choice between these sizes depends on how tall you’d like your loaf! The 9×5 pan yields slightly shorter loaves while still allowing ample room for rising during baking; both options will work wonderfully well here.
- Mixing bowls: A good set of mixing bowls allows us to tackle different parts of our recipe easily—from whisking dry ingredients together to creaming wet ones separately before combining them later on.
- Whisk: A whisk isn’t just great for blending; it aerates mixtures as well! This means incorporating air into your batter which leads directly back to achieving a lighter texture overall.
- Measuring cups & spoons: Precision is key in baking—using standard measuring tools ensures consistency across batches every time!
- Rubber spatula: Perfectly suited for scraping down sides & folding mixtures together gently without deflating them—a must-have tool in every baker’s arsenal!
Step 1: Preheat Your Oven and Prepare Your Pan
Before diving into mixing those alluring ingredients together, let’s start by preheating your oven to 350°F (175°C). This step is crucial because placing your batter into a hot oven ensures immediate heat exposure—a fundamental component necessary for optimal rising right from the get-go! Meanwhile, grab your trusted loaf pan (either 8×4 or 9×5 inches will do) and spray it generously with cooking spray; this prevents any sticky situations later when attempting removal post-baking! A well-greased pan makes all the difference between perfectly releasing slices versus having them cling tightly—a definite no-no!
Step 2: Whisk Together Dry Ingredients
In a small bowl—which I recommend using one that’s not too deep so whisking becomes effortless—combine your all-purpose flour, baking soda, and salt thoroughly until blended evenly throughout—that’s what we call “whisking”! This process helps distribute those leavening agents uniformly throughout our mixture so every bite rises perfectly instead of having sporadic lumps hiding within! Once combined nicely (look out for any clumps!), set aside this dry mixture; we won’t need it just yet but trust me—it’ll come back into play soon enough!
Step 3: Cream Together Wet Ingredients
Moving onto your larger mixing bowl now—we’re ready to combine some magic here! Pour in vegetable oil alongside granulated sugar followed by creamy dollops of Biscoff spread—you may want to take a moment reveling at how beautiful & velvety it looks before stirring away! Using either an electric hand mixer set at medium speed or simply relying on good ol’ elbow grease (a sturdy spoon works too), mix these three components until they meld into one cohesive unit resembling liquid gold—this process known as creaming incorporates air bubbles which contribute significantly towards creating lightness later on during baking; don’t rush this step!
Step 4: Incorporate Bananas & Other Wet Ingredients
Once you’ve achieved that beautiful creamy consistency from step three—it’s time to introduce mashed bananas into this delightful party alongside eggs & milk too! Gently fold these additions into your mixture until everything appears harmoniously blended together—or alternatively whip them vigorously if feeling adventurous! Ensure no banana chunks linger behind; we want full integration here so every slice offers bursts upon bites filled undeniably reminiscent memories tied closely within its aroma wafting through kitchens worldwide…
Stay tuned as we continue unraveling more secrets behind crafting perfect banana bread next time—we’re almost there!
Step 5: The Sweet Symphony of Ingredients
Now that we have our flour mixture all set, it’s time to bring the star of the show to the forefront. In a large mixing bowl, we’ll combine the vegetable oil, granulated sugar, and that utterly intoxicating Biscoff spread. I know what you might be thinking—oil and sugar? But trust me on this! The oil not only keeps the bread moist and tender but also ensures that lovely crumb structure we’re after. Using a hand mixer or a sturdy wooden spoon, mix these ingredients together until they become creamy and velvety. You want this mixture to look luscious and slightly lighter in color; it’s a crucial step for achieving that beautiful texture once baked.
Next up, it’s time to add in those overripe bananas. I’ve always been captivated by how bananas transform in this recipe; they add natural sweetness and moisture while infusing the loaf with a delightful banana flavor that plays beautifully against the spiced notes of Biscoff. Take your two overripe bananas (the more speckles, the better!) and mash them into submission—aim for a chunky puree with some small bits remaining for added texture. Then, crack in those two large eggs and pour in your choice of milk—be it dairy or non-dairy—as well as a splash of vinegar or lemon juice. This little addition is absolutely paramount because it reacts with the baking soda, creating carbon dioxide bubbles that help our bread rise beautifully. Mix everything until just combined; don’t worry if there are a few lumps—those will bake out just fine!
Step 6: Marrying Flavors and Textures
Once you’ve combined your wet ingredients thoroughly, it’s time to introduce them to their dry counterparts. Gently fold in the flour mixture we prepared earlier, using a spatula or wooden spoon. This is where patience becomes essential; you want to mix until just combined. Trust me on this step! Overmixing can lead to tough banana bread rather than that wonderfully tender loaf we’re aiming for. As you stir, you’ll notice how the batter thickens and transforms into something magical—a rich batter swirled with hints of brown sugar from the Biscoff spread and flecks of banana.
Now, at this moment, take a deep breath and revel in the aroma wafting through your kitchen. It truly feels like you’re creating something extraordinary! As you scoop this luscious batter into your prepared loaf pan—either an 8×4 or 9×5-inch—you want to make sure it fills about two-thirds full for optimal rising space during baking. Use a spatula to gently smooth the top; this simple act makes all the difference when it comes time for slicing later on.
Step 7: The Baking Bliss
Next comes one of my favorite parts—the baking! Preheat your oven to 350°F (175°C) if you haven’t already done so because we want our loaf to start rising immediately upon entering its warm embrace. You’ll place your filled loaf pan right in the center of your preheated oven—a crucial position for even heat distribution which ensures all sides get that golden-brown crust we adore so much.
As it bakes, keep an eye on those first 20 minutes but resist any urge to open the oven door too soon; doing so can cause sudden temperature drops that could hinder your bread from rising properly! During this time, marvel at how your kitchen begins to fill with that heavenly aroma of spiced caramelized goodness—it’s like comfort wrapped in warmth! After approximately 45-55 minutes of baking (remember every oven is unique), perform a doneness test by inserting a toothpick right through the center of the loaf. If it comes out with just a few crumbs attached—that’s perfection! If there’s wet batter clinging onto it still, pop it back into the oven for another few minutes.
Step 8: Cooling Down Before Enjoying
Once you’ve achieved that glorious baking result, it’s crucial not to rush ahead—patience pays off here! Carefully remove your loaf from the oven and let it cool in its pan for at least ten minutes before attempting to slice into it. This resting period allows moisture inside the bread to redistribute evenly throughout its crumb structure—this transformative effect makes all the difference between dry slices versus melt-in-your-mouth bliss!
After cooling slightly, gently run a knife around the edges of your pan to loosen any stubborn bits before turning it out onto a wire rack if possible. If you don’t have one available (I’ve been there!), simply place it on a plate or cutting board but remember: avoid slicing too early as it’s still delicate at this stage! Give yourself permission to let it cool completely before diving in—though I completely understand if temptation wins over!
Conclusion:
As we wrap up this delightful journey through my beloved Biscoff Banana Bread Recipe, I can’t help but feel a surge of excitement! From mixing together those simple ingredients in a bowl to pulling out a golden loaf that fills your kitchen with an intoxicating aroma—it’s truly a labor of love that speaks to the heart of home baking. What makes this recipe so special is not just the unique blend of sweet ripe bananas and rich Biscoff cookie butter; it’s also about creating memories with every bite. The way this soft loaf melts in your mouth is nothing short of extraordinary.
I wholeheartedly believe this recipe deserves a prominent spot in your baking repertoire—not only because it bursts with flavor but because it’s incredibly accessible and versatile. Whether you’re whipping up a quick breakfast treat, preparing an afternoon snack for friends, or even bringing dessert to family gatherings, this banana bread shines brightly on any occasion. Imagine pulling that warm loaf from the oven and slicing into its tender crumb while steam wafts gently through the air—a moment that instantly elevates any ordinary day!
When serving this delectable bread, consider pairing it with a dollop of creamy nut butter or perhaps slathering on more Biscoff spread for an indulgent treat. Picture savoring one slice alongside a steaming cup of coffee or tea as you take a well-deserved moment of peace during a busy day—pure bliss! For an afternoon pick-me-up, try enjoying it with some fresh fruit or yogurt on the side; the balance of flavors is just sublime.
Feeling adventurous? This recipe is wonderfully adaptable! You might swap out some flour for whole wheat flour for added nutrition or fold in chocolate chips or nuts if you’re looking for extra texture and crunch. You could even experiment by adding spices like cinnamon or nutmeg to give it another layer of warmth. The options are endless! I invite you to dive into this culinary adventure—try my Biscoff Banana Bread Recipe, share your creations with friends and family, and don’t forget to tell me all about your experiences in the comments below!
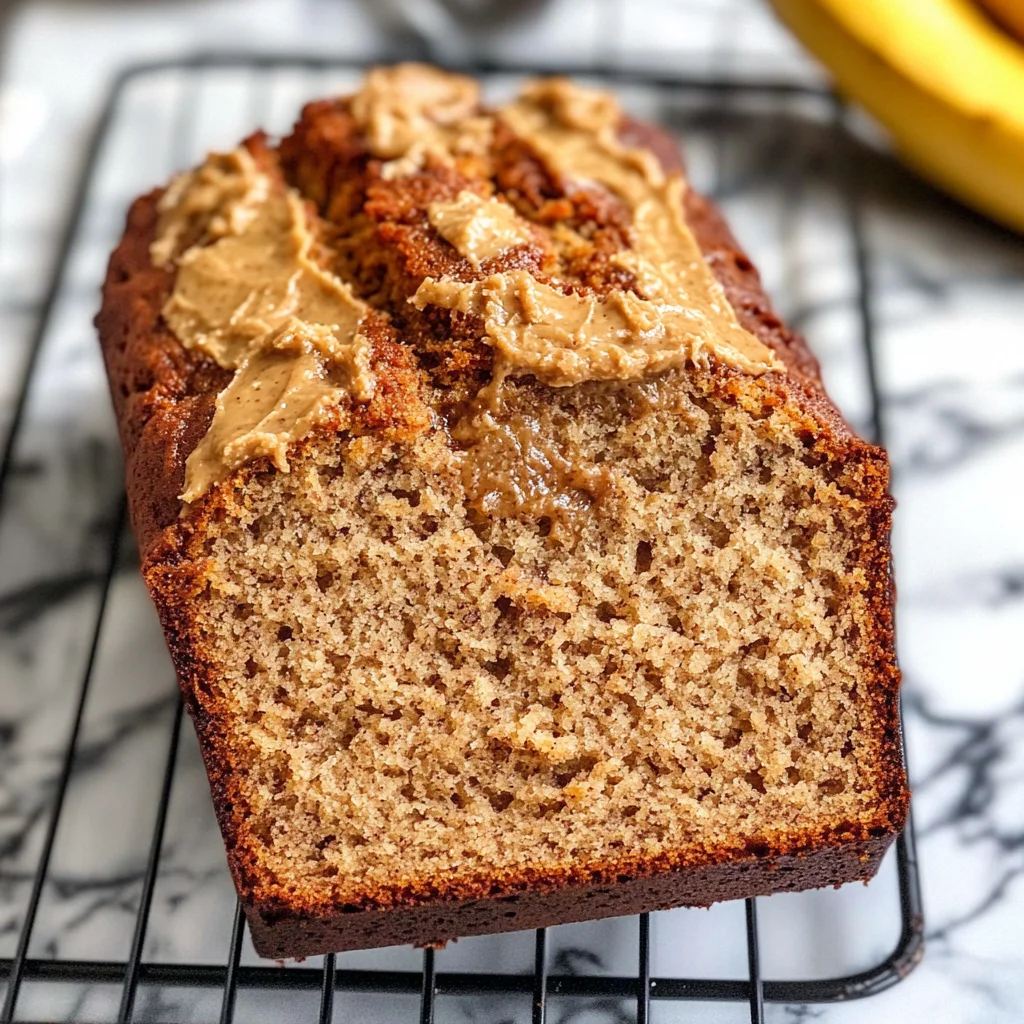
Biscoff Banana Bread
Experience the delightful fusion of flavors with this Biscoff Banana Bread Recipe. This moist and aromatic bread combines the natural sweetness of ripe bananas with the rich, spiced notes of Biscoff cookie butter, creating a comforting treat that’s perfect for breakfast or an afternoon snack.
- Prep Time: 15 minutes
- Cook Time: 50 minutes
- Total Time: 1 hour 5 minutes
- Yield: Approximately 10 servings 1x
- Category: Dessert
- Method: Baking
- Cuisine: American
Ingredients
- 2 cups all-purpose flour
- 1 teaspoon baking soda
- ¼ teaspoon salt
- ½ cup vegetable oil
- ½ cup granulated sugar
- ½ cup Biscoff spread
- 2 overripe bananas (mashed)
- 2 large eggs
- 7 tablespoons milk (any kind)
- ½ teaspoon vinegar or lemon juice
Instructions
- Preheat your oven to 350°F (175°C) and grease an 8×4 or 9×5-inch loaf pan.
- In a bowl, whisk together the flour, baking soda, and salt; set aside.
- In a larger bowl, mix together the vegetable oil, sugar, and Biscoff spread until creamy.
- Add mashed bananas, eggs, milk, and vinegar to the mixture; blend until combined.
- Gradually fold in the dry ingredients until just mixed—avoid overmixing.
- Pour the batter into the prepared loaf pan and smooth the top.
- Bake for 45-55 minutes or until a toothpick inserted in the center comes out clean.
- Let cool in the pan for ten minutes before transferring to a wire rack.
Nutrition
- Serving Size: 1 slice
- Calories: 210
- Sugar: 10g
- Sodium: 160mg
- Fat: 9g
- Saturated Fat: 1g
- Unsaturated Fat: 8g
- Trans Fat: 0g
- Carbohydrates: 31g
- Fiber: 1g
- Protein: 3g
- Cholesterol: 30mg