Strawberry Earthquake Cake
There’s something profoundly magical about baking, isn’t there? The way the simple act of mixing flour, sugar, and butter transforms into a delightful creation that fills your home with warmth and love is nothing short of alchemy. Today, I’m thrilled to share with you my cherished recipe for Strawberry Earthquake Cake. This is not just any dessert; it’s an experience that bridges the sweet nostalgia of childhood memories with the excitement of modern baking. The very thought of this cake brings back images of sun-drenched picnics and laughter shared over slices of moist, strawberry-infused goodness, crowned with rich cream cheese swirls and a sprinkle of coconut. It’s an irresistible invitation to indulge in life’s sweeter moments.
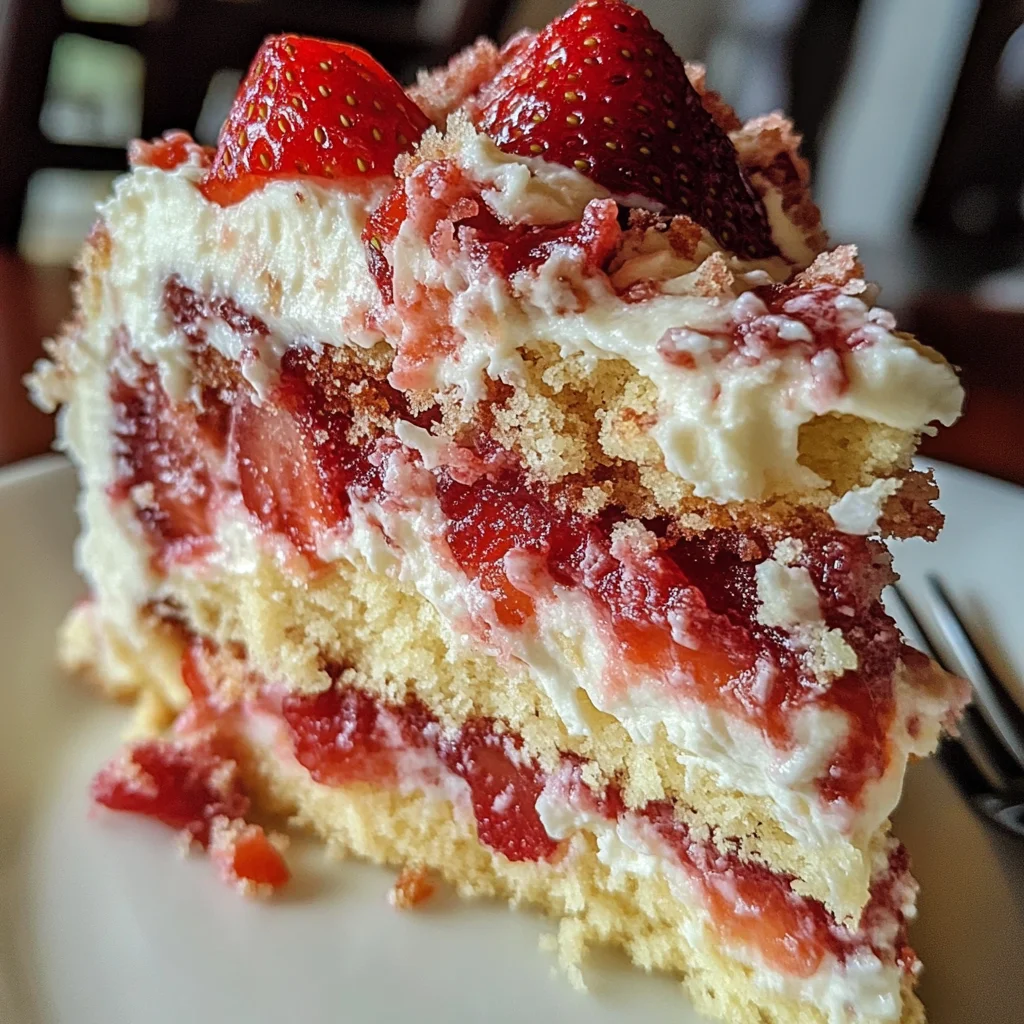
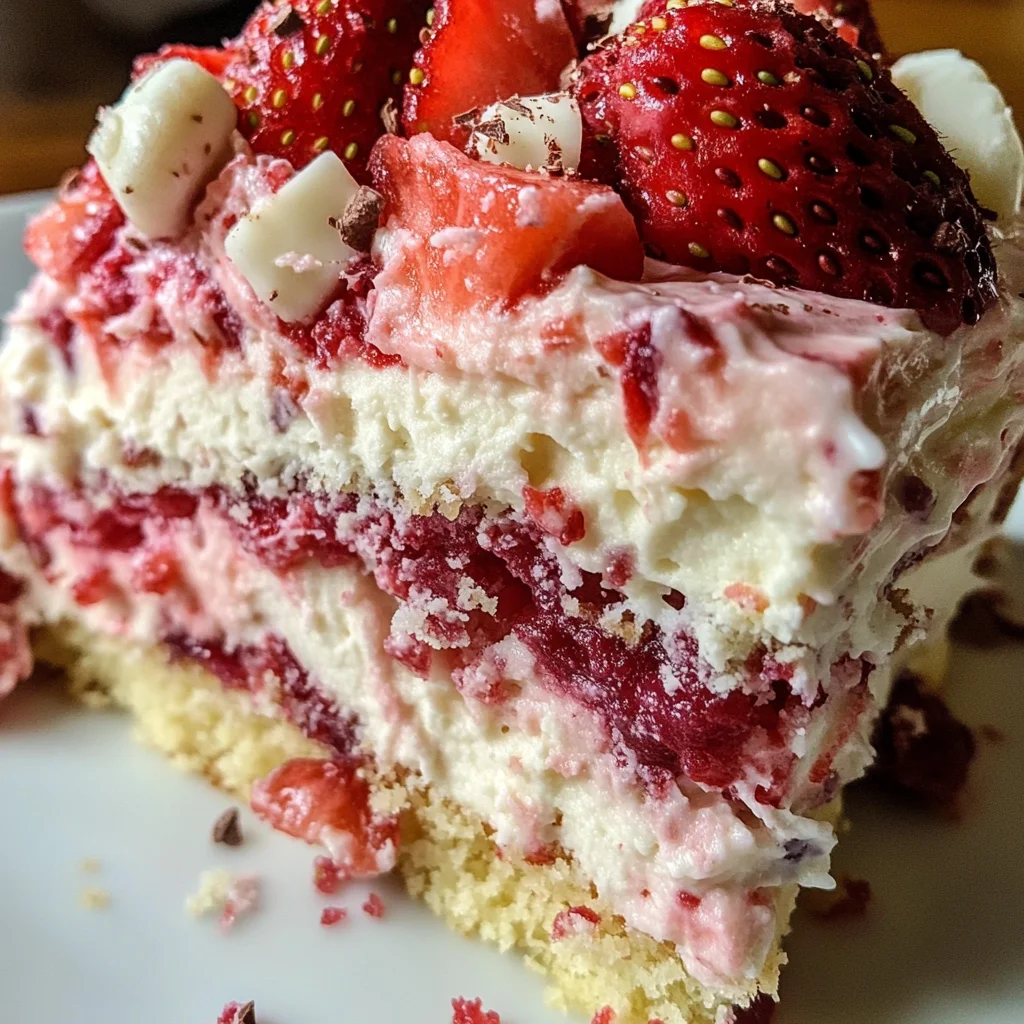
What makes this cake so special? It’s all about the harmony of flavors and textures that come together beautifully, creating an utterly intoxicating experience for your taste buds. Each bite reveals layers of moist strawberry cake mingled with luscious white chocolate chips and a creamy swirl that beckons you to take another forkful. The addition of coconut adds a delightful chewiness while fresh strawberries burst with juicy flavor, making every slice a celebration! Whether it’s for a birthday party, a casual gathering with friends, or simply a quiet evening at home, this Strawberry Earthquake Cake is sure to be the star attraction. Trust me when I say—once you serve this cake, it will leave everyone asking for seconds!
Strawberry Earthquake Cake: A Slice of Heaven
Baking this Strawberry Earthquake Cake is like embarking on a joyful culinary adventure. As we gather our ingredients and tools, I can already envision the delightful aroma wafting through your kitchen as it bakes. This cake embodies everything we love about comfort food—it’s indulgent yet approachable, making it perfect for both novice bakers and seasoned pros alike. So roll up your sleeves and get ready to create something truly extraordinary!
Ingredients:
Let’s dive into the wonderful world of ingredients that will make our Strawberry Earthquake Cake sing! Each component plays its own vital role in crafting this masterpiece, so let’s take a moment to appreciate why each one matters.
- 1 box strawberry cake mix. The foundation of our cake begins here! Using a box mix simplifies the process without sacrificing quality. Look for one that uses natural flavors—this will enhance the real strawberry taste we’re aiming for in our final product. The beauty of using a cake mix is its reliability; it ensures fluffy texture and perfect rise every time we bake.
- Ingredients listed on the box (eggs, oil, water). These are essential companions to our cake mix. Eggs not only provide structure but also moisture—think of them as tiny binders knitting our ingredients together into a cohesive batter. Oil adds richness and keeps the cake tender. Water hydrates everything—follow the package instructions closely for best results!
- 1½ cups fresh or frozen strawberries (chopped). Fresh strawberries add vibrant flavor and moisture to our cake while providing those lovely bursts of fruitiness in every bite. If using frozen strawberries, make sure to thaw and drain them first to avoid excess moisture altering our batter’s consistency.
- 1 cup white chocolate chips or chunks. Ahh, white chocolate—the sweet embrace that pairs beautifully with strawberries! These little morsels melt into luscious pockets throughout the cake as it bakes, creating decadent surprises within each slice. For those seeking alternatives due to dietary preferences or availability, feel free to use dairy-free white chocolate options.
- 1 cup sweetened shredded coconut. Coconut adds texture and its signature tropical sweetness that complements our strawberries wonderfully! When choosing shredded coconut, look for unsweetened varieties if you prefer more control over sugar levels; however, sweetened will give that extra little kick we adore in desserts.
- ½ cup chopped pecans or walnuts (optional). While nuts are optional here, they offer delightful crunch and depth when added to the batter—plus they’re packed with nutrients! If you’re not keen on nuts or have allergies in mind, simply leave them out without compromising on flavor.
- 8 oz cream cheese (softened). This ingredient is non-negotiable for achieving that creamy swirl throughout our cake; it adds richness and balances sweetness magnificently! Make sure it’s softened before using so you can blend it smoothly without lumps.
- ½ cup unsalted butter (softened). Butter acts as an enriching agent in our cream cheese mixture; softening is crucial here because it allows for proper creaming with sugar—a step important for incorporating air into our mixture which leads to fluffiness.
- 2½ cups powdered sugar. This sweet ingredient isn’t just for taste; it creates that luscious frosting-like texture we desire from our cream cheese swirl! Sifting helps prevent lumps—don’t skip this step if you want that smooth finish!
- 1 teaspoon vanilla extract. Vanilla extract brings warmth and depth to flavors—it enhances everything else in your dish by rounding out sweetness beautifully! Always opt for pure vanilla over imitation when possible; trust me—it makes a world of difference.
Now that we’ve gathered our ingredients brimming with potential, let’s chat about what tools we’ll need to bring this culinary creation to life!
Equipment You’ll Need:
Having the right tools makes all the difference between chaos and smooth sailing in your kitchen adventure! While these may not be ingredients, they are essential partners in crafting your Strawberry Earthquake Cake successfully.
- 9×13-inch baking pan – This pan size is perfect for ensuring even baking while allowing room for rising without overflow; its shape lends itself beautifully to layer cakes like ours where presentation matters too!
- Mixing bowls – A good set of mixing bowls is essential for keeping your workspace organized! Use a large bowl for combining dry ingredients and another one specifically reserved for wet ingredients so they can marry charmingly as we move forward.
- Electric mixer – An electric mixer speeds up processes like creaming butter and sugar together effortlessly! If you don’t have one handy, whisking by hand does work too—but prepare yourself for an arm workout!
- Spatula or wooden spoon – Either tool helps fold delicate mixtures gently without deflating air bubbles—we want lightness here after all! A rubber spatula also comes in handy when scraping down sides during mixing!
With all these pieces falling perfectly into place—let’s jump right into preparing our delicious Strawberry Earthquake Cake!
Step 1: Preheat Your Oven & Prepare Your Pan
Before anything else can unfold in this delicious journey, preheating your oven is absolutely paramount—that’s right; we want things heating up at 350°F (175°C) before we even think about pouring batter into pans! This ensures optimal rising while baking occurs evenly without any cool spots causing disasters later on down the line! Now grab your trusty 9×13-inch baking pan—greasing it well allows us easy release once it’s done baking so no precious slices go stuck inside! You can use non-stick spray or rub some softened butter along its interior sides—the choice is yours!
Step 2: Mix Up That Strawberry Cake
Now let’s turn our attention back over toward that beautiful box of strawberry cake mix waiting patiently on the counter! Following package directions closely means whisking together eggs along with oil & water until fully combined—this process forms a lovely base loaded with flavor potential waiting eagerly beneath all those mouthwatering additions coming next! Gently folding chopped strawberries along with white chocolate chips & shredded coconut carefully maintains airiness within batter while ensuring every bite holds tantalizing surprises bursting forth as they bake away together harmoniously within their cozy cocooning environment inside hot oven.
Step 3: Layer It Up
Once you’ve lovingly prepared both mixtures separately—you’ll find yourself pouring half that gorgeous pink-hued batter directly into prepared pan first thing next—and now comes part where magic happens as we introduce dollops upon dollops creamy mixture lovingly crafted earlier made from softened cream cheese blended perfectly alongside butter & powdered sugar plus hint flavor boost thanks pure vanilla extract enhancing overall delightfulness even further adding another layer complexity awaiting exploration soon enough during tasting time ahead later down road ahead too!
Step 4: Swirl Away!
After dropping spoonfuls generously atop first layer frosty goodness—you’ll pour remaining half onto top layer ensuring coverage fully envelops everything underneath nicely forming harmonious union between fruity flavors melded delicately within their surroundings—all while embracing technique known swirling gently around edges using knife creating artistry reminiscent nature itself reminding us beauty lies sometimes found unexpected places too like desserts made home kitchens filled joy laughter friends family alike sharing blissful experiences around tables gathered close together enjoying what life has offer us moments shared shared much deeper than food alone ever could do alone…
Baking requires patience but trust me—the wait will be worth every second once those heavenly scents start wafting through kitchen inviting every hungry soul nearby wanting join feast laid out before them eagerly awaiting discovery deliciousness contained within each slice served up warm…
Stay tuned as we continue exploring steps forward bringing this masterpiece closer reality incredibly soon now…
Step 5: Creamy Bliss – Preparing the Cream Cheese Swirl
Ah, now we arrive at one of the most delightful parts of this Strawberry Earthquake Cake: the cream cheese swirl. This step is absolutely paramount because it introduces a layer of creamy decadence that transforms an already fabulous cake into something truly extraordinary. In a medium bowl, you’ll want to beat together 8 ounces of softened cream cheese and ½ cup of softened unsalted butter until the mixture is silky smooth and utterly inviting. I like to use an electric mixer on medium speed for about 2-3 minutes, which helps to incorporate air into the mixture, making it light and fluffy. This is important because that airy texture will create a lovely contrast against the moist cake.
Once your cream cheese and butter are blended to perfection, slowly sift in 2½ cups of powdered sugar along with 1 teaspoon of vanilla extract. As you mix, you’ll notice the transformation; the powdered sugar adds sweetness while ensuring your cream cheese filling is rich yet not overly cloying. Keep mixing until everything is combined and smooth, about another minute or so. It’s crucial here to scrape down the sides of your bowl to ensure every last bit gets mixed in—trust me; you don’t want any lumps affecting your beautiful swirl! If you taste it (and I know you will!), you’ll find it’s sweet but tangy—a perfect complement to the fruity notes of the strawberry cake.
Step 6: Layering with Love – Assembling Your Cake
Now comes the fun part—layering all those wonderful flavors together! With half of your luscious batter already in the prepared pan, it’s time to drop spoonfuls of your cream cheese mixture right over that first layer. Don’t rush this step; gently dollop it across the surface rather than spreading it out right away. This way, as it bakes, you’ll get these delightful pockets of creamy goodness that will meld into the cake beautifully. Use a small spoon or spatula for this task; think of it as art! You want those little spoonfuls dotting the surface like clouds in a pink sky.
Next, pour over the remaining strawberry batter with care. I recommend starting from one corner and letting it flow across to avoid disturbing your carefully placed dollops too much. Once you’ve covered everything, grab a knife or a skewer and gently swirl through the batter from top to bottom and side to side in a figure-eight motion. The goal here isn’t to completely blend everything; instead, you’re creating swirls that will bake into breathtaking patterns. This swirling technique also helps incorporate some of that creamy filling into the cake itself, promising every bite will be a symphony of flavors! Remember not to overdo it—just a few swirls will do!
Step 7: Baking Magic – The Transformation Begins
With our masterpiece ready for the oven, let’s talk about baking! Preheat your oven to 350°F (175°C), if you haven’t already done so—it should be nice and hot by now! Gently place your pan in the center rack and set your timer for 40 minutes. But don’t wander off just yet! Keep an eye on your cake during these precious moments; as it bakes, you’ll see magic happen—the edges will start pulling away slightly from the pan while forming a golden crust that promises deliciousness.
Around the 30-minute mark, check on it—if you notice any signs of browning on top but aren’t sure if it’s done yet, gently give it a light tap in the center with your fingertips. If it springs back immediately without any indentation left behind, you’re on track! If not quite there yet, give it another five minutes before checking again. Each oven is different—some may run hotter or cooler than others—so don’t be disheartened if yours takes a couple more minutes than expected. Once done, allow yourself a moment to breathe in that heavenly aroma wafting from your kitchen; trust me when I say it’s worth every minute spent waiting!
Step 8: Cooling Down – The Essential Rest Period
Once you’ve pulled that glorious strawberry-swirled creation from the oven after about 40-45 minutes (or when it’s perfectly set), resist that urge to dive right in! I promise you; this cooling period is non-negotiable and absolutely vital for achieving optimal texture and flavor development. Allow your cake to rest in its pan on a wire rack for at least 20-30 minutes—this not only ensures easier slicing later but also allows those flavors to settle and marry beautifully.
As it cools gradually, something science-y happens—the moisture redistributes throughout the cake fibers—and let me tell you: this makes all the difference between a crumbly disaster and an incredibly moist treat! After this initial cooling period, carefully transfer your cake onto a cutting board or serving platter by flipping it upside down gently onto another plate (if needed) or simply lifting out if it’s come cleanly away from pan sides thanks to greasing well earlier on. Now take another moment—breathe deeply again—because soon you’ll be ready for that first slice!
Conclusion:
As we reach the end of our delightful journey together through this recipe, I can’t help but feel excited about sharing such a wonderful dessert with you! The way the bright notes of strawberries dance with silky white chocolate and toasted coconut creates what I can only describe as a symphony of flavors that is both comforting and uplifting. Each bite reveals the delicious cream cheese swirl hidden within—a truly extraordinary surprise that elevates this cake from ordinary to unforgettable. I sincerely hope my enthusiasm has sparked yours; after all, food is meant to be shared and cherished!
This Strawberry Earthquake Cake is not just about taste; it’s about creating joyful memories while baking. It’s versatile enough to shine at any gathering—from casual afternoon get-togethers with friends to birthday celebrations where everyone gathers around the table with eager anticipation. Imagine pulling this gorgeous creation from the oven—the golden edges glistening slightly under its light dusting of powdered sugar—and watching everyone’s eyes light up with delight as they take their first bite. That moment alone is worth every ounce of effort!
When it comes to serving suggestions, let your creativity run wild! Imagine savoring one slice alongside a scoop of dairy-free vanilla ice cream on a hot day—pure bliss! For an afternoon pick-me-up with friends over coffee, offering small squares dusted with powdered sugar would be absolutely divine. And if you’re feeling particularly indulgent? Drizzle some luscious dairy-free chocolate sauce over each portion; trust me when I say it’ll take your experience over the top!
Feeling adventurous? This recipe is wonderfully adaptable! You could substitute raspberries instead of strawberries for a lovely tart twist or throw in some lemon zest into your cream cheese mixture for an invigorating zing that perfectly complements the sweetness of the cake. Experimenting with different kinds of chocolate—dark or even mint-flavored—could also lead you down new flavor paths filled with tantalizing surprises! So why not gather your ingredients and make this beautiful dessert? Share your experiences with me; I can’t wait to hear how your version turns out!
Strawberry Earthquake Cake
Indulge in the delightful experience of baking with this Strawberry Earthquake Cake, a moist and flavorful dessert that brings together the sweetness of strawberries, the richness of white chocolate, and a luscious cream cheese swirl. Perfect for any occasion, from birthday celebrations to casual gatherings, this cake is an irresistible treat that will have everyone asking for seconds. Each slice reveals layers of juicy strawberries and creamy goodness, making it a true showstopper. Whether enjoyed fresh or stored for later, this cake promises to deliver joy with every bite.
- Prep Time: 20 minutes
- Cook Time: 45 minutes
- Total Time: 1 hour 5 minutes
- Yield: Approximately 12 servings 1x
- Category: Dessert
- Method: Baking
- Cuisine: American
Ingredients
- 1 box strawberry cake mix
- 1½ cups fresh or frozen strawberries (chopped)
- 1 cup white chocolate chips
- 1 cup sweetened shredded coconut
- 8 oz cream cheese (softened)
- ½ cup unsalted butter (softened)
- 2½ cups powdered sugar
- 1 teaspoon vanilla extract
Instructions
- Preheat your oven to 350°F (175°C) and grease a 9×13-inch baking pan.
- In a mixing bowl, prepare the strawberry cake mix according to package instructions, then fold in chopped strawberries, white chocolate chips, and shredded coconut.
- In another bowl, beat together softened cream cheese and butter until smooth. Gradually add powdered sugar and vanilla extract, mixing until well combined.
- Pour half of the strawberry batter into the prepared pan, then dollop spoonfuls of the cream cheese mixture on top. Swirl gently with a knife before adding the remaining batter on top.
- Bake for 40-45 minutes or until a toothpick comes out clean. Let cool before serving.
Nutrition
- Serving Size: 1 serving
- Calories: 360
- Sugar: 34g
- Sodium: 180mg
- Fat: 18g
- Saturated Fat: 10g
- Unsaturated Fat: 7g
- Trans Fat: 0g
- Carbohydrates: 50g
- Fiber: 2g
- Protein: 4g
- Cholesterol: 35mg