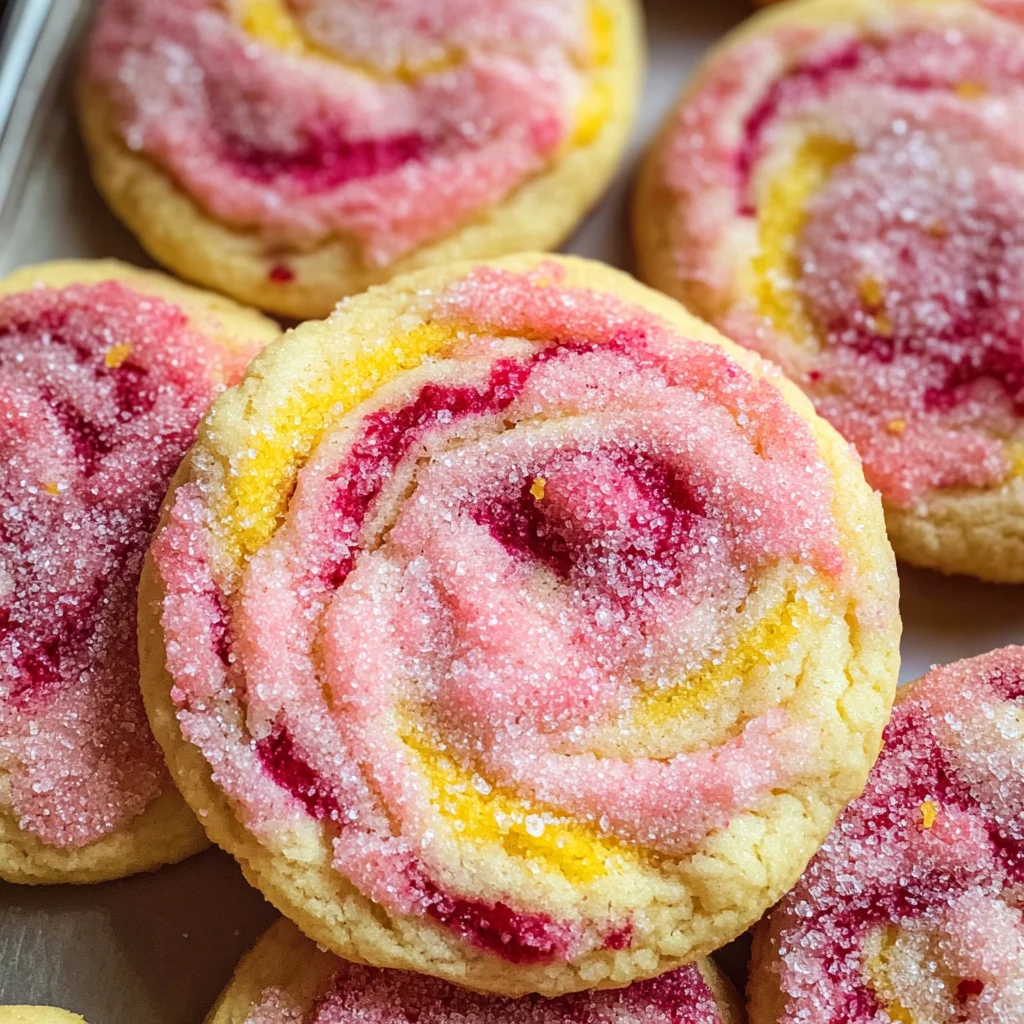
Raspberry Lemonade Cookies
When you take a bite of a Raspberry Lemonade Cookie, you’re not just indulging in a sweet treat; you’re capturing the essence of summer in every mouthful. The first thing that hits you is that bright, zesty lemon flavor, reminiscent of sunlit days and laughter shared with friends on warm afternoons. As you sink your teeth into the pillowy softness, the tangy raspberries burst forth, creating a delightful contrast that dances on your taste buds. These cookies aren’t just about flavor; they evoke memories of picnics, garden parties, and moments spent savoring life’s simple pleasures. This is what makes my Raspberry Lemonade Cookies so special – they’re an experience to be shared and cherished.
Imagine gathering your loved ones around a table, the sweet scent of freshly baked cookies wafting through the air as you present a platter full of these vibrant delights. There’s something utterly intoxicating about the way their golden edges shimmer under soft lighting, inviting everyone to dive in. Each cookie embodies joy—a testament to how a simple combination of ingredients can create something truly extraordinary. Trust me when I say that once you make these cookies, they will quickly become a staple in your baking repertoire. They’re easy to whip up and perfect for any occasion—from afternoon tea to dessert after a family dinner.
Raspberry Lemonade Cookies: A Sweet Escape to Summer
These Raspberry Lemonade Cookies are more than just another dessert; they are a joyful celebration of flavors that remind us of sunny days and carefree moments spent outdoors. Whipping them up is an effortless journey—one bowl, thirty minutes, and you’ll have warm cookies that fill your home with an irresistible aroma. Whether you’re baking for yourself or sharing with friends, these cookies promise to bring smiles all around!
Ingredients:
As we embark on this culinary adventure together, let’s gather our ingredients and prepare for the delightful process ahead! Each component plays a pivotal role in crafting our beloved Raspberry Lemonade Cookies.
- ½ cup (1 stick or 113g) unsalted butter, softened to room temperature. This ingredient is absolutely paramount because it contributes to the rich flavor and fluffy texture we’re aiming for in our cookies. When properly softened, butter creates air pockets during creaming that help our cookies rise beautifully while baking. If you need a dairy-free option, feel free to substitute with your favorite plant-based butter; just ensure it has a similar fat content for best results!
- 1 cup (200g) granulated sugar. Sugar isn’t just for sweetness; it’s also responsible for creating that lovely crisp edge on our cookies while keeping the center delightfully chewy. The granules dissolve as we mix them with butter and other wet ingredients—this process helps form that coveted structure within each cookie. For an alternative, you might try coconut sugar for a hint of caramel flavor.
- 1 large egg. Eggs serve as binding agents here, helping to hold everything together while contributing moisture and richness to our dough. They also add protein which aids in creating better structure as the cookies bake. If you’re looking for an egg-free option, consider using flaxseed meal mixed with water or even applesauce – both can provide that necessary binding effect without compromising flavor.
- 1 teaspoon vanilla extract. This liquid gold enhances all flavors in baking by adding depth and complexity. It’s like a secret handshake among flavors—it brings everything together harmoniously! Always opt for pure vanilla extract over imitation if possible; it makes a world of difference in taste.
- 1 tablespoon fresh lemon juice (approx. 1 lemon). Freshly squeezed lemon juice provides acidity which balances out sweetness beautifully while infusing your cookies with bright citrus notes that awaken your palate. I promise you—the freshness matters! Bottled lemon juice can work in a pinch but may lack the vibrant zing of fresh juice.
- 2 tablespoons lemon zest from about one large lemon. Zest is where all those aromatic oils reside! This finely grated peel adds an intense lemon flavor without adding extra liquid—it’s absolutely crucial for achieving that punchy lemonade essence we love so much.
- 1 ½ cups gluten-free 1:1 flour or all-purpose flour. The choice between gluten-free or all-purpose flour will depend on your dietary needs—both options yield fabulous results! Gluten-free blends are designed to mimic the properties of traditional flour while providing excellent structure without being overly dense or crumbly.
- ½ teaspoon baking powder and ¼ teaspoon baking soda work together as leavening agents here, helping our cookies puff up beautifully as they bake while ensuring they don’t fall flat—the perfect combination for achieving that soft cookie texture everyone adores!
- ⅔ cup frozen raspberries, gently broken into smaller pieces before adding them to the dough—this fruit provides bursts of tartness throughout each cookie while maintaining their shape during baking due to being frozen beforehand! If fresh raspberries are handy instead, feel free to use those too; just be cautious about overmixing since they’ll break down more easily.
- Coarse sugar (optional) for sprinkling atop your baked cookies before or after they come out of the oven adds an extra crunch and visual appeal—the kind of finishing touch that elevates homemade treats from ordinary to extraordinary!
Equipment You’ll Need:
Before diving into mixing and baking those delicious Raspberry Lemonade Cookies, let’s ensure we have all our essential tools at hand! Having the right equipment makes this whole experience smoother and truly enjoyable.
- Mixing bowl – A sturdy mixing bowl is fundamental for combining everything together seamlessly! Opting for one that’s large enough allows ample space when blending ingredients—no one likes batter splatters decorating their kitchen counters!
- Hand mixer or stand mixer – While mixing by hand can be therapeutic at times, having either type of mixer streamlines the process significantly! They make quick work of creaming butter and sugar until light and fluffy—a key step towards achieving perfectly textured cookies!
- Rubber spatula – This versatile tool will be invaluable when folding ingredients together gently without overmixing—a non-negotiable step if we want those beautiful swirls of raspberry throughout each cookie!
- Cookie scoop – Using this handy gadget ensures uniformity in size across all cookies—no more guessing games about how big each scoop should be! Plus, it helps maintain proper portion control which is always appreciated.
- Baking sheet lined with parchment paper – Lining your baking sheet prevents sticking while allowing even heat distribution across each cookie as they bake—resulting in perfectly golden edges every time!
Preparing the Raspberry Lemonade Cookies
Step 1: Creaming Magic
Begin by placing your softened butter and granulated sugar into your mixing bowl—a process known as creaming will soon transform these two simple ingredients into something magical! With either your hand mixer or stand mixer set on medium speed, blend them together until your mixture turns light and fluffy—this usually takes about 2–3 minutes. Why does this step matter? Creaming incorporates air into the batter which gives our cookies lift while creating that delightful tenderness everyone craves! Be patient here; rushing through this step may lead to denser cookies than desired.
Step 2: Incorporating Wet Ingredients
Next up comes adding in our egg along with vanilla extract and freshly squeezed lemon juice—each playing a vital role in enriching flavor along with binding everything cohesively together! Ensure these ingredients are well combined by continuing to mix on low speed until fully incorporated—the batter should look smooth yet still thickened slightly due to its airy texture established earlier during creaming time.
Step 3: Folding in Dry Ingredients
Now it’s time to introduce our dry components slowly into this lovely mixture: add gluten-free flour alongside baking powder and baking soda—all at once works beautifully here! Using your rubber spatula (or wooden spoon), gently fold them into the batter until almost fully incorporated—you want some little pockets visible where flour remains unmixed still—it’ll help maintain those gorgeous swirls later when we add raspberries! Don’t rush this step; overmixing could lead us down a path towards toughened dough instead of tender bliss!
Step 4: Adding Raspberries
If those frozen raspberries still appear whole rather than broken apart—take some time now just before adding them—to break them gently between fingertips into smaller pieces before folding them delicately into our delightful dough mixture using only minimal strokes necessary here too since we want those signature pink swirls rather than muddied colors throughout each cookie batch produced later down line once baked off nicely at last…
After incorporating everything beautifully together thus far—it’s essential now not only chill this dough briefly (aim roughly around ten minutes) but also preheat oven up towards three hundred fifty degrees Fahrenheit simultaneously allowing ample time preparing trays ready ahead prior serving guests soon after completion thereafter…
Stay tuned because we’re not done yet—we’ll soon tackle shaping these beauties next…and trust me when I say—they’re worth every moment spent waiting patiently ahead…
Step 5: Chilling the Dough – The Secret to Soft and Chewy Cookies
Now that you’ve mixed your beautiful batter, it’s time for a crucial step: chilling the dough. I know, I know—waiting can be tough when you’re so close to cookie bliss! But trust me on this one; allowing your dough to chill for at least 10 minutes (or even up to an hour if you have the patience) makes a world of difference. By resting the dough, the flavors meld together, which results in a more cohesive taste. Additionally, chilling firms up the fats in the butter which helps your cookies maintain a lovely shape instead of spreading out into flat discs while they bake.
As your dough chills, preheat your oven to 350°F (175°C). This temperature is perfect for baking these cookies because it allows them to rise and develop that delightful golden edge while keeping the center soft and chewy. While waiting, take a moment to think about how amazing it will feel biting into one of these tangy treats later! And remember, don’t rush this step; patience is key for achieving that perfect texture that makes each bite utterly satisfying.
Step 6: Scooping Perfect Cookie Mounds – The Art of Forming Cookies
Once you’ve allowed your dough to chill, it’s time to scoop out those cookie mounds! Grab a large cookie scoop or even two spoons if you don’t have one handy. This is where you can get creative and decide if you’d like giant cookies or smaller bites—after all, who would say no to more cookies? If you’re opting for larger cookies, aim for about 3 tablespoons of dough per scoop; if you want regular-sized cookies, aim for about 1.5 tablespoons.
As you drop the dough onto a baking sheet lined with parchment paper (which is absolutely non-negotiable because it prevents sticking), make sure to leave some space between each mound. This is important because as they bake, those little beauties will spread out slightly. You’ll want enough room for them to puff up without becoming friends in the oven! Keep an eye on their shapes—you want them round but not perfect spheres. Those charming imperfections add character and make them look homemade and inviting.
Step 7: Baking Time – Watching Your Cookies Transform
The moment has finally arrived! Slide that baking tray into your preheated oven and let the magic happen. Set a timer for about 14-16 minutes, but here’s where things get personal: every oven behaves differently due to variations in temperature calibration and hot spots. So keep an eye on your cookies as they bake! You’re looking for edges that are beautifully puffed up and just starting to turn golden brown while keeping that soft center intact.
As they bake, your kitchen will fill with an intoxicating aroma of lemony goodness mingling with the tartness of raspberries—utterly divine! When your timer goes off, resist the urge to open the oven door immediately; let them sit inside for an extra minute or two before checking on them. If they’re still pale and soft in the middle but golden around the edges, that’s exactly what you want. Remember: underbaking is often better than overbaking because they will continue firming up as they cool outside of the oven.
Step 8: Cooling – The Anticipation Before Indulgence
Once you’ve pulled those glorious raspberry lemonade cookies from the oven, it’s essential to let them cool completely on the baking sheet before transferring them onto a cooling rack. This step might seem mundane but bear with me! Allowing them to cool on the sheet gives them time to set properly without losing that coveted soft interior while also preventing any breakage during transfer.
After about 5-10 minutes (good luck resisting their appeal!), gently move each cookie onto a wire rack using a spatula—this helps air circulate around them so that they don’t steam and lose their delightful chewy texture. If you sprinkle coarse sugar over top while they’re still warm (a little extra sparkle never hurt anyone!), it will melt slightly into those lovely swirls of raspberry puree creating an enticing finish that speaks volumes about their flavor profile.
Conclusion:
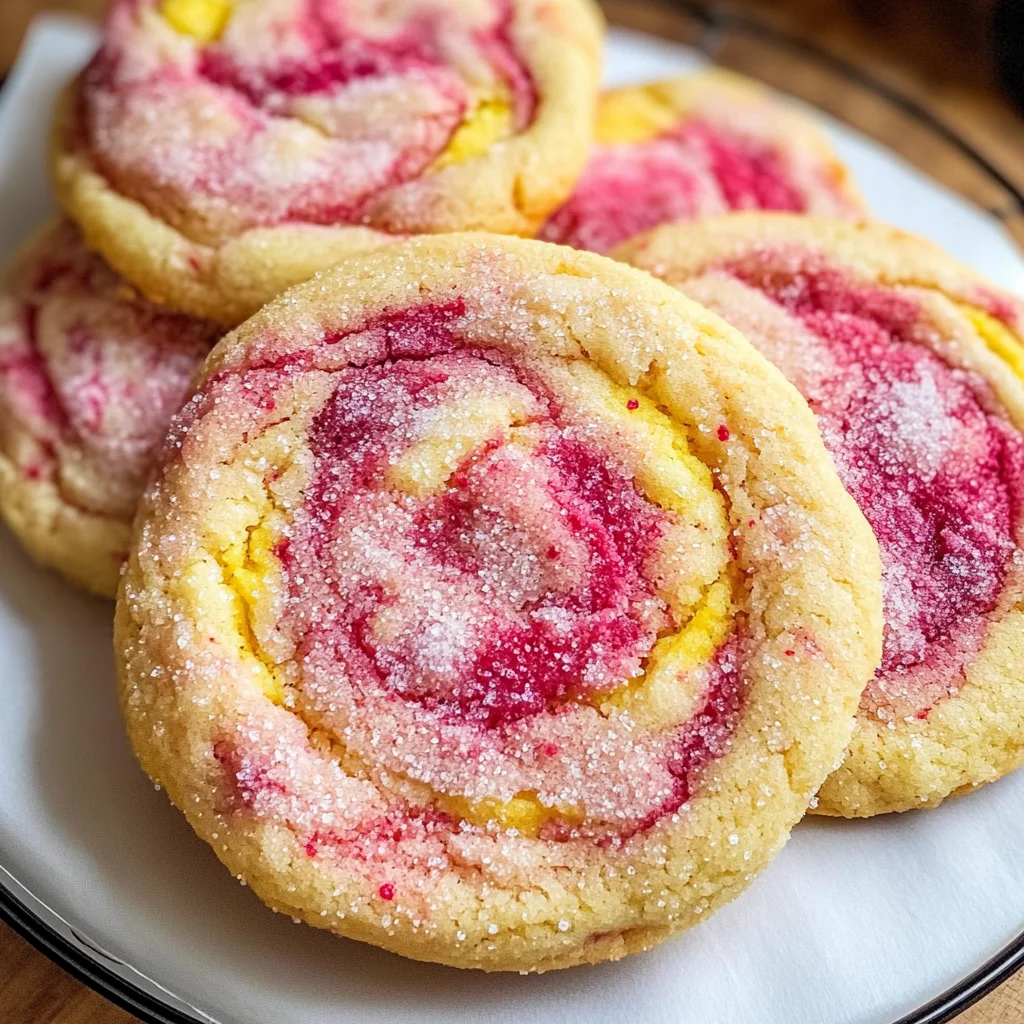
As we wrap up this delicious journey through making Raspberry Lemonade Cookies, I hope you feel inspired and excited to whip up this recipe in your own kitchen. There’s something truly extraordinary about combining bright raspberries with zesty lemons; it creates a symphony of flavors that dances on your palate and brings sunshine into even the cloudiest day. The soft texture paired with those charming swirls of pink raspberry make these cookies not only delightful to taste but also visually stunning—a perfect balance that elevates them beyond ordinary treats.
Why should this recipe be at the top of your must-try list? Because it’s more than just about flavor; it’s about joy! Making these cookies is an experience in itself—watching butter and sugar transform into creamy magic, feeling the excitement build as you fold in those vibrant raspberries, and finally pulling golden-brown treasures from the oven fills your home with warmth and happiness. Whether it’s for a casual afternoon snack or a festive gathering with friends, these cookies shine on every occasion!
Imagine savoring one alongside your morning coffee; that burst of tart raspberry against bright lemon pairs so wonderfully with your favorite brew! For an afternoon pick-me-up after a long day, enjoy one (or two!) while curled up with a good book or share them during game night with loved ones—each cookie offering smiles and sweet memories. And if you’re feeling adventurous? Try pairing these delightful cookies with a scoop of dairy-free vanilla ice cream or drizzling some homemade lemon glaze over the top for an extra layer of indulgence!
Feeling inspired? This recipe is wonderfully adaptable—maybe swap out raspberries for blueberries or blackberries if that’s what you have on hand! Or add some white chocolate chips for a touch of sweetness that complements the tartness beautifully. The possibilities are endless! I wholeheartedly encourage you to dive into this recipe, experiment with different variations, and most importantly, share your experience! Let’s create delicious memories together—one batch of Raspberry Lemonade Cookies at a time.
Raspberry Lemonade Cookies

Raspberry Lemonade Cookies are the perfect sweet escape that captures the essence of summer in every bite. These delightful treats combine the bright zest of fresh lemons with tart bursts of raspberries, creating a harmonious blend of flavors that’s both refreshing and indulgent. With a soft, pillowy texture and a hint of sweetness, these cookies are easy to make and ideal for any occasion—whether you’re enjoying them at an afternoon tea or serving them at a family gathering. In just 30 minutes, you can whip up a batch that will fill your home with an irresistible aroma and leave everyone asking for more.
- Prep Time: 15 minutes
- Cook Time: 14-16 minutes
- Total Time: 0 hours
- Yield: Approximately 24 cookies 1x
- Category: Dessert
- Method: Baking
- Cuisine: American
Ingredients
- ½ cup unsalted butter, softened
- 1 cup granulated sugar
- 1 large egg
- 1 teaspoon vanilla extract
- 1 tablespoon fresh lemon juice
- 2 tablespoons lemon zest
- 1 ½ cups gluten-free 1:1 flour (or all-purpose flour)
- ½ teaspoon baking powder
- ¼ teaspoon baking soda
- ⅔ cup frozen raspberries
Instructions
- Preheat your oven to 350°F (175°C) and line a baking sheet with parchment paper.
- In a mixing bowl, cream together softened butter and sugar until light and fluffy.
- Add the egg, vanilla extract, lemon juice, and lemon zest; mix until well combined.
- Gradually fold in gluten-free flour, baking powder, and baking soda until just incorporated.
- Gently fold in the frozen raspberries until evenly distributed.
- Chill the dough for at least 10 minutes.
- Scoop cookie mounds onto the prepared baking sheet, spacing them apart.
- Bake for 14-16 minutes or until edges are golden brown but centers remain soft.
- Let cool on the baking sheet for a few minutes before transferring to a wire rack.
Nutrition
- Serving Size: 1 cookie (30g)
- Calories: 120
- Sugar: 8g
- Sodium: 55mg
- Fat: 5g
- Saturated Fat: 3g
- Unsaturated Fat: 2g
- Trans Fat: 0g
- Carbohydrates: 17g
- Fiber: <1g
- Protein: <1g
- Cholesterol: 15mg