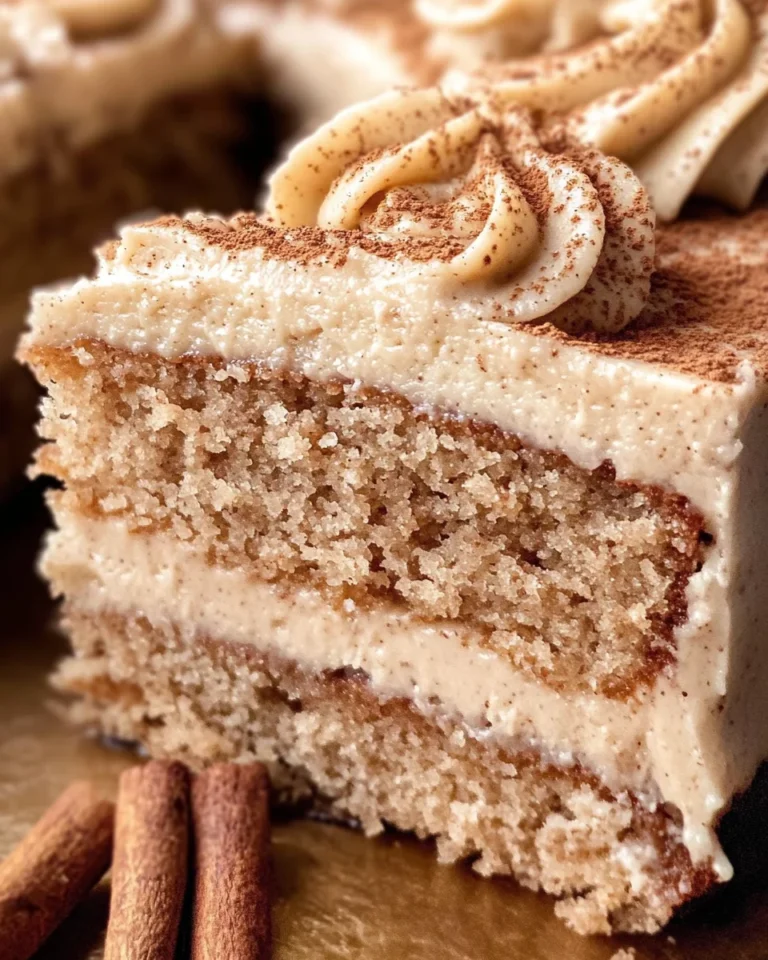
Irresistible Almond Sweet Rolls That Will Wow Your Guests
There’s something ethereal about the aroma of fresh-baked goods wafting through the house, isn’t there? The warmth that fills your kitchen as you pull out a tray of golden, fluffy rolls is nothing short of magic. These Irresistible Almond Sweet Rolls That Will Wow Your Guests are not just any rolls; they’re a heartfelt embrace wrapped in dough, brimming with rich almond flavor and topped with a luscious cream cheese frosting. I promise you, each bite is like a gentle hug from inside out—soft, sweet, and utterly satisfying. When you serve these at brunch or as dessert, expect smiles to light up the room as they sink their teeth into these delightful morsels.
The beauty of these almond sweet rolls lies not only in their taste but also in their ability to bring people together. Imagine this scene: friends gathered around your table, laughter filling the air as they savor each bite. This recipe has become a beloved tradition in my home, cherished for its simplicity and elegance. It’s perfect for special occasions or even just a cozy weekend. Trust me on this; once you make these rolls, they will become a staple in your baking repertoire. They bridge the gap between comfort food and indulgence with every fluffy layer that reveals itself upon pulling apart—an experience that is genuinely unforgettable.
Irresistible Almond Sweet Rolls That Will Wow Your Guests: A Divine Taste Experience
Let’s dive into creating these remarkable sweet rolls together! As we embark on this culinary journey, keep your heart open to all the delightful aromas and textures we’ll encounter along the way. Each step is infused with love and intention, ensuring that your rolls turn out perfectly every time. Whether it’s your first attempt or your hundredth, I want you to relish the process as much as the final product.
Ingredients:
In this adventure of baking, every ingredient plays a pivotal role in crafting those irresistible almond sweet rolls that will wow your guests. Let’s explore what makes each component essential for our delectable creation.
- 4 to 4 1/2 cups all-purpose flour. Flour is truly the backbone of our sweet rolls—it gives structure and body while enabling that wonderful rise we’re after. Depending on humidity and how you measure it (spooned or scooped), you might find yourself adjusting this amount slightly to achieve the perfect dough consistency—smooth yet slightly tacky without sticking to your fingers too much. Always choose high-quality all-purpose flour for optimal results; it sets the foundation for our delectable treat.
- 1/2 cup granulated sugar. This sugar does more than just add sweetness; it’s instrumental in browning our rolls beautifully as they bake, giving them an enticing golden hue that’s simply irresistible. Sugar also helps with moisture retention, keeping our rolls soft and tender long after they’re out of the oven. When selecting sugar, opt for fine granulated sugar so it dissolves easily into our dough without leaving gritty bits behind.
- 1 packet Rapid Rise Instant Yeast (2 1/4 tsp.). Yeast is our magical leavening agent; it’s what transforms our dense dough into airy rolls filled with delightful pockets of air. Using rapid rise yeast means less waiting time—perfect for when you’re eager to dive into those warm sweet rolls quickly! Just make sure your milk is warm but not hot—around 110°F—to activate the yeast effectively without killing it off.
- 1 teaspoon salt. Salt may seem simple, but it’s absolutely paramount in enhancing flavors while balancing sweetness throughout our dough and filling. It also strengthens gluten development which is key for achieving that ideal chewy texture we crave in baked goods like these delicious almond rolls.
- 1 1/2 cups milk (warm). Warm milk serves two purposes here: it activates our yeast while also enriching our dough with moisture and fat from dairy, resulting in soft and tender rolls brimming with flavor! Always remember to check that your milk isn’t boiling hot; if it’s too hot when mixed with yeast, you’ll end up with sad little rolls instead of fluffy wonders!
- 6 tablespoons butter (melted). Butter brings richness to our sweet rolls—a non-negotiable element if you want a luxurious mouthfeel! As it melts into our warm milk mixture before being added to the flour, it creates a silky texture that elevates every bite from ordinary to extraordinary—truly liquid gold!
- 1 large egg (at room temperature). Adding an egg not only enriches our dough but also provides structure and stability as it bakes. Room temperature eggs blend more seamlessly into ingredients compared to cold eggs straight from the fridge—thus helping us create that smooth dough we desire!
- 1/3 cup unsalted butter (at room temperature). This butter will be used in our filling mixture and must be softened enough to blend easily with other ingredients like almond meal and sugar! Unsalted butter allows us greater control over salt levels within our recipe—something crucial since we already have salt added elsewhere.
- 1 1/3 cups almond meal. This ingredient delivers an incredible nutty flavor profile while adding texture that’s simply divine! Almond meal keeps things gluten-free friendly if necessary; however, do ensure it’s finely ground so there aren’t any large chunks interrupting our lovely roll experience!
- 1/2 cup granulated sugar (for filling). Just like before, sugar enhances sweetness but has additional roles here: it draws moisture out of ingredients like almond meal making everything cohesive while caramelizing beautifully during baking creating those signature golden edges!
- 2 teaspoons almond extract & 1/2 teaspoon vanilla extract (complementary flavors). These extracts are key ingredients that deepen flavor profiles—the beautiful marriage of almond and vanilla creates an aromatic symphony making each bite utterly intoxicating! Don’t skip on quality extracts; pure extracts are always better than imitation for robust flavors.
- 1/4 teaspoon salt & a pinch salt (for balance). Similar reasoning applies here as mentioned earlier: balance enhances flavors across sweets keeping things from becoming overwhelmingly sugary while allowing other flavors shine through!
- 4 ounces cream cheese (at room temperature) & 1 1/2 cups powdered sugar (for frosting). Cream cheese lends creamy tanginess offering contrast against sweetness while powdered sugar thickens up nicely providing that dreamy frosting texture everyone loves atop their freshly baked goodies!
- 1 teaspoon vanilla extract & 1/2 teaspoon almond extract (in frosting). Repeating those signature flavors help maintain continuity throughout making sure each layer harmonizes beautifully together!
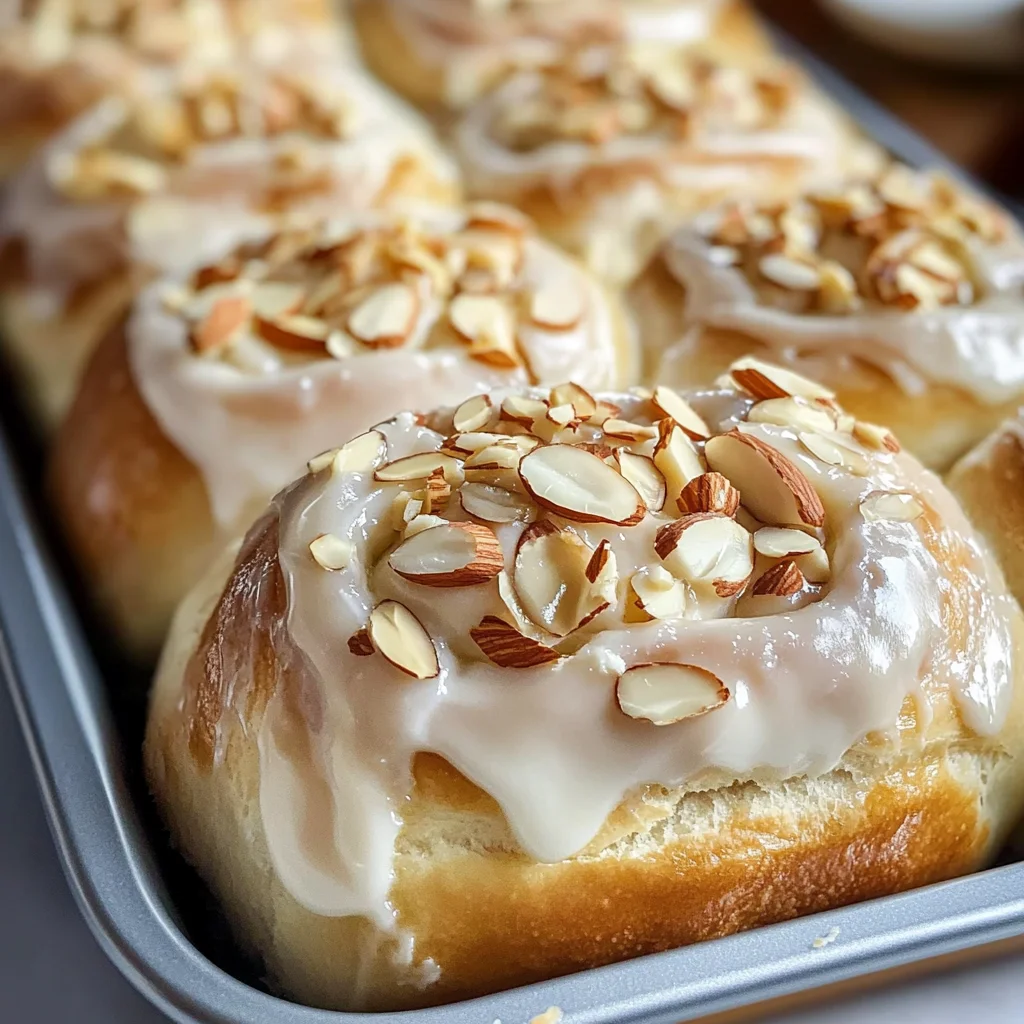
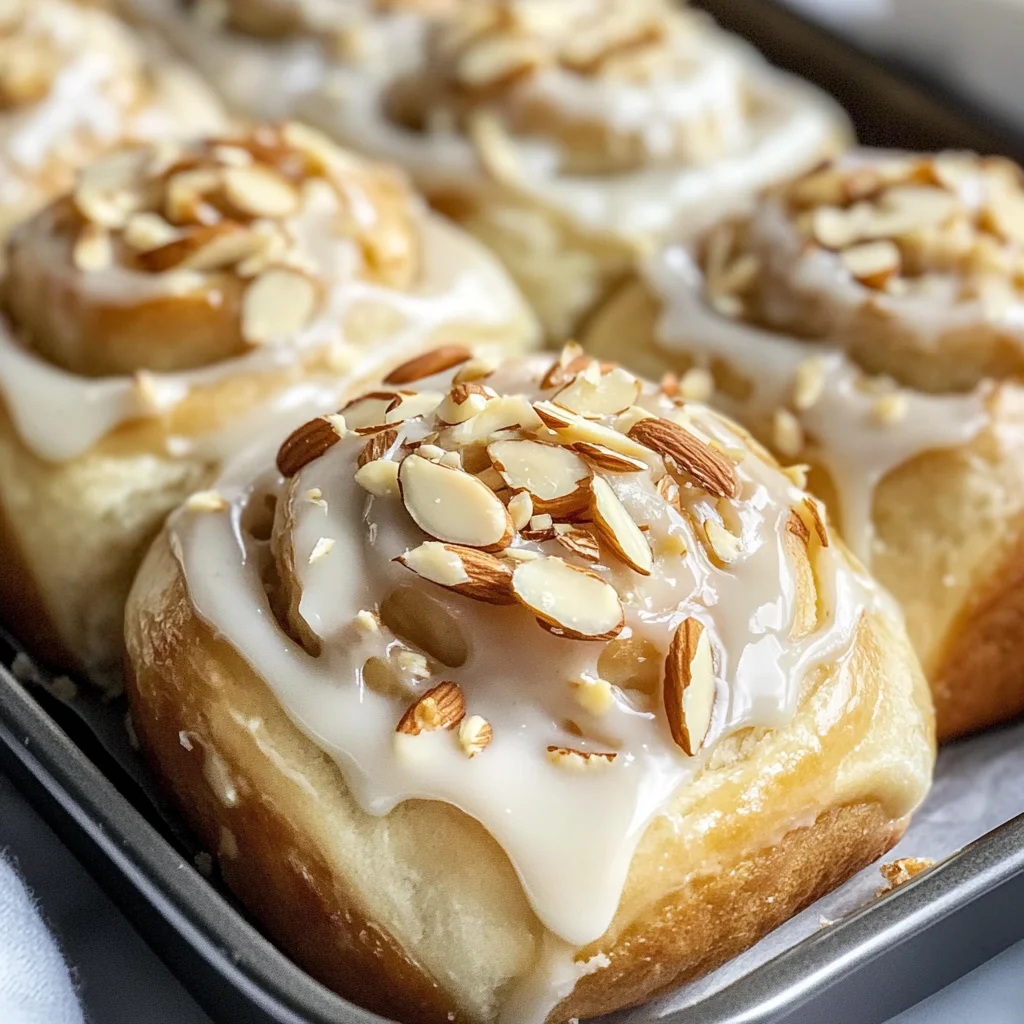
- 1/2 cup slivered almonds (for crunch). Slivered almonds provide lovely textural contrast against soft pillowy buns while echoing prominent nutty notes present within overall theme—totally elevating presentation too!
As we gather all these splendid ingredients together, each one contributes something unique toward crafting mouthwatering memories through shared experiences around tables filled with joy!
Equipment You’ll Need:
While ingredients are essential partners in this baking journey, having the right tools can truly make all the difference between good and great! Let’s ensure we gather everything needed so you can focus solely on enjoying this wonderful process.
- Mixing Bowls – A set of sturdy mixing bowls is essential for combining ingredients efficiently without causing spills or messes somewhere along the way! Opt for glass or stainless steel options since they retain heat well if needed later on during rising stages.
- Measuring Cups & Spoons – Accurate measurements matter immensely when baking! Invest in good-quality measuring cups alongside spoons dedicated solely towards dry versus wet ingredients—it’ll save hassle down line knowing exactly what was included each time!
- Wooden Spoon or Dough Whisk – Either tool works wonderfully when blending together sticky doughs like ours without over-mixing—a technique known as “folding” which preserves air bubbles created during mixing phases resulting fluffy end products everyone craves!
- Rolling Pin – A trusty rolling pin helps flatten out dough evenly ensuring uniform size across all pieces before shaping them into those gorgeous swirls we’ll finalize later on—they’re part artistry part engineering after all!
- Baking Sheet or Pan lined with Parchment Paper – Lining pans prevents sticking while allowing easy removal post-baking when ready serve guests proudly at gathering occasions where impressiveness matters most—it keeps clean-up simple too afterward!
With these pieces assembled alongside fresh ingredients ready-to-go…the magic truly begins unfolding soon enough!
Preparing the Irresistible Almond Sweet Rolls That Will Wow Your Guests
Now comes perhaps my favorite part—the actual hands-on preparation where excitement begins bubbling up just like yeasted dough rising under warmth! Get ready because soon enough glorious aromas will fill every corner reminding us why we adore baking so much together…
Step 1: Activate That Yeast!
First things first; let’s wake up that sleepy yeast by combining warm milk (remember—not too hot!) along with one tablespoon of granulated sugar within one bowl—we want those little organisms thriving happily here! Mix gently until dissolved completely before sprinkling instant yeast evenly atop surface area—this ensures maximum activation effect occurs once allowed resting period takes place uninterruptedly about five minutes long…watch closely for bubbles forming indicating life stirring amongst mixture below…how exciting right?
Step 2: Create The Dough
Once activated yeast bubbles are dancing away joyfully inside bowl grabbing attention instantly—it’s time adding remaining two tablespoons granulated sugar plus melted butter followed by egg incorporation stirring vigorously until combined thoroughly achieved throughout batch formation visual cues indicating creamy consistency achieved ideally resembling pancake batter almost…next comes gradual addition flour while mixing gently until cohesive ball forms naturally pulling away sides productively—don’t rush this step either please allow patience reign supreme at such pivotal moments leading crunchy outer crust coupled pillowy softness altogether magically intertwined effortlessly seamlessly emerging forth victorious shortly thereafter…
Step 3: Knead With Love
After achieving desired cohesive ball shape now transfer onto lightly floured counter surface prepping kneading phase ahead…gently pressing down folding over repeatedly working through stretch-and-fold motions using palms exerting pressure generating warmth unlocking gluten network aiding elasticity development crucial making final product perfection realized later…kneading approximately eight minutes total duration should suffice till smooth elastic feel presents itself ideally resembling baby’s bottom finish touch overall appearance rather than rough patches lingering about stubbornly refusing cooperate fully…
Step 4: Rise To New Heights
Once kneaded satisfyingly well place formed ball inside lightly greased bowl covering tightly using plastic wrap allowing rise hour-plus time period give-or-take depending ambient temperatures surrounding environment—this phase allows fermentation occur properly yielding lightness airy texture sought-after results ultimately leading us closer destinations reminiscent heavenly aromas drifting invitingly throughout realms homes inviting guests come partake celebrating joyous moments shared around tables filled delectable treats arrayed lavishly displayed beautifully before eyes awaiting indulgent bites taken eagerly awaiting satisfaction moment arrive gracefully finally…
Stay tuned my friend as we delve deeper into preparing both filling luscious frosting enchanting visions brought forth tantalizing imaginations coming alive revealing delights await definitely worth anticipation guaranteed satisfaction beyond measure promised sincerely throughout experience shared intimately unfolding gracefully unravelled slowly indulging senses captivated completely transformed forever…
Step 5: Kneading the Dough to Soft Perfection
Now that your dough is all mixed together, it’s time for one of the most satisfying parts of this process: kneading! This step is crucial because it develops the gluten in the flour, which gives our sweet rolls that fluffy, airy texture we crave. Lightly dust your countertop with a sprinkling of flour—don’t go overboard here; just enough to prevent sticking. Transfer your dough onto the surface and begin kneading by pushing it down and away from you with the heel of your hand, then fold it back over itself. Rotate it a quarter turn and repeat this motion. Keep going for about 8 to 10 minutes, or until the dough is smooth and elastic—this is where you’ll want to feel that lovely resistance as you stretch and fold.
As you knead, you might notice your dough becoming stickier at first; don’t panic! A little bit of stickiness is normal and actually beneficial as it helps retain moisture. However, if your dough feels overly wet and gooey, sprinkle in a little extra flour—just a tablespoon at a time—until it’s manageable. You’ll know you’re done when the dough springs back when poked lightly with a finger—a gentle rebuke that shows it’s ready for its first rise. Trust me on this; investing time in kneading will pay off with soft, pillowy rolls that will melt in your mouth.
Step 6: Letting It Rise – Patience is Key
Once you’ve kneaded your dough into submission, place it in a large greased bowl, turning it once so all sides are coated with a thin layer of oil. Cover the bowl tightly with plastic wrap or a damp kitchen towel to create a warm environment for your dough to rise—this is non-negotiable! The yeast needs warmth to activate and create those delightful air pockets that make our sweet rolls light and fluffy. You’ll want to set your bowl in a cozy spot, perhaps near an oven set to low heat or simply on your kitchen counter if it’s warm enough.
Allow the dough to rise until it doubles in size, which usually takes about 1 to 1.5 hours depending on room temperature. I know waiting can be tough—it’s like watching paint dry! But I promise you this step is where the magic happens; it transforms simple ingredients into something extraordinary. As the dough rises, take a moment to relish that intoxicating smell wafting through your kitchen—it’s like a warm hug! When ready, gently poke the dough—if it holds an indentation without collapsing, it’s perfect!
Step 7: Shaping Your Rolls – Crafting Art from Dough
Now comes one of my favorite parts: shaping those beautiful almond sweet rolls! After your dough has risen beautifully, punch it down gently—this releases any trapped air bubbles created during fermentation—and transfer it back onto your floured surface. Roll out the dough into a rectangle measuring approximately 20 by 12 inches; aim for an even thickness of about 1/4 inch throughout. This evenness ensures that each roll bakes uniformly—nobody likes an uneven bake!
Spread that luscious mixture of softened butter (1/3 cup), almond meal, granulated sugar (1/2 cup), egg (1 large), almond extract (2 teaspoons), vanilla extract (1/2 teaspoon), and salt (1/4 teaspoon) generously over the rolled-out dough using an offset spatula or even just the back of a spoon. Make sure every inch is covered so every bite will be bursting with flavor! Now comes the fun part: starting from one long side of the rectangle, roll up tightly into a log shape like you’re wrapping up all those delicious flavors inside! Once rolled up completely, pinch the seam closed gently but firmly—it’s essential for keeping everything tucked inside.
Using a sharp knife or dental floss (yes, you read that right!), slice the log into 12 equal pieces—each should be about 1.5 inches wide for optimal baking results. Place these beauties cut-side up in a greased baking dish or on parchment paper-lined sheets. As they sit there looking adorable and invitingly plump, cover them again with plastic wrap or a towel for their second rise; this should take about another 30 minutes until they’ve puffed up nicely.
Step 8: Baking Your Irresistible Almond Sweet Rolls
Ahhh—the moment we’ve all been waiting for! Preheat your oven to 350°F (175°C). While waiting for that glorious heat to build up inside, take this opportunity to appreciate how incredible your kitchen smells right now—seriously intoxicating! When you’re ready, uncover those beautiful rolls and place them in the oven. Bake for about 25-30 minutes until they’re golden brown on top; keep an eye out toward the last few minutes—ovens can vary quite significantly!
You want them to look perfectly golden but also be cautious not to overbake them because dry sweet rolls are just sad rolls! To test doneness without cutting into them too soon (which would let out all that steam), gently tap on one roll—the sound should be slightly hollow if they’re done cooking! As soon as they come out of the oven, allow them to cool slightly while still basking in their aromatic glory before adding that divine cream cheese frosting on top—we wouldn’t want warm rolls getting soggy!
Conclusion:
As we wrap up this delightful journey through baking these Irresistible Almond Sweet Rolls That Will Wow Your Guests, I can’t help but feel excited for what awaits you in your kitchen! This recipe isn’t just about creating something delicious; it’s about weaving together flavors and textures that sing with each bite. The soft richness of the dough paired with the nutty almond filling creates a symphony of flavors that dances on your palate. And let’s not forget about that creamy frosting drizzled on top—a truly extraordinary touch that elevates every mouthful into something profoundly satisfying.
What makes this recipe a must-try extends beyond its irresistible taste; it’s also about the joy found in making it. Picture yourself kneading dough with love, waiting patiently as it rises like magic before your eyes, then rolling it out into beautiful spirals filled with almond goodness. Each step is an experience unto itself—a heartfelt ritual that transforms ordinary moments into something special. Whether it’s a brunch gathering or an intimate family breakfast on a lazy Sunday morning, these sweet rolls are sure to steal the show every time.
Imagine savoring one with a steaming cup of coffee as morning sunlight pours through your window; how perfect does that sound? Or perhaps you’d like one as an afternoon pick-me-up alongside some herbal tea? For those cozy evenings when dessert calls your name, serve these almond rolls warm with another drizzle of icing over top—they become utterly intoxicating! You could even pair them with fresh fruit or chocolate dipping sauce to create a truly decadent experience.
Feeling adventurous? This recipe is wonderfully adaptable! You could easily stir in some chopped dark chocolate or pistachios into the filling for added flair or experiment by swapping out different extracts like hazelnut or vanilla depending on what your heart desires. Don’t hesitate to get creative; after all, cooking is all about exploration and having fun! I invite you to try this recipe yourself—I promise it will be a memorable experience you’ll cherish and want to share with others. So gather your ingredients, whip up these lovely rolls, and let me know how they wowed your guests!
Irresistible Almond Sweet Rolls That Will Wow Your Guests

Indulge in the delightful experience of making Irresistible Almond Sweet Rolls That Will Wow Your Guests. These fluffy, golden rolls are infused with rich almond flavor and topped with a creamy frosting that makes them perfect for any occasion, from brunch gatherings to cozy family breakfasts. Imagine the joy as your friends and family gather around, savoring each bite of these tender treats. The combination of soft dough and nutty filling creates a comforting yet sophisticated dessert that is sure to impress. With simple ingredients and clear instructions, this recipe is accessible for bakers of all skill levels. Get ready to transform your kitchen into a haven of warmth and sweetness—your guests won’t be able to resist!
- Prep Time: 20 minutes
- Cook Time: 30 minutes
- Total Time: 50 minutes
- Yield: Makes about 12 servings 1x
- Category: Dessert
- Method: Baking
- Cuisine: American
Ingredients
- 4 to 4 1/2 cups all-purpose flour
- 1/2 cup granulated sugar
- 1 packet Rapid Rise Instant Yeast (2 1/4 tsp.)
- 1 teaspoon salt
- 1 1/2 cups warm milk
- 6 tablespoons melted butter
- 1 large egg (at room temperature)
- 1/3 cup unsalted butter (for filling)
- 1 1/3 cups almond meal
- 2 teaspoons almond extract
- 1/2 teaspoon vanilla extract
- 4 ounces cream cheese
- 1 1/2 cups powdered sugar
Instructions
- In a bowl, combine warm milk with sugar and sprinkle yeast on top; let it sit for about five minutes until bubbly.
- Mix in melted butter and egg until combined. Gradually add flour and salt, mixing until a dough forms.
- Knead the dough on a floured surface for about 8 minutes until smooth.
- Place the dough in a greased bowl, cover it, and let it rise for 1 to 1.5 hours until doubled in size.
- Roll out the dough into a rectangle, spread filling mixture made from softened butter, almond meal, sugars, extracts, and salt over it.
- Roll tightly into a log and slice into pieces; place in a greased pan and let rise for another 30 minutes.
- Preheat oven to 350°F (175°C) and bake rolls for about 25–30 minutes or until golden brown.
- Prepare the frosting by mixing cream cheese with powdered sugar and extracts until smooth; frost warm rolls before serving.
Nutrition
- Serving Size: 1 roll (70g)
- Calories: 250
- Sugar: 12g
- Sodium: 200mg
- Fat: 9g
- Saturated Fat: 5g
- Unsaturated Fat: 3g
- Trans Fat: 0g
- Carbohydrates: 38g
- Fiber: 1g
- Protein: 5g
- Cholesterol: 30mg