No-Bake Peanut Butter Oat Cups Recipe
There’s something truly magical about a recipe that brings people together—a sweet little moment of joy nestled between the pages of our culinary adventures. The No-Bake Peanut Butter Oat Cups are not just a treat; they’re a harmonious blend of nostalgia and innovation, reminiscent of childhood afternoons spent crafting delightful snacks in the kitchen. Imagine the velvety, creamy texture of peanut butter that envelops your senses, as you mix it with rich maple syrup and buttery coconut oil, creating a symphony of flavors that dance on your palate. Each bite is an experience, a celebration of simple ingredients that come together to form something extraordinarily satisfying. Trust me when I say, these oat cups will become your go-to dessert for every occasion—whether it’s a midnight snack or a gathering with friends.
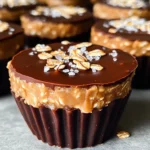
And let’s talk about the sheer convenience! In less than 30 minutes, you can whip up these no-bake wonders without ever turning on the oven. There’s something deeply reassuring about knowing you have a stash of these delectable cups waiting for you in the freezer. They’re perfectly portioned and easy to store, making them ideal for meal prepping or those days when life gets just a bit too hectic. Plus, the combination of chewy oats topped with luscious chocolate and a sprinkle of flaky sea salt creates an irresistible contrast that will have your taste buds singing. So grab your favorite apron, roll up your sleeves, and let’s embark on this delightful culinary journey together!
No-Bake Peanut Butter Oat Cups Recipe: A Sweet Symphony of Flavors
These no-bake peanut butter oat cups are not only incredibly simple to make but also deeply satisfying, offering a perfect balance between indulgence and nutrition. Each bite transports you to that cozy kitchen where love is mixed into every ingredient. Let’s dive into this recipe!
Ingredients:
As we embark on crafting our No-Bake Peanut Butter Oat Cups, it’s essential to appreciate each ingredient’s role in creating this delicious treat. Each one contributes not just flavor but also texture and character to our final masterpiece.
- 1 cup creamy peanut butter (natural or regular both work). This is the heart and soul of our oat cups—the creamy peanut butter brings richness and depth while providing healthy fats and protein. Whether you choose natural or regular peanut butter depends on your preference; natural varieties often have fewer additives and offer an intense peanut flavor that shines through beautifully. Just make sure it’s well-stirred if it’s natural; you want that liquid gold fully incorporated for a smooth consistency.
- 1/4 cup pure maple syrup (or honey). Here comes the sweetness! Pure maple syrup adds a distinctively warm flavor profile that complements the nuttiness of the peanut butter like nothing else can. If you’re looking for an alternative, honey works just as well—it has its own unique sweetness and lovely floral notes. This liquid sweetener also helps bind everything together while adding moisture to our base layer.
- 1/4 cup melted coconut oil. Coconut oil serves multiple purposes here; it provides healthy fats while allowing our mixture to set up beautifully once chilled. When melted, it combines seamlessly with the other ingredients, imparting a subtle tropical aroma that’s utterly intoxicating without overwhelming any flavors. Just remember—don’t skip this step! The melted state is crucial for achieving that perfect consistency.
- 1 1/2 cups old-fashioned rolled oats. These oats are what give our oat cups their hearty texture, providing chewiness that pairs so well with the smoothness of peanut butter and chocolate topping. Old-fashioned oats hold their shape wonderfully during chilling, creating just enough resistance with every bite without being overly tough. Avoid quick-cooking oats; they’ll create a mushy texture instead of that delightful chew we’re after.
- 1/2 teaspoon vanilla extract. Ahh, vanilla—the magical ingredient that enhances all flavors! A splash of vanilla extract will elevate your oat cups from delicious to truly extraordinary by adding warmth and complexity to every bite. It’s amazing how such a small amount can make such a significant impact on flavor.
- Pinch of salt. Don’t underestimate salt—it’s absolutely paramount in balancing sweetness and enhancing flavors throughout this recipe! A little pinch goes a long way in bringing out all those wonderful notes in our ingredients.
FOR THE CHOCOLATE TOPPING
- 1 cup semi-sweet chocolate chips (or dark chocolate, if preferred). Now we arrive at one of my favorite parts—the chocolate topping! Semi-sweet chocolate chips provide just the right amount of sweetness while melting beautifully over our oat base to create an indulgent layer on top. If you prefer dark chocolate for its richer flavor profile or lower sugar content, go right ahead! Just ensure whatever chocolate you choose is quality—this will shine through in taste.
- 1 tablespoon coconut oil. We’re using coconut oil again here to help thin out the chocolate for easier melting and spreading over our oat mixture. This ensures we achieve that glossy finish we all adore!
- Flaky sea salt for topping (optional). If you’re like me and enjoy contrasting flavors in your treats, sprinkling flaky sea salt atop each cup is non-negotiable! It adds an incredible burst of salty goodness against the sweet backdrop—an irresistible combination that keeps you coming back for more!
Equipment You’ll Need:
Having the right tools at hand makes cooking both smoother and more enjoyable—a joyful experience rather than just another chore! Here are some essential pieces you’ll need:
- Standard 12-cup muffin tin – This will be where all the magic happens! A muffin tin allows us to form perfectly portioned cups without any mess involved in shaping them by hand—plus they chill beautifully in each individual compartment.
- Paper or silicone liners – These help prevent sticking while making cleanup effortless afterward! Silicone liners are my personal favorite because they’re reusable—you’ll find they peel away easily from chilled treats without leaving any residue behind.
- Mixing bowls – Having various sizes handy makes mixing easier (especially when combining different components). You’ll need at least one medium bowl for mixing your base layer ingredients!
- Spatula or spoon – A sturdy spatula is perfect for mixing everything thoroughly but also great for pressing down layers firmly into place within each cupcake liner.
- Microwave-safe bowl (or double boiler) – Whichever method you choose to melt your chocolate topping matters here—both options yield equally decadent results but may require slightly different techniques based on personal preference!
Now that we have everything lined up perfectly let’s dive into preparing those delectable No-Bake Peanut Butter Oat Cups!
Step 1: Preparing Your Muffin Tin
To begin this sweet adventure into making No-Bake Peanut Butter Oat Cups Recipe, start by taking your standard muffin tin—a trusty companion throughout this process—and lining it with paper or silicone liners so nothing sticks during freezing later on! Each liner creates its own little vessel where all those glorious layers will come together harmoniously without any fuss when serving them later; trust me—this step is crucial for achieving success!
Step 2: Mixing Your Base Layer
In your medium-sized mixing bowl, combine creamy peanut butter along with pure maple syrup and melted coconut oil before adding vanilla extract alongside a pinch of salt until everything melds into one beautiful amalgamation—smoothness should be achieved here through gentle stirring techniques rather than vigorous whisking (we don’t want air bubbles!). Once mixed thoroughly together resembling liquid gold infused with warmth from real maple syrup—add old-fashioned rolled oats next; fold gently until each grain becomes coated evenly by sticky goodness reminiscent of childhood memories spent baking treats at home together!
Step 3: Forming Those Lovely Cups
Now comes perhaps my favorite part—forming those gorgeous little cups! Scoop approximately two tablespoons’ worth out onto each prepared liner using either an ice cream scoop or spoon before pressing firmly downward using either side until flat across bottom surfaces evenly distributed throughout entire muffin tray below (you want uniformity here!). This ensures structural integrity once frozen later down line as well—so don’t rush this step; precision matters during formation time!
Step 4: Making That Irresistible Chocolate Topping
While those oat bases are chilling nicely inside freezer awaiting their transformation into blissful bites—we turn our attention towards crafting luscious chocolate topping next! Measure one cup worth semi-sweet chips alongside tablespoonful coconut oil placed carefully inside microwave-safe bowl then heat gently over low power setting within microwave intervals lasting thirty seconds each time stirring between rounds until melted down completely smooth consistency achieved (keep watch closely though so nothing scorches!). Alternatively consider opting for double boiler technique instead if preferred—it yields similar results while offering additional control over heating process too!
With these first steps laid out before us—I can already feel excitement bubbling inside just thinking about devouring these marvelous creations once completed together soon enough! Stay tuned as we continue exploring further stages ahead shortly…
Step 5: Melting the Chocolate Topping to Perfection
Now, let’s dive into the luxurious world of chocolate! This step is a crucial part of our No-Bake Peanut Butter Oat Cups Recipe, as it transforms our simple oat base into something utterly indulgent. Begin by grabbing a microwave-safe bowl and adding your cup of semi-sweet chocolate chips along with one tablespoon of coconut oil. The coconut oil isn’t just for adding richness; it helps the chocolate achieve that perfect, glossy finish that you see in professional kitchens. Trust me on this—chocolate topped with coconut oil will have a smooth texture that’s simply irresistible.
When you’re ready to melt the chocolate, pop the bowl in the microwave and heat it in 30-second intervals. This gentle approach is essential; we want to avoid scorching the chocolate at all costs, which can create an unappetizing grainy texture. After each interval, take a moment to stir the mixture vigorously. You’ll notice that as you stir, the chocolate will begin to melt and become creamy. This step is not just about heating; it’s about coaxing that silky goodness from the chips. Continue this process until everything is melted together and there are no lumps left behind. When you see that beautiful liquid gold in front of you, know that you’ve mastered an essential technique in chocolate melting!
Step 6: Coating Your Oat Cups with Chocolate Bliss
Once you’ve achieved that velvety melted chocolate, it’s time for one of my favorite parts: topping those gorgeous oat cups! Carefully remove your muffin tin from the freezer—you should see that they’ve firmed up nicely and are slightly hardened. Now comes the fun part! Using a spoon, gently scoop about one tablespoon of your luscious melted chocolate over each oat cup. As you do this, take care to spread it evenly across the surface so every bite has that delightful blend of flavors we crave.
This step isn’t just about aesthetic appeal; it’s also about creating layers of flavor and texture. The contrast between the creamy peanut butter base and the rich chocolate topping makes each cup a tiny celebration in your mouth! If you’re feeling creative (and I encourage you to be), you could even experiment with swirling or marbling techniques by only partially mixing the chocolate into the top layer—this gives an artisanal feel to your treats! Once each cup is coated and looking divine, it’s time for another chill session before we add our special finishing touch.
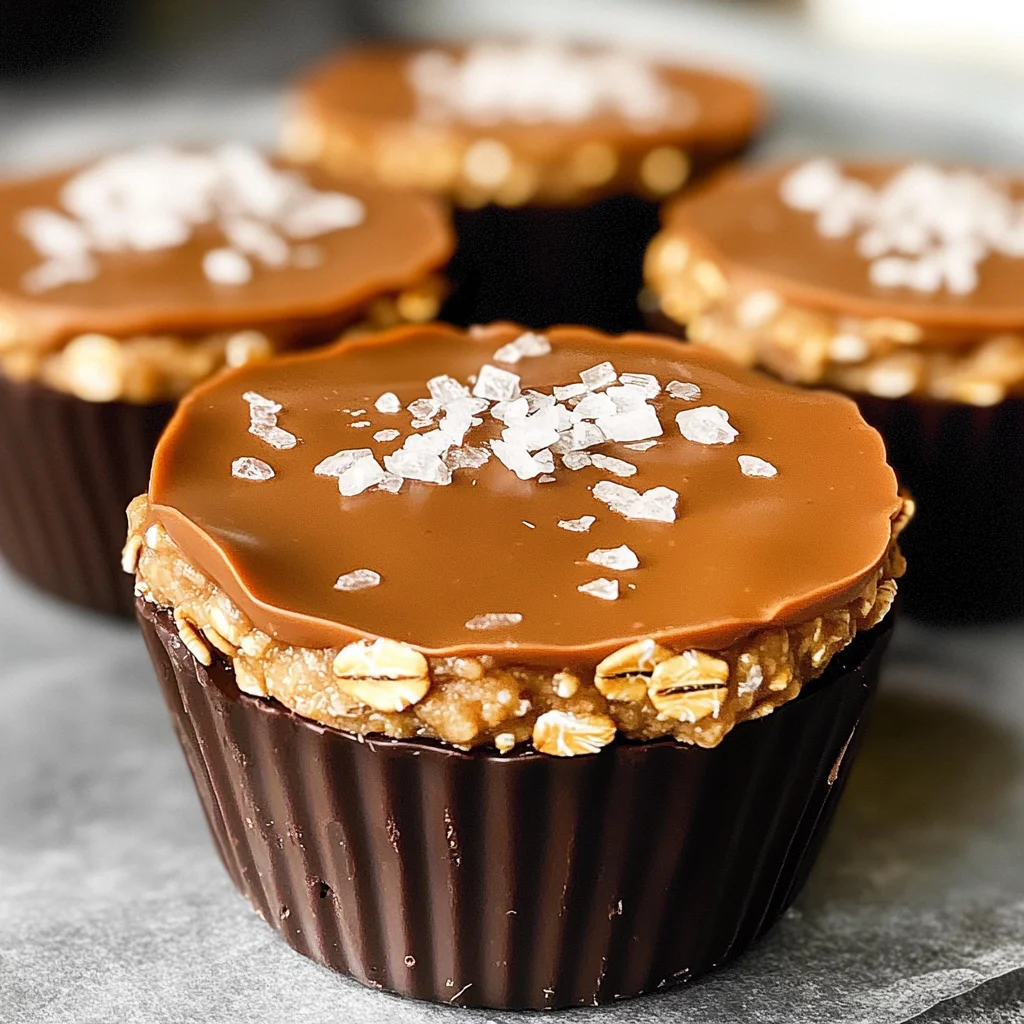
Step 7: Adding That Special Touch with Flaky Sea Salt
Ah, flaky sea salt—the magical ingredient that takes our No-Bake Peanut Butter Oat Cups Recipe from good to extraordinary! After you’ve coated your oat cups with chocolate, consider sprinkling a small pinch of flaky sea salt on top of each one while they’re still warm and gooey. Not only does this enhance the visual appeal with its delicate crystals glistening against the dark chocolate, but it also creates a wonderful balance between sweet and salty flavors.
This contrast is absolutely paramount because it draws out the natural nutty richness of peanut butter and elevates each bite into something truly profound. Imagine biting into these little cups—first hitting that creamy peanut butter layer followed by an explosion of sweet chocolate and then a burst of savory saltiness—it’s an experience unlike any other! Once you’ve added your salt (if using), return your muffin tin back to the freezer for another 15 to 20 minutes. During this time, allow yourself some patience; this chilling phase ensures that everything sets perfectly so when you finally bite into them later, they hold their shape beautifully without crumbling apart.
Step 8: The Moment of Truth—Final Chill Time
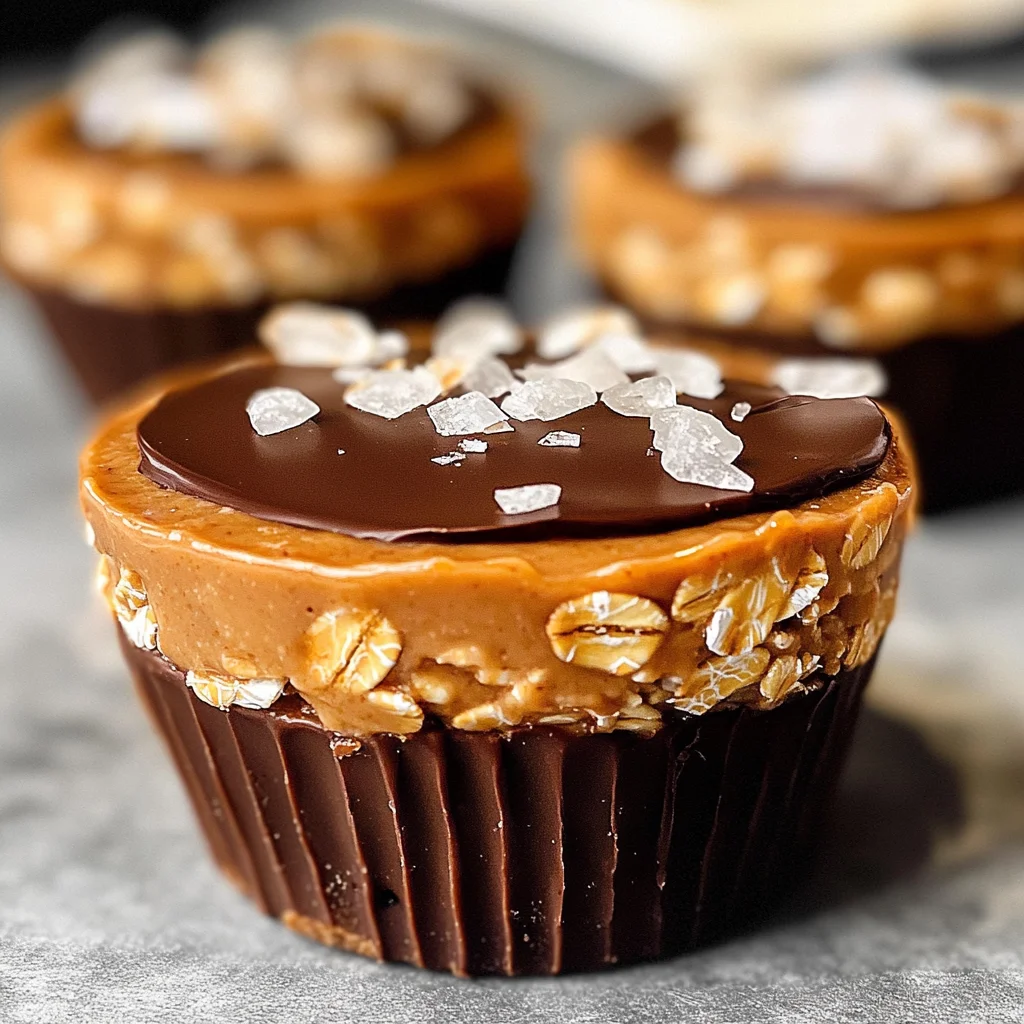
After what feels like an eternity (but really is just about 15-20 minutes!), it’s finally time for us to unveil our masterpiece! Take a deep breath and prepare for joy as you pull your muffin tin from the freezer. Gently press down on one side of each paper or silicone liner, allowing them to pop out effortlessly—this is where all your hard work pays off! You’ll find these little cups sitting proudly in their liners, perfectly formed and ready for devouring.
As you’re peeling them away from their molds, take a moment to appreciate how beautiful they look—the glossy sheen from the melted chocolate combined with those sparkling flecks of sea salt creates a stunning presentation worthy of any gathering or quiet night at home. At this point, I recommend letting them sit at room temperature for just a few minutes before enjoying; this allows flavors to bloom even more wonderfully as they soften slightly—trust me on this one! Each cup should be firm but not rock-hard; if they feel too solid right out of the freezer, give them a brief rest so they’re pleasantly chewy when bitten into.
Final Touches: Enjoying Your Irresistible No-Bake Peanut Butter Oat Cups Recipe
With all steps complete and your kitchen filled with delightful aromas, I invite you to indulge in these heavenly creations! Whether you’re savoring them solo during a quiet evening or sharing them with friends over coffee (which I highly recommend), these No-Bake Peanut Butter Oat Cups are sure to impress everyone around you. They embody comfort food at its finest while being deceptively simple—a true testament to how cooking can bring joy without needing extensive effort.
As you enjoy these little bites of happiness, remember: cooking isn’t just about following recipes; it’s about love infused into every step—taking time to appreciate ingredients and celebrating what they bring into our lives. So go ahead—take a big bite—and savor every moment because these cups are not just food; they’re memories waiting to be made!
Storage and Enjoyment Tips for Your No-Bake Peanut Butter Oat Cups Recipe
Now that your delightful No-Bake Peanut Butter Oat Cups are chilling in the freezer, ready to tantalize your taste buds, let’s talk about how to store these delectable treats. I can hardly contain my excitement as I think about you enjoying them! These little cups of joy not only make for a quick snack but are also perfect for meal prep or sweet cravings throughout the week. Trust me, once you take that first bite, you’ll want to keep them on hand at all times!
Storing Leftover No-Bake Peanut Butter Oat Cups Recipe
To ensure your No-Bake Peanut Butter Oat Cups remain fresh and delicious, it’s best to store them in an airtight container. A glass or BPA-free plastic container works beautifully; just make sure it’s well-sealed. You can keep them in the refrigerator for up to one week, which is fantastic because they’re perfect for those moments when you need a little pick-me-up or something sweet after dinner. Want a pro tip? If you’re worried about moisture making them soggy, simply place a slice of bread in the container with them—this little trick helps maintain their texture and keeps everything wonderfully fresh! After storage, you’ll find that the flavors meld beautifully together, creating a harmonious blend of peanut butter and chocolate that’s even more satisfying than when they were first made. Serve them chilled straight from the fridge for a refreshing treat that perfectly balances creamy and crunchy textures!
Freezing No-Bake Peanut Butter Oat Cups Recipe for Later
If you’re looking to extend the life of these indulgent cups even further, freezing is an excellent option! To freeze your No-Bake Peanut Butter Oat Cups, simply arrange them in a single layer on a parchment-lined baking sheet and freeze until solid; this usually takes about an hour. Once firm, transfer them to an airtight container or a freezer bag for optimal storage. They can be kept frozen for up to three months without losing their delightful charm! When you’re ready to enjoy one (or two!), just take them out of the freezer and let them thaw at room temperature for about 10-15 minutes. The convenience factor here is absolutely paramount; having these treats ready at a moment’s notice makes it so easy to satisfy those sweet cravings without any fuss. Trust me, once you start freezing these cups, you’ll wonder how you ever lived without this delightful stash!
No-Bake Peanut Butter Oat Cups
Satisfy your sweet tooth with this No-Bake Peanut Butter Oat Cups Recipe! Quick to make and deliciously rich—try it today!
- Prep Time: 15 minutes
- Cook Time: 5 minutes
- Total Time: 20 minutes
- Yield: Approximately 12 servings 1x
- Category: Dessert
- Method: No-Baking
- Cuisine: American
Ingredients
- 1 cup creamy peanut butter
- 1/4 cup pure maple syrup
- 1/4 cup melted coconut oil
- 1 1/2 cups old-fashioned rolled oats
- 1/2 teaspoon vanilla extract
- Pinch of salt
- 1 cup semi-sweet chocolate chips
- 1 tablespoon coconut oil
- Flaky sea salt (optional)
Instructions
- Prepare a standard muffin tin by lining it with paper or silicone liners.
- In a mixing bowl, combine peanut butter, maple syrup, melted coconut oil, vanilla extract, and salt until smooth.
- Fold in old-fashioned rolled oats until evenly coated.
- Scoop about two tablespoons into each muffin liner and press down firmly.
- In a microwave-safe bowl, melt chocolate chips and coconut oil together in 30-second intervals until smooth.
- Spoon melted chocolate over each oat cup and sprinkle with flaky sea salt if desired.
- Freeze for at least 20 minutes until set.
Nutrition
- Serving Size: 1 serving
- Calories: 190
- Sugar: 8g
- Sodium: 40mg
- Fat: 12g
- Saturated Fat: 6g
- Unsaturated Fat: 6g
- Trans Fat: 0g
- Carbohydrates: 18g
- Fiber: 2g
- Protein: 5g
- Cholesterol: 0mg