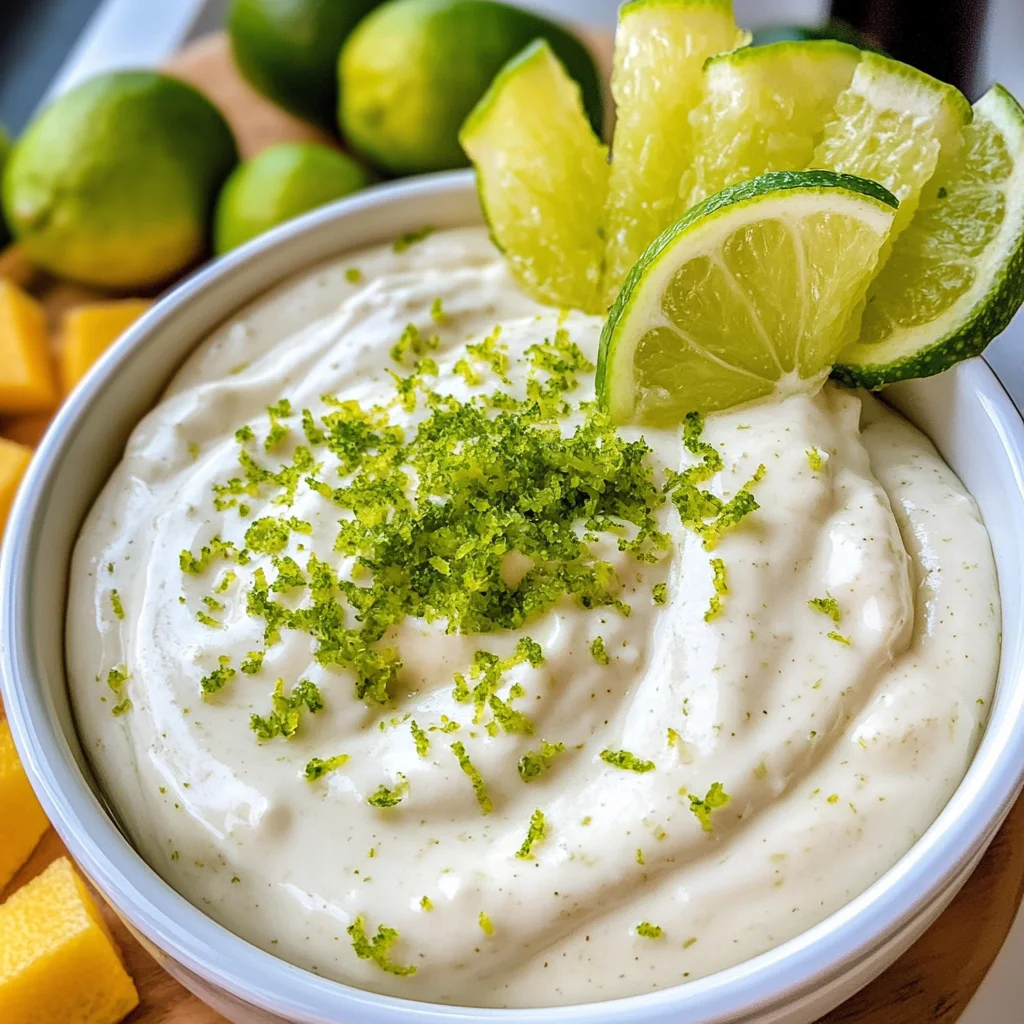
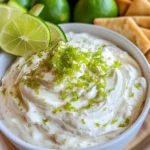
Key Lime Pie Fruit Dip
There’s something utterly enchanting about the way a simple dish can evoke memories, stir emotions, and create a sense of connection among friends and family. When it comes to my beloved Key Lime Pie Fruit Dip, it’s not just about the delightful combination of sweet and tart flavors; it’s a celebration of bright, sunny days and laughter shared over fresh fruit. Imagine dipping juicy strawberries or crunchy graham crackers into a creamy, velvety dip that sings with zesty lime—it’s an experience that transports you to warmer climes with every bite. This recipe has a way of wrapping you in warmth and cheer, making it the perfect companion for spring barbecues or summer gatherings. I promise you, once you try this Key Lime Pie Fruit Dip, you’ll find yourself daydreaming about it long after the last scoop is gone.
What makes this dip so special is its simplicity. With just five ingredients and only five minutes of your time, you can whip up a dessert that feels both indulgent and refreshing. As someone who has always been captivated by the art of creating memorable moments around food, I’ve discovered that this dish is more than just a treat—it’s an invitation to gather around the table with loved ones. Whether you’re hosting a lively get-together or simply enjoying a quiet afternoon at home, this Key Lime Pie Fruit Dip will surely elevate your experience into something truly extraordinary.
Key Lime Pie Fruit Dip: A Refreshing Delight for Any Occasion
Are you ready to embark on this culinary adventure? This Key Lime Pie Fruit Dip is as easy as it is delicious. It combines the vibrant flavor of key limes with the fluffy texture reminiscent of your favorite pie filling, but in dip form! Perfect for pairing with fresh fruit or crispy crackers, this dip invites everyone to indulge without feeling guilty. So grab your mixing bowls and let’s bring this delightful treat to life!
Ingredients:
As we dive into our ingredient list, think of each element as a key player in our culinary symphony. Each one contributes its unique notes to create that harmonious balance we crave in our dishes. Let’s explore these ingredients together!
- ½ cup vegan marshmallows fluff (or vegan marshmallows creme). This luscious ingredient serves as the heart of our dip—it adds sweetness and texture while keeping everything wonderfully light. The marshmallow fluff brings an airy quality that makes each bite feel like a cloud of flavor cascading over your taste buds. When selecting your marshmallow fluff, look for brands that are labeled vegan if you’re avoiding animal-derived products; they often provide the same delightful consistency and taste without compromise.
- ⅓ cup sweetened condensed milk. Ahh, sweetened condensed milk—this ingredient is like liquid gold in desserts! It enriches our dip with creamy goodness while enhancing its sweetness without being overwhelming. The richness of condensed milk balances out the tanginess from the lime juice beautifully, creating that perfect blend we adore in key lime pie recipes. Just be sure not to skip out on quality here; opt for brands made with minimal additives for the best results.
- ¼ cup key lime juice (can use bottles). Now we’re getting to the star performer—the key lime juice! Its bright acidity brings life to our dip, cutting through the sweetness and providing that signature tartness we associate with key lime desserts. You can absolutely use bottled juice if you’re short on time; however, fresh-squeezed juice offers an intensity that’s hard to beat. The zingy flavor will awaken your senses and keep everyone coming back for more.
- 1 tbsp lime zest (plus extra for garnish). Don’t underestimate the power of zest! This little addition amplifies our dip’s flavor profile by adding aromatic oils from the lime peel—it’s like capturing sunshine in a jar! Using fresh zest not only enhances taste but also adds visual appeal when garnished atop our dip before serving—a splash of color against that creamy backdrop makes it even more inviting.
- 1 cup heavy whipping cream. Finally, let’s talk about heavy whipping cream—the magical ingredient that elevates this dip from good to unforgettable! Whipping cream gives us that luxurious texture we crave in desserts; when whipped until stiff peaks form, it becomes airy and fluffy, turning our mixture into something truly delightful. Remember to chill your bowl beforehand; this step helps achieve those beautiful peaks faster and ensures your cream maintains its structure throughout mixing.

Equipment You’ll Need:
Before we dive into preparing our delicious Key Lime Pie Fruit Dip, let’s ensure you’re equipped with all the right tools for success! Having these essentials on hand will make crafting this delightful treat even smoother and more enjoyable.
- Mixing bowls – A sturdy set of mixing bowls is essential for combining ingredients seamlessly without any spills or fuss. Opt for glass or stainless steel varieties since they hold temperature well—especially helpful when working with whipped cream!
- Whisk – A reliable whisk will be your best friend during this process—its design allows air to incorporate easily into mixtures like whipped cream so you achieve those lovely stiff peaks we want for our dip’s texture.
- Electric mixer – While you can manually whisk your heavy cream into submission (and earn extra arm strength!), I highly recommend using an electric mixer if you have one available—it cuts down on time significantly while giving you perfectly whipped cream every single time.
- Zester/grater – For getting that vibrant lime zest just right without any bitter pith sneaking in! A microplane grater works wonders here—be sure to zest before juicing for maximum efficiency!
Now that we’ve got all our ingredients ready and tools lined up like excited little soldiers waiting to create magic in your kitchen, let’s jump into preparing our fabulous Key Lime Pie Fruit Dip!
Step 1: Whisking Up Sweetness
In a medium mixing bowl, start by whisking together the vegan marshmallows fluff, sweetened condensed milk, key lime juice, and lime zest until everything comes together smoothly. This step is all about blending those flavors harmoniously—you’re creating a base that’s both sweetened by marshmallows yet brightened by tangy lime! Trust me on this: take care not to rush through it; ensuring thorough incorporation means every bite will be bursting with balanced flavor.
Step 2: Whipping Cream into Clouds
In another large mixing bowl (you’ll want one that’s big enough), pour in your heavy whipping cream and get ready to whip! Using an electric mixer on medium-high speed will help you achieve those beautiful stiff peaks we’re after much quicker than manual methods would allow—you’ll know you’re there when the cream holds its shape beautifully without drooping back down at all! This process is crucial because it introduces air into your mixture—the very secret behind why homemade whipped cream tastes so ethereal compared to store-bought options.
Step 3: Folding Flavors Together
Once you’ve achieved those lovely peaks in your whipped cream (which should feel like soft clouds!), it’s time gently fold them into your previously mixed marshmallow concoction using a spatula or wooden spoon—this technique ensures we don’t deflate all that wonderful air we’ve just incorporated! Start by adding about one-third of the whipped cream first; fold gently until combined before incorporating more gradually until everything melds together seamlessly—we’re aiming for a light yet cohesive texture here!
Step 4: Chill for Perfection
After folding everything together lovingly (seriously—it’s like tucking them in for their beauty nap!), cover your bowl tightly with plastic wrap or transfer contents into an airtight container before placing it in fridge blissfully chill out for at least one hour while flavors develop magnificently—ideally overnight if time permits! Why chill? Well…it’s essential because allowing those flavors ample time allows them meld beautifully while achieving optimal texture when served chilled!
Stay tuned as we continue unraveling each step toward finishing off this irresistible Key Lime Pie Fruit Dip—and trust me when I say it’s worth every moment spent waiting patiently!
The Magic of Chilling: Patience is Key
Step 5: Chill Out for the Ultimate Flavor Experience
Once you’ve folded that beautifully whipped cream into your marshmallow mixture, it’s time for a crucial step that you definitely don’t want to skip: chilling. This isn’t just about keeping your fruit dip cool; it’s about allowing the flavors to meld together in a way that’s utterly transformative. Cover your bowl with a lid or plastic wrap—this helps lock in all those vibrant and zesty notes we’ve incorporated. Place it in the refrigerator and let it chill for at least one hour, though I often recommend letting it sit overnight if possible. Trust me on this, the longer you allow it to rest, the more the flavors will deepen and harmonize, creating a dip that’s not just good but profoundly satisfying.
During this time, something magical happens—the tartness of the key lime juice starts to mellow, blending seamlessly with the sweetness of the marshmallows and condensed milk. You’ll find that the whipped cream lightens everything up perfectly, giving your dip that airy texture we all crave. When you finally pull it out of the fridge, you’ll notice how luscious it looks, almost like fluffy clouds kissed with sunshine. If you’re feeling adventurous, take a quick taste after an hour; while it’ll be delicious already, just wait until it’s had time to really get to know those key lime flavors!
Step 6: The Zesty Garnish – A Final Flourish
As serving time approaches and your guests start to arrive (or maybe you just can’t resist anymore), let’s add some flair that will elevate your Key Lime Pie Fruit Dip from delightful to extraordinary! Before serving, sprinkle some additional lime zest on top of your chilled dip. This garnish isn’t just for show; the fresh zest adds an invigorating burst of citrus aroma that will entice everyone before they even dip their first fruit or cracker. The bright green flecks against the creamy backdrop create an inviting visual contrast that’s hard to resist.
This small detail is absolutely paramount—think of it as adding a finishing touch to a beautiful painting. It brings both flavor and an aesthetic appeal that makes your dish feel special and thoughtfully prepared. Don’t hold back here; this is your moment to shine! And remember, when garnishing with lime zest, use a microplane or fine grater for best results—this allows you to extract maximum flavor without any bitterness from the white pith underneath.
Step 7: Pairing Perfection – What To Serve With Your Dip
Now comes one of my favorite parts: deciding what delectable items to serve alongside this creamy creation! Think about what fruits and snacks would complement the sweet-tart essence of your Key Lime Pie Fruit Dip. I love serving mine with fresh strawberries because their juiciness contrasts beautifully with the dip’s fluffy texture. Pineapple is another fantastic option; its tropical sweetness perfectly dances with those zesty notes from our dip. But don’t stop there!
You could also set out graham crackers that evoke those classic key lime pie crust flavors or Nilla wafers for an added layer of nostalgia—who doesn’t love those? Even animal crackers can make a playful appearance; their subtle sweetness pairs wonderfully with our dessert dip! Arrange everything beautifully on a large platter so guests can indulge freely and explore combinations that excite their taste buds. Remember, this is about creating an experience as much as providing dessert—it should feel festive and fun!
Step 8: The Moment of Truth – Serving Your Creation
Finally, we’ve made it to serving! As you unveil your Key Lime Pie Fruit Dip to eager friends or family members gathered around the table, take a moment to relish in this accomplishment—you deserve it! Use a sturdy spoon or spatula to scoop out generous portions into small bowls or directly onto plates for people to dive into easily. Encourage them to mix and match their dippers with abandon—there’s no wrong way to enjoy this treat!
Keep an eye on how quickly people are gravitating toward your dish; I promise you won’t have leftovers! And if by some miracle there’s any left after everyone has had their fill? You can store it in an airtight container in the fridge for up to three days—though I doubt it will last that long! Each bite offers an utterly intoxicating experience—a perfect balance between creamy sweetness and tangy brightness. As everyone digs in, watch their faces light up—those moments remind us why we pour our hearts into cooking.
Conclusion:
As we reach the end of our journey through making this Key Lime Pie Fruit Dip, I hope you can feel my excitement radiating off these pages! It has been such a joy sharing this recipe with you—a recipe so simple yet profoundly satisfying. The harmonious blend of sweetened condensed milk with zesty lime juice creates an uplifting flavor profile that’s not just refreshing but downright addictive. Each bite offers a silken texture that dances across your palate, weaving together memories of sunlit afternoons and laughter-filled gatherings.
This recipe isn’t just about taste; it’s an experience—one that welcomes creativity and spontaneity in the kitchen. Imagine serving this vibrant dip at spring picnics or summer barbecues; its lightness complements everything from fresh fruit platters to crunchy graham crackers. When you pull out that chilled bowl adorned with zesty lime zest just before serving, I promise you’ll see faces light up with anticipation. It’s perfect for family gatherings or even just as a mid-afternoon pick-me-up when you’re craving something sweet yet refreshing.
For serving suggestions, picture yourself savoring one creamy scoop alongside juicy strawberries or bright pineapple chunks—the contrast between textures will take your taste experience to new heights! For an afternoon pick-me-up during those warm days, consider pairing it with delicate Nilla wafers or animal crackers; they provide a delightful crunch that enhances every mouthful. For a truly decadent experience, why not drizzle some melted vegan chocolate over the top? The possibilities are endless when it comes to pairing!
Feeling adventurous? This recipe is wonderfully adaptable—try swapping out key lime juice with fresh citrus like lemon or orange for an entirely new twist on flavor; each variation brings its own charm while still delivering that creamy indulgence we adore. You could even fold in some crushed pineapple for an added tropical vibe or sprinkle toasted coconut flakes on top for extra texture! I can’t wait for you all to try this out—be sure to share your experiences with me and let’s connect through our love of cooking! Your kitchen adventures await!
Key Lime Pie Fruit Dip
Experience bliss with our easy Key Lime Pie Fruit Dip – sweet, tangy perfection in just five minutes! Dive into this refreshing treat today!
- Prep Time: 5 minutes
- Cook Time: 0 minutes
- Total Time: 5 minutes
- Yield: About 6 servings 1x
- Category: Dessert
- Method: No-cook
- Cuisine: American
Ingredients
- ½ cup vegan marshmallow fluff
- ⅓ cup sweetened condensed milk
- ¼ cup key lime juice
- 1 tbsp lime zest (plus extra for garnish)
- 1 cup heavy whipping cream
Instructions
- In a medium mixing bowl, whisk together the vegan marshmallow fluff, sweetened condensed milk, key lime juice, and lime zest until smooth.
- In another large bowl, whip the heavy cream until stiff peaks form using an electric mixer.
- Gently fold the whipped cream into the key lime mixture until fully incorporated.
- Transfer the dip to an airtight container and chill in the refrigerator for at least one hour (preferably overnight) to allow flavors to meld.
- Before serving, garnish with additional lime zest. Serve with fresh fruit and crackers.
Nutrition
- Serving Size: 1/4 cup (60g)
- Calories: 160
- Sugar: 15g
- Sodium: 50mg
- Fat: 7g
- Saturated Fat: 5g
- Unsaturated Fat: 2g
- Trans Fat: 0g
- Carbohydrates: 22g
- Fiber: 0g
- Protein: 1g
- Cholesterol: 30mg