Karpatka (Polish Carpathian Cream Cake Recipe)
There’s something truly magical about baking, isn’t there? The way the ingredients come together to create not just food, but an experience—an olfactory symphony of warmth and nostalgia that transports you to cherished moments with family and friends. Today, I’m thrilled to share with you my beloved recipe for Karpatka (Polish Carpathian Cream Cake). This dessert is more than just a cake; it embodies the essence of Polish culinary tradition and offers an indulgent treat that whispers secrets of the Carpathian Mountains. As you prepare this layered delight, you’ll find yourself captivated by the rich aroma of vanilla wafting through your kitchen, merging seamlessly with the buttery choux pastry that forms its delicate crust.
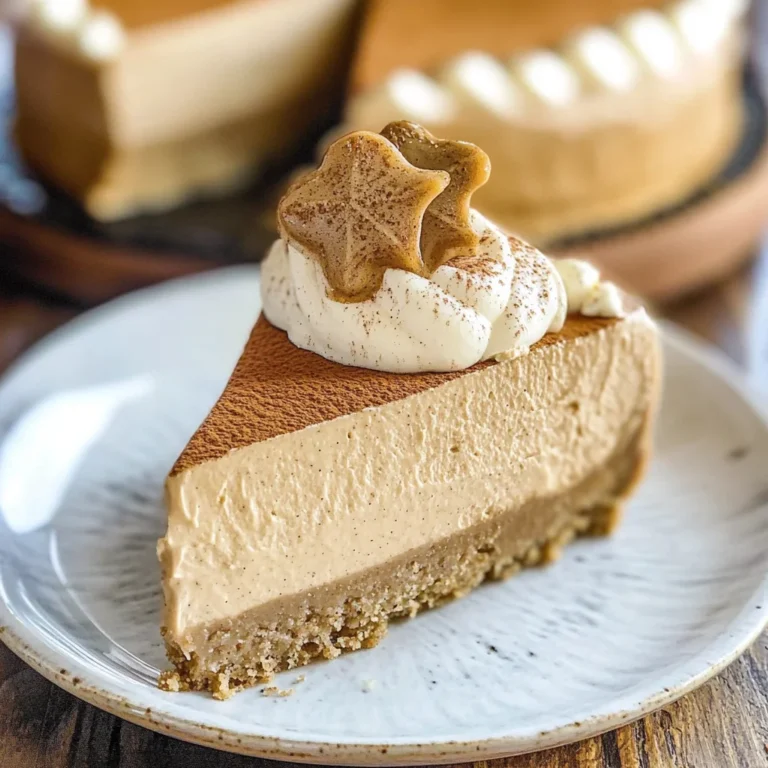
In Poland, Karpatka is a beloved treasure found at birthdays, holidays, and family gatherings—a bridge connecting generations through shared tastes and memories. What makes this cake so special? It’s the contrast between the light, airy layers of choux pastry and the creamy filling that feels like a gentle embrace. Each bite sends you on a journey through textures: the crispness of the outer layer gives way to a luscious cream that sings with vanilla notes, all crowned with a dusting of powdered sugar reminiscent of fresh snow covering the majestic peaks. This dessert is ideal for any occasion—whether you’re celebrating or simply treating yourself on a quiet afternoon—and I promise you, once you try making it at home, it will become a cherished part of your own culinary repertoire.
Karpatka (Polish Carpathian Cream Cake Recipe): A Slice of Polish Tradition
Let’s embark on this delightful journey together! Making Karpatka might sound intricate at first glance, but I assure you that with patience and love, you’ll create a stunning centerpiece for any gathering. Each step unveils layers of flavor and texture that will impress your loved ones while warming your heart.
Ingredients:
Before we dive into the magic of creation, let’s gather our ingredients—the true stars of our show. Each component plays an essential role in crafting this exquisite dessert, so let’s explore them together!
- 5 large egg yolks. These golden gems are crucial for our creamy filling; they impart richness and help achieve that velvety texture we crave in desserts. When selecting eggs, look for fresh ones from reputable sources; free-range or organic varieties often have more vibrant yolks and superior flavor. If you happen to have an egg allergy or want to make this recipe vegan-friendly, consider using a commercial egg replacer or silken tofu blended until smooth.
- 2/3 cup granulated white sugar (divided into 1/3 cup + 1/3 cup). Sugar is not merely a sweetener here; it’s what transforms our ingredients into something truly extraordinary. The first portion helps create our custard-like filling by balancing flavors while contributing to texture. The second portion is used in our choux pastry to give it structure and sweetness without overpowering its delicate nature.
- 7 tablespoons potato starch. This ingredient might seem unusual if you’re unfamiliar with Polish baking, but it works wonders in achieving a light cream consistency without the use of heavy thickeners or gelatin. Potato starch also lends a subtle flavor while helping stabilize our filling as it cools down. If potato starch isn’t available in your pantry, cornstarch can serve as an excellent substitute.
- 2 1/2 cups whole milk. Whole milk brings creaminess and depth to our vanilla filling while helping dissolve sugar and starch evenly for that perfect custard-like consistency we desire. When selecting milk, go for high-quality options; organic varieties usually have better flavor profiles due to how cows are raised and fed.
- 1/4 teaspoon salt. Salt may seem minor compared to other ingredients but trust me—it’s absolutely paramount! A pinch enhances all the flavors in your dessert without making it taste salty at all; think of it as highlighting each element’s unique characteristics rather than overshadowing them.
- 2 teaspoons pure vanilla extract & 2 teaspoons vanilla bean paste (or more vanilla extract). Vanilla is where we find profound satisfaction in this recipe! It adds warmth and complexity to our creamy filling while giving off an intoxicating aroma as it bakes. I always recommend using pure extracts over imitation because they truly elevate flavors beyond compare.
- 200 grams unsalted butter (at room temperature)—this translates roughly to about 14 tablespoons plus 1 teaspoon—will give us that luxurious texture we’re after in both layers of dough and filling alike! Room temperature butter creams beautifully with sugar when making pastries; if it’s too cold or melted, you’ll end up with inconsistent results.
- 2 tablespoons granulated white sugar—another small portion added specifically for enhancing caramelization during baking while providing extra sweetness needed in our pastry layer!
- 3/4 cup water—this simple ingredient facilitates steam creation during baking when combined with flour; moisture is what makes those lovely airy pockets form within our choux pastry layers!
- 6 tablespoons unsalted butter & 1/8 teaspoon salt—the combination here ensures our pastry has enough fat content leading to beautifully golden-hued crispiness without being greasy!
- 3/4 cup all-purpose flour provides structure needed for creating stability when puffing up during baking processes alongside moisture present from previously mentioned components!
- 3 large eggs & 1 large egg yolk add richness while acting as binders resulting in tender yet firm layers which hold everything together perfectly!
- Butter (to grease the pans)—a small detail but one that’s non-negotiable! A well-greased surface prevents sticking which would ruin both appearance AND texture!
- Powdered sugar (for dusting on top) adds an irresistible finishing touch visually while providing light sweetness contrasting nicely against rich flavors beneath it all!
Equipment You’ll Need:
Now that we’ve gathered everything necessary for success let’s ensure we have the right tools ready at hand! Having these essential partners makes every step smoother because they allow creativity to flow without unnecessary interruptions.
- Mixing bowls: A set of various sizes is indispensable when working with different components simultaneously—from whisking egg yolks for custards to combining dry ingredients seamlessly! Look for sturdy options made from glass or stainless steel as they withstand heat well during mixing processes.
- Electric mixer or whisk: While manual whisks can do wonders too; I highly recommend using an electric mixer if possible since it saves time AND energy when whipping those egg whites perfectly fluffy!
- Saucepan: You’ll need one sturdy enough capable of handling heat well since we’re combining milk over low flames soon—cast iron or thick-bottomed versions work tremendously here!
- Piping bag fitted with star tip (optional): Though not strictly necessary; utilizing them helps achieve decorative effects garnishing desserts beautifully once assembled later on!
With everything prepped ahead-of-time including tools laid out conveniently nearby—we can confidently dive into making Karpatka together!
Step 1: Crafting Your Luxurious Cream Filling
To begin this delightful adventure into making Karpatka (Polish Carpathian Cream Cake), let’s start by preparing that utterly intoxicating cream filling which will elevate each slice into sheer bliss! In a medium saucepan over medium heat combine your whole milk along with half (1/3 cup) granulated sugar alongside potato starch dissolved previously mixed alongside remaining ingredients until smooth before gently bringing mixture up-to-temp stirring continuously until thickened resembling pudding consistency achieved after about five minutes boiling softly away—it’s crucial NOT TO RUSH THIS STEP because patience here allows those flavors melding beautifully together transforming mere liquids into something profoundly satisfying indeed!
Once thickening occurs remove from heat immediately then stir-in remaining pure vanilla extract along-with two teaspoons vanillin paste offering additional depth whereupon allowing cooling slightly before transferring mixture into separate bowl covering surface directly touching wrap preventing skin formation whilst chilling completely inside fridge overnight ideally allowing flavors marry harmoniously together waiting eagerly anticipation prior assembling final masterpiece desired next day—this makes all difference trust me!
Step 2: Creating Your Choux Pastry Layers
Now let’s turn our attention towards crafting those beautifully delicate choux pastry layers which cradle that delicious cream filling like warm hugs from loved ones wrapped around nothing short than comfort itself! Start off by preheating oven around 375°F ensuring adequate temp throughout bake cycle delivering perfect puffs later down line ensuring even distribution upon rising stages observed closely throughout process ahead!
In another saucepan combine salted water alongside six tablespoons unsalted butter bringing mixture back-to-boil itself before gradually incorporating measured amounts all-purpose flour stirring vigorously until cohesive dough forms leaving sides clean away pan edges approximately three minutes constant motion displays elasticity achievable desired stage reached successfully yay! Next step involves letting cool briefly allowing safe incorporation whole eggs beat thoroughly until combined fully resulting smooth glossy batter emerging ready transition next phase ahead!
Step 3: Piping & Baking Your Pastry Layers
Now comes my favorite part—the piping process where visions come alive transforming mere dough into beautiful shapes awaiting luscious fillings soon thereafter greeting them warmly upon completion! Using either piping bag fitted star tip OR basic zip-lock option cutting corner slightly gives control desired shapes easily producing round discs measuring about six inches wide spaced evenly apart on prepared parchment-lined sheets greased lightly beforehand preventing any mishaps arising preventing sticking issues later down line ruining overall aesthetics observed keenly throughout process amazing experience unfolding right before eyes!
Baking time should approximate thirty-five minutes within preheated oven observed carefully yielding golden-brown exteriors puffed perfectly maintaining structural integrity holding wonderful surprises inside awaiting discovery anytime soon afterward enjoyably presented guests alike feeling genuine excitement building anticipation within each bite savored lovingly remembering origins passed down generations preceding us inspiring further exploration joyfully celebrated culinary journeys undertaken navigating diverse cultures embraced wholeheartedly along paths traveled forward confidently sharing traditions continuing thrive beautifully today onward!
Step 4: Assembling Your Karpatka
Finally—the moment arrives when everything comes together culminating effort invested thus far crafting exquisite masterpiece worthy deserving admiration indeed—you’ve earned praise incoming surely take pride knowing created something special lasting memories made shared amongst family friends alike witnessing expressions delight echoed joyfully surrounding table adorned festive decorations celebrating occasions dear hearts touched forever marked significant milestones achieved collectively treasured forevermore reminding us why love cooking baking holds such incredible power bringing people closer united by shared experiences formed bonds flourish enriched lives touched deeply through unforgettable tastes aromas linger long after vanished plates returned empty gracefully poised awaiting next gathering future enjoyed fondly reminiscing stories told shared recounted laughter ringing sweetly across rooms filled warmth suffused love radiated bright shining moments cherished eternally etched souls intertwined forevermore amidst joyful celebrations unfolding beautifully always onward upward continuing illuminate paths traveled onward joyously evermore blessed grateful reflecting fondly looking back reminiscing grateful heartwarming moments passed lived vibrantly embracing adventures await surely greet us warmly next time promised smiles exchanged lovingly once again soon following suit simple pleasures life manifest brought forth delightful creations baked lovingly from scratch undeniably heartfelt offerings shared lovingly amongst nearest dearest friends families alike indeed—let’s gather again soon shall we?
Step 5: Preparing the Cream Filling – The Heart of Karpatka
Now that we’ve conquered the choux pastry, it’s time to turn our attention to the luscious vanilla cream filling, which is truly the heart of this Karpatka (Polish Carpathian Cream Cake Recipe). Begin by pouring your 2 1/2 cups of whole milk into a medium saucepan and set it over medium heat. As it warms, we want to coax out every bit of flavor from the milk without boiling it—this step is crucial because scalding creates an unpleasant texture and flavor in your filling. While that lovely milk heats up, grab a mixing bowl and whisk together the 5 large egg yolks, 1/3 cup of granulated sugar, 7 tablespoons of potato starch, and a pinch of salt until you have a smooth and velvety mixture. This combination acts as both your thickening agent and your sweetener, so make sure there are no lumps; a seamless blend here means a silky cream later.
Once your milk is steaming but not boiling—look for small bubbles forming around the edges—it’s time to temper those egg yolks. Gradually pour about one cup of the hot milk into your egg mixture while whisking vigorously; this is crucial for preventing curdling. After you’ve warmed those yolks gently, pour everything back into the saucepan with the remaining milk. Now return this mixture to medium heat, stirring continuously with a wooden spoon or a heat-resistant spatula. Watch closely as it begins to thicken—it should take about 5-10 minutes. You’ll know it’s ready when you can draw a line across the bottom of your pan with your spatula that holds its shape for a moment before closing back in. This creamy goodness will be thick enough to stand proudly between those choux layers!
Step 6: Flavoring Your Cream – Elevating Simplicity
Here comes one of my favorite parts—the flavoring! Once your custard has reached that perfect thickness, remove it from the heat and stir in 2 teaspoons of pure vanilla extract and 2 teaspoons of vanilla bean paste if you have it on hand. Trust me when I say that this step transforms your already delicious cream into something utterly intoxicating. The vanilla brings warmth and depth, creating a symphony of flavors that harmonize beautifully with the lightness of choux pastry. You’ll want to let this mixture cool slightly before adding in the room temperature butter—200 grams or about 14 tablespoons plus an extra teaspoon—cut into chunks.
Incorporate the butter piece by piece while whisking until it’s completely melted and blended into that luxurious cream filling. The reason we add butter at this stage is twofold: it enriches the filling further while also ensuring an ultra-smooth texture that will melt in your mouth when paired with our crispy pastry layers. Don’t rush through this step; patience is key! Allowing your cream to come down to room temperature before chilling makes all the difference in achieving that dreamy consistency once set in the fridge.
Step 7: Chilling Your Cream – A Non-Negotiable Step
Ahh, now we arrive at perhaps one of my favorite parts—the chilling phase! Once you’ve fully combined all elements into that rich vanilla cream, transfer it into a bowl and cover it tightly with plastic wrap. Be sure to press the wrap directly onto the surface of the cream; this prevents any pesky skin from forming on top—a little science trick I’ve learned through trial and error! Now place this bowl in the refrigerator for at least an hour—though I often recommend letting it chill for two if you have time because cooler temperatures help solidify everything nicely.
Why is chilling so important? Well, besides allowing those flavors to deepen even more beautifully, cold temperatures help firm up our filling so it’s easier to spread between our delicate choux layers later on without making them soggy or collapsing under pressure. When you’re ready to assemble everything later on, you’ll find that chilled cream spreads like liquid gold—silky, smooth, and utterly divine!
Step 8: Baking Your Choux Pastry – The Art of Transformation
With our preparation complete and our cream nestled comfortably in its chilly abode, let’s focus on baking our choux pastry layers! Preheat your oven to 425°F (220°C), making sure you’ve got all your ingredients lined up because timing is critical here! In a medium saucepan over medium heat, combine 3/4 cup water, 6 tablespoons unsalted butter, and 1/8 teaspoon salt; bring this mixture just to a simmer. The moment those little bubbles start dancing along the edges, add in your measured out all-purpose flour all at once—and trust me on this part—begin stirring vigorously with a wooden spoon or silicone spatula.
This technique called panade helps create steam pockets within our dough as it cooks in the oven—a crucial aspect for achieving that puffiness we want from our Karpatka! Keep stirring for about two minutes until you notice that dough pulling away from the sides of the pan and forming a cohesive ball—that’s when you know you’re ready for eggs! Remove from heat and allow it to cool slightly (about five minutes) before adding in one large egg at a time followed by another large egg yolk while mixing well after each addition until fully incorporated.
You’ll notice how much lighter and fluffier your dough becomes after each egg; don’t be alarmed if it seems too thin initially; trust me—it’s supposed to look like glossy perfection! Once all eggs are beautifully mixed in, prepare two baking sheets lined with parchment paper or greased lightly with butter. Use either a piping bag fitted with a large plain tip or simply dollop generous mounds using two spoons onto each sheet—make sure they’re spaced about two inches apart since they will expand majestically during baking!
Into your preheated oven they go for about 20-25 minutes until they are golden brown and puffed high like clouds against an azure sky! It’s absolutely paramount not to open that oven door during baking as sudden temperature changes can cause them to deflate like sad balloons—the suspense will be worth every second!
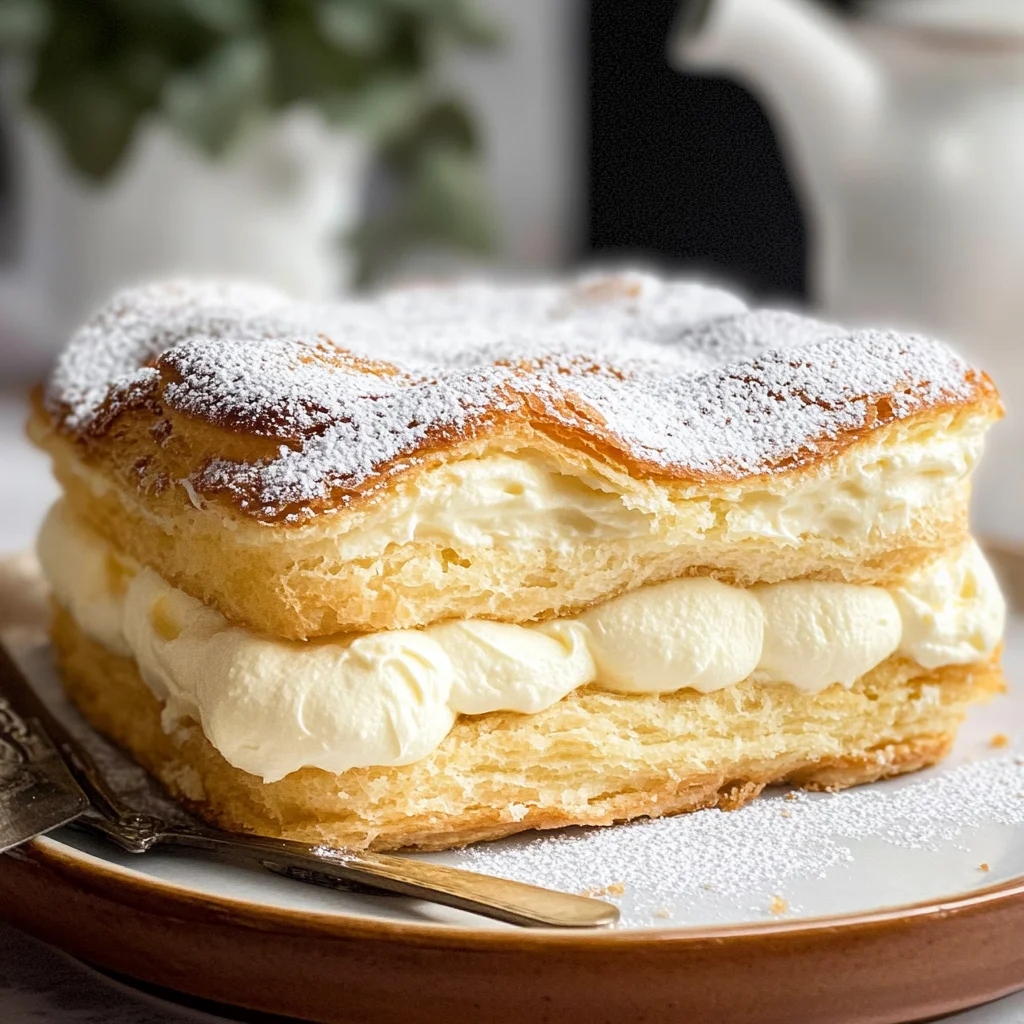
Karpatka (Polish Carpathian Cream Cake)
Experience the enchanting world of baking with our Karpatka (Polish Carpathian Cream Cake Recipe). This delightful dessert is a beautiful fusion of airy choux pastry and a velvety vanilla cream filling, creating a luscious treat that captures the essence of Polish culinary tradition. Every slice offers a rich aroma and a harmonious blend of textures that transport you to cherished gatherings with loved ones. Perfect for celebrations or quiet afternoons, making Karpatka is a rewarding journey that will leave you and your guests craving more. Treat yourself to this indulgent masterpiece and add it to your collection of favorite desserts.
- Prep Time: 30 minutes
- Cook Time: 25 minutes
- Total Time: 55 minutes
- Yield: Serves approximately 10 slices 1x
- Category: Dessert
- Method: Baking
- Cuisine: Polish
Ingredients
- 5 large egg yolks
- 2/3 cup granulated sugar (divided)
- 7 tablespoons potato starch
- 2 1/2 cups whole milk
- 200 grams unsalted butter (room temperature)
- 3/4 cup all-purpose flour
- 3 large eggs
- Powdered sugar (for dusting)
Instructions
- Preheat your oven to 425°F (220°C).
- Prepare the cream filling by heating milk in a saucepan. In a bowl, mix egg yolks, sugar, potato starch, and salt until smooth. Gradually whisk in hot milk, then return to heat, stirring until thickened.
- Remove from heat and stir in vanilla extract and butter until smooth. Chill in the refrigerator.
- For the choux pastry, combine water, butter, and salt in a saucepan; bring to a simmer. Stir in flour at once until dough forms.
- Let cool slightly, then beat in eggs one at a time until glossy. Pipe onto baking sheets.
- Bake for about 20-25 minutes until golden brown.
- Once cooled, slice the pastry layers horizontally and fill with the chilled cream before assembling.
Nutrition
- Serving Size: 1 serving
- Calories: 320
- Sugar: 18g
- Sodium: 150mg
- Fat: 20g
- Saturated Fat: 12g
- Unsaturated Fat: 7g
- Trans Fat: 0g
- Carbohydrates: 30g
- Fiber: 1g
- Protein: 5g
- Cholesterol: 100mg