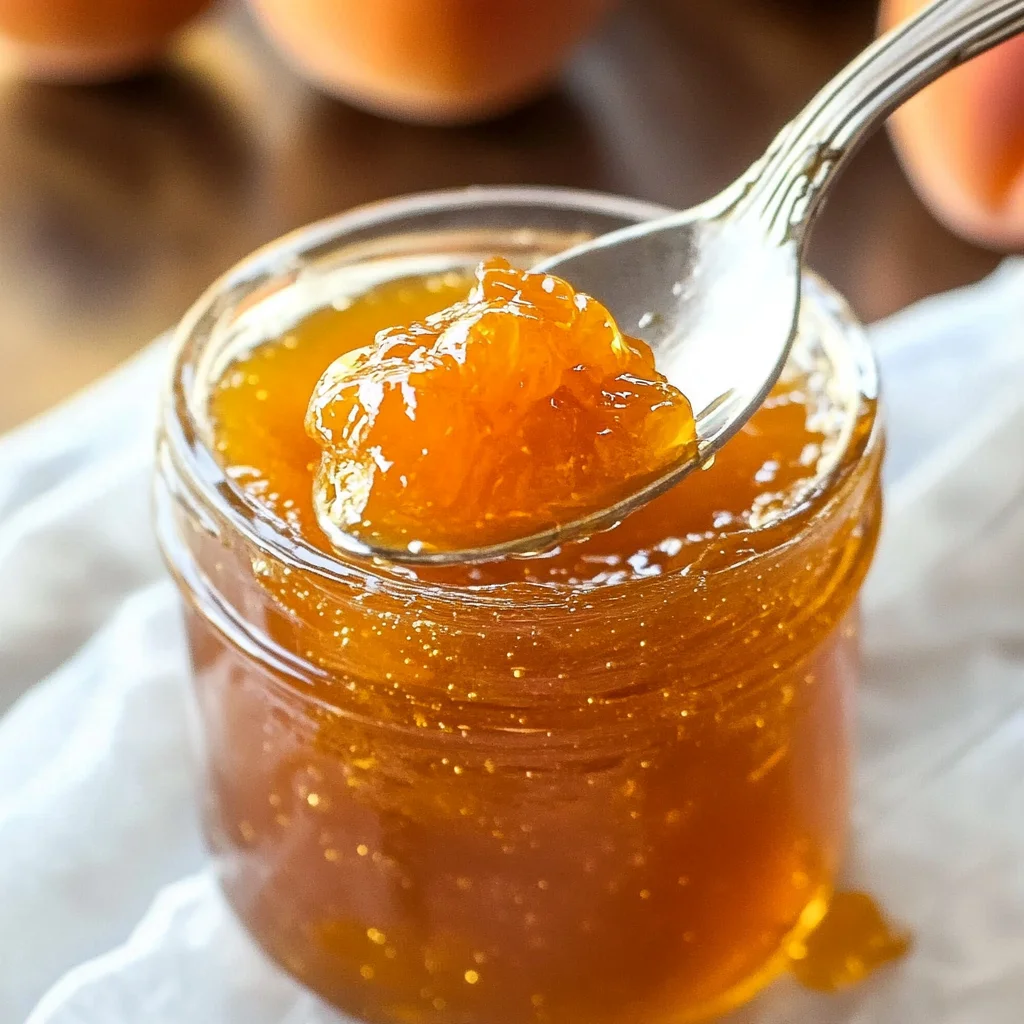
Apricot Jam
There’s something utterly enchanting about transforming fresh, sun-kissed apricots into a jar of sweet, luscious Apricot Jam. For me, it’s more than just a recipe; it’s an experience steeped in nostalgia and love. Picture this: the vibrant orange hue of the apricots glistening under the sunlight, their sweet aroma filling your kitchen as you slice through their tender flesh. With each chop, you’re not just preparing fruit; you’re unlocking memories of summer days spent with family, laughter echoing through the air while jars of homemade jam line the pantry shelves. This jam is like liquid gold—spreading joy on toast, drizzling over desserts, or simply enjoyed by the spoonful straight from the jar. I promise you, once you taste this jam, you’ll understand why preserving these little beauties is an absolute must.
Now, let me share my heart with you about why this Apricot Jam holds such a special place in my culinary repertoire. The beauty of making jam lies in its simplicity; just three ingredients come together to create something truly extraordinary. Each component plays a vital role: the apricots bring sweetness and flavor, while sugar aids in preservation and intensifies that delicious taste we crave. Lemon juice adds a touch of acidity to balance everything out—it’s like adding a vibrant note to a beautiful song. And here’s the best part: there’s no need for pectin! The natural sugars and pectin present in those ripe apricots make this jam wonderfully thick and spreadable without any fuss. Whether enjoyed at breakfast or gifted to friends during festive seasons, this jam embodies love and warmth.
Apricot Jam: A Sweet Summer Symphony
As we embark on this delightful journey to make Apricot Jam together, I can’t help but feel excited about sharing this beloved recipe with you. Honestly, there’s something incredibly gratifying about preserving summer’s bounty—it’s like bottling sunshine for those colder months ahead when we crave that burst of flavor from our favorite fruits. Making your own jam is not only rewarding but also allows you to control every aspect of what goes into your jar—no preservatives or artificial flavors here! Instead, you’re left with pure love and nature’s goodness.
Ingredients:
Before we dive into the cooking process, let’s gather our ingredients because embarking on this culinary adventure requires some wonderful components to create our masterpiece.
- 2.5 kg (5.5 lb) fresh apricots – When choosing apricots for your jam, look for those that are perfectly ripe—plump and fragrant with a slightly soft texture when gently pressed. These beauties are going to be the stars of our show! The ripeness is crucial because it directly influences both the flavor and sweetness of your jam; underripe fruit will yield a tart result that may not be as enjoyable. I recommend washing them gently and slicing them in half to remove the pits; this step not only prepares them for cooking but allows you to marvel at their stunning color before they transform into gooey goodness.
- 1/4 cup (60 ml) water – Water serves as a gentle companion in our cooking pot; it helps create steam during the initial stages of simmering which ensures that your apricots soften beautifully without sticking or burning. Trust me when I say that this little bit of moisture is absolutely paramount for creating that silky-smooth texture we all adore in jams!
- 1/4 cup (60 ml) freshly squeezed lemon juice – Ahh, lemon juice—the secret weapon in many culinary creations! Not only does it lend a delightful brightness to our Apricot Jam, but its acidity balances out the sweetness from both sugar and apricots beautifully. When selecting lemons for juicing, opt for ones that feel heavy for their size; these are typically juicier! Squeezing fresh juice is essential here; bottled varieties may lack that vibrant zing we want.
- 1.8 kg (4 lb) granulated sugar – Sugar is so much more than just sweetness—it acts as a preservative and creates that lovely gel-like consistency we seek when making jams. It binds with pectin present in fruit during cooking to thicken our mixture as it cools down. While granulated sugar is traditional for jams like ours because it dissolves easily and yields consistent results, you could explore alternatives like coconut sugar or agave syrup if you’re looking for different flavor profiles! Just remember, adjusting quantities might require some experimentation.
Equipment You’ll Need:
Having the right tools makes all the difference in turning an exciting recipe into a delightful reality! While these items aren’t ingredients per se, they are essential partners that will help guide us through creating our beautiful Apricot Jam.
- Large pot – You’ll need a heavy-bottomed pot to prevent scorching as we cook our fruits down into jam bliss. A thick base distributes heat evenly ensuring our apricots cook gently without caramelizing too quickly—a common pitfall when making jams!
- Wooden spoon – This trusty utensil will become your best friend throughout the process! Using wood prevents scratching any non-stick surfaces while allowing you to stir vigorously enough to break down those lovely chunks of fruit as they soften.
- Measuring cups & spoons – Precision matters here! Accurate measurements ensure consistency every time you make this jam—trust me; no one wants runny or overly thick results!
- Jars with lids – Glass jars are perfect vessels for storing your completed jam safely while showcasing its beautiful color! Make sure they’re sterilized before filling them up—this prevents spoilage and ensures each spoonful remains as delightful as intended.
Step 1: Preparing Your Apricots
Begin our journey by washing those gorgeous apricots under cool running water—you want them clean and free from any lingering dirt or debris before working with them. Next comes the fun part: halving each fruit and removing their pits gently with your fingers or using a small knife if desired. As you cut through their tender flesh, take a moment to inhale their intoxicating aroma; it’s simply divine! Once pitted, chop them into smaller pieces—this helps accelerate cooking time since we want these beauties softened quickly so they can mingle with sugar’s sweetness later on.
Step 2: Cooking Down Your Fruit
In your large pot over medium heat, combine your chopped apricots along with 1/4 cup water—a soothing bath that’ll encourage them to release their juices while starting off our cooking process gently! Stir occasionally using your wooden spoon until everything begins bubbling softly; don’t rush this step! Allowing those flavors to meld while softening will result in an utterly intoxicating experience later on once everything comes together beautifully!
Step 3: Sweetening Up
After around 10 minutes of simmering away happily on medium heat—your kitchen should be filled with an aroma reminiscent of summer—I invite you now to add 1.8 kg granulated sugar into the pot! As soon as it hits those warm fruits joined by lemon juice magic (which you’ve prepared earlier), stir continuously until all grains dissolve completely—it may take some persistence but trust me when I say it’s worth every moment spent stirring away!
Step 4: The Magic of Simmering
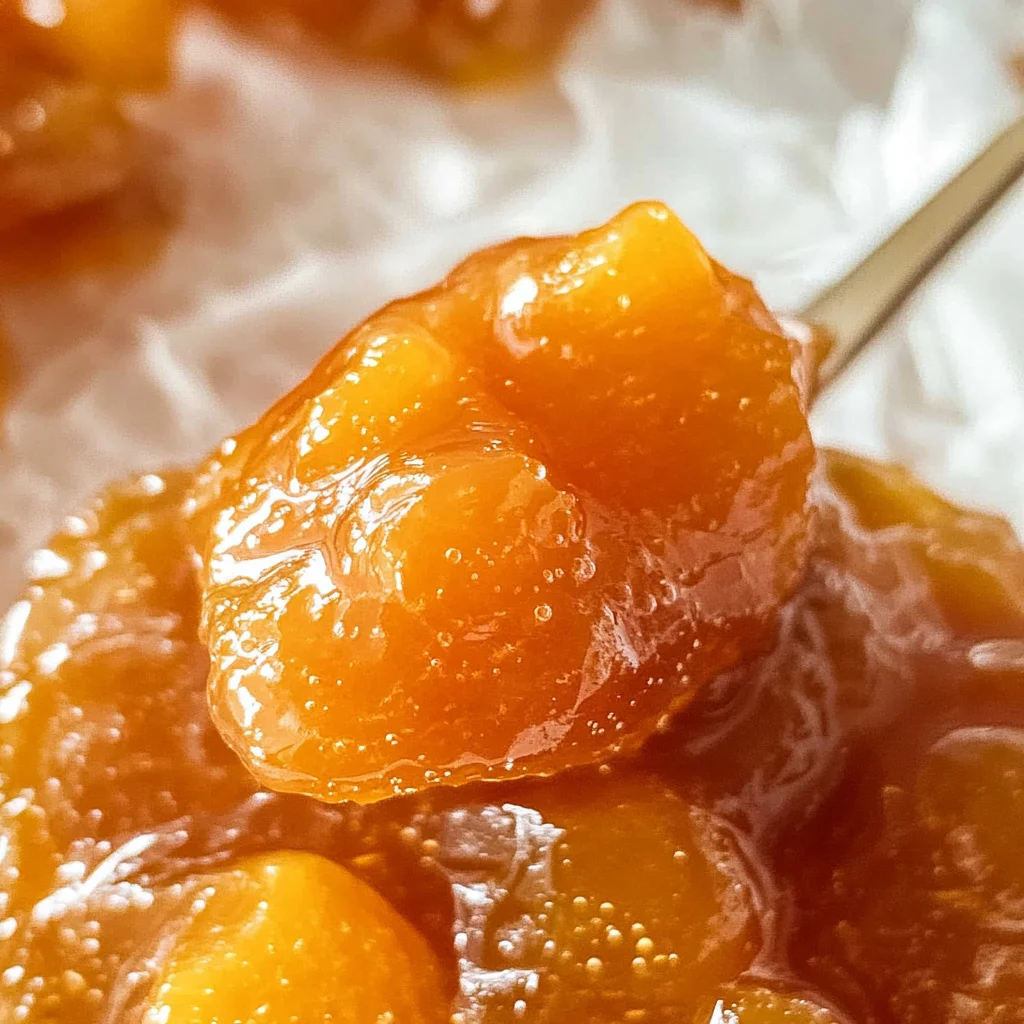
Now comes my favorite part—the simmering phase where transformation happens right before our eyes! Lower the heat slightly while keeping an eye on things bubbling away warmly beneath you; continue stirring occasionally so nothing sticks at the bottom (that’d be tragic!). Allow this mixture simmer gently for approximately 45 minutes until it thickens beautifully—we’re aiming for reaching around 220°F (104°C). To test if it’s ready for jarring: drop some on a chilled plate (keep one handy!) then run your finger through it—if it holds its shape without running back together instantly then congratulations—you’ve achieved perfection!
Stay tuned as we continue crafting this delightful Apricot Jam together…
The Art of Crafting Your Apricot Jam
As we dive deeper into the luscious world of homemade Apricot Jam, it’s essential to embrace each step with care and passion. This is not just about cooking; it’s about creating a jarful of sunny memories that will brighten your mornings and sweeten your afternoons. Each moment spent making this jam is an opportunity to celebrate the vibrant flavors of summer, capturing the essence of ripe apricots at their peak. So, let’s get into it!
Step 5: Simmering to Perfection
With your apricots beautifully prepared and diced, it’s time to move on to a crucial step: simmering them down into a rich, flavorful base. In a large, heavy-bottomed pot—trust me, this matters for even cooking—combine your chopped apricots with 1/4 cup of water. This addition isn’t just for moisture; it helps create steam that breaks down the fruit, transforming those juicy pieces into a luscious pulp. As you bring the mixture to a gentle simmer over medium heat, keep stirring occasionally to prevent any sticking or burning—after all, we want every bit of flavor preserved.
This simmering process should take around 15-20 minutes. You’ll notice the apricots softening and releasing their delightful aroma—this is the moment when kitchen magic starts happening! As they break down, you’ll want to mash them slightly with a potato masher or fork; I personally love leaving a few chunks for texture because they add character to your jam. Be patient during this phase; allowing the fruit to cook down properly ensures a beautifully balanced jam with an intense apricot flavor that will sing in every bite.
Step 6: Sweetening the Deal
Once your apricots have turned into that gloriously soft pulp, it’s time to introduce the sugar—a whopping 1.8 kg (4 lbs) of granulated sugar! Now I know what you might be thinking: that seems like a lot! But remember, sugar is not only for sweetness; it acts as a preservative in jams and jellies, helping them last longer while also enhancing their flavor profile. Sprinkle the sugar evenly over the simmered apricot mixture and stir gently until fully incorporated. You’ll see it dissolve beautifully, creating what looks like liquid gold bubbling away in your pot.
The next step involves raising the heat slightly while continuing to stir; you want this mixture to come to a robust boil. Why boil? This is where we’re developing that deep flavor and achieving the perfect consistency. Keep an eye on it—you’re looking for those glorious bubbles that break through the surface vigorously without splattering everywhere (a splatter screen can be handy here!). Let this boil for about 10-15 minutes while stirring frequently; if you notice any foam forming on top, don’t worry! Just skim it off gently with a spoon—it won’t affect the taste but will help achieve that clear appearance we’re aiming for.
Step 7: The Lemon Juice Transformation
Now comes another pivotal moment in our jam-making journey—adding 1/4 cup of freshly squeezed lemon juice! This ingredient is absolutely paramount because not only does it provide acidity that balances out the sweetness of our sugar-laden mixture, but it also helps preserve color and adds brightness to our jam’s flavor profile. Pour in the lemon juice slowly while stirring continuously; there’s something so satisfying about watching how these elements meld together.
After adding the lemon juice, continue boiling for another 10-15 minutes until you reach what we call “the gel stage.” To test if you’ve hit this magical point—the one where your jam will set perfectly—you can use either a candy thermometer (aim for 220°F or 104°C) or perform the classic “plate test.” For this method, drop a spoonful of your jam onto a chilled plate (keep one in your freezer just for this purpose!). Let it sit for a minute before running your finger through it; if it holds its shape and doesn’t flood back together immediately, congratulations—you’ve achieved gel stage! If not, give it another couple of minutes before testing again.
Step 8: Jar It Up!
Once your Apricot Jam has reached perfection and passed the gel test with flying colors, it’s time to transfer this liquid sunshine into jars! First things first: ensure all your jars are clean and sterilized—this is non-negotiable when preserving food at home because we want every spoonful to be deliciously safe! You can sterilize them by boiling them in water for about 10 minutes or placing them in an oven at low heat until dry.
Carefully ladle hot jam into each jar using a funnel (to avoid any sticky messes), filling them up to about 1/4 inch from the top—this little space allows air circulation as they cool down. Wipe any drips from around the rims with a clean cloth for proper sealing later on. Once filled, it’s essential to cap each jar tightly with sterilized lids while still hot; this creates an airtight seal as they cool down.
Now here’s where patience truly pays off: after jarring up all your apricot goodness, allow them to sit undisturbed at room temperature for at least 24 hours before moving them into storage. During this time, you’ll hear delightful popping sounds as they seal—the sweetest symphony of success! I promise you that waiting will be worth every second when you finally crack open one of those jars come wintertime.
Conclusion:
As we wrap up this delightful journey through crafting your very own Apricot Jam, I hope my enthusiasm has sparked yours! There’s something inherently magical about preserving fruit at its peak ripeness; it’s not just about creating jam but capturing memories of sunny days spent in orchards or family gatherings filled with laughter and love. The harmonious blend of sweet apricots balanced by the zingy lemon juice creates a truly extraordinary flavor profile that elevates this recipe beyond anything store-bought could ever offer. Each spoonful is an invitation to relive those moments and create new ones with loved ones around!
I can’t stress enough why this recipe is an absolute must-try—it’s not just delicious but also incredibly rewarding. The joy derived from making something so wholesome with just three simple ingredients brings a sense of accomplishment that’s hard to match. Whether you’re slathering it on toast during breakfast or using it as a filling in pastries for dessert, this versatile jam shines on every occasion! Picture yourself serving guests warm scones topped with creamy butter and a generous dollop of your homemade apricot delight—just think about their smiles!
Imagine savoring one with fresh Greek yogurt topped with granola for an energizing start to your day or perhaps swirling it into oatmeal for added sweetness; each bite becomes more than just food—it’s an experience! For an afternoon pick-me-up, try pairing your Apricot Jam with sharp cheese on crusty bread—a combination that dances between sweet and savory beautifully! And if you’re feeling adventurous one day, why not try blending some finely chopped herbs like rosemary or mint into your jam? This simple addition can introduce an exhilarating herbaceous note that brightens up any dish while maintaining that signature apricot sweetness.
Feeling inspired? This recipe is wonderfully adaptable! You can experiment by adding spices like cinnamon or ginger for warmth or even mixing in other fruits like peaches or raspberries for variation—each twist will bring its own unique flair while keeping that genuinely comforting essence intact. I wholeheartedly encourage you to dive into this process, embrace creativity in the kitchen, and share your creations with friends and family. Let’s preserve those flavors together; I can’t wait to hear all about your own adventures with Apricot Jam!
Apricot Jam
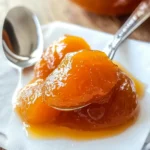
Delight in the sweet taste of summer all year long with this homemade Apricot Jam. Crafted from fresh, ripe apricots, this jam captures the essence of sunny days and family gatherings. With just three simple ingredients—apricots, sugar, and lemon juice—you can create a delicious spread that adds joy to your breakfast table or serves as a delightful gift. The natural sweetness of the apricots shines through, while the lemon juice balances it perfectly, creating a thick, luscious spread reminiscent of warm summers. Easy to make and free from preservatives, this Apricot Jam is not only a treat but also a way to preserve precious memories in each jar.
- Prep Time: 30 minutes
- Cook Time: 45 minutes
- Total Time: 1 hour 15 minutes
- Yield: Approximately 30 servings 1x
- Category: Dessert
- Method: Preserving
- Cuisine: Homemade
Ingredients
- 2.5 kg fresh apricots
- 1/4 cup water
- 1/4 cup freshly squeezed lemon juice
- 1.8 kg granulated sugar
Instructions
- Wash apricots under cool water, halve them, and remove pits.
- Chop apricots into smaller pieces for quicker cooking.
- In a large pot over medium heat, combine chopped apricots and water; simmer for about 15-20 minutes until softened.
- Stir in granulated sugar and lemon juice; cook on medium-high heat until boiling vigorously for 10-15 minutes.
- Perform the gel test using a chilled plate; if it holds its shape when tested, it’s ready.
- Pour hot jam into sterilized glass jars and seal tightly; let cool at room temperature before storing.
Nutrition
- Serving Size: 1 tablespoon
- Calories: 52
- Sugar: 12g
- Sodium: 0mg
- Fat: 0g
- Saturated Fat: 0g
- Unsaturated Fat: 0g
- Trans Fat: 0g
- Carbohydrates: 13g
- Fiber: 0g
- Protein: <1g
- Cholesterol: 0mg