Apricot Shortbread Bars Recipe
There’s something incredibly magical about the way a simple recipe can evoke memories and transport you to cherished moments spent in the kitchen. This Apricot Shortbread Bars Recipe is not just about satisfying your sweet tooth; it’s a heartfelt blend of flavors and textures that tells a story of warmth, comfort, and a love for baking that runs deep in my veins. Picture this: you’re standing in your cozy kitchen, the scent of buttery shortbread mingling with the sweet aroma of simmering apricots. As it bakes, your heart races with anticipation, knowing that each bite will be a delightful combination of crumbly crust and luscious filling. It’s truly an experience meant to be savored, shared, and celebrated.
When I think of these apricot shortbread bars, I’m reminded of sun-drenched afternoons spent with family and friends, where laughter fills the air alongside the enticing smells wafting from the oven. The gentle sweetness of dried apricots harmonizes beautifully with the buttery richness of shortbread, creating a treat that feels both special and comforting. This recipe is perfect for gatherings or simply as a little indulgence after a long day. Trust me when I say that once you take your first bite, you’ll understand why this dish holds such a special place in my heart.
Apricot Shortbread Bars Recipe: A Delightful Sweet Treat
Let’s embark on this culinary adventure together! With just a handful of ingredients and a little bit of love, we’re going to create something absolutely divine. The beauty of these apricot shortbread bars lies not only in their delightful taste but also in their simplicity—each ingredient plays its part beautifully, coming together in harmony to create a dessert that’s greater than the sum of its parts.
Ingredients:
To begin our journey into making these scrumptious bars, we need to gather our trusty ingredients. Each one contributes significantly to the final product, so let’s take a moment to appreciate what they bring to our Apricot Shortbread Bars Recipe.
- 3 cups (360g) all-purpose flour: This is the backbone of our shortbread crust. All-purpose flour provides just the right amount of structure without being too heavy or dense. When selecting your flour, look for brands that have a fine texture; this ensures a light and crumbly crust that will melt in your mouth. If you’re feeling adventurous or want to add extra flavor, consider substituting part of this flour with whole wheat or almond flour for some added nuttiness!
- 1 cup (200g) granulated sugar: Sugar does more than just sweeten; it plays an essential role in tenderizing our shortbread dough by inhibiting gluten formation—this is what gives us that delectable melt-in-your-mouth texture! When measuring sugar, use the spoon-and-level method rather than packing it into the cup; this ensures accuracy and prevents overly sweet bars.
- 1 teaspoon baking powder: This leavening agent is crucial for giving our crust just enough lift while still keeping it beautifully dense. The baking powder reacts with moisture and heat during baking, causing tiny bubbles to form which contributes to that perfect shortbread texture. Make sure your baking powder is fresh; an old canister can lead to disappointing results!
- 1/2 teaspoon salt: Don’t skip salt! It enhances all the flavors in our recipe while balancing out the sweetness. A pinch might seem insignificant but think of it as nature’s flavor amplifier—it brings out the best in everything it touches!
- 1 1/2 cups (340g or 3 sticks) unsalted butter, cold and cut into small cubes: Ahh, butter—the star of our show! Unsalted butter allows us to control the salt content in our dessert perfectly. Cold butter is vital here because when incorporated into flour, it creates those lovely flaky layers we adore in shortbreads. Be sure to cut it into small cubes before adding; this makes blending easier and more uniform.
- 1 large egg, lightly beaten: This ingredient acts as a binding agent—bringing everything together—and adds richness to our dough. When using eggs in baked goods, it’s best if they are at room temperature as they mix more easily into your batter but don’t sweat it too much if you forget to pull them out ahead of time!
- 1 teaspoon vanilla extract: Vanilla adds depth and warmth to our recipe—think of it as giving your bars an extra hug! Always opt for pure vanilla extract over imitation for maximum flavor impact; it’s worth every penny.
- 2 cups (about 350-400g) dried apricots, roughly chopped: These beauties are what make our filling sing! Dried apricots provide natural sweetness along with their unique tanginess. When choosing dried fruits, always check for sulfites if you’re sensitive; organic options often have fewer preservatives.
- 1 1/2 cups water: Water is necessary for rehydrating those dried apricots during cooking; it transforms them from chewy snacks into luscious gems bursting with flavor!
- 1/2 cup (100g) granulated sugar (adjust to taste depending on apricot sweetness): This sugar goes directly into our filling mixture—the amount can vary based on how sweet or tart your dried apricots are because we want that perfect balance between tartness and sweetness.
- 2 tablespoons fresh lemon juice: Bright acidity from lemon juice cuts through sweetness beautifully while enhancing overall flavor complexity—don’t underestimate how important this step is!
- 1/4 teaspoon almond extract (optional but highly recommended): Almond extract gives an intoxicating hint of nutty flavor that complements dried apricots perfectly—it’s like adding an extra layer of depth without overwhelming! Just remember—a little goes a long way.
- Pinch of salt: Just like before! This reinforces all those beautiful flavors we’ve layered throughout our recipe.
Equipment You’ll Need:
Before we dive headfirst into these delicious bars, let’s ensure we have all the right tools at hand—having good equipment makes any baking endeavor not only smoother but immensely enjoyable! Think of these tools as your partners on this culinary journey; each one plays an indispensable role in helping you achieve impeccable results.
- Large mixing bowl – A sturdy mixing bowl allows plenty of space for combining ingredients without fear of spills or messes. Opt for glass or stainless steel for durability—they won’t retain odors like plastic might over time!
- Medium saucepan – You’ll need this handy pot for cooking down those luscious apricots until they’re soft and syrupy. A heavy-bottomed saucepan distributes heat evenly and helps prevent scorching—keeping those flavors intact!
- Pastry blender or fork – Essential tools when cutting cold butter into flour; they help create those lovely flaky layers we’re after by breaking down fat without melting it completely! If you don’t have either on hand? Your fingers work just fine too—just be mindful not to warm up the butter too much.
- 9×13 inch baking pan – A must-have for holding all that goodness together as it bakes—and don’t forget parchment paper lining if possible! It makes removal easy while ensuring less sticking occurs during cooling.
- Wire rack – After baking comes cooling—and letting your bars cool properly is non-negotiable! A wire rack promotes airflow around all sides so they won’t become soggy underneath while setting up nicely!
Now that we’ve gathered all our ingredients and tools let’s get started on making these amazing Apricot Shortbread Bars!
Step 1: Crafting Our Apricot Filling
In a medium saucepan over medium heat, combine those glorious chopped dried apricots with water and sugar. This initial step is essential because we’re coaxing out their natural sugars while rehydrating them so they transform from chewy pieces into succulent morsels bursting with flavor! Bring this mixture up gently until simmering—don’t rush this process; patience pays off here as you stir occasionally until everything melds beautifully together like magic happening inside your pot. Once you see tiny bubbles emerging around the edges—lower that heat down low enough so nothing burns—and cover it up! Allow those apricots some quiet time to soften (about 15–20 minutes). Stir every now & then just to make sure nothing sticks too fiercely at bottom—that would be disastrous! After cooking time has elapsed? Remove from heat & stir in fresh lemon juice along with optional almond extract & pinch o’ salt…trust me on this one; it’ll elevate flavor levels astronomically high!
Step 2: Preparing Our Shortbread Crust
While our filling cools slightly—which should afford us enough time—you’ll want to preheat oven settings now at 375°F (190°C). Greasing & flouring (or lining w/parchment paper) means ensuring easy release later on once baked goods come out nice & hot! In another large mixing bowl whisk together flour/sugar/baking powder/salt until fully combined before adding those cold cubed butter pieces straight into mix like treasure being unearthed from earth’s depths…okay maybe not quite THAT dramatic—but you get my point right? We aim here towards creating coarse crumbs resembling sand-like texture after cutting butter thoroughly using pastry blender/fork until pea-sized chunks remain throughout—not smooth paste mind you—that’s key aspect here folks!!
Step 3: Bringing It All Together
Next up? In another smaller bowl whisk together beaten egg alongside vanilla extract then pour mixture directly over crumbly dry bits already waiting patiently below…now comes crucial part where we fold gently using hands/fork just until dough starts coming together into cohesive mass—no need stressing about perfectionism here since slight crumbles will only yield beautiful end result anyway upon baking process later down line…just don’t overwork thing okay? We want melt-in-your-mouth goodness rather than toughened lumps masquerading as desserts!!
Step 4: Layering Our Delicious Creation
Reserving about 1½–2 cups worth aside from dough means creating textured topping later which contrasts nicely against soft fruity interior—we press remaining portion firmly across bottom prepared pan ensuring even coverage before pouring cooled apricot filling evenly atop crust leaving small border around edges ideally (about quarter inch). Finally finish off by crumbling reserved dough over entire filling generously—you’ll want every bite packed full flavors after baked goodness emerges golden brown & bubbling slightly around edges looking absolutely irresistible!!
And there we have it—a fabulous start towards crafting unforgettable Apricot Shortbread Bars worthy enough sharing amongst family/friends alike…stay tuned next steps involving baking/cooling process leading ultimately towards divine indulgences awaiting devouring soon enough!!
Step 5: The Waiting Game – Cooling Is Key
Once your Apricot Shortbread Bars have emerged from the oven, they will be a sight to behold, with their golden top glistening invitingly, and the apricot filling bubbling slightly at the edges. But hold on just a moment! Before you start slicing into this deliciousness, we must exercise a little patience. This step is absolutely paramount because allowing your bars to cool completely is what transforms them from simply baked goods into something truly extraordinary. When they cool, the filling sets up beautifully, and the buttery shortbread firms up, giving you that perfect bar structure. If you rush this step, you’ll end up with a crumbly mess instead of neatly cut squares, and trust me—nobody wants that!
Let your freshly baked creation sit in the pan on a wire rack for at least 2-3 hours at room temperature. You can also pop it in the refrigerator after about an hour of cooling if you’re looking to speed things along—though I promise you, letting it cool slowly allows all those flavors to meld even more beautifully. During this time, take a moment to inhale the intoxicating aroma wafting through your kitchen. It’s like a warm hug that promises blissful bites ahead!
Step 6: The Art of Cutting – Slicing with Precision
Now that your Apricot Shortbread Bars have cooled completely, it’s time for one of my favorite parts—cutting them into perfectly portioned squares or bars! If you’ve used parchment paper (which I highly recommend), this step becomes even easier; simply lift them out of the pan using the overhang and set them onto a cutting board. Use a sharp knife to slice through these delectable layers, making sure to wipe your knife clean between cuts for those pristine edges—this little detail can make all the difference in presentation!
When cutting, aim for squares or rectangles that are about two inches wide; this size is perfect for snacking and sharing! As you make each cut, take note of how satisfying it feels as the knife glides through the shortbread crust and encounters that luscious apricot filling beneath. The contrast between buttery crunch and fruity sweetness is nothing short of divine! And if you find yourself nibbling on any rough edges—you know I won’t tell anyone; it’s all part of the process!
Step 7: The Final Flourish – Presentation Matters
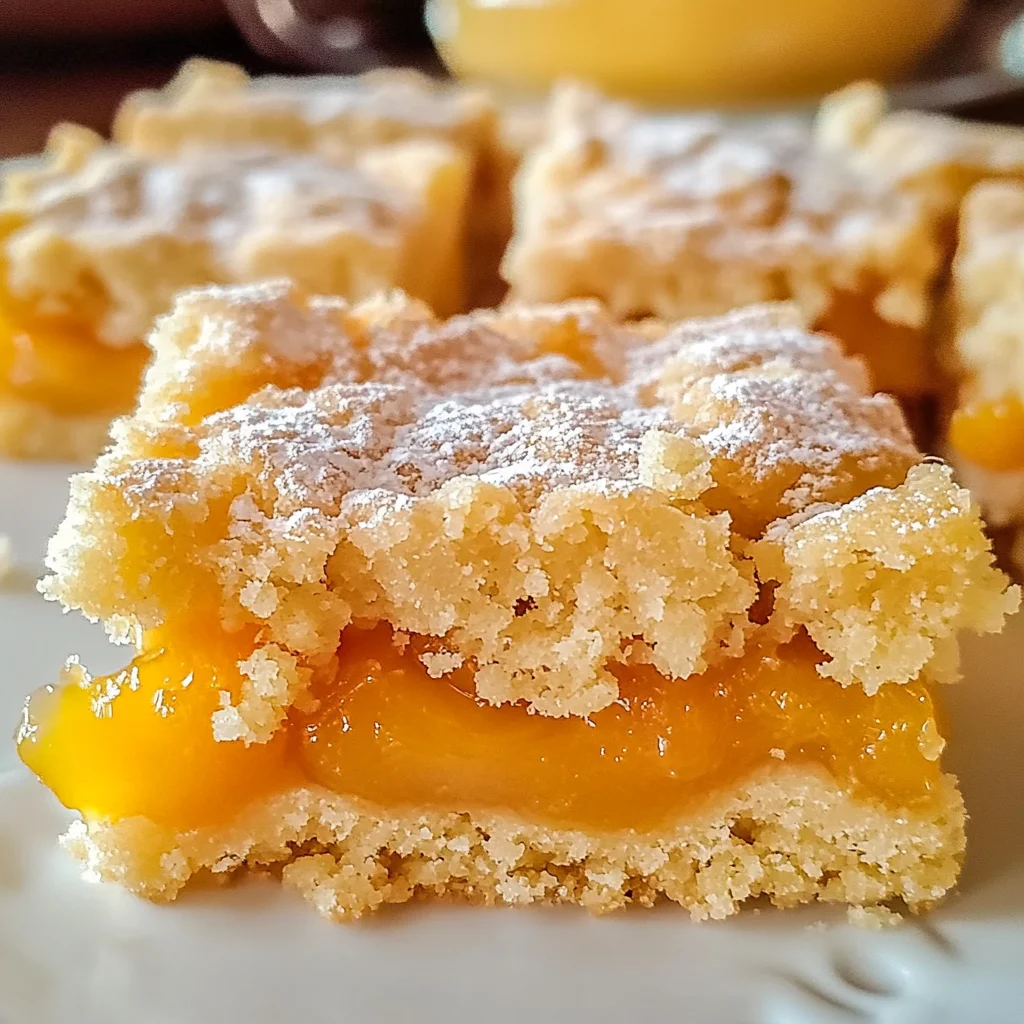
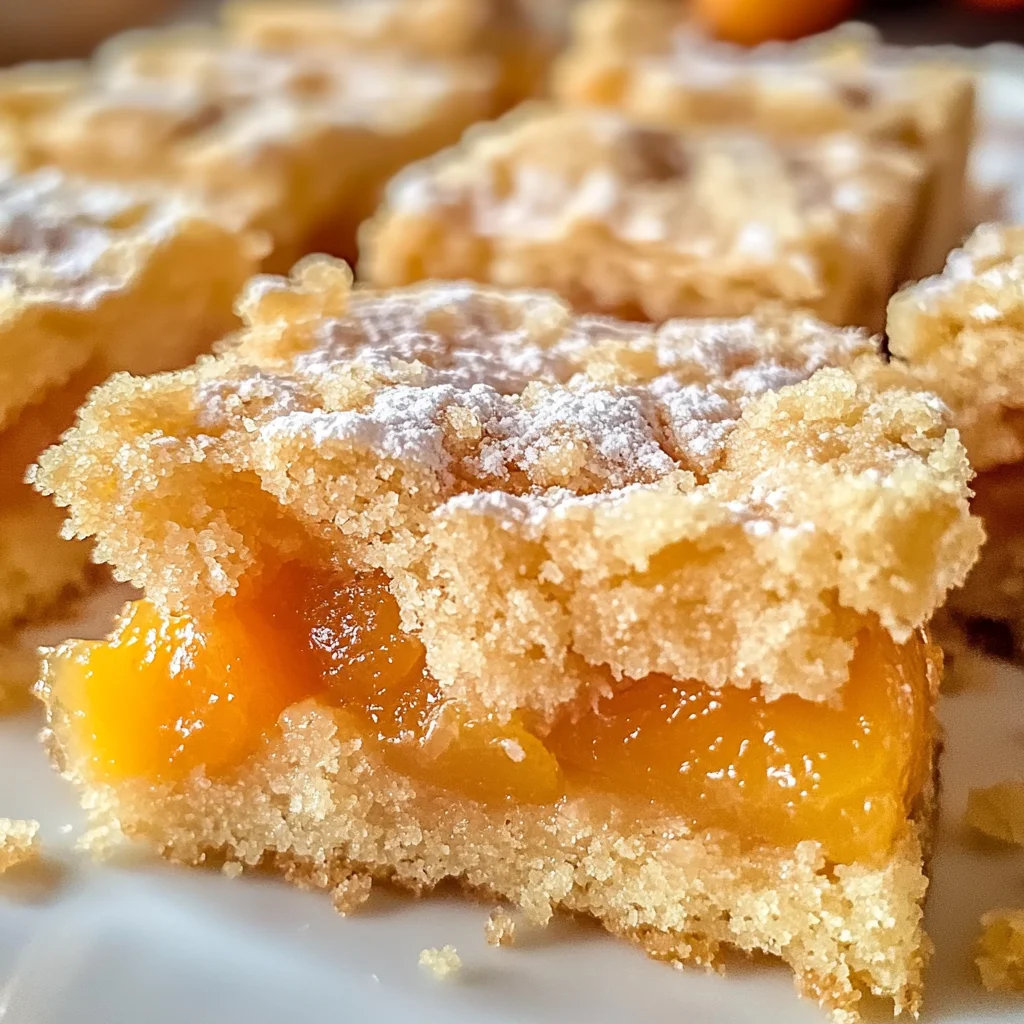
Presentation can truly elevate your baking experience from homey comfort food to an elegant treat worthy of any gathering or special occasion. Once you’ve cut your Apricot Shortbread Bars into those delightful shapes, consider dusting them with a light sprinkle of powdered sugar for an extra touch of sweetness and visual appeal. This simple embellishment not only makes these bars look stunning but also adds another layer of flavor that dances on your palate.
To serve these beauties, consider arranging them on a lovely platter surrounded by fresh fruit or sprigs of mint for color contrast. And why not pair them with a cup of herbal tea or coffee? The warmth from these beverages complements the sweet tartness of apricots seamlessly. Trust me when I say that this final flourish transforms not just how they look but how they feel—a simple gesture that takes these bars from wonderful home-baked goodness to something truly special.
Step 8: Enjoy Every Bite – Savoring Your Creation
Now comes perhaps the most rewarding part—the tasting! As you take that first bite of your homemade Apricot Shortbread Bar, allow yourself to truly savor each element: feel the crumbly texture melt away as it meets your tongue, taste the sweet yet slightly tangy apricot filling bursting with flavor alongside subtle hints of vanilla and almond (if you chose to add it). Each mouthful is an ode to simple ingredients transformed by love and care into something profoundly satisfying.
As you enjoy these treats—whether alone or shared among friends—take a moment to appreciate not just the flavors but also the memories created in making them. Baking connects us; it allows us to share joy, love, and comfort through food. So as you relish every morsel over laughter-filled conversations or cozy afternoons spent at home, remember that these Apricot Shortbread Bars are more than just dessert—they’re an experience waiting to be cherished.
Conclusion:
As we wrap up this journey through the Apricot Shortbread Bars recipe, I want you to feel the warmth and excitement that fills my heart every time I make these treats. There’s something profoundly satisfying about the combination of that tender shortbread crust paired with the sweet-tart apricot filling; it’s like each bite tells a story of love and care that goes into baking. The buttery richness of the crust contrasts so beautifully with the fruity filling that your taste buds will be dancing with joy!
This recipe isn’t just about creating something delicious; it’s about sharing moments with those you cherish. Whether it’s afternoon tea with friends or a family gathering where laughter fills the air, these bars become an instant favorite every time. Picture yourself lifting that golden pan from the oven—the aroma wafting through your kitchen beckoning everyone nearby—and watch as they gather around eagerly anticipating that first bite. It’s those experiences—the shared joy over something homemade—that truly elevate this recipe beyond ordinary baking.
When serving your Apricot Shortbread Bars, imagine savoring one alongside a cup of freshly brewed chamomile tea or perhaps some rich coffee—each sip amplifying those bright apricot notes beautifully. For an afternoon pick-me-up, they pair perfectly with creamy vanilla ice cream melting gently over top—a match made in dessert heaven! And if you’re feeling indulgent, drizzle some warm caramel sauce over them; it’s simply divine!
Feeling adventurous? This recipe is wonderfully adaptable! You could swap in different dried fruits like tart cherries or succulent peaches for an exciting twist on flavors—think of all those combinations just waiting for you to explore! You could even add chopped nuts for added crunch or throw in some spices like cinnamon or nutmeg to warm things up during colder months. I encourage you to dive in and experiment—baking should be fun and personal! So grab those ingredients, make some memories in your kitchen, and don’t forget to share your experience with me—I can’t wait to hear how yours turn out!
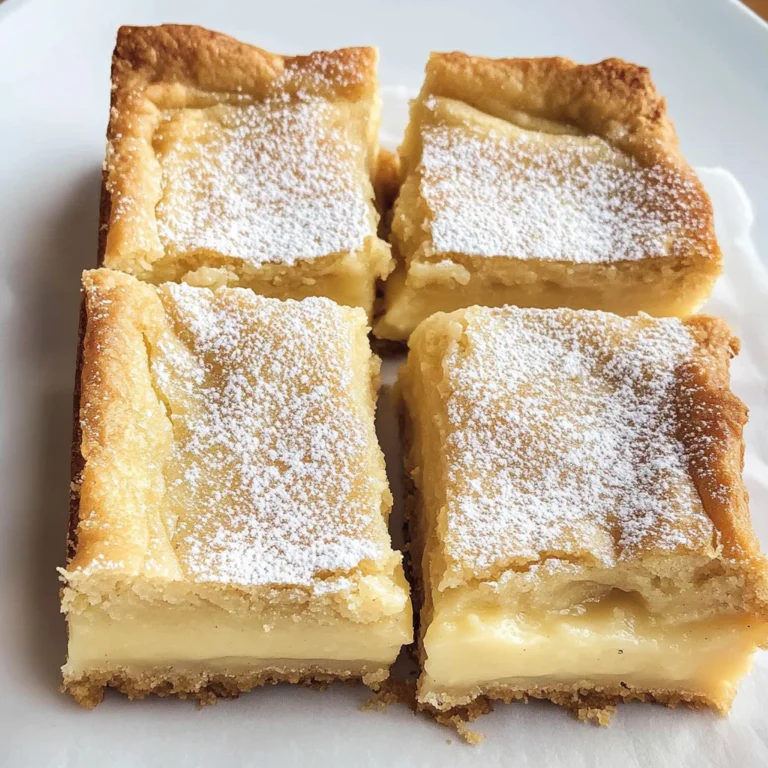
Apricot Shortbread Bars

Indulge in the delightful experience of making Apricot Shortbread Bars, a sweet treat that perfectly blends a buttery shortbread crust with a luscious apricot filling. These bars are not just a dessert; they evoke cherished memories and warmth, making them ideal for sharing during gatherings or enjoying as a comforting snack at home. With their crumbly texture and vibrant flavor, each bite is a journey into blissful sweetness. Perfect for any occasion, these bars will surely become a favorite in your baking repertoire.
- Prep Time: 20 minutes
- Cook Time: 30 minutes
- Total Time: 50 minutes
- Yield: Approximately 16 servings 1x
- Category: Dessert
- Method: Baking
- Cuisine: American
Ingredients
- 3 cups all-purpose flour
- 1 cup granulated sugar
- 1 teaspoon baking powder
- 1/2 teaspoon salt
- 1 1/2 cups unsalted butter, cold and cubed
- 1 large egg, lightly beaten
- 1 teaspoon vanilla extract
- 2 cups dried apricots, chopped
- 1 1/2 cups water
- 1/2 cup granulated sugar (for filling)
- 2 tablespoons fresh lemon juice
- Pinch of salt
Instructions
- Preheat the oven to 375°F (190°C) and grease a 9×13 inch baking pan.
- In a medium saucepan, combine dried apricots, water, and sugar. Simmer until soft (15-20 minutes). Stir in lemon juice and set aside.
- In a large bowl, mix flour, sugar, baking powder, and salt. Cut in cold butter until crumbly.
- Add beaten egg and vanilla to the dry mixture, stirring until combined.
- Reserve about 1½ cups of dough for topping. Press remaining dough into the prepared pan.
- Spread the apricot filling over the crust and crumble reserved dough on top.
- Bake for about 25-30 minutes or until golden brown. Allow to cool completely before slicing.
Nutrition
- Serving Size: 1 bar (50g)
- Calories: 200
- Sugar: 12g
- Sodium: 80mg
- Fat: 10g
- Saturated Fat: 6g
- Unsaturated Fat: 4g
- Trans Fat: 0g
- Carbohydrates: 26g
- Fiber: 1g
- Protein: 2g
- Cholesterol: 30mg