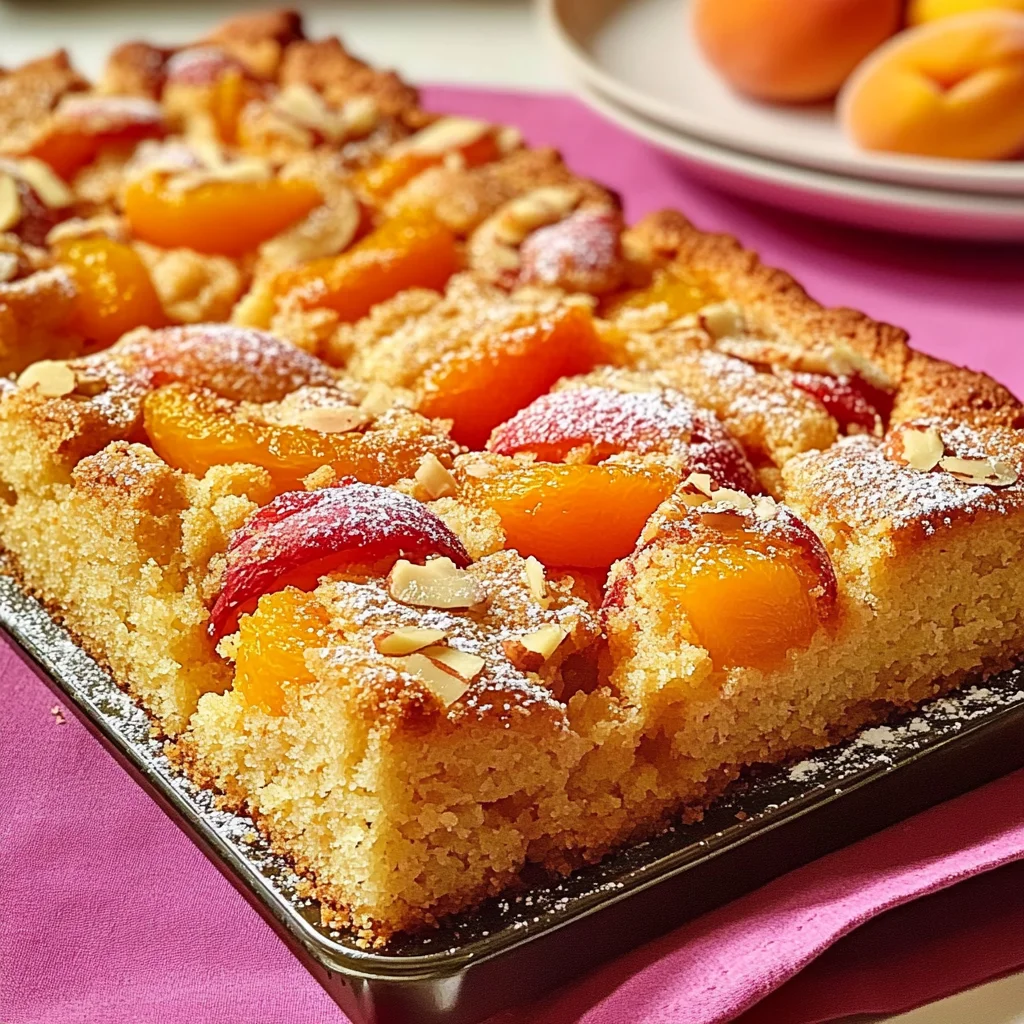
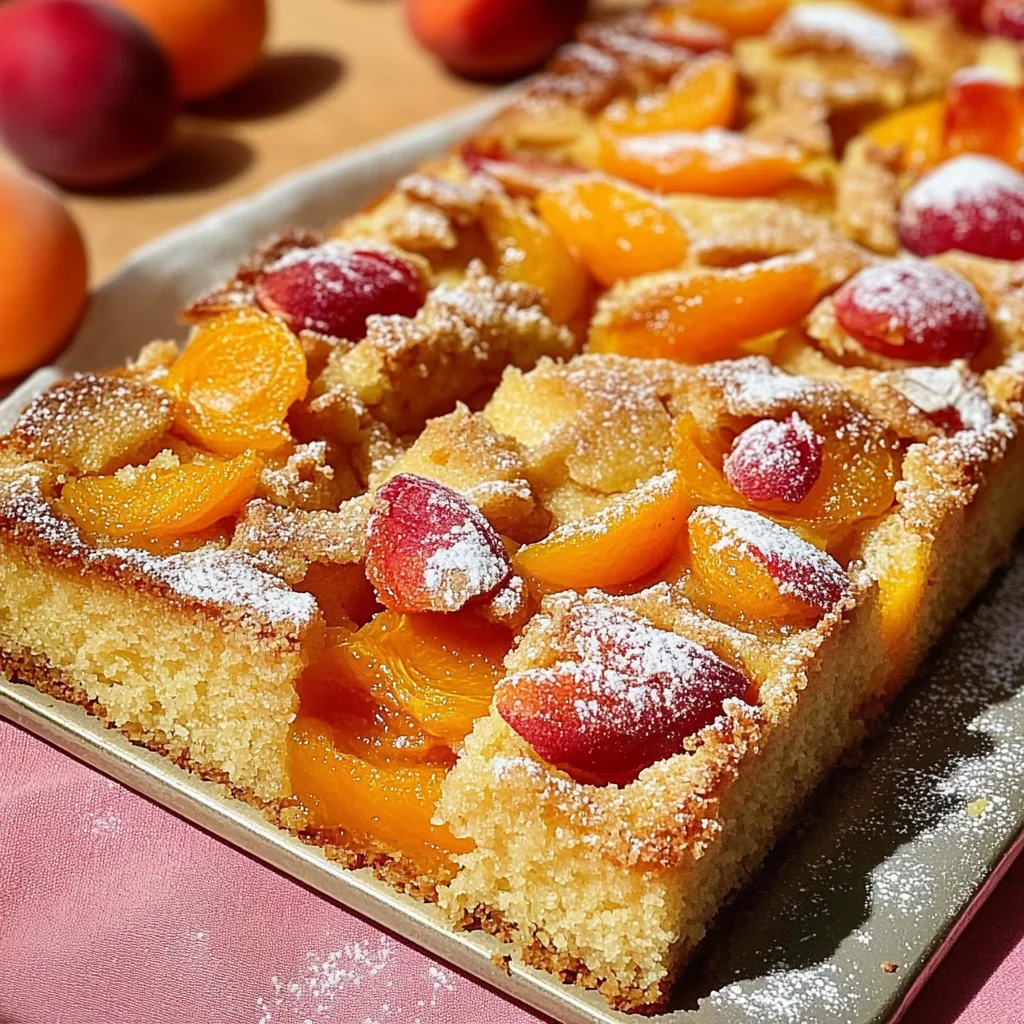
Apricot and almond traybake
There’s something truly magical about a warm kitchen filled with the sweet aroma of baking, isn’t there? The moment you pull out a traybake from the oven, that golden crust glistening with sugar and fruit, is nothing short of an experience that transcends mere sustenance. Today, I’m thrilled to share my family’s beloved Apricot and almond traybake recipe—a dish that not only brings comfort but also celebrates the lusciousness of summer fruits! Each bite is a delightful symphony of flavors: the sweetness of apricots harmonizing beautifully with the nutty undertones of ground almonds. This recipe isn’t just about food; it’s about creating memories, sharing joy, and savoring those fleeting moments of warmth and connection.
As I write this, I can almost hear laughter echoing from past gatherings where this traybake graced our table. I’ve always been captivated by how a simple dessert can hold such significance. This Apricot and almond traybake is perfect for any occasion—be it a sunny afternoon picnic, a cozy family dinner, or simply as a treat after a long day. It’s light enough to enjoy as an afternoon snack yet indulgent enough to be served at gatherings. Trust me when I say that once you take that first bite, you’ll be transported back to sunlit days filled with laughter and love.
Apricot and Almond Traybake: A Slice of Summer Bliss
Let’s embark on this delightful culinary journey together! This easy-to-make traybake is not just about combining ingredients; it’s about crafting something truly special that showcases the beauty of fresh apricots and the richness of almonds. You’ll find that every step in making this dessert is infused with love and care, ensuring that your creation is nothing short of extraordinary.
Ingredients:
As we gather our ingredients, remember that each one plays a vital role in crafting this delightful treat.
- 220 g butter – This essential ingredient is what gives our cake its rich flavor and tender crumb. When you use high-quality unsalted butter at room temperature, you’re allowing for optimal creaming with the sugar. This process creates tiny air pockets in our batter that will help achieve that light and airy texture we all adore! If you can’t find unsalted butter, feel free to use salted butter but reduce any additional salt in the recipe slightly.
- 220 g caster sugar (superfine sugar) – Caster sugar dissolves quickly into our batter due to its fine grain size, ensuring a smooth texture without grit. It sweetens our cake while also contributing to its structure when creamed with butter. If caster sugar isn’t available, granulated sugar can work in a pinch; just know it may take slightly longer to cream into the butter.
- 4 medium eggs – Eggs are not merely binding agents; they add moisture and richness while also helping our cake rise during baking. When adding them one by one into the creamed mixture, you’re allowing each egg to fully incorporate before adding the next—this is crucial for achieving uniformity throughout your batter!
- 50 g ground almonds – Ground almonds bring an exquisite nuttiness and moisture to our bake. They enhance both flavor and texture while complementing the sweetness of apricots beautifully. If you’re looking for alternatives due to allergies or preference, finely ground oats or another nut meal could work nicely here.
- 170 g self-raising flour – Self-raising flour contains baking powder already mixed in, which means it’s perfectly balanced for creating fluffy baked goods like our traybake. Using self-raising flour takes out some guesswork since it already has leavening agents incorporated—just be sure it’s fresh!
- 1 tsp baking powder – Even though we’re using self-raising flour, adding a touch more baking powder ensures our cake rises beautifully without being dense. It’s that extra insurance policy for achieving lightness!
- 1 tsp vanilla extract – Vanilla adds depth to flavors—it’s like a warm hug for your taste buds! Always opt for pure vanilla extract when possible; synthetic varieties simply do not compare in terms of richness and aroma.
- 8 apricots (halved) – Fresh apricots are the stars here! Their juicy sweetness balances perfectly against the nutty almond base. Choose ripe apricots for maximum flavor—look for fruit that yields slightly when pressed but isn’t overly soft.
- Caster sugar (to sprinkle over the fruit) – A sprinkle of caster sugar over those gorgeous apricot halves enhances their natural sweetness as they bake down into caramelized perfection.
- Icing sugar (to serve) – To finish off this beautiful dessert with elegance, icing sugar creates an inviting presentation when dusted atop each slice before serving!
Equipment You’ll Need:
Now let’s talk about some essential tools that will make your baking adventure smoother! Having the right equipment means less frustration and more joy as we create something wonderful together.
- Mixing bowl – A large mixing bowl is an absolute necessity for combining all those delicious ingredients easily without any mess spilling over! Opt for glass or stainless steel so you can see your mixtures change textures as you beat them together.
- Electric mixer or whisk – While an electric mixer saves time and effort when creaming butter and sugar until fluffy, using a good old-fashioned whisk can achieve similar results if you’re feeling dedicated! Just be prepared for quite a workout!
- Spatula – A sturdy spatula is your best friend when it comes to folding in dry ingredients without deflating air bubbles you’ve just created; it ensures everything combines evenly while scraping down sides effectively.
- Stoneware dish or baking tin – I recommend using a stoneware dish because it distributes heat more evenly than metal pans—resulting in beautifully baked cakes every time! Just make sure to give it a quick spray with cooking oil before pouring in your batter.
With our ingredients prepped and tools lined up like eager apprentices ready for action, let’s dive into making this scrumptious Apricot and almond traybake!
Step 1: Creaming Together Butter and Sugar
Start by placing your room-temperature butter into your mixing bowl along with caster sugar. This process—known as creaming—is absolutely paramount because it incorporates air into the mix which will contribute significantly towards making our cake fluffy rather than dense. Using either an electric mixer or a whisk (whichever feels right!), beat them together at medium speed until pale yellow—this should take about 3–5 minutes if you’re using an electric mixer or around double that if whisking by hand. You want it to look light and fluffy; don’t rush this step! Rushing here could lead to disappointing results later on because insufficiently creamed butter won’t have captured enough air pockets needed for rising properly during baking.
Step 2: Adding Eggs One By One
Next up: eggs! Crack each egg individually into your creamy mixture while mixing gently on low speed. After adding each egg, increase speed briefly until fully incorporated before moving onto the next one—you want each egg blended well into your mixture before introducing another so they emulsify properly instead of curdling! The science behind this step lies in how eggs act as binders—they help hold everything together while providing moisture too! After adding all four eggs successfully (good job!), scrape down any stubborn bits from sides of bowl back into mix—the last thing we want is any hidden lumps sneaking their way into our batter!
Step 3: Folding In The Dry Ingredients
Now comes one of my favorite parts: combining everything together beautifully! Grab yourself another bowl where you’ll mix self-raising flour along with ground almonds and baking powder—this ensures even distribution throughout without clumping up later on when folded back into wet mixture. Gently fold these dry ingredients into your wet mixture using your spatula—it’s crucial here that you don’t overmix at this stage; we want just combined batter so avoid vigorous stirring unless absolutely necessary! Overmixing leads gluten development which makes cakes tough instead of tender—nobody wants chewy sponge cake now do they? So remember: gentle folding motions only till no dry streaks remain visible!
Step 4: Preparing Your Dish And Pouring Batter
After mastering mixing techniques comes time spent prepping where magic happens within oven confines! Spray either stoneware dish generously with cooking spray or grease lightly before carefully pouring batter inside—using spatula helps ensure smoothness across surface area too since nobody likes lumpy cakes right? Once distributed evenly throughout pan edges are smoothed down nicely—you might even consider giving pan slight jiggle motion just so batter settles evenly all around edges too! Now let’s place those stunning halved apricots atop surface lovingly arranged however appeals best visually—they will sink slightly during baking creating divine pockets throughout sponge underneath making bites utterly intoxicating!
As we continue through these steps together towards creating this delightful Apricot and almond traybake masterpiece—I promise you’ll discover joy not only within taste itself but also within process itself unfolding gracefully along way too…
Step 5: Pouring the Batter – The Heart of Your Traybake
Now that you’ve lovingly prepared your batter, it’s time to pour it into your chosen dish. I have a special fondness for using a stoneware dish for this apricot and almond traybake; it not only distributes heat beautifully but also gives the cake that charming rustic look. If you haven’t already, lightly spray your dish with Lurpak cooking spray to ensure an easy release once your delightful creation is baked. This step is absolutely crucial because it prevents any unsightly sticking, which would rob you of that glorious moment when you lift out the first slice to reveal its golden beauty.
As you pour the cake batter into the dish, take a moment to appreciate its texture—smooth and velvety, almost like liquid gold. Using a spatula, gently smooth out the top to create an even surface. This is where patience pays off because a well-distributed batter ensures that every bite will cook evenly, providing you with a sponge that is both light and airy. Trust me on this: taking those few extra seconds to achieve perfection at this stage will reward you with a traybake that sings of harmony in flavor and texture.
Step 6: Arranging the Apricots – A Touch of Artisan Flair
Ah, the apricots! These vibrant jewels are truly the stars of our show. As you take each halved apricot in hand, notice their luscious curves and sweet aroma—their vibrant color is not just for show; it’s an invitation to taste the sunshine captured within! Start by pressing them gently into the batter, alternating between placing them cut-side up and down in a decorative pattern. This isn’t merely about aesthetics (though who doesn’t love a beautiful dessert?); it’s about ensuring that those apricots infuse their juicy sweetness throughout the cake.
Why do we press them in? Well, this technique allows the fruit to meld beautifully with the sponge as it bakes, creating pockets of moist sweetness that make every bite utterly intoxicating. You’ll want to make sure they’re snugly nestled within the batter but not completely submerged—this ensures they caramelize beautifully on top while still lending their juiciness beneath. Sprinkle some caster sugar over these lovely apricots before they meet their fate in the oven; this step is non-negotiable as it encourages caramelization and enhances their natural sweetness, transforming them into little bursts of pleasure.
Step 7: Baking – The Sweet Transformation
With everything carefully arranged and sprinkled with love, it’s time to send our traybake into its warm cocoon—the oven set at 180℃ (350℉). Baking is where all your hard work comes together in a symphony of flavors and aromas that will fill your kitchen with anticipation! Set your timer for 35-40 minutes; during this time, watch as your cake rises majestically and turns a beautiful golden brown. It’s like watching magic unfold before your eyes.
But don’t just rely on time alone; be vigilant! Halfway through baking, take a moment to peek inside (but don’t open the door too wide—it can disrupt that precious heat!). You should see a gentle puffing up of your sponge and perhaps even some bubbling around those gorgeous apricots. When you think you’re nearing the end of baking time, grab a skewer or toothpick and gently insert it into the center of your cake—if it comes out clean or with just a few crumbs clinging to it, congratulations! Your traybake is ready for its grand exit. If not, give it another few minutes while keeping an eye on those lovely golden edges!
Step 8: Cooling – The Patience Game
Once your masterpiece has reached perfect doneness, remove it from the oven with care—remember that stoneware can hold onto heat longer than metal pans. Letting it cool in its dish is essential; this step allows flavors to settle while also giving structure to your cake so that each cut reveals beautifully defined squares rather than crumbling ruins. You wouldn’t want all those glorious flavors lost in messy pieces now would you?
Allowing your traybake to cool for about 10-15 minutes will let steam escape without sacrificing moisture—this balance is paramount for achieving that perfect texture! While it’s cooling, prepare yourself by envisioning how wonderfully satisfying each slice will be topped with a dusting of icing sugar—just enough sweetness to complement those tangy apricots without overpowering their delicate flavor. When you’re finally ready to serve after it’s cooled slightly but still warm enough for melting butter if you’d like—a true indulgence—cut into squares generously sized enough for sharing but just small enough that you’ll find room for seconds!
Conclusion:
What an incredible journey we’ve had together through this recipe! From creaming that velvety butter and sugar to folding in the delicate flour and almonds, each step has brought us closer to creating something truly extraordinary—your very own Apricot and almond traybake! The harmonious balance between the sweet apricots and nutty almonds creates a symphony of flavors that are not just pleasing to the palate but also profoundly satisfying to make. I hope my enthusiasm has inspired you because this isn’t just any dessert; it’s a heartfelt invitation to share joy with family and friends.
You see, this recipe is not merely about taste; it’s about experience—the joy of baking something beautiful from scratch. Picture pulling this golden delight from your oven—the way it glistens under the light—and serving generous squares at gatherings or cozy afternoons spent with loved ones. Whether it’s a casual weeknight treat or an elegant dessert for special occasions like birthdays or potlucks, your Apricot and almond traybake will shine brightly wherever it’s served.
Imagine savoring one of these delectable squares alongside a cup of steaming tea on a breezy afternoon or perhaps pairing it with a scoop of vanilla coconut ice cream for an indulgent treat after dinner. Each mouthful is like biting into sunshine! And if you’re feeling adventurous? Don’t hesitate to jazz things up by adding spices like cinnamon or experimenting with other fruits like peaches or plums—they would beautifully complement the base flavors while offering their unique twist.
So go ahead—dive into this delightful adventure of baking! I can’t wait for you to try out this recipe; I’d love nothing more than to hear how your own Apricot and almond traybake turns out. Share your creations, connect with others who share this passion for baking, and let’s celebrate these moments together—with joy in our hearts and treats on our plates!
Apricot and Almond Traybake

Discover the joy of baking with this delightful Apricot and Almond Traybake, where the sweetness of ripe apricots meets the rich nuttiness of ground almonds. This scrumptious dessert is perfect for any occasion, whether it’s a sunny picnic or a cozy family gathering. Each slice reveals a moist sponge that harmonizes beautifully with juicy apricots, creating a light yet indulgent treat. Easy to prepare and even easier to enjoy, this traybake not only fills your home with wonderful aromas but also creates lasting memories around the table.
- Prep Time: 15 minutes
- Cook Time: 40 minutes
- Total Time: 55 minutes
- Yield: Makes approximately 12 servings 1x
- Category: Dessert
- Method: Baking
- Cuisine: British
Ingredients
- 220 g butter
- 220 g caster sugar
- 4 medium eggs
- 50 g ground almonds
- 170 g self-raising flour
- 1 tsp baking powder
- 1 tsp vanilla extract
- 8 halved apricots
- Caster sugar (for sprinkling)
- Icing sugar (for serving)
Instructions
- Preheat your oven to 180°C (350°F). Grease a stoneware dish with cooking spray.
- In a large mixing bowl, cream together the softened butter and caster sugar until light and fluffy.
- Add the eggs one at a time, mixing well after each addition.
- In another bowl, combine self-raising flour, ground almonds, and baking powder.
- Gently fold the dry mixture into the wet mixture until just combined.
- Pour the batter into the prepared dish and smooth out the top.
- Press halved apricots into the batter cut-side up, then sprinkle with caster sugar.
- Bake for 35-40 minutes or until golden brown and a skewer comes out clean.
- Allow to cool slightly before dusting with icing sugar and slicing.
Nutrition
- Serving Size: 1 serving
- Calories: 230
- Sugar: 15g
- Sodium: 90mg
- Fat: 10g
- Saturated Fat: 6g
- Unsaturated Fat: 4g
- Trans Fat: 0g
- Carbohydrates: 30g
- Fiber: 1g
- Protein: 3g
- Cholesterol: 50mg