Orange Poppy Seed Cookies
There’s something truly magical about the aroma of freshly baked cookies wafting through the house, isn’t there? It’s an invitation to pause, to savor, and to enjoy a moment of bliss. Today, I want to share my cherished recipe for Orange Poppy Seed Cookies—an utterly delightful creation that embodies the spirit of comfort baking. These cookies are not just a treat; they are a celebration of the vibrant flavors of orange combined with the subtle crunch of poppy seeds. Imagine biting into one of these soft, tender cookies, where each morsel bursts with citrusy goodness, leaving you feeling uplifted and satisfied. Trust me when I say, once you bake these beauties, they will quickly become a beloved staple in your home!
What makes these Orange Poppy Seed Cookies truly special is their simplicity paired with a profound flavor profile that dances on your palate. The interplay between the zesty orange and the nutty poppy seeds creates a symphony of flavors that is both refreshing and comforting—a perfect harmony for any occasion. Whether you’re enjoying them with a cup of tea in the afternoon or sharing them at a family gathering, these cookies have an uncanny ability to bring people together. The best part? There’s no chilling time required! You can dive right into baking without waiting around, which is exactly how I like my baking adventures—quick and rewarding.
Orange Poppy Seed Cookies: A Burst of Citrus Delight
I’m so excited to take you on this culinary journey today! These cookies are an easy yet impressive addition to your dessert repertoire. With each bite, you’ll experience that glorious orange zest mingling beautifully with the delicate crunch of poppy seeds. If you’ve ever had a cookie that made you feel warm inside and brought a smile to your face, then get ready because these cookies will do just that!
Ingredients:
Let’s gather our ingredients, shall we? Each element plays an essential role in crafting these irresistible Orange Poppy Seed Cookies, elevating them from ordinary to extraordinary.
- 2 cups all purpose flour. This is the backbone of our cookie dough—providing structure and stability while keeping our cookies tender. When choosing flour, look for high-quality all-purpose flour that has been properly stored; it should be fresh and free from any off odors or clumps. Remember to measure it accurately by spooning it into your measuring cup and leveling it off with a knife rather than packing it down; this ensures your cookies won’t turn out too dense.
- 1/2 tsp salt. Salt is an unsung hero in baking—it enhances the flavors of all other ingredients without making things salty! It balances sweetness and brings out those lovely citrus notes from our orange zest. Always opt for fine sea salt for even distribution throughout the dough; if you only have coarse salt on hand, make sure to grind it down for better incorporation.
- 1/2 tsp baking soda. Baking soda serves as our leavening agent here; it activates when mixed with acidic elements like orange juice or zest in our recipe. This reaction provides lift and creates those irresistible soft textures we crave in cookies. Ensure your baking soda is fresh by checking its expiration date before starting; expired soda might lead to flat cookies instead of airy delights!
- 2 tsp orange zest. Here lies one of the stars of our show—the vibrant essence of fresh oranges! Zest captures those aromatic oils that pack an intense punch of flavor without adding any liquid content. When selecting oranges for zesting, choose organic if possible since they are less likely to be waxed or treated with chemicals.
- 2 tbsp poppy seeds. These little seeds add delightful crunch and visual appeal—plus they have a subtle nuttiness that complements the citrus perfectly! When adding poppy seeds, make sure they’re fresh (you can check by giving them a sniff; they should smell nutty) since stale seeds can lose their flavor.
- 3/4 cup unsalted butter, softened to room temperature. This ingredient is crucial for creating that tender crumb we love in cookies. Softened butter creams beautifully with sugar, allowing air to incorporate into the mixture—a key step for lightness! If you forget to get your butter out early enough, don’t panic! You can gently microwave it in short bursts (about 10 seconds) until it’s just soft enough but not melted.
- 1 cup granulated sugar. Sugar not only sweetens our cookies but also contributes moisture and aids in browning during baking—which gives us those lovely golden edges! For this recipe, regular granulated sugar works perfectly; however, if you’re feeling adventurous and want deeper flavor notes, using raw sugar can create delightful caramel undertones.
- 1 egg + 2 egg yolks, at room temperature. Eggs provide structure through protein while also enriching our dough for that luxurious texture we desire. Room-temperature eggs blend more smoothly into mixtures than cold eggs straight from the fridge—so if you’ve forgotten this step ahead of time, simply submerge them in warm water for about 10 minutes.
- 1 1/2 tsp orange extract. A dash of pure orange extract intensifies our cookie’s flavor without overwhelming it—the extract amplifies what’s already there! Always opt for pure extracts over imitation ones for the best quality taste—and remember: little goes a long way!
- 1 drop of orange food color (optional). While this step is purely optional, adding a tiny drop can give your cookies a beautiful sunny hue reminiscent of bright citrus fruit! Just be careful not to overdo it; you want just enough for visual appeal without compromising flavor.
- ½ cup powdered sugar. This sugar will become part of our luscious glaze—adding sweetness while providing that signature smooth texture we adore on top of baked goods! Use freshly sifted powdered sugar if possible; this ensures no lumps remain which could mar your dreamy glaze.
- 1-2 tbsp orange juice. Freshly squeezed juice adds zingy brightness to our glaze while enhancing those fabulous citrus notes found throughout the cookie itself! Don’t skimp on freshness here; bottled juices often lack depth compared to what nature intended!
- 1 tbsp orange zest sprinkled on top (optional). Just when you think these cookies can’t get any better—here comes another burst of flavor! Sprinkling some additional zest atop your glazed cookies not only looks gorgeous but gives an extra hit of aromatic goodness when folks take their first bite!
Equipment You’ll Need:
Before we dive into creating these delightful treats together, let’s ensure we have all our necessary tools at hand because having the right equipment makes everything smoother and more enjoyable!
- Mixing bowls – You’ll need both large and medium-sized bowls: one big enough for creaming butter and sugar together while another smaller bowl accommodates whisking dry ingredients like flour and baking soda without making too much mess!
- Measuring cups & spoons – Accurate measurements are non-negotiable in baking! Invest in good-quality measuring cups (both liquid and dry) along with precise measuring spoons so every ingredient finds its rightful place within our cookie masterpiece.
- Rubber spatula – This handy tool helps scrape down sides when mixing batter—ensuring no precious dough gets left behind—and folds in glazes seamlessly when finishing touches come around!
- Cookie scoop – Using this nifty gadget guarantees uniform size across all cookies so they bake evenly together rather than ending up lopsided or varying drastically in size (trust me: no one wants unevenly baked goodies!).
- Baking sheet – A sturdy cookie sheet lined either with parchment paper or silicone mats provides non-stick surfaces for perfect releases once cookies cool down after baking while preserving their shape nicely during cooking time!
Now that we’re all set up let’s jump into preparing these scrumptious Orange Poppy Seed Cookies—the heartwarming experience awaits us!
Preparing the Orange Poppy Seed Cookies
Step 1: Preheat Your Oven & Whisk Dry Ingredients
First things first: preheat your oven to 300°F (150°C). This step is crucial because having your oven at the right temperature ensures consistent baking from start to finish—no one likes soft centers when they were expecting chewiness or overly brown edges unexpectedly appearing mid-bake! While that’s warming up beautifully, grab yourself a medium bowl where we’ll whisk together flour (2 cups), salt (½ tsp), baking soda (½ tsp), orange zest (2 tsp), and poppy seeds (2 tbsp). Whisking helps combine everything evenly while aerating those dry ingredients—a technique known as “sifting” which prevents clumping later on during mixing stages—you want every bite packed full-flavor goodness after all!
Step 2: Cream Butter & Sugar
Next up: let’s cream together softened unsalted butter (¾ cup) along with granulated sugar (1 cup) using either an electric mixer or elbow grease if you’re feeling adventurous today! This process known as creaming incorporates air bubbles into melted fats promoting lightness within baked goods later down line—it creates tenderness too since sugars begin dissolving during this phase before yielding delicious results post-baking cycle begins shortly thereafter too as well! Make sure both butter & sugar mix until light yellow fluffiness forms—not pasty white—that’ll take about three minutes usually depending on speed settings used here…don’t rush this step either because patience yields rewards later on trust me here friends!
Step 3: Add Eggs & Extracts
Once creamed perfectly together now comes adding eggs: start by dropping one whole egg plus two egg yolks right into buttery mixture along with fragrant pure orange extract (1½ tsp). Mix until fully combined again aiming towards achieving fluffy textures throughout batter base prior moving onto next stage where dry components join forces soon thereafter too shortly afterward…this addition allows proteins within eggs bind everything cohesively while enriching flavors further enhancing overall taste experience awaiting everyone involved once complete cookie masterpieces emerge from ovens shortly henceforth later down line too additionally here friends!
Step 4: Combine Wet And Dry Mixtures
Now it’s time for magic happen as we stir together wet mixture containing creamy goodness alongside dry ingredients whisked earlier—using spatula fold gently until just combined don’t overmix please lest risk toughening texture outcome desired ultimately upon cooling stage afterwards following bakes completed well ahead too ideally afterward folks enjoyably indulge thereafter though here subsequently friends today…just remember gentle folding ensures nice balance maintained rather than harsh stirring techniques which could lead towards undesirable dense cookie realms nobody wishes venture towards ultimately resulting here instead once done correctly thereafter everyone loves enjoying such delectable treats eventually created amidst joyful atmosphere surrounding kitchen magic happening alongside everyone involved today thus far indeed dear friends here today meanwhile!
The Joy of Mixing and Baking
Step 5: Melding the Magic
Now that we’ve got our butter and sugar creamed together, it’s time to add in the stars of our show: the eggs! In a large mixing bowl, beat in one whole egg along with two egg yolks. Make sure they are at room temperature—this is crucial because it helps achieve that beautifully airy texture we crave in cookies. As you beat them in, you’ll notice the mixture transforming; it should become light and fluffy, holding air bubbles that will give your cookies that tender crumb. I promise you, this step is not just about adding moisture; it’s about creating a delightful structure that will ensure each bite is a little cloud of happiness. You’ll know it’s ready when the mixture has doubled in volume and has taken on a pale yellow hue. Trust me on this; patience here pays off as it sets the foundation for moist, delectable cookies.
Next up is our lovely orange extract. This ingredient doesn’t just bring flavor; it infuses every bite with an aromatic quality that makes your kitchen feel like a sunlit grove filled with citrus trees. Add in 1½ teaspoons of orange extract along with a drop of orange food color if you’re feeling fancy! The food color is entirely optional, but I find it adds a cheerful touch to the dough—after all, who doesn’t love vibrant, inviting cookies? Just mix until everything is well incorporated; you want to see a beautiful blend of colors and fragrances swirling together into a symphony of flavor.
Step 6: Combining Dry Ingredients for Perfection
Now comes the moment where all these delicious elements come together. Take your whisked flour mixture—the one we set aside earlier—and gently stir it into the buttery egg mixture using a spatula or wooden spoon. This step is often overlooked, but trust me when I say it’s absolutely paramount to be gentle here! Overmixing can develop gluten too much, leading to tough cookies instead of the soft delights we’re aiming for. Instead, fold the dry ingredients in just until they’re combined; you want to see some streaks of flour still present. This delicate folding technique preserves that tender crumb we’re after while also ensuring even distribution of flavors throughout your cookie dough.
As you fold, take a moment to inhale deeply—you’ll catch whiffs of zesty orange mingling with nutty poppy seeds. These two ingredients complement each other so beautifully! Poppy seeds add not only texture but also a subtle crunch that contrasts perfectly with the softness of the cookie itself. It’s like taking a bite out of sunshine! And don’t rush this step; allow yourself to savor how everything comes together before moving on.
Step 7: Preparing for Baking Bliss
With our dough ready, let’s prepare for baking by lining our baking sheet. Grab either parchment paper or a silicone baking mat—either will work wonders here by preventing sticking and enabling even heat distribution. Trust me when I say this small detail can make all the difference between perfectly baked cookies and those sad, misshapen blobs we sometimes encounter in our kitchens. Preheating your oven to 300°F (150°C) now makes sure it’s hot enough when our cookie dough hits those racks.
Using a cookie scoop or simply two spoons, portion out generous dollops of dough onto your lined baking sheet—aim for about one tablespoon per cookie. Make sure they’re spaced out adequately (around 2 inches apart) since they will spread slightly during baking. Watching those little mounds transform into glorious golden treats is one of my favorite moments! If you’d like to sprinkle some extra poppy seeds on top before baking for an added touch of elegance, go right ahead! The visual appeal elevates them from simple cookies to something truly extraordinary.
Step 8: The Art of Baking
Now we arrive at perhaps one of the most exciting phases—baking your Orange Poppy Seed Cookies! Slide your prepared baking sheet into the preheated oven and set your timer for 20 minutes. Keep an eye on them as they bake; you’re looking for very lightly browned edges and bottoms—a hint of golden color indicating perfection without overbaking. Remember that every oven behaves slightly differently due to variations in temperature calibration and heat distribution—so don’t hesitate to rotate your baking sheet halfway through if you notice uneven browning.
The aroma wafting through your kitchen will be utterly intoxicating; it’s hard not to sneak bites at this stage! But resist—let them bake undisturbed until they’re just set around the edges while still appearing slightly soft in the center—that’s exactly what we want! When they’ve reached this point (usually around 20-25 minutes), remove them from the oven and allow them to cool on the baking sheet for several minutes before transferring them onto a wire rack. This cooling period is essential as it allows them to firm up just enough while still retaining that melt-in-your-mouth tenderness we’re aiming for.
Conclusion:
As we wrap up this delightful journey into the world of Orange Poppy Seed Cookies, I hope my excitement has been contagious! These cookies are not just another dessert; they embody a beautiful balance of flavors that dance on your palate with every bite—the sweet brightness of orange zest intertwines with the subtle nuttiness of poppy seeds in such a harmonious way that it’s hard not to fall in love with them. Each soft cookie is like taking a bite of sunshine, making even the gloomiest days feel warm and inviting.
Why is this recipe a must-try? It’s simple yet extraordinary! Not only does it come together effortlessly without any chilling time—making it perfect for those spontaneous baking moments—but it also brings joy to any occasion. Whether you’re celebrating with friends over afternoon tea or surprising your family during movie night, pulling these beauties from the oven fills your home with an utterly intoxicating aroma that invites everyone around. Imagine watching loved ones’ faces light up as they take their first bite; that’s pure magic right there!
When it comes to serving suggestions, think beyond just enjoying these cookies alone; imagine savoring one alongside a cup of herbal tea for an afternoon pick-me-up or pairing it with creamy vanilla ice cream for a truly decadent experience—yes please! You could even crumble some on top of yogurt for breakfast or serve alongside fresh fruit for a brunch spread that feels special yet effortless. The versatility here is endless!
Feeling adventurous? This recipe is wonderfully adaptable! You can experiment by adding different extracts like almond or lemon if you’re looking to switch things up; perhaps even fold in chopped nuts or dried fruit if you’re feeling creative! The possibilities are truly endless and each tweak brings its own unique touch while still maintaining the essence of those beloved Orange Poppy Seed Cookies we all crave. So gather your ingredients and get baking—I can’t wait to hear about your experiences and see how you make this recipe your own!
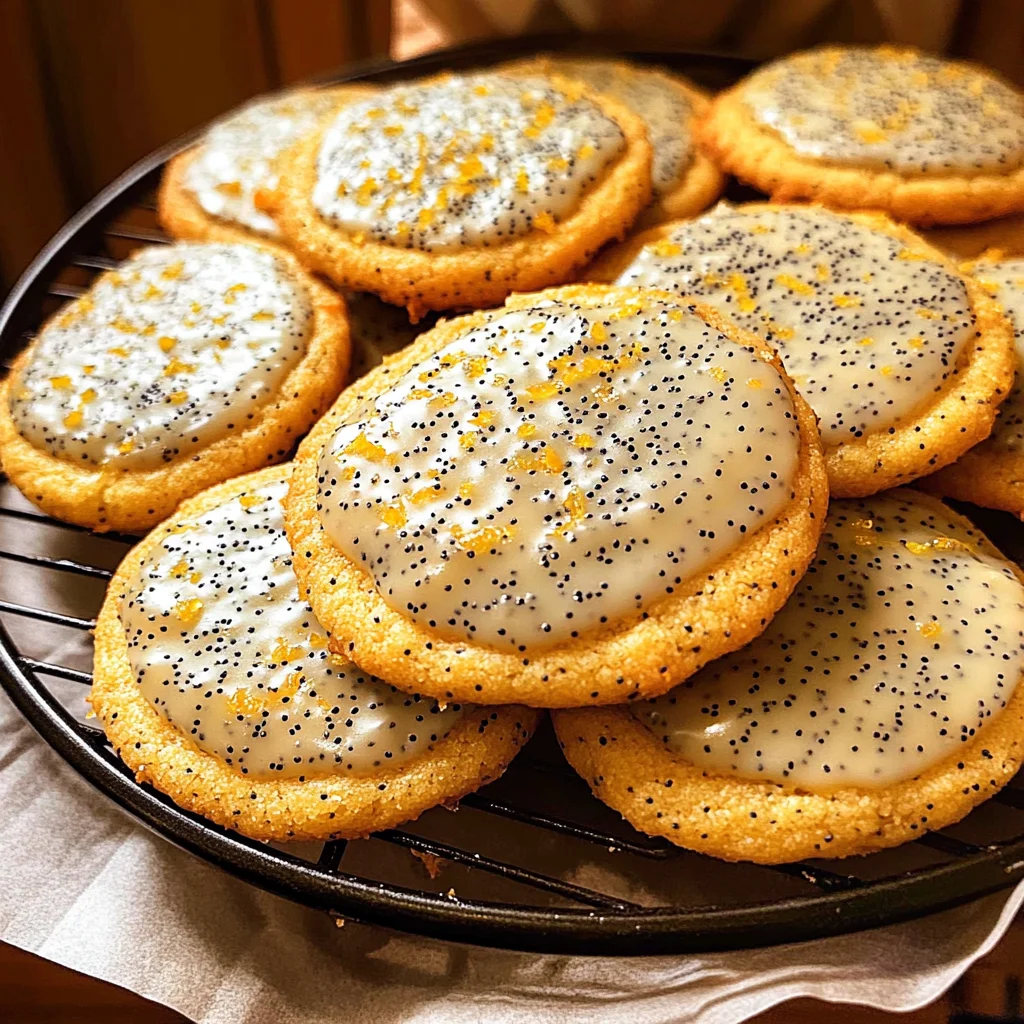
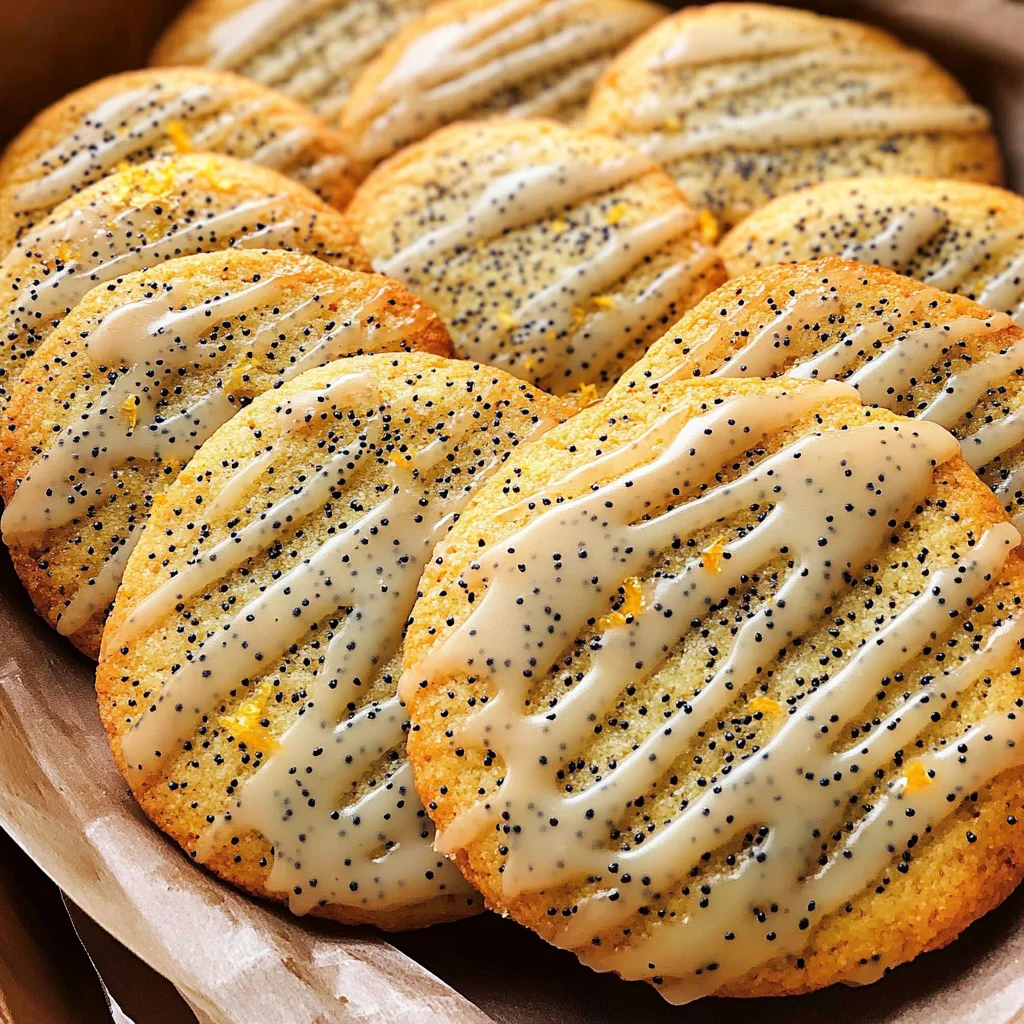
Orange Poppy Seed Cookies

Indulge in the delightful experience of baking with Orange Poppy Seed Cookies—an enchanting treat that combines the zesty flavor of fresh oranges with the subtle crunch of poppy seeds. These cookies are soft, tender, and bursting with citrus goodness, making them the perfect addition to any gathering or a cozy afternoon pick-me-up. The best part? There’s no chilling time required, so you can dive straight into baking without any delay. Each bite offers a comforting warmth that brings smiles and joy, ensuring they become a beloved staple in your home!
- Prep Time: 15 minutes
- Cook Time: 20 minutes
- Total Time: 35 minutes
- Yield: Approximately 24 cookies 1x
- Category: Dessert
- Method: Baking
- Cuisine: American
Ingredients
- 2 cups all-purpose flour
- 1/2 tsp salt
- 1/2 tsp baking soda
- 2 tsp orange zest
- 2 tbsp poppy seeds
- 3/4 cup unsalted butter (softened)
- 1 cup granulated sugar
- 1 egg + 2 egg yolks (room temperature)
- 1 1/2 tsp orange extract
- Optional: Orange food color, powdered sugar, and orange juice for glaze
Instructions
- Preheat your oven to 300°F (150°C).
- In a medium bowl, whisk together flour, salt, baking soda, orange zest, and poppy seeds.
- In a large bowl, cream together softened butter and granulated sugar until light and fluffy.
- Beat in the egg and egg yolks one at a time. Then add orange extract (and food color if using), mixing until well combined.
- Gently fold the dry ingredients into the wet mixture until just combined.
- Scoop tablespoon-sized portions onto lined baking sheets, spacing them about 2 inches apart.
- Bake for 20 minutes or until lightly browned around the edges.
- Allow cookies to cool before glazing with a mixture of powdered sugar and orange juice.
Nutrition
- Serving Size: 1 cookie (30g)
- Calories: 134
- Sugar: 9g
- Sodium: 44mg
- Fat: 6g
- Saturated Fat: 3g
- Unsaturated Fat: 2g
- Trans Fat: 0g
- Carbohydrates: 19g
- Fiber: <1g
- Protein: 2g
- Cholesterol: 20mg