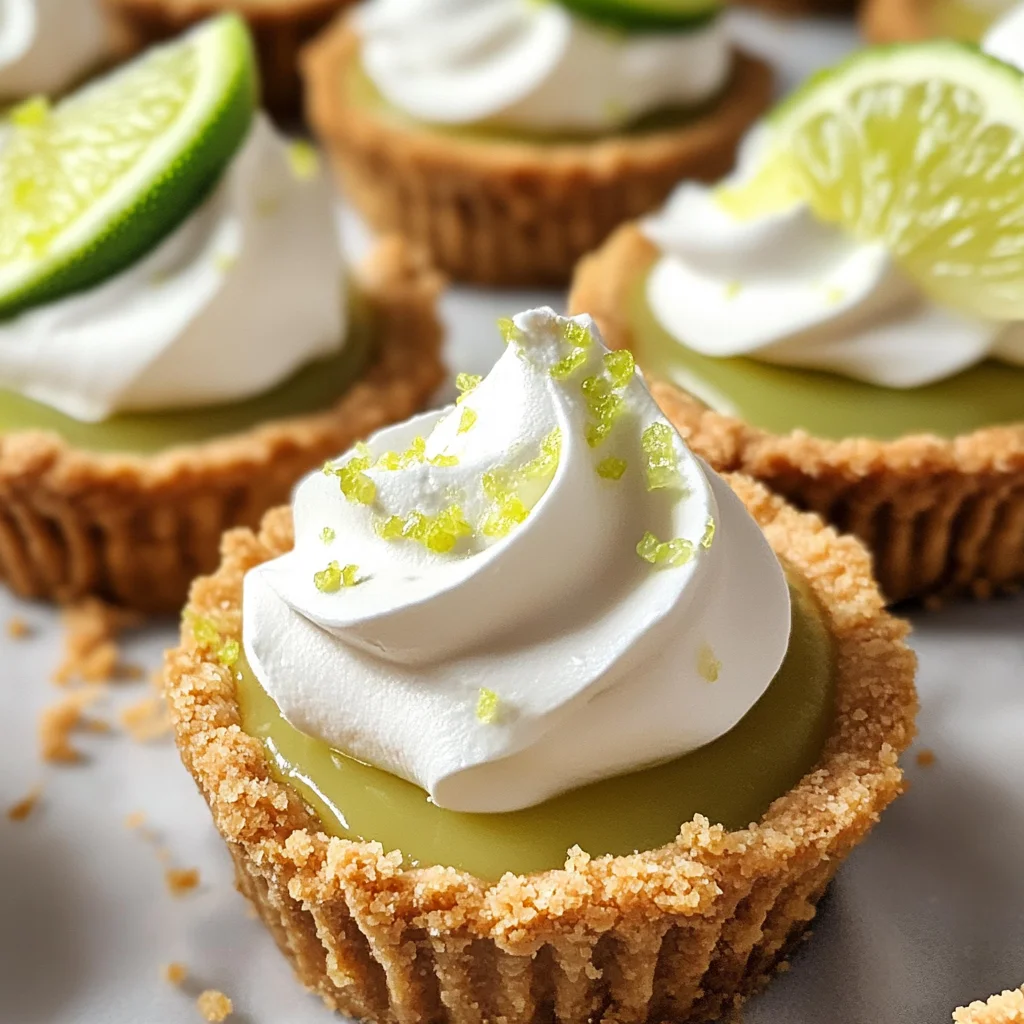
Mini Key Lime Pies
There’s something truly magical about the first bite of a Mini Key Lime Pie. Imagine this: as you sink your teeth into the delicate crust, the refreshing burst of tangy key lime filling dances across your palate, followed by the comforting sweetness of creamy goodness. It’s not just a dessert; it’s a celebration of flavors that transcends time and tradition. These little bites are perfect for every occasion, whether it’s a casual family gathering or an elegant dinner party. Each mini pie is a delightful reminder that food can be both simple and extraordinary—a philosophy I cherish deeply in my cooking journey.
I’ve always been captivated by the vibrant allure of key lime pies. Growing up, I remember watching my grandmother meticulously prepare her version of this classic dessert. She’d tell stories about the origins of key limes and how they flourished in the warm Florida sun, imparting their unique flavor to countless desserts. With each swirl of her whisk, she wove tales that made every ingredient feel alive—a connection between family and food that I strive to recreate with these Mini Key Lime Pies. Trust me when I say, once you try these poppable bites, you’ll be sharing them with friends and family, creating your own stories along the way.
Mini Key Lime Pies: A Refreshing Bite-Sized Delight
These Mini Key Lime Pies are not only adorable but also incredibly easy to make! Using just seven basic ingredients, they come together beautifully in muffin pans, making them perfect for sharing or enjoying all on your own. Whether you’re an experienced baker or just starting out in the kitchen, this recipe will guide you through each step with warmth and encouragement. Let’s dive into this delightful culinary adventure together!
Ingredients:
Embarking on this culinary journey means gathering a few essential ingredients that will transform simple components into something truly special—Mini Key Lime Pies! Each ingredient plays a crucial role in creating that symphony of flavors we all adore.
- 1 ½ cups (180 grams) graham cracker crumbs. This ingredient forms the base of our pies and provides that quintessential crunch paired with a hint of sweetness. When choosing graham crackers, look for those made with whole grains for added depth of flavor and texture. Crushing them into fine crumbs allows us to create an even crust that holds together beautifully while providing that satisfying bite.
- ⅓ cup (70 grams) granulated sugar. Sugar does more than just sweeten; it enhances flavors and contributes to the texture of our crust. The granulated sugar dissolves easily when mixed with graham cracker crumbs and butter, ensuring an even distribution throughout, which is paramount for achieving that lovely golden crust after baking.
- 6 tablespoons (85 grams) unsalted butter, melted. Butter is where rich flavor comes from! Using unsalted butter gives you better control over the sweetness of your pies since it allows you to add exactly what you want without any added saltiness. Make sure it’s melted but not hot—this ensures it combines well with your dry ingredients without cooking them prematurely.
- 1 cup (240 ml) key lime juice. The star ingredient! Freshly squeezed key lime juice offers an intoxicating tartness that makes these mini pies sing. If fresh key limes are hard to find, bottled juice can work too; just check for pure juice without additives for the best results.
- 2 (14-ounce) cans sweetened condensed milk (not evaporated milk!). Sweetened condensed milk is like liquid gold—thick and creamy, it adds richness and sweetness while balancing out the acidity from our key lime juice beautifully. Make sure to grab sweetened condensed milk specifically; it’s essential for achieving that luscious filling we crave.
- 4 large egg yolks at room temperature. Egg yolks serve as natural thickeners and binders in our filling, contributing to its smooth consistency and rich flavor profile. Room temperature yolks mix more easily into our filling mixture—so don’t skip this step!
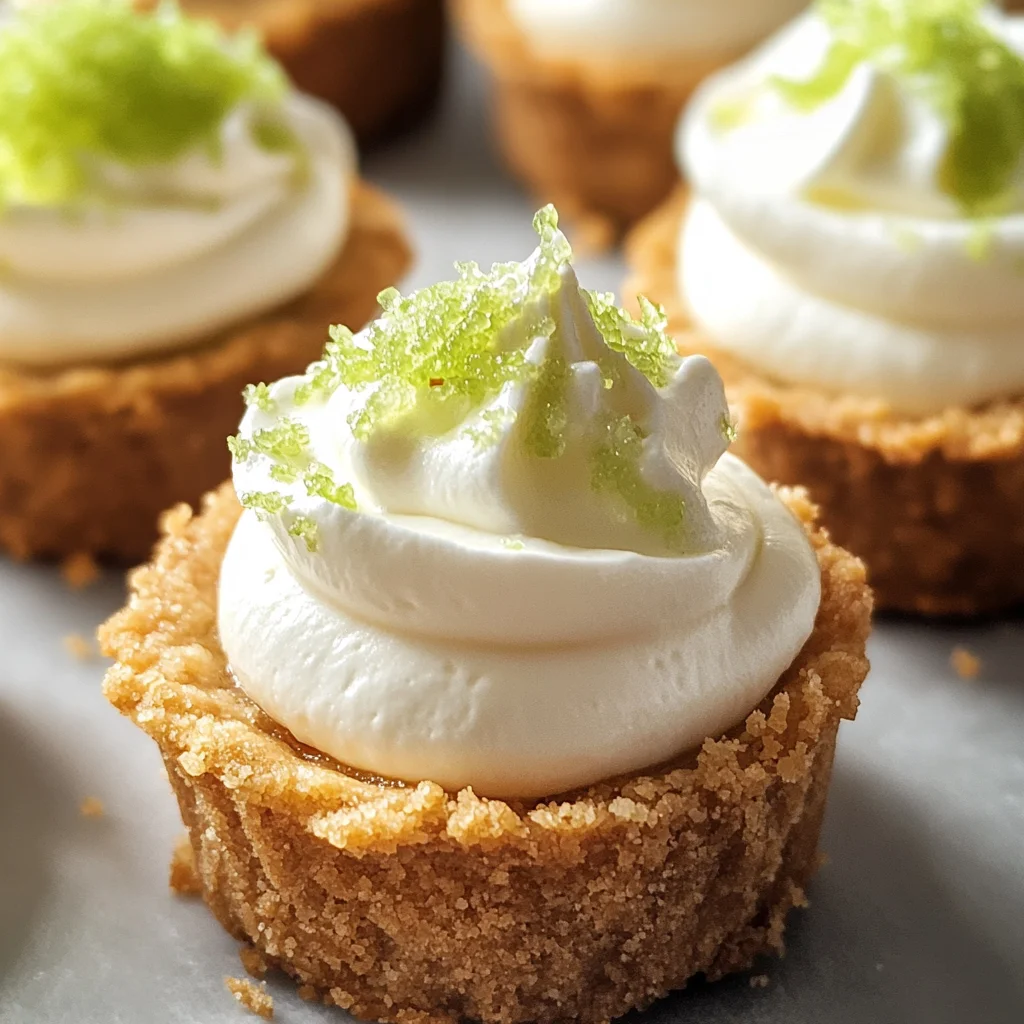
- Homemade whipped cream (optional). While optional, a dollop of homemade whipped cream elevates these mini pies to another level! The airy creaminess complements the zesty filling perfectly—plus, who doesn’t love a good swirl of whipped cream? It’s incredibly easy to make at home using just heavy cream and sugar; trust me on this one!
Equipment You’ll Need:
Having the right tools at your disposal can make this baking experience not only smoother but also more enjoyable! While they might not be ingredients, these essential pieces of equipment are your partners in creating something wonderful.
- **Muffin pan – This non-stick pan is integral for shaping our mini pies perfectly! A standard muffin pan holds 12 muffins; however, we’ll be using 18 liners across two pans because we want plenty of these delectable treats on hand! If you don’t have non-stick pans handy, lightly greasing them will ensure easy release once baked.
- **Mixing bowls – A set of mixing bowls in various sizes is essential for combining your ingredients seamlessly! Opt for glass or stainless steel bowls as they hold up well under heat if needed later during baking or mixing warm ingredients together.
- **Whisk – This trusty tool helps emulsify our filling ingredients smoothly! Whisks come in different sizes; choose one that feels comfortable in your hand for thorough mixing without splatter.
- **Measuring cups & spoons – Precision is key in baking! Accurate measurements ensure everything comes together perfectly—investing in sturdy measuring tools will pay off immensely!
- **Rubber spatula – This versatile tool helps scrape every last bit from your mixing bowl so nothing goes wasted! A good rubber spatula also allows gentle folding techniques when incorporating delicate mixtures like whipped cream later on.
Now that we’ve gathered our ingredients and tools, let’s dive into preparing these delightful little pies!
Step 1: Crafting the Perfect Graham Cracker Crust
To start our journey toward making these Mini Key Lime Pies, we first need to create a solid foundation with our graham cracker crust. Preheat your oven to 350°F (180°C) because we want everything ready when it’s time to bake—the aroma wafting through your kitchen will be utterly intoxicating! Line two muffin pans with 18 liners—this step is crucial as it prevents sticking while allowing easy removal once baked. In a mixing bowl, combine your graham cracker crumbs with granulated sugar until well blended; this combination brings out a lovely sweetness that pairs wonderfully with our tart filling later on.
Next comes the melted butter—add it slowly into your crumb mixture while stirring gently until all crumbs are evenly moistened. This process is vital because if some crumbs remain dry, they won’t hold together properly during baking. Once combined thoroughly (it should resemble wet sand), distribute about one heaping tablespoon per liner evenly across all 18 liners before firmly pressing down each mixture layer using the bottom of a measuring cup or similar object—a technique known as compressing—which creates an even base necessary for holding up against our delicious filling later!
Step 2: Baking Our Crusts
Now that we have pressed down our graham cracker mixture nicely into each liner let’s give them some love in the oven! Place those muffin pans into preheated oven space carefully—it’s important not to rush this step as hot air circulation matters here too much heat could cause uneven browning while too little may leave us doughy bases instead! Bake them for about 5 minutes until they turn lightly golden brown; keep an eye on them so they don’t over-bake since we still have more steps ahead!
Once those crusts emerge from their brief encounter with heat looking beautiful—a light golden hue signaling readiness—we’ll set them aside momentarily while keeping the oven temperature steady at 350°F (180°C). Those warm scents mingling around should remind us why we’re doing this—the anticipation builds deliciously!
Step 3: Whisking Together Our Filling
While waiting patiently for those crusts to cool slightly before adding fillings—let’s shift gears towards crafting our zesty key lime pie mixture! In yet another large mixing bowl (make sure it’s clean!), combine freshly squeezed key lime juice alongside sweetened condensed milk plus egg yolks whisking vigorously until fully combined—this stage transforms humble elements into an utterly extraordinary filling bursting forth inviting acidity balanced beautifully by sweetness from condensed milk alongside richness brought forth by yolks themselves!
This process is fundamental as it allows all ingredients to blend harmoniously ensuring every bite delivers incredible taste sensations across palates everywhere trust me when I say there’s nothing quite like diving into one tiny morsel packed full surprises within!
Step 4: Filling Those Crusts
Now comes perhaps one of my favorite moments—the moment we fill those cooled crusts with velvety goodness prepared earlier! Grab yourself a ladle or measuring cup then gently pour equal amounts directly into each lined muffin cavity almost reaching its top edge but leaving just enough room so they don’t overflow during baking—a delicate balance indeed but worth taking care over since proper rising occurs within ovens’ embrace ensures perfect setting ahead afterwards!
You’ll notice how enticingly bright yellow hues emerge showcasing freshness radiating cheerfulness beckoning everyone near who might catch sight while wafted aromas tease senses nearby alike… Bake these beauties now at same temperature once again between 12-15 minutes until tops appear just set—a mere jiggle should remain indicating softness within yet firmness present overall too—it’s magic happening right before eyes watching over carefully throughout duration ensuring nothing burns away unexpectedly either stands true testament artistry behind cooking itself!
Stay tuned as we continue through remaining steps leading towards chilled perfection soon waiting eagerly ahead…
The Magic of Mini Key Lime Pies: Step-by-Step
Step 5: Pouring the Zesty Filling
Now that you’ve created a beautifully baked crust, it’s time for the moment we’ve all been waiting for—the key lime filling! In a large mixing bowl, combine 1 cup of fresh key lime juice with two 14-ounce cans of sweetened condensed milk and 4 large egg yolks. This is where the magic happens! As you whisk these ingredients together, you’re not just combining flavors; you’re creating a harmonious balance between the tartness of the key limes and the sweetness of the condensed milk. The egg yolks serve as an emulsifier, bringing everything together into a luscious filling that will set beautifully in the oven.
I know it might be tempting to skip this step and dive right into pouring, but take your time here. Whisk vigorously until everything is fully combined and smooth—around 2 to 3 minutes should do it. You want to ensure that there are no streaks of egg or lumps from the condensed milk because this will affect the texture of your mini pies. Trust me on this: a well-mixed filling will result in perfectly creamy bites of joy!
Step 6: Filling Your Crusts
Once your filling is ready, it’s time to fill those golden brown crusts! Carefully evenly distribute the zesty mixture among each of your prepared muffin liners, filling each one almost to the top but leaving just a smidge of space—about a quarter-inch is perfect. This little gap allows for some expansion as they bake while ensuring they don’t overflow, which could create a messy situation in your oven (and nobody wants that!).
As you pour in the filling, take a moment to appreciate how vibrant and inviting it looks! That beautiful yellow-green hue tells you that you’re about to enjoy something truly extraordinary. Remember, every pie is now a little capsule of sunshine and summer vibes, so don’t rush this step; let yourself enjoy the process!
Step 7: Baking to Perfection
With your mini key lime pies filled, it’s time for them to transform in the oven! Keep your oven at 350°F (180°C)—this consistent heat is crucial for setting the filling without overcooking it. Bake them for 12 to 15 minutes; during this time, you’ll witness an incredible transformation as they puff slightly and their tops become set yet still have a slight jiggle when you gently shake the pan.
At around the 12-minute mark, check on them closely; sometimes ovens can vary by quite a bit in temperature accuracy. Look for a pale golden color on top—if they’re starting to brown too much before they reach that jiggle stage, don’t hesitate to pull them out early. The goal here is not only to set them but also preserve that delightful custardy texture inside. This careful baking process is absolutely paramount; if overbaked, they may become rubbery—a fate none of us desire!
Step 8: Cooling Down and Setting Up
Once your timer goes off and those mini beauties are looking just right, carefully remove them from the oven and place them on a wire rack to cool completely—a process that should take about an hour. This cooling stage allows both flavors and textures to develop further; when they start hot from the oven, they may seem delicate and wobbly—but don’t worry! As they cool down slowly off heat, they’ll firm up nicely.
After about an hour at room temperature, these mini pies will still need some chilling time in the refrigerator—at least 2 to 3 hours—to achieve that perfect bite-sized firmness we love so much in key lime pie. This step isn’t just about making them cold; it’s essential for letting all those delightful flavors meld together beautifully while achieving that classic creamy filling texture. So resist any temptation to dig in right away! The patience required here truly transforms these treats into something profoundly satisfying.
Conclusion:
As we wrap up this delicious journey through making Mini Key Lime Pies together, I genuinely hope my excitement has been contagious! From the moment we combined those luscious key lime juice with sweetened condensed milk, crafting each element turned into an experience filled with joy and anticipation. The bright tang of the key limes dances harmoniously with the buttery sweetness of the graham cracker crust, creating an utterly intoxicating symphony of flavors that elevates this dessert into something truly extraordinary.
This recipe is more than just another dessert; it’s an invitation to create joyful memories—whether you’re serving these at a sun-drenched gathering or simply treating yourself on a quiet afternoon. Imagine pulling them from the oven, their golden tops glistening invitingly as everyone gathers around in eager anticipation. The delight on their faces when they take that first bite is truly priceless! These little bites pack a punch of flavor while being incredibly easy to whip up, making them perfect for both novice bakers and experienced chefs alike.
When it comes time to enjoy your creations, think about pairing these mini delights with something equally refreshing—a glass of iced tea or perhaps some sparkling water infused with fresh fruit would be divine! For an afternoon pick-me-up, consider enjoying one alongside your favorite herbal tea; it’s such a lovely contrast! And if you’re feeling particularly indulgent, why not try them with a scoop of coconut sorbet? The creamy coconut complements the zesty lime beautifully—a match made in dessert heaven!
Feeling adventurous? These Mini Key Lime Pies are wonderfully adaptable! You might choose to swap out key lime juice for another citrus like blood orange or even grapefruit; think about how exciting those variations would be! Or perhaps add some finely chopped mint leaves into the filling mixture for an extra layer of freshness? You could also drizzle some chocolate sauce over the top before serving—because why not elevate something already incredible? I encourage you to explore and play with these flavors as you discover what makes your heart sing. Every time you create this recipe, share your experiences—I’m always thrilled to hear how others have brought their twist into my beloved creation!
Mini Key Lime Pies

Mini Key Lime Pies are a refreshing and delightful treat that perfectly balances the tangy zing of key lime with a sweet, buttery crust. These bite-sized desserts come together effortlessly in muffin pans, making them ideal for any occasion—from casual family gatherings to elegant dinner parties. With just a handful of ingredients, you can recreate this classic dessert that captures the essence of summer in every creamy morsel. Each mini pie is a celebration of flavors that’s both simple and extraordinary. Once you taste these poppable delights, you’ll be eager to share them with friends and family!
- Prep Time: 20 minutes
- Cook Time: 20 minutes
- Total Time: 40 minutes
- Yield: Approximately 18 mini pies 1x
- Category: Dessert
- Method: Baking
- Cuisine: American
Ingredients
- 1 ½ cups graham cracker crumbs
- ⅓ cup granulated sugar
- 6 tablespoons unsalted butter, melted
- 1 cup key lime juice
- 2 cans sweetened condensed milk
- 4 large egg yolks
Instructions
- Preheat oven to 350°F (180°C) and line muffin pans with liners.
- In a bowl, mix graham cracker crumbs, sugar, and melted butter until combined. Press evenly into muffin liners.
- Bake crusts for 5 minutes until golden brown; set aside to cool.
- In another bowl, whisk together key lime juice, sweetened condensed milk, and egg yolks until smooth.
- Pour filling into cooled crusts, filling each almost to the top. Bake for 12-15 minutes until set but slightly jiggly.
- Cool at room temperature for an hour, then refrigerate for at least 2 hours before serving.
Nutrition
- Serving Size: 1 mini pie (55g)
- Calories: 148
- Sugar: 14g
- Sodium: 54mg
- Fat: 8g
- Saturated Fat: 5g
- Unsaturated Fat: 3g
- Trans Fat: 0g
- Carbohydrates: 16g
- Fiber: <1g
- Protein: 2g
- Cholesterol: 61mg