Apricot Chicken Thighs
There’s something truly magical about the way certain recipes can transport us to moments in time, weaving together memories, emotions, and experiences into a beautiful tapestry of flavor. When I think of my beloved Apricot Chicken Thighs, I’m flooded with warmth—the kind that wraps around you like a cozy blanket on a chilly evening. This dish isn’t just a meal; it’s an experience that transforms the ordinary into the extraordinary. As the chicken bakes, the kitchen fills with an utterly intoxicating aroma that makes your heart sigh with contentment. The sweet and tangy apricot glaze glistens like liquid gold as it envelops each succulent thigh, inviting you to indulge in its symphony of flavors. I promise you, this recipe will become a cherished part of your culinary repertoire, a bridge between tradition and modern comfort food.
What makes these Apricot Chicken Thighs truly special is not just the delightful marriage of sweet and savory but also the ease with which they come together. With just a handful of ingredients and minimal effort, you can create a dish that feels like it belongs on a festive occasion yet is perfectly suitable for a weeknight dinner after a long day. Imagine gathering around the table with family or friends as laughter fills the air and stories are shared—all while enjoying this profoundly satisfying meal that warms both body and soul. So grab your apron, let’s embark on this culinary journey together!
Apricot Chicken Thighs: A Sweet Symphony of Flavor
Welcome to one of my favorite go-to recipes—Apricot Chicken Thighs! If you’re looking for a deliciously simple dish that’s bursting with flavor and sure to impress, then you’re in for a treat. This recipe marries tender chicken thighs with an exquisite apricot glaze that dances between sweet and tangy notes. It’s perfect for family dinners or gatherings with friends when you want to serve something comforting yet impressive.
Ingredients:
As we dive into this delightful recipe for Apricot Chicken Thighs, let’s take a moment to appreciate each ingredient’s role in creating this masterpiece. Every element adds its unique touch, resulting in an unforgettable dining experience.
- 1 cup apricot jam. This ingredient is truly the star of our show! It provides the essential sweetness and richness that define our glaze. When selecting apricot jam, look for options made from real fruit without excessive additives; this ensures you capture the pure essence of apricots in every bite. The jam’s sticky texture helps to create that luscious coating on the chicken during baking, making it utterly irresistible. If you want to experiment or can’t find apricot jam, feel free to substitute it with peach or mango preserves for a delightful twist!
- ¼ cup finely diced onions. These little gems add depth and savory complexity to our dish. Onions caramelize beautifully when cooked, providing sweetness that balances out the glaze’s brightness. Opting for yellow onions works well here due to their mild flavor profile; however, if you’re feeling adventurous, shallots could also be used for an extra layer of sophistication. Make sure they’re finely diced so they meld seamlessly into our sauce without overpowering.
- 2 tablespoons soy sauce. This ingredient brings umami—a savory depth—that elevates our dish from simply good to absolutely magnificent! Soy sauce not only enhances flavor but also helps tenderize the chicken as it cooks, ensuring each bite remains juicy and flavorful. If you’re looking for alternatives due to dietary preferences or restrictions, coconut aminos offer a wonderful soy-free option while still delivering that savory note we love.
- 1 tablespoon honey. Honey acts as nature’s sweetener here while adding its distinct floral notes that harmonize beautifully with apricot jam. Its viscosity contributes to achieving that perfect glaze consistency we desire—smooth enough to coat yet thick enough not to run off too quickly during baking. Look for raw or local honey if possible; it often has more complex flavors than mass-produced varieties.
- 1 tablespoon dijon mustard. This zingy ingredient adds just the right amount of acidity and sharpness to cut through the sweetness of our glaze; it’s crucial for balancing all those flavors out! The mustard also helps emulsify our sauce so that everything blends perfectly together into one cohesive mixture rather than separate components fighting for attention.
- 1 tablespoon apple cider vinegar. A splash of acidity goes a long way in brightening up dishes! Apple cider vinegar complements our sweet ingredients while enhancing their natural flavors—think of it as bringing everything back into focus! Plus, its slight tang gives depth without being overpowering.
- 1 teaspoon minced garlic. Garlic is like magic in cooking—it adds warmth and richness while imparting an aromatic quality that’s simply irresistible! Fresh garlic is always best since dried forms lack vibrancy; however, if you’re short on time or ingredients, jarred minced garlic works too (but try not to make it your go-to!).
- 1 teaspoon ground ginger. Ground ginger infuses our chicken thighs with warmth reminiscent of cozy nights spent by the fire—it’s both fragrant and slightly peppery! Ginger’s warm spice pairs beautifully with sweetness while offering some health benefits too (think digestion!). Fresh ginger could be used instead if grated finely; just keep in mind fresh will have a stronger punch compared to dried.
- ⅛ teaspoon red pepper flakes (optional). A pinch here adds subtle heat without overwhelming other flavors—it’s all about finding that perfect balance! Feel free to adjust according to your heat tolerance or leave them out entirely if you prefer milder dishes; this recipe shines regardless!
- 6 chicken thighs (bone-in skin-on preferred). Chicken thighs are my favorite cut because they remain incredibly juicy even after baking—they’re packed full of flavor thanks partly due their higher fat content compared to breasts! The skin becomes crispy in the oven while protecting moist meat beneath; don’t skip it! If bone-in isn’t available or preferred (though I highly recommend!), boneless thighs work too—just reduce cooking time slightly.
- Fresh parsley for garnish (optional). While optional garnishes may seem trivial at first glance—they truly elevate presentation significantly! A sprinkle of fresh parsley brightens up colors while adding freshness visually appealing against those rich hues from glazing process!
Equipment You’ll Need:
Cooking is much more enjoyable when you have reliable tools by your side! Think of them as your trusty companions throughout this culinary adventure—helping make every step easier and more efficient while ensuring your Apricot Chicken Thighs turn out absolutely perfect!
- Baking dish (9×13-inch recommended). This will be where all magic happens! A glass or ceramic dish works wonders here as they distribute heat evenly allowing chicken thighs cook consistently without drying out—an essential factor considering we want those juicy results!
- Mixing bowl (medium size). You’ll need something spacious enough so everything can blend easily without overflowing—this is where we’ll combine all those delightful ingredients together before pouring over chicken!
- Measuring cups & spoons: Precision matters in cooking too—it ensures each ingredient shines through their unique characteristics rather than becoming lost amongst others’ flavors; accurate measurements lead us toward success!
- Basting brush (optional but helpful!). If you want an extra layer finesse when applying glaze onto chicken midway through baking process—the basting brush allows us control over how much gets applied ensuring even coverage across every inch!
Preparing the Apricot Chicken Thighs
Step 1: Create Your Glorious Glaze
To begin crafting our wondrous Apricot Chicken Thighs experience, start by gathering all ingredients needed for our glaze—this means mixing together those vibrant elements we discussed earlier: apricot jam, finely diced onions, soy sauce, honey…you get the picture! In your mixing bowl combine these items thoroughly until they form one cohesive mixture reminiscent of sunshine captured inside glass jars—a true feast not just visually but aromatically too! Whisking helps ensure everything merges properly instead lumped separately which would lead uneven distribution once poured over chicken later down line—a crucial detail worth taking time over!
Step 2: Prepare Your Chicken
Now comes one of my favorite parts—the transformation begins! Preheat your oven to 375°F (190°C) ahead so it’s ready by time we finish prepping everything else—this ensures no waiting around afterward which could lead drying out meat unnecessarily during initial stages cooking process where moisture needs sealed within tightly first before browning occurs later on down line once temperature rises sufficiently inside oven environment itself…not something any home cook wants happening! Pat dry each thigh lightly using paper towels beforehand removing excess moisture prevents steaming occurring instead crispiness achieved once placed hot oven later on—don’t rush this step!
Step 3: Season Those Thighs!
Once patted dry place chicken pieces into prepared baking dish spaced apart enough allow air circulate evenly around each piece—this will help achieve even browning rather than uneven patches throughout surface area when cooked eventually afterward…trust me here folks it makes difference later final presentation wise too which matters especially serving guests who expect best possible experience dining alongside loved ones gathered table sharing stories laughter amidst delicious aromas wafting through air enticing senses drawing everyone closer toward meal ahead waiting patiently without knowing how delightful awaits them moment first bite taken…a beautiful thought indeed isn’t it?
Step 4: Pour That Heavenly Glaze
Here comes perhaps most satisfying aspect whole process thus far—we’re finally ready pour heavenly mixture created earlier atop arranged thighs carefully ensuring generous coverage across entire surface area leaving no patch untouched whatsoever; every inch deserves attention equally don’t skimp friends—you’ll want layers upon layers goodness seeped deep within meat fibers themselves infusing flavors directly into protein during bake time ahead turning what seems simple into something extraordinary worthy any occasion celebrated enjoyed shared among company gathered round tables filled warmth laughter joy…amazing isn’t it?!
And there you have it—the beginning stages leading us closer toward enjoying sumptuous Apricot Chicken Thighs destined please palates everywhere they grace presence upon providing nourishment beyond mere sustenance alone reaching hearts minds souls alike…stay tuned folks more exciting steps await ahead unfolding soon unveiling secrets behind creating such culinary treasure worth remembering long after last morsel devoured gone forever until next time brought back again reminding us why cooking matters most importantly loved ones gathered moments shared memories forged through gastronomic delights experienced wholeheartedly…
Step 5: Marinating the Chicken Thighs for Maximum Flavor
Now that you have your tantalizing apricot glaze ready, it’s time to turn our attention to the chicken thighs. To truly elevate this dish and ensure every bite is bursting with flavor, marinating is absolutely paramount. Place the six chicken thighs into a large mixing bowl or a resealable plastic bag—whatever feels most convenient for you. Then, pour about half of that glorious apricot glaze over the chicken, making sure every piece is generously coated. This step isn’t just about adding flavor; it’s about allowing the ingredients to work their magic, penetrating deep into the meat fibers and transforming them into succulent morsels of joy.
Why is marinating so crucial? The acidity from the apple cider vinegar in our glaze tenderizes the chicken while the sugars in the apricot jam create a beautiful caramelization during baking—resulting in those mouthwatering crispy edges we all adore. I recommend letting your chicken marinate for at least 30 minutes—though if you have a couple of hours to spare, even better! Just imagine how those flavors will deepen and meld together over time. During this period, cover your bowl with plastic wrap or seal your bag, then pop it into the refrigerator. Remember, don’t rush this step! Great things take time, and patience will reward you with an utterly intoxicating dish that will have everyone asking for seconds.
Step 6: Preparing Your Baking Dish
While your chicken is luxuriating in that sweet and savory marinade, let’s prepare the stage for our culinary masterpiece. Preheat your oven to 375°F (190°C). This temperature is crucial as it allows the chicken to cook evenly while achieving that delightful golden-brown finish without drying out. An oven thermometer can be a handy tool here; you want to ensure that your oven is correctly calibrated because an undercooked or overcooked dish can lead to disappointing results.
Once preheated, take out a baking dish—one large enough to comfortably fit all six thighs without overcrowding them. You want them nestled together but not cramped; they need room to breathe so they roast beautifully without steaming each other. Lightly grease your baking dish with olive oil or non-stick spray; this simple act ensures easy cleanup and prevents any sticking woes during baking. Now’s also a good moment to pour any leftover marinade from your chicken onto the bottom of the dish—it adds another layer of flavor as it bakes! Trust me on this one; every little detail counts when creating an extraordinary meal.
Step 7: Nestling Chicken Thighs into Their Cozy Home
With your baking dish prepped and waiting eagerly, it’s time to carefully place those marinated chicken thighs inside. Using tongs or your hands (with clean fingers!), lay each thigh skin-side up in the dish, allowing that luscious glaze to cling onto them like a warm hug. As you arrange them, visualize how those thighs will roast and caramelize—this is where dreams of crispy skin come true! Make sure there’s some space between each piece; this allows hot air to circulate freely around them so they cook evenly and develop that irresistible crispy exterior.
As you’re placing each thigh down, take a moment to appreciate how bright and inviting they look—the vibrant hues of apricot glistening under kitchen lights are simply mesmerizing! Once they’re all snugly arranged in their cozy abode, drizzle any remaining glaze over each piece generously—this step enhances flavor even more while creating that gorgeous sticky surface we all crave. And don’t forget: save a little bit of that glaze for basting later on! It’ll give you an excuse to sneak back into the kitchen halfway through cooking for some aromatic spoonfuls of bliss.
Step 8: Baking Your Perfect Apricot Chicken Thighs
Now comes perhaps one of my favorite parts—the baking! Slide your beautifully arranged baking dish into the preheated oven and set a timer for 25 minutes. As soon as those thighs hit the heat, you’ll begin to experience an enchanting aroma wafting through your kitchen—a symphony of sweet and savory notes dancing in harmony together. This initial phase allows the chicken to cook through gently while developing its delightful crust.
After 25 minutes have passed, grab that reserved glaze from earlier and use a basting brush or spoon to coat each thigh again with love. This will enhance their color even further while keeping them moist throughout cooking—a non-negotiable step if you want juicy meat! Return them to bake for an additional 15-20 minutes until they reach an internal temperature of 165°F (74°C). To test doneness accurately without cutting into them (which would release all those lovely juices), invest in an instant-read thermometer—it’s worth its weight in gold!
As they finish baking, keep an eye on their skin—you’re looking for that beautiful golden brown color with crispy edges! If you notice they’re browning too quickly before being fully cooked inside, feel free to cover them loosely with aluminum foil until they finish roasting through. Not only will you avoid burning but also maintain moisture levels—something we never want to compromise on!
Final Touches
Step 9: The Art of Resting Before Serving
Once your Apricot Chicken Thighs are perfectly baked and bursting with flavors from their rich glaze, it may be tempting to dive right in—but hold on just a moment longer! Allowing these beauties to rest for about five minutes before serving is essential for achieving optimal texture and flavor distribution throughout each bite. During this resting period, juices redistribute within each thigh instead of spilling out when cut immediately—a simple yet transformative act that guarantees moistness.
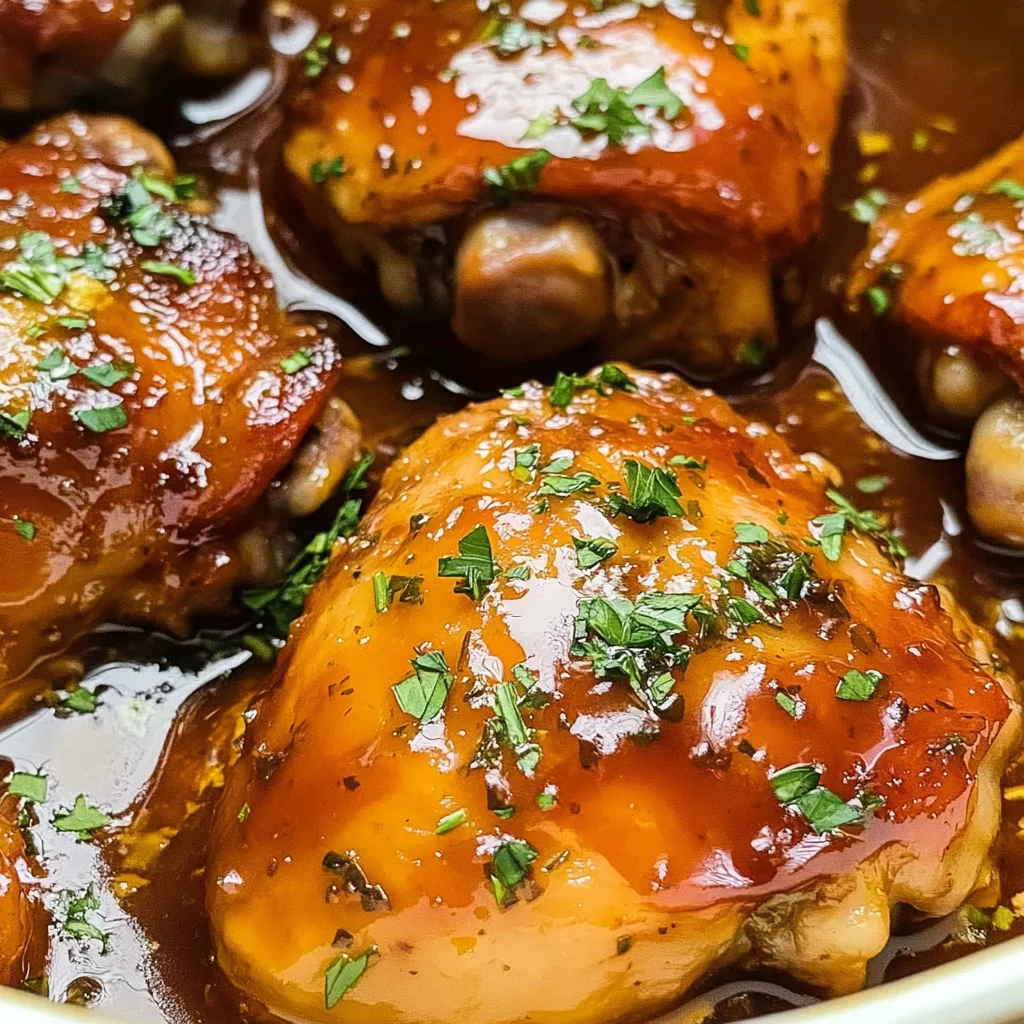
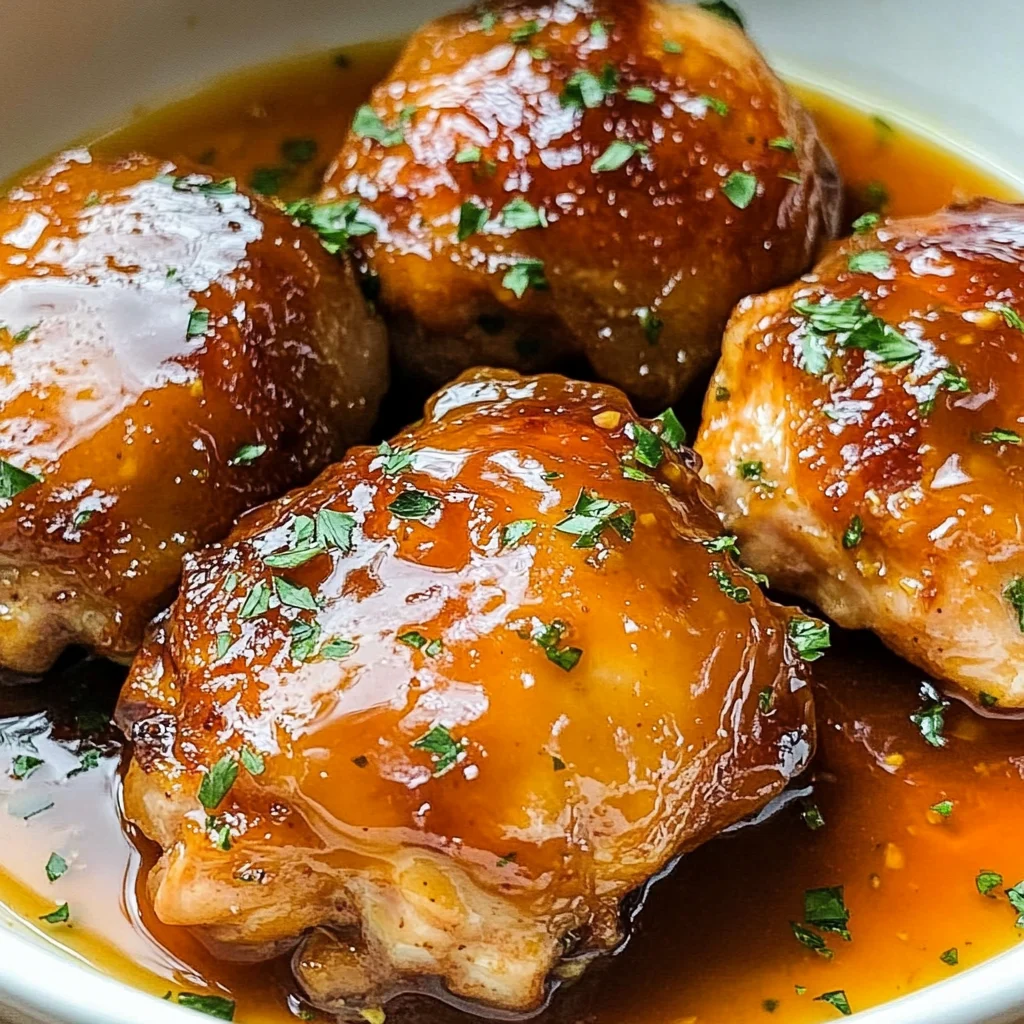
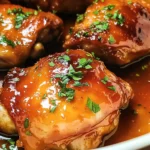
Try plating them up alongside some colorful veggies or fluffy rice; their vibrant hues against fresh greens create such an inviting presentation! For added flair—and let’s be honest—you deserve it sprinkle some finely chopped fresh parsley over everything before serving; not only does it bring brightness visually but adds another layer of freshness when tasting too. As you gather around the table with loved ones sharing stories over this delicious meal you’ve created from scratch—I promise you’ll feel immensely proud knowing you’ve crafted something truly extraordinary!
So there you have it—your very own Apricot Chicken Thighs recipe brimming with warmth and love! Each bite holds memories waiting to unfold as laughter fills the room—just like family dinners at my grandmother’s house growing up! Enjoy every moment around this comforting dish; I can’t wait for you all to experience its irresistible charm just like I do every single time I make it!
Storage and Enjoyment Tips for Your Apricot Chicken Thighs
Now that your Apricot Chicken Thighs are beautifully baked, glazed to perfection, and tantalizingly fragrant, it’s time to dig in! But wait—before you devour every last bite, let’s chat about how to store those succulent thighs for later enjoyment. Trust me, leftovers can be just as delightful if stored properly, ensuring that the sweet and sour symphony of flavors remains intact.
Storing Leftover Apricot Chicken Thighs
To keep your leftover Apricot Chicken Thighs fresh and flavorful, I recommend using an airtight container. This not only prevents moisture loss but also protects against any unwanted odors from infiltrating your delicious dish. Stored in the refrigerator, these delightful thighs will last for about 3 to 4 days. If you want to maintain their juicy texture, place a slice of bread in the container with the chicken; this little trick helps absorb excess moisture and keeps the chicken from drying out. When you’re ready to enjoy them again, simply reheat them in the oven or microwave until warmed through. The glaze will remain sticky and sweet, creating that utterly intoxicating flavor experience all over again!
Freezing Apricot Chicken Thighs for Later
If you find yourself with extra chicken thighs—or if you simply want to prepare ahead—freezing is an excellent option! Allow the cooked thighs to cool completely before transferring them into freezer-safe bags or containers. Squeeze out as much air as possible before sealing; this is crucial for preventing freezer burn. When stored properly, they can last up to 3 months in the freezer without losing their deliciousness. The beauty of freezing these savory delights is that they make for a quick meal on busy nights—just thaw them overnight in the fridge and reheat in the oven until piping hot. Imagine pulling a bag from your freezer on a hectic weeknight and transforming it into a warm supper that tastes freshly made; it’s pure convenience at its finest!
Apricot Chicken Thighs
Apricot Chicken Thighs are a delightful dish that brings together the sweet and tangy flavors of apricot jam with savory chicken, creating a comforting meal perfect for any occasion. This easy-to-make recipe is not only packed with flavor but also comes together effortlessly, making it an ideal choice for weeknight dinners or gatherings with friends and family. The juicy chicken thighs are enveloped in a rich glaze that caramelizes beautifully in the oven, filling your kitchen with an irresistible aroma. Serve them alongside fluffy rice or fresh vegetables for a complete meal that warms both body and soul.
- Prep Time: 30 minutes
- Cook Time: 40 minutes
- Total Time: 1 hour 10 minutes
- Yield: Serves approximately 6 people 1x
- Category: Main
- Method: Baking
- Cuisine: American
Ingredients
- 1 cup apricot jam
- ¼ cup finely diced onions
- 2 tablespoons soy sauce
- 1 tablespoon honey
- 1 tablespoon Dijon mustard
- 1 tablespoon apple cider vinegar
- 1 teaspoon minced garlic
- 1 teaspoon ground ginger
- 6 chicken thighs (bone-in, skin-on preferred)
- Fresh parsley for garnish (optional)
Instructions
- Preheat your oven to 375°F (190°C).
- In a mixing bowl, combine apricot jam, diced onions, soy sauce, honey, Dijon mustard, apple cider vinegar, minced garlic, and ground ginger until well mixed.
- Pat dry the chicken thighs and place them in a baking dish. Pour half of the glaze over the chicken, ensuring each piece is coated.
- Marinate the chicken for at least 30 minutes in the refrigerator.
- Arrange chicken thighs skin-side up in the baking dish and pour remaining glaze over them.
- Bake for 25 minutes; then baste with remaining glaze and continue baking for another 15-20 minutes or until the internal temperature reaches 165°F (74°C).
- Allow to rest for 5 minutes before serving, garnished with fresh parsley if desired.
Nutrition
- Serving Size: 1 chicken thigh (150g)
- Calories: 330
- Sugar: 22g
- Sodium: 580mg
- Fat: 20g
- Saturated Fat: 6g
- Unsaturated Fat: 14g
- Trans Fat: 0g
- Carbohydrates: 18g
- Fiber: 0g
- Protein: 22g
- Cholesterol: 105mg