Thai Peanut Chicken
There’s something utterly magical about cooking that transcends mere nourishment—it becomes an experience, a journey through flavors and memories. When I think about my Thai Peanut Chicken, I’m reminded of warm evenings filled with laughter, the tantalizing aroma wrapping around you like a cozy blanket. This dish is more than just a meal; it’s a celebration of culinary creativity and a bridge between tradition and innovation. Imagine tender chicken pieces enveloped in a creamy peanut sauce that dances on your palate, creating a symphony of flavors that is both comforting and exciting. Each bite feels like a warm hug, leaving you deeply satisfied yet yearning for just one more taste. Trust me when I say this recipe will quickly become one of your go-to favorites for busy weeknights or special gatherings.
This Thai Peanut Chicken has a story woven into its creation—a delightful blend of influences and tastes that have captivated palates across the globe. The contrast of sweet and savory in this dish speaks to our love for balance in food; think of how the rich, nutty flavor of peanut butter complements the salty depth of soy sauce, all while being lifted by luscious coconut milk. It’s truly extraordinary how these simple ingredients can come together to create something so profoundly satisfying. Whether you’re hosting friends for dinner or simply indulging in some self-care after a long day, this recipe is perfect for creating moments that matter. So roll up your sleeves, pour yourself a soothing cup of tea, and let’s dive into making this delicious Thai Peanut Chicken together!
Thai Peanut Chicken: A Creamy Delight in Just 30 Minutes
You’re about to embark on a culinary adventure that promises not only speed but also an explosion of flavor! This Thai Peanut Chicken recipe is incredibly simple yet showcases the beauty of combining fresh ingredients with hearty staples. You won’t need to spend hours slaving away in the kitchen—just 30 minutes is all it takes to whip up this delightful dish. Let’s get started!
Ingredients:
As we gather our ingredients for this flavorful journey, remember that each component plays a crucial role in creating that beloved Thai-inspired taste.
- 4 boneless, skinless chicken breasts (about 1.5 lbs). The star of our show! Opting for boneless and skinless chicken breasts ensures quick cooking and easy cutting into bite-sized pieces; nobody wants to wrestle with bones when they’re ready to indulge! Look for chicken that’s firm to the touch and has no discoloration—this guarantees freshness. If you’re feeling adventurous or want to mix things up, chicken thighs could be used here as well; they add richness but might take slightly longer to cook through.
- 2 cloves fresh garlic, minced. Oh, garlic—the aromatic gem that brings everything to life! When minced finely, it releases essential oils that create an intoxicating aroma as they cook. Fresh garlic is non-negotiable here; pre-minced versions lack the vibrant punch we crave in our sauce. As you chop it up, breathe in its pungent scent—it’s one of those little moments where cooking feels almost meditative.
- 1/4 cup low-sodium soy sauce. This ingredient adds depth and umami richness without overwhelming saltiness thanks to the low-sodium option. Soy sauce acts as both seasoning and marinade for our chicken; it enhances flavors while keeping everything balanced. Make sure you choose a quality brand—there’s nothing quite like that first taste when everything comes together!
- 1/3 cup creamy natural peanut butter. Here’s where we get that luscious creaminess! Natural peanut butter (the kind without added sugars or hydrogenated oils) will give us that silky texture we desire in our sauce while providing protein-rich goodness too. Stir it well before using as it tends to separate in the jar—this creamy dream is what transforms our dish into something truly special.
- 1/2 cup full-fat coconut milk. Liquid gold right here! Full-fat coconut milk lends an incredible richness and creaminess to our sauce while balancing out the robust flavors from the peanut butter and soy sauce beautifully. It also offers a hint of sweetness and makes everything feel indulgent without being heavy.
- Salt and pepper to taste. Simple yet effective! These pantry staples help round out flavors but don’t rush this step—taste as you go! You’ll find just the right amount will elevate your dish beautifully.
- 1 tablespoon vegetable oil. A small but vital player that helps sear our chicken beautifully while preventing sticking in the skillet. Feel free to use any neutral oil here—grapeseed or canola work well if you prefer.
Equipment You’ll Need:
The right tools are essential partners on this culinary journey—they make your experience smoother and more enjoyable! Having these items at hand will help bring your delicious Thai Peanut Chicken to life effortlessly.
- Large skillet – This versatile kitchen workhorse is perfect for sautéing chicken quickly over medium-high heat while ensuring even cooking throughout so every piece turns golden brown.
- Sharp knife – A good-quality knife makes prep work feel like less of a chore! With its sharp blade, chopping garlic or cutting chicken becomes quick and efficient—a sharp knife is absolutely paramount for safety too!
- Cutting board – Utilize a sturdy cutting board that provides enough space for chopping without crowding your workspace—this makes prepping ingredients easier while keeping your kitchen tidy.
- Wooden spoon or spatula – Ideal for stirring and mixing everything together as we build layers of flavor in our sauce without scratching your skillet’s surface.
- Measuring cups/spoons – Accurate measurements ensure consistency each time you make this dish, which means you’ll always hit those delightful flavor notes perfectly!
Now that we have all our ingredients prepped along with necessary equipment ready at hand, let’s dive into preparing our delectable Thai Peanut Chicken!
Step 1: Preparing Your Chicken
Begin by cutting those beautiful chicken breasts into bite-sized pieces; aim for roughly uniform sizes so they cook evenly throughout—nobody wants dry chunks next to tender morsels! Once cut, season them generously with salt and pepper because these simple seasonings are foundational in enhancing their natural flavor before hitting the skillet.
Step 2: Searing the Chicken
In your large skillet over medium-high heat, pour in that tablespoon of vegetable oil—let it heat up until shimmering but not smoking (about 1 minute should do). Carefully add your seasoned chicken pieces one by one; listen closely as they hit the pan—the sound should be music to your ears! Cook them undisturbed for about 5-7 minutes until they develop a lovely golden crust on one side before flipping them over gently with your spatula.
Step 3: Aromatic Garlic Infusion
Once the chicken is browned all over but still juicy inside (you can check doneness with an instant-read thermometer reaching 165°F), remove it from the skillet onto a plate—allowing it some breathing room helps maintain its juiciness later on when mixed back into the sauce! Now lower your heat slightly before adding minced garlic directly into that same glorious pan filled with remnants from searing—trust me on this step because those browned bits hold immense flavor potential waiting to be unlocked! Sauté for about one minute until fragrant—that smell will wrap around you like an embrace!
Step 4: Creating Our Sauce
Stir in low-sodium soy sauce along with creamy natural peanut butter—you’ll notice how quickly these two come together into an uplifting liquid gold right before your eyes! Then pour in full-fat coconut milk gradually while whisking gently until smooth—you’re creating pure magic here! Allow everything to simmer gently so flavors meld together beautifully—it doesn’t take long (just around three minutes) before returning cooked chicken back into this luscious concoction where every piece gets lovingly coated in flavor-packed sauce goodness!
Now take a moment… savor this process because soon enough you’ll be serving up bowls brimming with joyfully fragrant dishes infused with warmth straight from your heart—and isn’t that what cooking is truly all about? Let’s keep going until every last detail shines through perfectly…
Step 5: Bringing the Sauce to Life
Now that you’ve sautéed the garlic until it’s just fragrant—trust me, there’s nothing quite like that warm, nutty aroma wafting through your kitchen—it’s time to create a sauce that will elevate your dish into a realm of flavor you never knew possible. In the same skillet, gently reduce the heat to medium, and add in your low-sodium soy sauce. This ingredient is more than just a seasoning; it acts as a flavor enhancer, infusing your chicken with umami goodness that makes every bite utterly irresistible. As the soy sauce meets the hot skillet, you’ll hear a delightful sizzle that tells you we’re on the right track!
Next, it’s time for the star of our show: creamy natural peanut butter. Measure out 1/3 cup and stir it into the mixture. You want to make sure you choose a peanut butter that’s free of additives—just pure peanuts and perhaps a pinch of salt—to keep things honest and flavorful. This step is crucial because as the peanut butter melts and melds with the soy sauce, it transforms into a velvety sauce that clings beautifully to the chicken. Finally, pour in 1/2 cup of full-fat coconut milk; this will lend an incredible creaminess to your sauce and balance out the saltiness of the soy sauce while enriching the dish with its tropical notes. Stir everything together vigorously until it’s perfectly combined; you’ll notice how it thickens slightly and takes on that luscious golden hue. The key here is to really allow those flavors to marry—don’t rush this step! A good simmer will deepen the taste and enhance every component.
Step 6: Marrying Chicken with Sauce
Now for one of my favorite parts: reintroducing our perfectly cooked chicken back into its flavorful embrace! Once your sauce is smooth and creamy, it’s time to return the golden-brown chicken pieces back to the skillet. Gently fold them into that heavenly blend of peanut goodness, ensuring each piece is generously coated. At this point, you may feel tempted to dive in with a spoon (and who could blame you?), but take a moment to let everything simmer together for about three minutes over medium-low heat. This allows the chicken not only to soak up all those amazing flavors but also ensures it’s heated through without overcooking.
As your chicken bathes in this rich sauce, watch as it transforms from simple meat into something profoundly satisfying—a marriage of textures where each bite brings together tender chicken and that utterly intoxicating peanut sauce. This is where patience pays off; letting them mingle for just a few minutes enhances not only flavor but also texture as they absorb moisture from each other. You’ll know it’s ready when everything is warmed through and aromatic—your kitchen will be filled with an enticing scent that beckons everyone to gather around.
Step 7: Serving Suggestions That Shine
With your Thai Peanut Chicken now simmered to perfection, let’s talk about how best to serve this delightful dish! Whether you’re hosting friends or simply enjoying a cozy dinner at home, presentation can make all the difference. I recommend serving this glorious concoction over fluffy jasmine rice or soft rice noodles; both options provide a wonderful canvas for soaking up every last drop of that creamy peanut sauce. If you’re using rice, aim for about 1 cup per serving—this will soak up all those delicious juices beautifully!
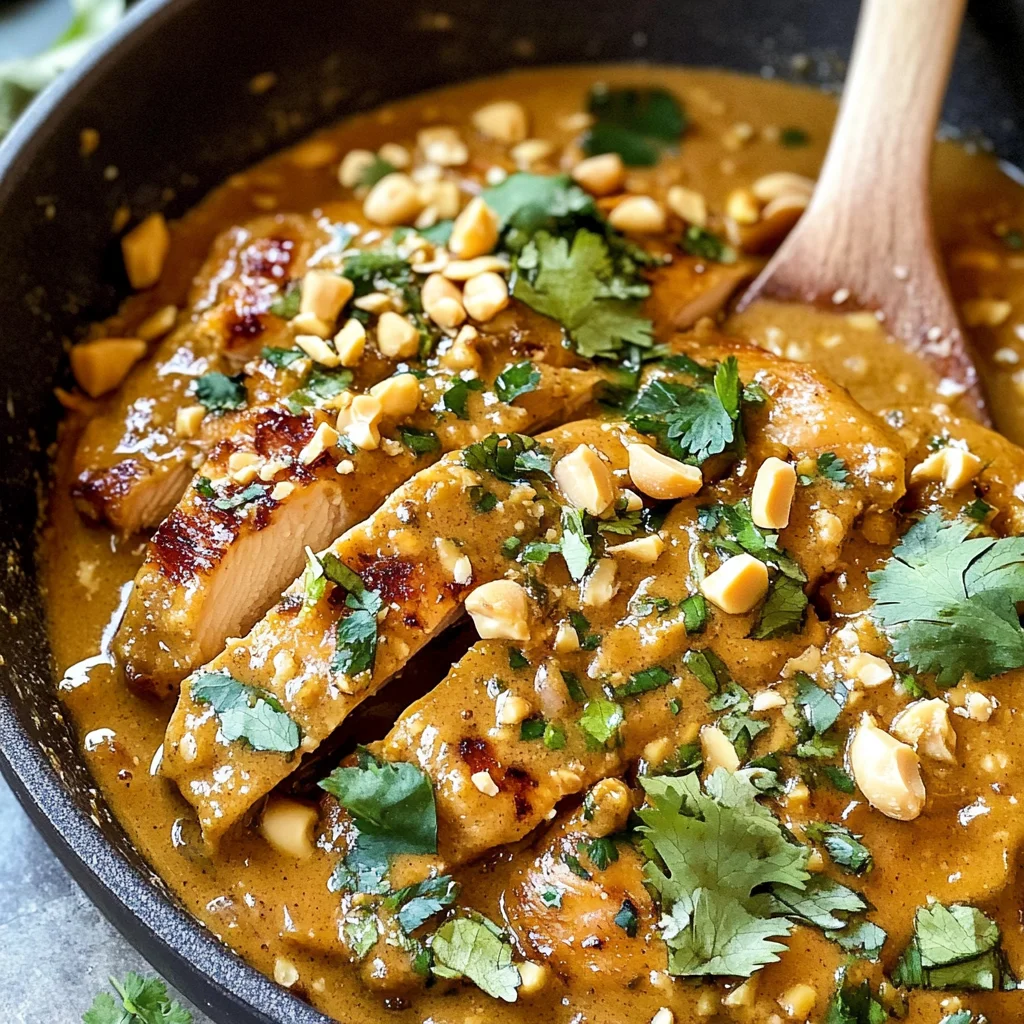
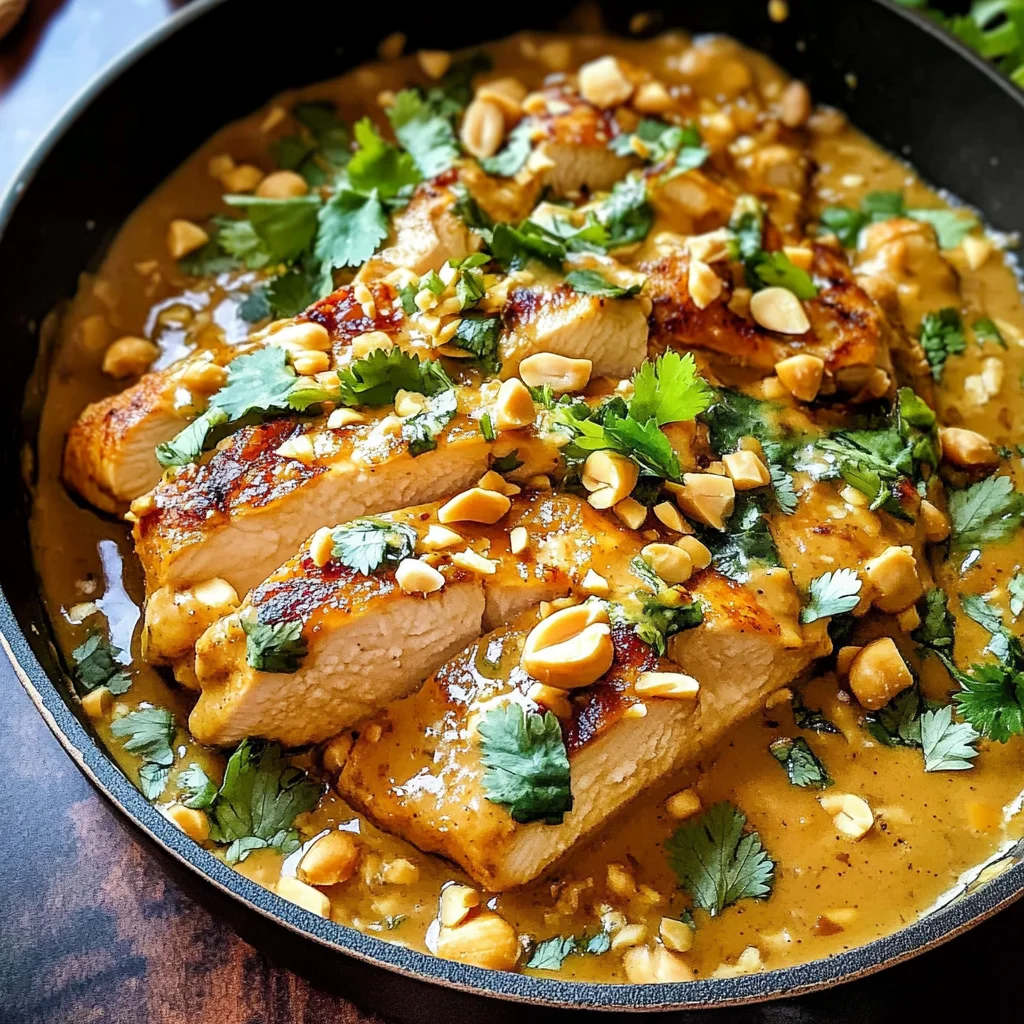
Once plated, don’t forget about garnishing! A sprinkle of chopped peanuts adds both crunch and an extra nutty flavor that complements our rich sauce perfectly—plus, they look so inviting against those warm colors! A handful of fresh cilantro can bring brightness and freshness that cuts through some richness of the dish while adding an aromatic touch that’s simply enchanting. Trust me on this: these finishing touches don’t just elevate aesthetics; they enhance flavor profiles too! Your guests will be raving about this dish long after they’ve left your table.
Step 8: Final Touches Before Enjoying
Before diving into your creation (which I know you’re itching to do!), let’s pause for one last essential step: allowing everything to rest for just a couple of minutes before serving. While it might seem counterintuitive when everything looks so deliciously ready-to-go, letting your Thai Peanut Chicken sit for about five minutes actually allows those flavors to settle deeply throughout each piece of chicken and every bit of sauce. It’s akin to letting wine breathe—it enhances flavor by giving time for all those complex notes to harmonize beautifully.
You might wonder why resting matters so much in cooking; well, it allows any residual heat within the dish to redistribute evenly throughout without drying anything out or making components rubbery from immediate plating. Plus, when you finally serve it after resting, you’ll notice how every bite feels even more succulent! So take this moment—it’s worth it.
Next Major Phase – Enjoying Your Thai Peanut Chicken
Now comes my favorite part—the moment where all this culinary magic transforms into shared joy around your dining table! Each bite should be an experience—a symphony of flavors dancing across your palate as you savor the nutty richness intertwined with tender chicken pieces and enveloped in a luxurious coconut kiss. And remember, cooking is not just about sustenance; it’s about creating warmth and connection among loved ones.
So gather around with family or friends (or indulge solo if you prefer), serve up generous portions over rice or noodles adorned with those crunchy peanuts and bright cilantro sprigs—and watch as everyone digs in with smiles on their faces! I promise you this Thai Peanut Chicken will leave everyone satisfied and asking for seconds—not just because it’s delicious but because it reflects love poured into every carefully considered step along the way. Enjoy every moment—you’ve earned it!
Storage and Enjoyment Tips for Your Thai Peanut Chicken
And just like that, your kitchen is filled with the fragrant aroma of your Thai Peanut Chicken, a dish that’s not only ready to delight your taste buds but also invites you to gather around the table with loved ones. But wait! Before you dive into this creamy, nutty bliss, let’s talk about how to preserve those delicious leftovers—because trust me, you’re going to want to savor every last bite of this extraordinary meal. Storing your Thai Peanut Chicken properly will ensure that its flavors remain vibrant and its texture stays luscious, making it all the more enjoyable when you’re ready for round two.
Storing Leftover Thai Peanut Chicken
To keep your Thai Peanut Chicken fresh and flavorful, I recommend transferring any leftovers into an airtight container. Glass containers are fantastic as they help maintain the quality of the food while being easy on the eyes in your fridge. If you store it in an airtight container, it can stay good in the refrigerator for about 3-4 days—though I bet it won’t last that long! One pro tip I love is placing a slice of bread in with the chicken; this little trick helps absorb excess moisture and keeps everything delightful. When you reheat it, you’ll find that the sauce has thickened slightly and becomes even more luxurious as it warms up. Simply pop it in the microwave or on the stovetop over low heat until it’s heated through, and you’re good to go! The combination of flavors might surprise you; sometimes they deepen and meld together beautifully overnight.
Freezing Thai Peanut Chicken for Later
If you’re someone who loves to meal prep or simply wants to have a hearty dish ready at a moment’s notice, freezing your Thai Peanut Chicken is a fantastic option! Just let it cool completely before transferring it into freezer-safe containers or heavy-duty zip-top bags. Be sure to squeeze out any excess air from the bags before sealing them up tight—this makes a world of difference in preserving flavor and preventing freezer burn. When stored correctly, your delectable chicken will be safe in the freezer for up to 3 months! When you’re ready to enjoy it again, simply thaw it overnight in the fridge before reheating; trust me when I say that having this dish on hand is pure convenience and will make your busy weeknights feel like a culinary treat!
Thai Peanut Chicken

Experience delightful flavors with our quick and easy Thai Peanut Chicken recipe—perfect for busy nights or special gatherings. Try it today!
- Prep Time: 10 minutes
- Cook Time: 20 minutes
- Total Time: 30 minutes
- Yield: Serves 4
- Category: Dinner
- Method: Frying
- Cuisine: Thai
Ingredients
- 4 boneless, skinless chicken breasts (about 1.5 lbs)
- 2 cloves fresh garlic, minced
- 1/4 cup low-sodium soy sauce
- 1/3 cup creamy natural peanut butter
- 1/2 cup full-fat coconut milk
- Salt and pepper to taste
- 1 tablespoon vegetable oil
Instructions
- Cut chicken into bite-sized pieces and season with salt and pepper.
- Heat vegetable oil in a large skillet over medium-high heat. Sear chicken for 5-7 minutes until golden brown; remove from pan.
- In the same pan, sauté minced garlic for about 1 minute.
- Stir in soy sauce and creamy peanut butter until combined, then add coconut milk gradually while whisking until smooth.
- Reintroduce chicken to the skillet, simmering for an additional 3 minutes until coated and heated through.
Nutrition
- Serving Size: 1 plate (300g)
- Calories: 430
- Sugar: 6g
- Sodium: 560mg
- Fat: 24g
- Saturated Fat: 10g
- Unsaturated Fat: 12g
- Trans Fat: 0g
- Carbohydrates: 18g
- Fiber: 2g
- Protein: 36g
- Cholesterol: 95mg