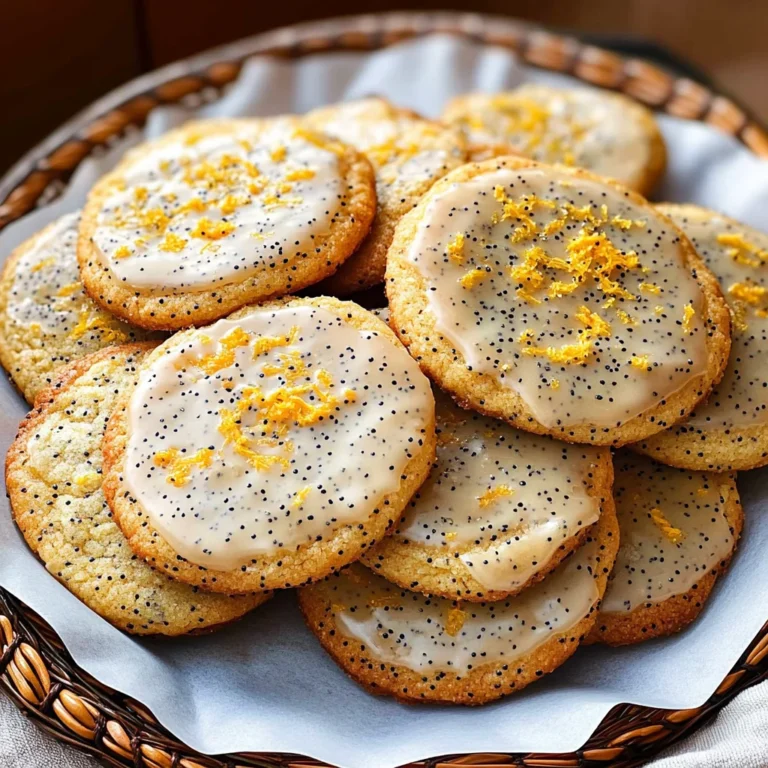
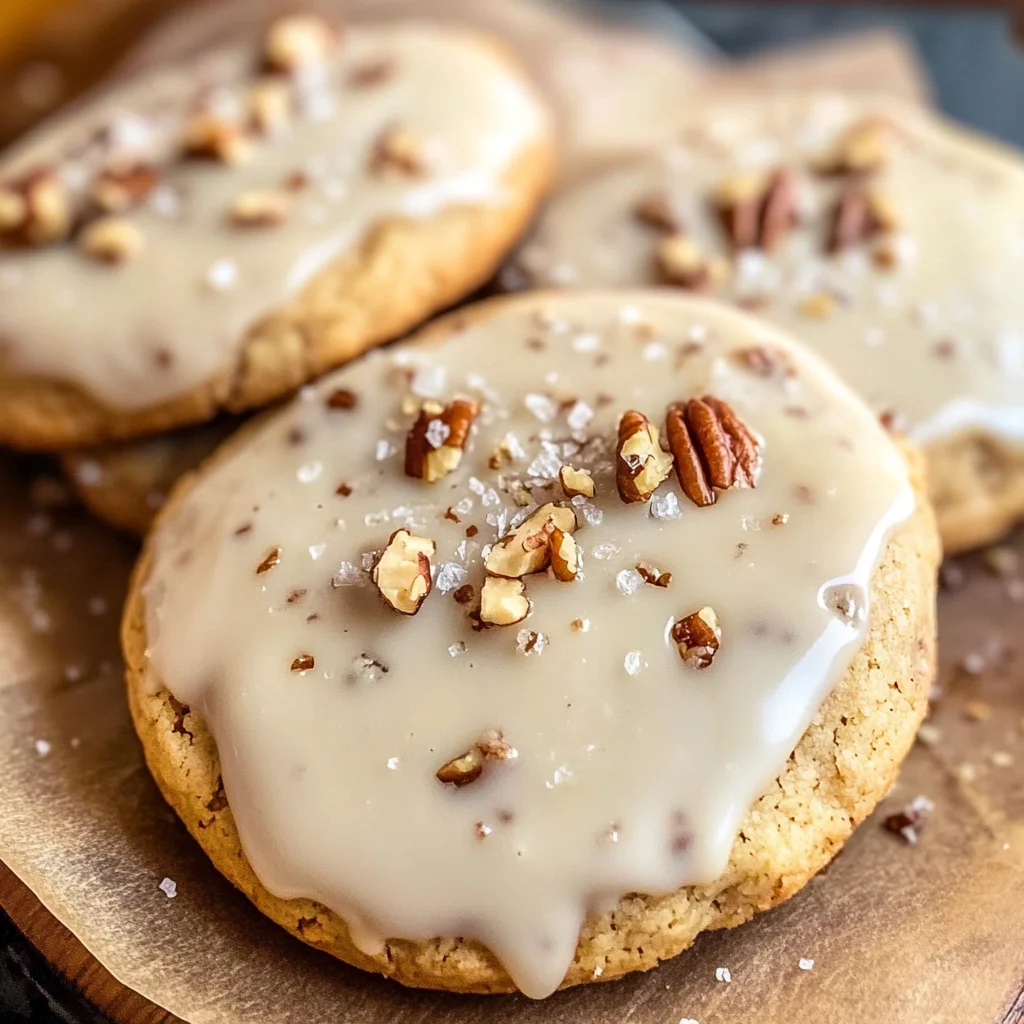
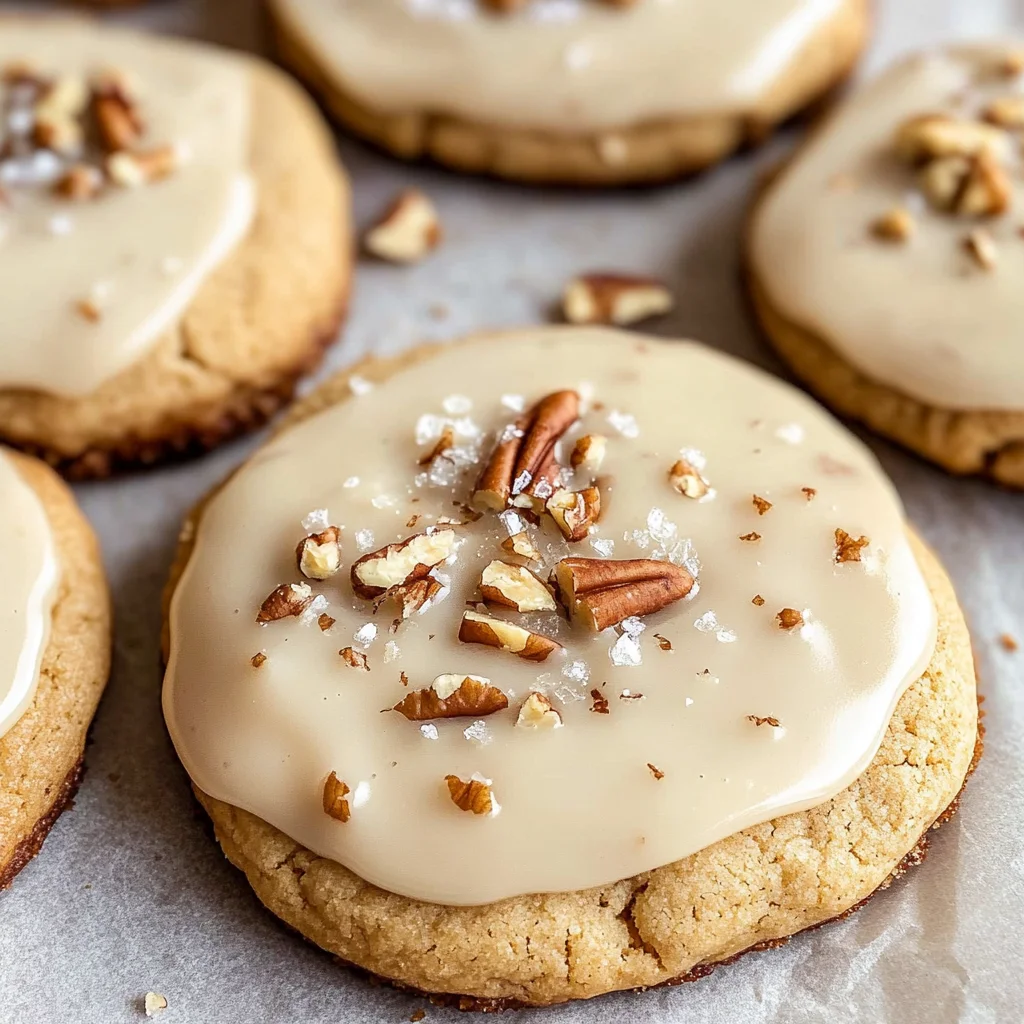
Soft Maple Cookies with Brown Butter Icing
There’s something utterly intoxicating about the first whiff of freshly baked cookies wafting through the house, isn’t there? It’s a sensory embrace that transcends just the act of baking; it invites us into a world where warmth and sweetness meld seamlessly. Today, I’m thrilled to share with you my cherished recipe for Soft Maple Cookies with Brown Butter Icing—a delightful creation that perfectly marries nostalgia with modern taste. Imagine biting into a chewy cookie, rich with the deep, earthy notes of pure maple syrup, followed by the luxurious drizzle of creamy brown butter icing that adds an irresistible nuttiness. Each bite is not just a treat; it’s a moment of bliss, an experience that brings joy to your heart and comfort to your soul.
As the leaves turn to gold and the air carries that crisp hint of autumn, these cookies become more than just a dessert; they’re an invitation to gather around the table, share stories, and create memories. The rich flavor profile of maple syrup evokes feelings of home and hearth—an ode to simpler times spent with family in cozy kitchens filled with laughter and love. Trust me when I say that these cookies will not only satisfy your sweet tooth but will also serve as a bridge connecting generations through their universally appealing flavor. So let’s embark on this delicious journey together!
Soft Maple Cookies with Brown Butter Icing: A Cozy Fall Delight
Are you ready to make some magic in the kitchen? These Soft Maple Cookies are incredibly easy to whip up yet offer a depth of flavor that feels like you’ve spent hours crafting them. With pantry staples combined with premium ingredients like pure maple syrup and nutty brown butter, this recipe is sure to impress everyone who takes a bite. Let’s dive in!
Ingredients:
Embarking on this culinary journey begins here as we gather our ingredients—each one plays a crucial role in creating these enchanting cookies.
- 2 3/4 cups all-purpose flour. Flour is often referred to as the backbone of baking, providing structure and stability. In this recipe, all-purpose flour strikes a perfect balance between tenderness and chewiness, ensuring our cookies remain soft yet sturdy enough to hold up under the luscious brown butter icing. When measuring flour, be gentle; scooping directly from the bag can compact it too much, leading to denser cookies than we desire.
- 1 tsp baking soda. This leavening agent is essential for creating those beautiful little pockets of air within our cookies, giving them lift and helping them achieve that delightful soft texture we crave. It reacts with acidic ingredients—in our case, the maple syrup—to create carbon dioxide bubbles during baking, which helps our cookies rise beautifully.
- 1/2 tsp fine sea salt. A touch of salt enhances all flavors present in baked goods; it’s like a secret ingredient that amplifies sweetness while balancing out richness. Using fine sea salt allows it to dissolve easily into our dough without leaving gritty bits behind.
- 1 tsp ground cinnamon. Cinnamon brings warmth and depth to these cookies while echoing those comforting fall vibes we adore. Its fragrant aroma transports us straight into an autumnal wonderland, making each bite feel like a warm hug.
- 1/2 cup unsalted butter, softened to room temperature. This is crucial for creaming properly and creating that light, airy texture we’re aiming for in our Soft Maple Cookies with Brown Butter Icing. If your butter is too cold, it won’t cream effectively; if it’s melted, your cookies will spread too much. The quality of butter matters here—European-style butter with higher fat content will give you even richer results.
- 1 cup packed brown sugar. This ingredient infuses our cookies with moisture and distinct caramel flavor thanks to its molasses content. Packing it tightly ensures we’re getting every ounce of sweetness we need for those chewy centers while also contributing to the gorgeous color.
- 1/2 cup pure maple syrup (Grade A Dark recommended). Here’s where the magic truly happens! Pure maple syrup adds unparalleled depth and complexity; its rich flavor profiles are not only delicious but also evoke memories of cozy mornings filled with pancakes drizzled in liquid gold. Not all syrups are created equal—opt for real maple syrup instead of imitation for authentic taste.
- 1 large egg, at room temperature. Eggs serve as binders in baking while adding both moisture and richness to our cookie dough. Using eggs at room temperature helps them incorporate more smoothly into the batter—it’s one small step toward cookie perfection!
- 1 tsp pure vanilla extract. Vanilla rounds out flavors beautifully while adding its own hint of warmth—a true ally in any sweet treat! Always choose pure vanilla extract over imitation for optimal depth; your taste buds will thank you later.
- 1/4 cup unsalted butter (to brown). Browning this butter transforms it into something utterly divine—creating nutty aromas that enhance our icing’s flavor dramatically! This process gives our icing its signature complexity while infusing everything with sumptuousness.
- 1 1/2 cups powdered sugar, sifted. Powdered sugar creates that silky smooth texture we want in our icing while ensuring no lumps disrupt its glossy finish. Sifting also helps aerate it slightly so we can achieve optimal consistency—it may seem minor but trust me on this one!
- 2 Tbsp pure maple syrup for drizzling or dipping those glorious cookies post-bake! Just as before, opt for high-quality syrup here—it serves as both sweetener and flavor enhancer!
- 1–2 Tbsp milk or cream (as needed for consistency)—this ingredient helps us achieve desired pourability in our icing while maintaining its creamy richness without overpowering those lovely maple notes.
- 1/4 tsp ground cinnamon (optional)—a sprinkle adds another layer of warmth if desired! Feel free to skip if you’re not feeling extra-spicy!
- Lastly, flaky sea salt or chopped toasted pecans for sprinkling atop those lovely iced creations right before they set—the touch of salt enhances sweetness beautifully while toasted pecans add delightful crunch!
Equipment You’ll Need:
Before we get into the nitty-gritty steps of making these Soft Maple Cookies with Brown Butter Icing, let’s talk about some essential tools you’ll want by your side during this delicious adventure! Having the right equipment can make all the difference between good baking experiences and truly great ones—let’s ensure we’re fully equipped!
- Mixing bowls – A set including various sizes is invaluable when working through different stages of mixing ingredients together—from dry components in larger bowls down to smaller ones for wet mixtures or icings.
- Stand mixer or hand mixer – While you can mix by hand if you’re feeling strong (and very patient!), using an electric mixer streamlines things significantly! It makes creaming butter easier—which is key when aiming for lightness—and ensures proper incorporation without tiring out your arm muscles before cookie creation even begins!
- Rubber spatula – This handy tool works wonders at scraping down sides of bowls so nothing goes unincorporated! It’ll help ensure everything gets mixed evenly—no sad flour streaks left behind here!
- Baking sheets lined with parchment paper – Lining your sheets prevents sticking while allowing even browning—all good things! Plus cleanup becomes effortless afterward since flavors don’t cling stubbornly onto metal surfaces.
Now that we’ve gathered both ingredients and equipment fit for success let’s dive headfirst into preparing these divine treats together!
Step 1: Whisking Together Dry Ingredients
In a medium bowl—a space where dry ingredients come together magically—you’ll whisk together the flour, baking soda, salt, and cinnamon until they’re evenly combined like old friends at a reunion! This step ensures uniformity throughout each cookie bite so every single one has just as much flavor impact as another does—a beautiful harmony achieved through careful merging! Whisking also aerates these components slightly—a little fluff before everything meets its buttery counterpart later on!
Step 2: Creaming Butter & Sugar
Next up comes what I fondly call the magic moment—creaming together softened unsalted butter along with packed brown sugar using either your stand mixer fitted with paddle attachment or trusty hand mixer set at medium speed until lightened in color and fluffy (this should take about 2–3 minutes). Scrape down sides regularly so everything incorporates evenly—it’s worth taking this time early on because well-creamed mixture leads directly towards achieving perfectly tender outcomes later during baking process!
Step 3: Bringing in Sweetness
Once your mixture looks airy like clouds drifting across blue skies above—add pure maple syrup gradually beating until completely blended throughout—the aroma alone should send shivers down spines making mouths water instantly at thought! Then crack open one lovely egg (that should be at room temperature) along alongside vanilla extract before continuing till just combined—that means no more visible streaks remain but still keeping some texture intact—which sets stage nicely ahead!
Step 4: Folding in Dry Components
Now comes perhaps one of most critical steps—the introduction phase where dry ingredients meet wet goodness gradually on low speed until flour streaks disappear completely—but don’t overmix here folks; this part requires gentle folding motions rather than vigorous stirring lest toughness emerges instead…so take care not rush through—it will reward patience tenfold once baked! Afterward cover dough tightly before chilling it adequately (at least an hour) allowing flavors deepen further whilst preventing excess spread during bake time later on…trust me when I say waiting pays off magnificently bringing forth delights beyond measure once finished!
Stay tuned because next we’ll explore how to bring those chilled cookie dough balls into existence alongside crafting luscious icing that’ll crown each masterpiece beautifully…
Step 5: Chill for Flavors to Marry and Dough to Firm Up
Now, this is where the magic truly begins! After you’ve mixed your soft cookie dough—oh, the smell of that maple syrup is already enchanting—it’s time to cover it up and pop it into the refrigerator. You’ll want to chill this dough for at least one hour, but if you can wait a bit longer—up to three days—that’s even better! Why chill, you ask? Well, allowing the dough to rest not only firms it up, preventing those glorious cookies from spreading too much in the oven, but it also gives the flavors a chance to meld together beautifully. It’s all about that depth of flavor; think of it as giving your cookies time to marinate in their own deliciousness.
Trust me on this: patience is key here! As the dough chills, it gets easier to scoop and shape without becoming a sticky mess. Plus, you’ll find that the subtle sweetness of the maple syrup intensifies, creating a flavor profile that’s utterly intoxicating. So, while you’re waiting, maybe pour yourself a cup of tea or coffee and dream about how delightful these cookies are going to be!
Step 6: Preheat Your Oven and Prepare for Baking Bliss
Once your dough has chilled and you’re practically bursting with excitement (I know I am!), it’s time to preheat your oven to 350°F (175°C). This temperature is absolutely paramount because it ensures that your cookies bake evenly without drying out. While your oven warms up, line two baking sheets with parchment paper. This simple step makes cleanup a breeze while also preventing any sticking; we want your cookies sliding right off without any fuss!
Now comes the fun part—scooping out those delightful little dollops of dough! Using a tablespoon or a cookie scoop (which I wholeheartedly recommend for uniformity), measure out about 1.5 tablespoons of dough for each cookie, spacing them about two inches apart on your prepared baking sheets. Don’t rush this step; gentle hands will yield soft edges and perfectly round cookies once baked. Just picture those warm treats emerging from the oven, golden around the edges yet perfectly soft in the center. Bake them for about 10–12 minutes until they are lightly golden on the edges but still look just set in the middle; they should feel slightly puffy when you touch them gently.
Step 7: Mastering Brown Butter Icing—The Sweet Crown Jewel
While your cookies are baking and filling your kitchen with that heavenly scent reminiscent of cozy autumn afternoons (seriously, can you smell it?), let’s turn our attention to making that decadent brown butter icing that will transform these soft maple cookies into something truly extraordinary. Grab a light-colored saucepan—this is important because it allows you to see the color change in the butter more easily—and melt 1/4 cup of unsalted butter over medium heat. As you watch it melt into liquid gold, keep an eye on it as you gently swirl the pan; this technique helps prevent burning while also encouraging even cooking.
You’ll notice as the butter begins foaming that delightful nutty aroma starts developing—that’s when things get exciting! Continue cooking until those tiny brown bits form at the bottom of the pan and impart an intensely rich flavor. This step is crucial because those browned bits are what give our icing its distinctive taste—a symphony of flavors that pairs so beautifully with maple. Once you’ve reached that perfect nutty smell and light brown color (about 4-5 minutes), immediately pour it into a heatproof bowl; stopping further cooking is non-negotiable here! Now whisk in sifted powdered sugar and pure maple syrup until smooth—the texture should be thick yet pourable.
If needed, add milk one tablespoon at a time until you’ve achieved an ideal consistency for dipping or drizzling; this might take just one or two tablespoons depending on how thick your icing turned out. If you’re feeling adventurous, don’t hesitate to mix in some optional cinnamon for added warmth—it complements everything so beautifully!
Step 8: The Joyful Assembly—Dipping Cookies in Icing
With your cookies now cool enough to handle (allow at least five minutes on the baking sheet before transferring them to a wire rack), it’s finally time for one of my favorite parts—the icing! Grab each cookie and dip its top into that creamy brown butter icing; let excess drip back into the bowl because we don’t need any waste here! Alternatively, if you’re feeling particularly artistic (or just want an easier clean-up), you can use a spoon or piping bag to drizzle it over each cookie instead.
While the icing is still wet—this is absolutely paramount—you’ll want to sprinkle them with flaky sea salt or some finely chopped toasted pecans for an extra touch of indulgence. The contrast between sweet and salty creates such an unforgettable bite every single time! Allow them to set for about thirty minutes before serving; during this time, you’ll witness how beautifully they firm up while still retaining their soft essence inside.
Final Touches: Relishing Every Bite
After all that careful preparation and patience, you’re now ready to enjoy these Soft Maple Cookies with Brown Butter Icing! Each bite promises layers of flavor—from that luscious maple sweetness enveloped by nutty hints from brown butter—and trust me when I say they are profoundly satisfying. Whether you’re sharing them with loved ones or keeping them all for yourself (no judgment here!), I promise these cookies will bring warmth and joy with every single crumb.
So gather around with friends or family—perhaps alongside a warm mug of cider—and savor these delightful creations together. Cooking isn’t just about feeding ourselves; it’s about creating memories filled with laughter and love around our tables. Enjoy every moment—you deserve it!
Storage and Enjoyment Tips for Your Soft Maple Cookies with Brown Butter Icing
Now that your kitchen is filled with the warm, sweet aroma of freshly baked Soft Maple Cookies with Brown Butter Icing, it’s time to dive into the delightful world of enjoying them! Trust me, these cookies are not only delicious right out of the oven but also have a wonderful way of bringing joy long after baking day. Whether you’re savoring one with your morning coffee or sharing them with loved ones, knowing how to store and preserve their magic will ensure they’re just as delightful days later.
Storing Leftover Soft Maple Cookies with Brown Butter Icing
To keep your Soft Maple Cookies at their best, make sure to store them in an airtight container at room temperature. This is absolutely paramount for preserving their soft texture and delectable flavor. Ideally, they’ll last about a week this way. If you want to take it a step further, consider placing a slice of bread in the container; it works wonders for maintaining moisture! Yes, it may sound quirky, but the bread absorbs excess air and keeps those cookies wonderfully chewy. Even after a few days, you’ll find that the cookies retain their rich maple essence and delightful chewiness, almost like they were just made! When you’re ready to indulge again, simply let them sit out for a few minutes or give them a quick 10-second zap in the microwave to restore that fresh-baked warmth.
Freezing Soft Maple Cookies with Brown Butter Icing for Later
Feeling like you might not finish all those delicious cookies at once? No problem! Freezing these gems is an excellent option that allows you to enjoy your Soft Maple Cookies any time the craving strikes. To freeze properly, lay the cooled cookies on a baking sheet lined with parchment paper and place them in the freezer until they’re solid—about an hour should do it. Once frozen, transfer them to a freezer-safe bag or container where they can stay good for up to three months. When you’re ready to enjoy one (or three), simply remove them from the freezer and let them thaw at room temperature for about 30 minutes. You can also pop them in the microwave for a few seconds if you’re looking for that fresh-out-of-the-oven experience without waiting. The convenience factor here is simply fantastic; imagine having homemade cookies ready at your fingertips whenever you desire!
Soft Maple Cookies with Brown Butter Icing
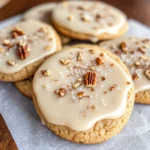
Soft Maple Cookies with Brown Butter Icing are the perfect cozy treat for any occasion. Bursting with the rich flavor of pure maple syrup and topped with a creamy brown butter icing, these soft cookies are sure to delight your taste buds. With their chewy texture and delightful nutty sweetness, they evoke the warmth of home and create wonderful memories when shared with loved ones. Whether enjoyed fresh from the oven or saved for later, these cookies encapsulate the essence of fall baking.
- Prep Time: 30 minutes
- Cook Time: 12 minutes
- Total Time: 42 minutes
- Yield: Approximately 24 cookies 1x
- Category: Dessert
- Method: Baking
- Cuisine: American
Ingredients
- 2 3/4 cups all-purpose flour
- 1 tsp baking soda
- 1/2 tsp fine sea salt
- 1 tsp ground cinnamon
- 1/2 cup unsalted butter (softened)
- 1 cup packed brown sugar
- 1/2 cup pure maple syrup
- 1 large egg (room temperature)
- 1 tsp pure vanilla extract
- 1/4 cup unsalted butter (for browning)
- 1 1/2 cups powdered sugar (sifted)
- 2 tbsp pure maple syrup (for icing)
- Milk or cream as needed for icing consistency
Instructions
- Preheat oven to 350°F (175°C) and prepare baking sheets by lining them with parchment paper.
- In a bowl, whisk together flour, baking soda, salt, and cinnamon; set aside.
- In a mixing bowl, cream softened butter and brown sugar until light and fluffy. Gradually mix in maple syrup, egg, and vanilla until well combined.
- Slowly incorporate dry ingredients into wet mixture until just combined. Chill dough in the refrigerator for at least one hour.
- Scoop dough onto prepared baking sheets, spacing them about two inches apart. Bake for 10–12 minutes or until lightly golden around the edges.
- For the icing, brown the additional butter in a saucepan over medium heat; whisk in powdered sugar and maple syrup until smooth. Adjust consistency with milk if necessary.
- Once cookies are cool, dip tops into icing and let set.
Nutrition
- Serving Size: 1 serving
- Calories: 150
- Sugar: 9g
- Sodium: 70mg
- Fat: 6g
- Saturated Fat: 4g
- Unsaturated Fat: 2g
- Trans Fat: 0g
- Carbohydrates: 23g
- Fiber: <1g
- Protein: <1g
- Cholesterol: <5mg