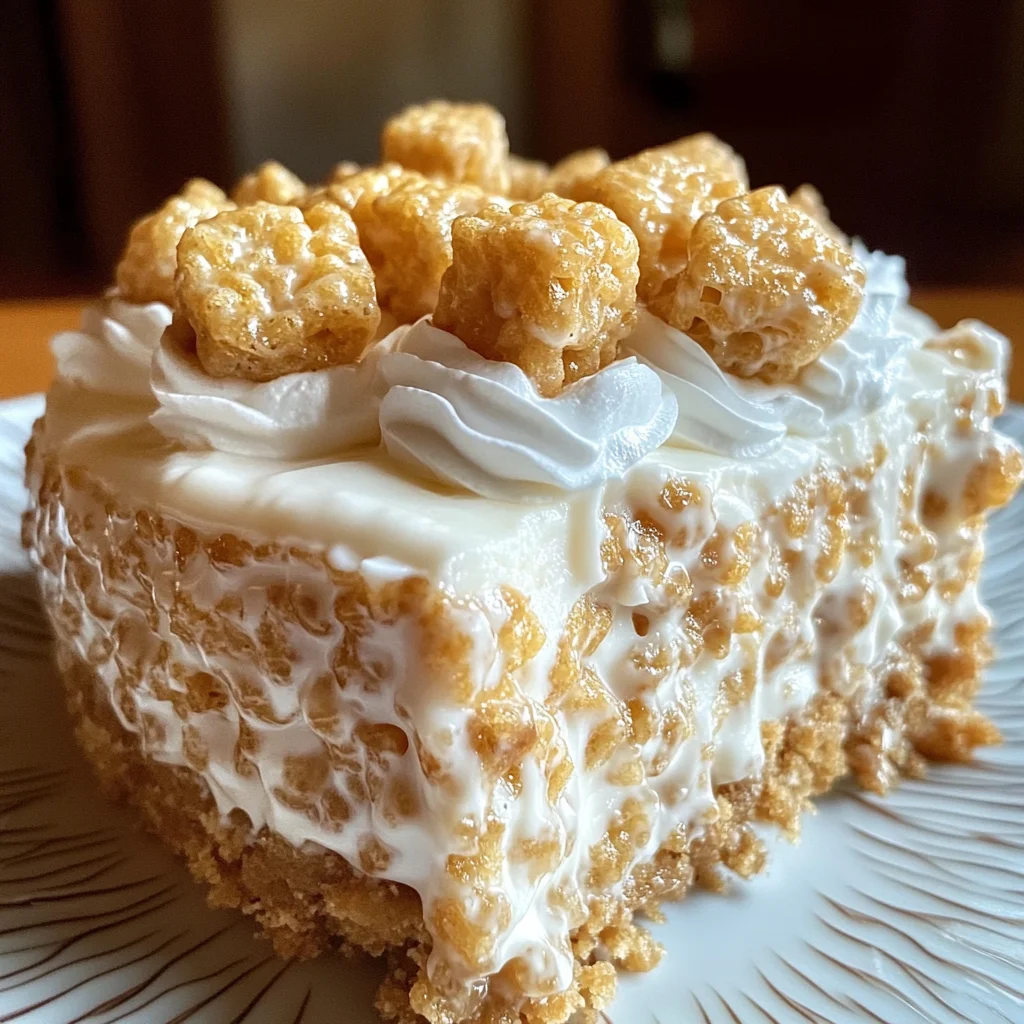
Rice Krispy Treat No-Bake Cheesecake
There’s something deeply nostalgic about the combination of crunchy Rice Krispies and creamy cheesecake that can transport you back to carefree childhood days. Each bite of this Rice Krispy Treat No-Bake Cheesecake is not just a dessert; it’s an experience, a joyful reunion of textures and flavors that whispers tales of laughter-filled gatherings and playful afternoons. The gooey richness of melted marshmallows intertwined with the airy sweetness of whipped cream creates a symphony of flavors that dances on your palate. Trust me, once you slice into this delightful creation, you’ll feel like a kid again, indulging in the ultimate treat that somehow manages to be both comforting and exciting.
As we embark on this culinary adventure together, I promise you it’s not just about putting ingredients together—it’s about crafting memories. This no-bake cheesecake is perfect for any occasion: birthday parties, family get-togethers, or even a cozy night in when you’re craving something sweet but want to keep things simple. The juxtaposition of the creamy filling against the crispy crust is nothing short of extraordinary, making it a dessert that appeals to both kids and adults alike. So gather your ingredients, roll up your sleeves, and let’s make magic happen in the kitchen!
Rice Krispy Treat No-Bake Cheesecake: A Creamy Delight with Crunchy Charm
In this recipe, we combine two beloved treats—the classic Rice Krispy treat and the rich decadence of cheesecake—into one easy-to-make masterpiece that requires no baking at all! Perfect for those hot summer days when turning on the oven feels like a crime, this dessert is as fun to make as it is to eat. Plus, it invites creativity; feel free to customize it with your favorite toppings or mix-ins! Let’s dive into the ingredients that bring this delightful dish to life.
Ingredients:
As we prepare to whip up our Rice Krispy Treat No-Bake Cheesecake, let’s take a moment to appreciate each ingredient’s role in creating this magical dessert. Every component has been chosen not just for its flavor but also for its ability to contribute texture and harmony throughout the dish.
- 6 cups Rice Krispies cereal. This iconic cereal isn’t just for breakfast; it forms the backbone of our crust! It provides that satisfying crunch which perfectly contrasts with the creamy filling we’ll create later. When selecting your Rice Krispies, opt for fresh boxes—stale cereal won’t give you that delightful snap and could lead to a less-than-perfect texture. Remember that each bite should have a playful crunch!
- ¼ cup salted butter. This golden delight adds richness and depth while helping bind our crust together. Butter also plays a crucial role in balancing sweetness; without it, our dessert could taste overly sugary. Make sure your butter is at room temperature before melting—it’ll ensure smoother incorporation with the marshmallows later on.
- 1 (10 oz) bag miniature vegan marshmallows. These little puffs are essential for achieving that gooey texture we all love in Rice Krispy treats. Vegan marshmallows melt beautifully without any animal-derived gelatin and provide just the right amount of sweetness. Look for brands that offer fluffy textures to get optimal results; they should melt seamlessly into your butter.
- 1 (8 oz) block cream cheese, softened. Cream cheese brings a luscious creaminess that forms the base of our cheesecake filling, giving it that signature tangy flavor we adore. Softening it beforehand is non-negotiable because cold cream cheese can lead to lumps in your mixture—a smooth cheesecake is what we’re aiming for!
- ½ cup granulated sugar. Sugar not only sweetens but also contributes to the overall structure by maintaining moisture within our filling. I always recommend using granulated sugar here rather than brown sugar because we want that clean flavor profile without added molasses notes competing with our vanilla essence.
- 1 tsp pure vanilla extract. This liquid gold elevates our cheesecake’s flavor profile by adding warmth and complexity—think of it as the secret ingredient that makes everything just sing! Always opt for pure vanilla extract over imitation varieties if your budget allows; trust me—the difference in flavor will be worth it.
- 1 (7 oz) jar vegan marshmallow crème (e.g., Fluff). Here’s where things get really exciting! Marshmallow crème adds extra gooeyness and enhances the overall texture of our cheesecake filling while keeping everything light and airy—a key element in no-bake desserts.
- 1 (8 oz) tub Cool Whip, thawed. This whipped topping acts like a cloud of happiness in our filling—lightening it up while ensuring every bite melts in your mouth! If you’re looking for alternatives due to dietary preferences or restrictions, homemade whipped coconut cream can be an excellent substitute.
- Whipped cream (homemade or canned). To top off our cheesecake beautifully, whipped cream adds not just decoration but also another layer of creamy indulgence alongside those delicious cubed treats we’ll sprinkle on top later.
- Cubed store-bought or homemade Rice Krispy Treats. These playful cubes add whimsy and nostalgia—it wouldn’t be complete without them! You can use store-bought ones for convenience or make them from scratch if you’re feeling adventurous; either way will bring joy and familiarity to each serving!
Equipment You’ll Need:
Having the right tools can truly enhance your cooking experience—it makes everything smoother and more enjoyable as you craft this delicious masterpiece together! While these may not be ingredients per se, they are essential partners in bringing our vision to life.
- 9- or 10-inch springform pan – This pan is perfect for creating layered desserts because it allows you to easily release your cake after chilling without disturbing its shape—an absolute must-have for cheesecakes! If you don’t have one on hand, a regular cake pan lined with parchment paper could work too; however, keep in mind releasing might be slightly trickier.
- Large mixing bowl – A sturdy bowl is indispensable when mixing up all those delicious layers—from combining cereal with melted marshmallows to blending together our creamy filling ingredients! Choose one that’s large enough so everything has plenty of space while mixing; mess-free preparation means less stress!
- Medium saucepan – You’ll need this crucial tool for melting butter and marshmallows together beautifully over low heat—a process known as emulsifying—which ensures everything blends seamlessly into one luscious mixture before pouring over those crispy cereals below!
- Spatula – A good rubber spatula will become your best friend here; it helps scrape every last bit out from bowls while ensuring gentle folding techniques remain intact during assembly—that lightness we’re aiming for depends heavily on how well we incorporate air into mixtures!
Step 1: Prepping Your Pan Like A Pro
The first step might seem simple but trust me—it sets up everything else beautifully! Generously grease your springform pan with nonstick spray; this small yet crucial action prevents sticking later on when it’s time to release our lovely creation from its mold after chilling. If there are any sticky spots left behind post-chill—oh no!—you’ll find yourself wrestling with bits instead of enjoying those glorious slices you’ve crafted so lovingly.
Step 2: Crafting The Perfect Crust
Now let’s dive into making that heavenly crust—you know, where all the magic starts! In a large bowl, pour in those crisp Rice Krispies cereal bits—they’re what give us such delightful crunch within each bite! Meanwhile, grab your medium saucepan and melt together salted butter alongside vegan marshmallows over low heat—this process requires patience as you stir constantly until completely smooth (about 5 minutes). It’s essential not just simply toss everything together at once because if done incorrectly? You risk ending up with clumps instead of those silky strands we’d like winding through each piece later on… So take this time seriously—those flavors deserve careful attention!
Step 3: Forming The Crust Like An Artist
Once you’ve achieved that creamy blend resembling liquid gold flowing freely from spoon back into bowl—immediately pour it over prepared rice cereals waiting patiently nearby—and mix until every single flake gets coated evenly (no one likes dry bites!). Then transfer this sticky cereal harmony straight into greased springform pan using greased spatula or glass bottom pressing firmly downwards creating sturdy base & slightly upward along sides so they hold their shape nicely once chilled out later… Allowing these layers some time away from heat lets settle comfortably at room temp before diving right into next steps ahead!
Step 4: Preparing The Creamy Filling
With our crust now patiently setting itself aside—let’s focus on crafting what truly makes this dish sing: THE FILLING! Grab yourself either stand mixer or large bowl along with softened cream cheese ready awaiting transformation into whipped perfection shortly… Beat together until smooth (just about minute should do!) along side granulated sugar paired alongside sumptuous vanilla extract infusing warmth throughout—it’s moments like these where scents wafting around remind us why we love baking so much! Next comes adding vegan marshmallow crème followed by gently folding Cool Whip carefully through hand-held spatula ensuring airy texture stays intact while incorporating fully… Remember here: don’t rush this step because if skipped? Filling ends up dense rather than delightfully light—and who wants THAT?
As we continue through these steps towards assembling something beautiful worthy enough memories made around family tables shared fondly amongst friends… You’re doing amazing—keep going strong as next steps await us right around corner ready shine bright soon enough too…
Step 5: Filling the Crust with Creamy Bliss
Now that your crust has set into a delightful, sturdy base, it’s time to bring the magic of flavors together in the filling. In a stand mixer or a large mixing bowl, take the softened cream cheese—a crucial ingredient because it gives our cheesecake its luscious texture and rich flavor. You want to beat this together with the granulated sugar and pure vanilla extract until it transforms into a smooth, creamy mixture. This process should take about one minute, but don’t rush! You’re looking for that velvety consistency that feels almost like liquid gold slipping through your fingers.
Once you’ve achieved that creamy goodness, it’s time to add in the vegan marshmallows crème. This ingredient is absolutely paramount as it not only adds sweetness but also lends an airy lightness to the filling. Mix until fully incorporated; you should see a beautiful blend of colors and textures coming together. Now, here comes the fun part—gently fold in the thawed Cool Whip! Trust me on this: using a spatula and folding instead of stirring will help retain that heavenly fluffiness we love so much in desserts. Be gentle here; we want every bit of air to stay trapped inside this mixture, creating a luscious filling that will melt in your mouth when you finally take that first bite.
Step 6: Assembling Your No-Bake Cheesecake Masterpiece
With your crust ready and the filling whipped up into a dreamy concoction, it’s time to pour this luxurious mixture into that beautiful crust you created earlier. Carefully transfer the cheesecake filling into your springform pan, taking care not to disturb the crust too much—after all, we want it to remain intact! Using an offset spatula or even just the back of a spoon, smooth out the top gently until it’s nice and even. This step might seem simple, but ensuring an even surface is non-negotiable for presentation later; nobody wants a lopsided slice of cheesecake!
The visual cue here is important: you want your filling to seamlessly blend with the crust without any gaps or holes. Once you’ve smoothed it out beautifully, take a moment to admire your work! It’s always such a satisfying sight—the way those layers come together feels like art, doesn’t it? Now comes another critical step: let’s chill this masterpiece in the refrigerator for at least two hours. Why chill? Well, during this time, the filling will firm up and hold its shape when sliced—a transformation that is truly extraordinary! Not allowing enough chilling time could result in slices that crumble rather than hold their form.
Step 7: The Chilling Process: A True Test of Patience
I know waiting can be tough—especially when you’re excited about indulging in something so delicious—but I promise you that this patience is worth every second! As your Rice Krispy Treat No-Bake Cheesecake chills away in its cool haven, something magical happens: all those flavors meld together beautifully. The cream cheese develops depth while being perfectly complemented by that sweet marshmallow crème and light Cool Whip.
When I say at least two hours, I mean it as a minimum; if you can allow it to sit for three hours or even overnight, you’ll yield an even firmer filling with layers of flavor that are simply intoxicating! The cool temperature helps stabilize everything so when you cut into it later, each slice will reveal those gorgeous layers without collapsing under pressure. Just think about how rewarding it’s going to feel when you serve up each slice—perfectly formed and glistening with joy!
Step 8: Garnishing & Serving with Love
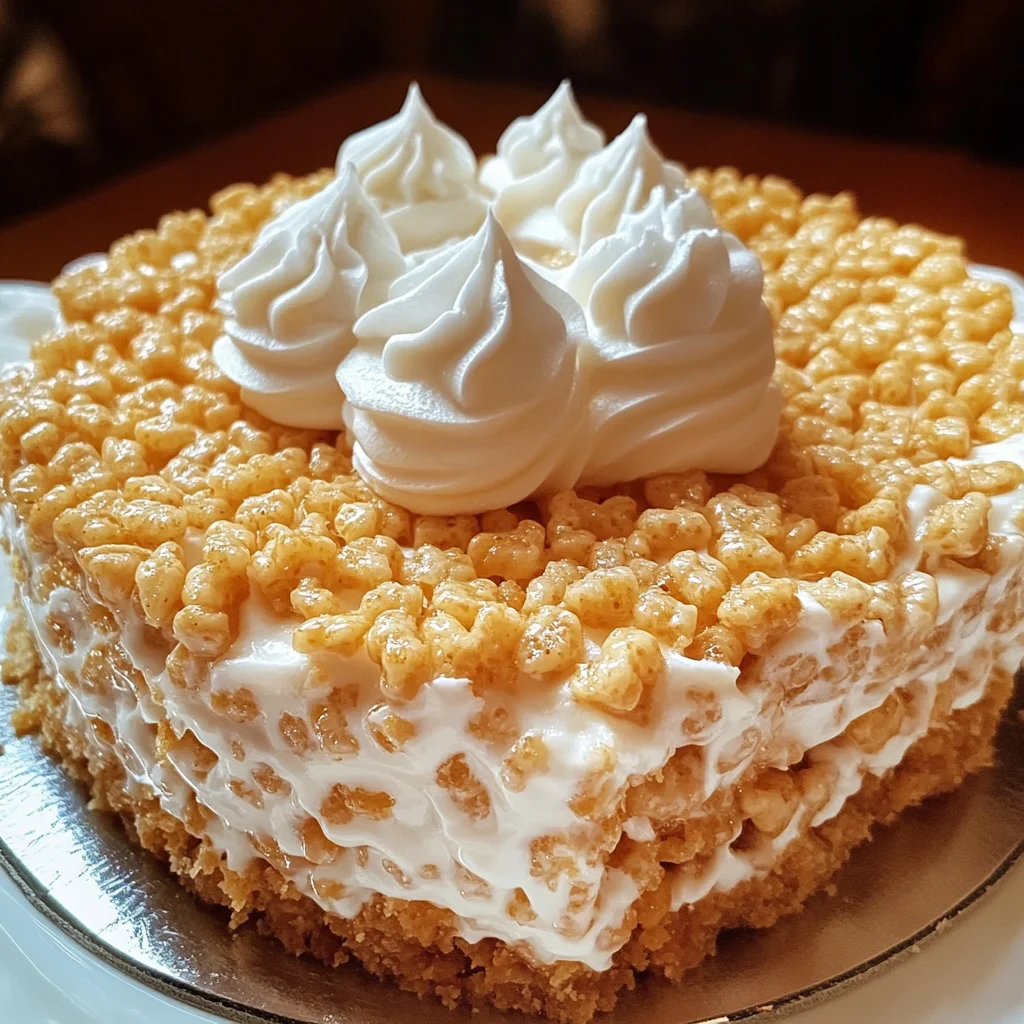
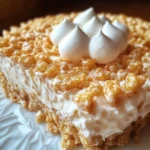
Finally! The moment has arrived where we can put on those final touches before presenting our stunning creation to family or friends—or perhaps just treating yourself (you deserve it!). Before serving up your Rice Krispy Treat No-Bake Cheesecake, grab some whipped cream—whether it’s homemade or straight from a can—and pipe or dollop it around the edge of your cheesecake like fluffy clouds resting atop a mountain peak. Not only does this add elegance and flair to your dessert; it also invites everyone in for a taste of what lies beneath!
Now for my favorite part: adorning our cheesecake with cubed Rice Krispy Treats on top! This playful addition not only enhances presentation but also adds texture and nostalgia—who can resist those chewy bites paired with creamy bliss? When you’re ready to serve, carefully release the springform collar—it’s like unveiling an artistic masterpiece you’ve created after patiently nurturing all those layers! To slice through this beauty cleanly, dip your knife in hot water first; wiping between cuts ensures those pristine edges remain sharp.
As you prepare to indulge in this delightful treat filled with childhood memories and sweet moments, remember: every bite is not just dessert—it’s an experience designed to evoke joy and happiness among family and friends alike. Enjoy every mouthful of this Rice Krispy Treat No-Bake Cheesecake; trust me—you’ll be reminiscing about its profound satisfaction long after it’s gone!
Storage and Enjoyment Tips for Your Rice Krispy Treat No-Bake Cheesecake
Now that your Rice Krispy Treat No-Bake Cheesecake has set beautifully in the fridge, it’s time to indulge in this delightful dessert! Trust me when I say that every bite is a playful reminder of childhood, with its creamy filling and crispy crust dancing together in perfect harmony. But before you dive in headfirst, let’s talk about how to best preserve this little masterpiece so you can savor its deliciousness for days to come.
Storing Leftover Rice Krispy Treat No-Bake Cheesecake
To keep your Rice Krispy Treat No-Bake Cheesecake fresh and delightful, I recommend storing any leftovers in an airtight container. A glass container works wonders as it helps maintain the cheesecake’s moisture and flavor while preventing it from absorbing any unwanted odors from the fridge. If you’ve made multiple layers or have decorated the top with whipped cream, just be careful when placing the lid on; you don’t want anything to mess up that gorgeous presentation! This dessert will stay fresh for up to five days in the refrigerator, although I promise you it might not last that long once your friends get a taste! One pro tip I love is to place a slice of bread in the container with the cheesecake. This little trick works wonders for keeping it moist — no one wants a dry cheesecake experience! After a few days, you’ll find that the flavors meld beautifully; they deepen over time, creating an even more intoxicating flavor profile. When you’re ready to serve again, simply slice through with a warm knife for clean cuts — it’s like cutting through butter!
Freezing Rice Krispy Treat No-Bake Cheesecake for Later
If you find yourself with more than enough cheesecake (or if you’re just planning ahead), freezing is an excellent option! To freeze your delightful creation properly, wrap each slice tightly in plastic wrap and then place them into a sturdy freezer-safe container or bag. This double-wrapping ensures no freezer burn makes its way into your sweet treat! The cheesecake can be frozen for up to three months, which means you could whip up a batch now and enjoy it later during those cozy nights when only something sweet will do. When you’re ready to indulge again, simply transfer a slice from the freezer to the refrigerator to thaw overnight — trust me, it’s like having a little piece of happiness waiting for you! Plus, knowing that such an extraordinary dessert is waiting in your freezer adds just a hint of excitement to those mundane days.
Rice Krispy Treat No-Bake Cheesecake
Dive into this easy Rice Krispy Treat No-Bake Cheesecake recipe that’s fun and creamy—perfect for any occasion. Try making one today!
- Prep Time: 30 minutes
- Cook Time: 0 minutes
- Total Time: 30 minutes
- Yield: Serves approximately 12 slices 1x
- Category: Dessert
- Method: No-Bake
- Cuisine: American
Ingredients
- 6 cups Rice Krispies cereal
- ¼ cup salted butter
- 10 oz bag miniature vegan marshmallows
- 8 oz block cream cheese, softened
- ½ cup granulated sugar
- 1 tsp pure vanilla extract
- 7 oz jar vegan marshmallow crème
- 8 oz tub Cool Whip, thawed
- Cubed store-bought or homemade Rice Krispy Treats for topping
Instructions
- Grease a springform pan with nonstick spray.
- In a large mixing bowl, combine Rice Krispies cereal.
- Melt butter and vegan marshmallows together in a medium saucepan over low heat until smooth. Pour over the cereal and mix well.
- Press the mixture into the bottom of the prepared pan to form the crust.
- In a stand mixer, beat softened cream cheese with granulated sugar and vanilla until smooth.
- Add vegan marshmallow crème and gently fold in Cool Whip until combined.
- Pour filling over the crust and smooth the top.
- Chill in the refrigerator for at least two hours before serving. Top with whipped cream and cubed Rice Krispy Treats before slicing.
Nutrition
- Serving Size: 1 slice (120g)
- Calories: 320
- Sugar: 24g
- Sodium: 150mg
- Fat: 12g
- Saturated Fat: 7g
- Unsaturated Fat: 4g
- Trans Fat: 0g
- Carbohydrates: 48g
- Fiber: 1g
- Protein: 3g
- Cholesterol: 30mg