Peach Tart
Every cook needs a good dessert recipe that can be whipped up anywhere — especially when you’re away from your kitchen and its mixer and rolling pin and comforting gadgets. This Peach Tart is that recipe for me. It’s not just about throwing some ingredients together; it’s an experience, a revelation of flavors and textures that come together in such harmony, you’ll wonder how something so simple can taste so extraordinary. Picture this: the warm aroma of baked peaches wafting through your home, the golden crust cradling juicy fruit, and that delightful crumbly topping just begging to be devoured. I promise you, every bite will transport you to a sun-drenched orchard on a lazy summer day.
The beauty of this tart lies not only in its ease but also in its versatility. You see, it’s more than just a dessert; it’s a canvas for creativity. You can experiment with different fruits depending on the season—nectarines, plums, or even berries would all be delightful! My mother shared this very recipe with me, her hands deftly peeling peaches while mine are happily embracing the skin-on approach for a rustic charm. After all, who wants extra dishes? As we gather around the table to share stories and laughter over this tart, it becomes clear: this is not just food; it’s a bridge between generations, an expression of love that transcends time.
Peach Tart: A Sweet Slice of Summer
Let’s dive into this delightful Peach Tart. It’s easy enough for beginners yet impressive enough to win over any crowd. With just a handful of ingredients and minimal tools required, you’ll find yourself saying goodbye to complicated desserts forever! Trust me when I say that once you’ve made this tart, it will become a staple in your baking repertoire.
Ingredients:
As we embark on this culinary journey together, let’s take a moment to appreciate each ingredient’s role in creating our masterpiece.
- 1 1/2 cups plus 2 tablespoons all-purpose flour. This flour is the foundation of our tart crust; it provides structure while still allowing for that tender bite we crave in desserts. When choosing flour, look for high-quality brands that are unbleached to avoid any off-flavors. The slight added depth from using all-purpose flour will help achieve a perfectly balanced texture that’s neither too crumbly nor too chewy.
- 3/4 teaspoon kosher salt. Salt might seem like an afterthought in sweet recipes, but it’s absolutely paramount here! It enhances the sweetness of our peaches and balances the flavors beautifully. Kosher salt is ideal because its larger flakes dissolve more slowly than fine salt, allowing for better distribution throughout the crust without making it overly salty.
- 3/4 cup plus 1 teaspoon sugar. Sugar is not just about sweetness; it plays multiple roles in our tart—caramelization adds color and depth while contributing to that lovely crunch in our crumble topping. I recommend using natural cane sugar if possible; it has a richer flavor profile compared to regular white sugar.
- 1/4 cup vegetable or canola oil. These oils lend moisture to our crust while keeping things light and flaky without overpowering other flavors. If you’re concerned about health or have allergies, both oils are neutral-tasting options that won’t interfere with the delicate peach essence we’re after.
- 1/4 cup mild olive oil. Ahh, olive oil—the secret weapon! Using half olive oil adds complexity and depth to our crust without making it greasy. Just ensure you choose a mild variety here; we want those fruity notes to dance rather than dominate.
- 2 tablespoons whole milk. This small amount of milk helps bind our ingredients together while adding richness and flavor to the dough without making it heavier than necessary. Whole milk gives us that luscious mouthfeel we desire but feel free to substitute with any non-dairy milk if preferred!
- 1/2 teaspoon almond extract. This ingredient is pure magic! Almond extract brings warmth and depth reminiscent of marzipan—a flavor profile that enhances the sweetness of our peaches beautifully without being too overwhelming. It’s like giving your taste buds a gentle hug.
- 2 tablespoons cold unsalted butter. Butter creates that coveted crispy texture in our crumble topping while providing richness and flavor. The cold temperature is crucial here—working quickly helps keep those little bits intact for optimal flakiness instead of melting into oblivion!
- 3 small ripe peaches (up to 5), pitted and thickly sliced (about 1/2-inch wide). Fresh peaches are undoubtedly the star of our show! Their sweet juiciness transforms under heat into something utterly intoxicating—almost jam-like—as they bubble delightfully within their pastry cradle. When selecting peaches at the market, go for those with a slight give when squeezed gently; they should feel soft yet firm enough not to bruise easily.
Equipment You’ll Need:
Having the right tools makes your cooking experience smoother and more enjoyable—and trust me when I say they play essential roles in creating something wonderful!
- Tart pan – This special pan ensures even baking while providing beautiful scalloped edges that elevate your presentation game! If you don’t have one handy, no worries—you can use any oven-safe dish or even shape aluminum foil into makeshift walls on a baking sheet.
- Mixing bowls – A good set of mixing bowls is indispensable; look for ones with non-slip bottoms so they stay put as you mix vigorously! They allow us to combine ingredients seamlessly without worrying about spills.
- Measuring cups & spoons – Accurate measurements are key to success in baking since even slight variations can alter outcomes dramatically! Invest in sturdy measuring tools that won’t bend or break easily over time—they’re worth every penny!
- Microplane grater – While optional for this recipe specifically, having one on hand for zesting citrus or grating nutmeg adds another layer of flavor whenever needed! They’re incredibly versatile tools to have tucked away in your kitchen arsenal.
Now that we’ve gathered everything we need let’s roll up those sleeves and start preparing our Peach Tart!
Step 1: Preheat & Prepare Your Crust
First things first: preheat your oven to 425 degrees Fahrenheit because timing is everything when it comes down to achieving that perfect bake! While waiting for the oven’s warmth envelops your kitchen like sunshine on an early summer morning, grab your mixing bowl and whisk together 1 1/2 cups flour with 3/4 teaspoon kosher salt and 1 teaspoon sugar until they are well combined—this step evenly distributes these dry ingredients throughout ensuring each bite bursts forth with balanced flavor!
In another smaller bowl (or even better—a measuring jug!), whisk together both oils along with 2 tablespoons whole milk and 1/2 teaspoon almond extract until fully blended—a beautiful liquid gold mixture ready to mingle with our dry friends soon! Pour this concoction directly into your flour mixture then gently fold using a fork until everything feels lightly moistened but don’t worry about overworking it—this dough should remain tender rather than toughened by excessive mixing!
Next comes the fun part: transfer this glorious mixture into your tart pan (or any suitable alternative) before pressing firmly yet gently onto both bottom surfaces as well as up sides until evenly coated throughout—it should be roughly 1/8 inch thick all around (a little thicker at edges adds character!). Trim any excess dough hanging overboard lovingly before patting yourself on the back; we’ve already achieved quite an accomplishment!
Step 2: Craft That Crumble
With our crust settled snugly inside its pan awaiting fruity adornment above like an eager canvas ready for paint strokes—you can now turn attention toward crafting an absolutely divine crumble topping! In another bowl (yes—I know there are many bowls involved!), combine together remaining sugar (3/4 cup), additional flour (2 tablespoons), kosher salt (just 1/4 teaspoon), followed by those glorious butter cubes previously chilled—instead of creaming them which would create airy fluffiness—we’ll pinch them together until resembling coarse pebbles—that textural contrast makes ALL difference later on!
Keep stirring until everything feels delightfully crumbly—as tempting as tasting raw mixtures may seem—resist urge since all these elements work harmoniously once baked yielding flavors far greater than mere snippets could ever convey! Should your chosen peaches happen particularly juicy today don’t fret—simply add another tablespoon flour here which acts like insurance against sogginess while simultaneously thickening juices bubbling beneath surface during baking process itself!
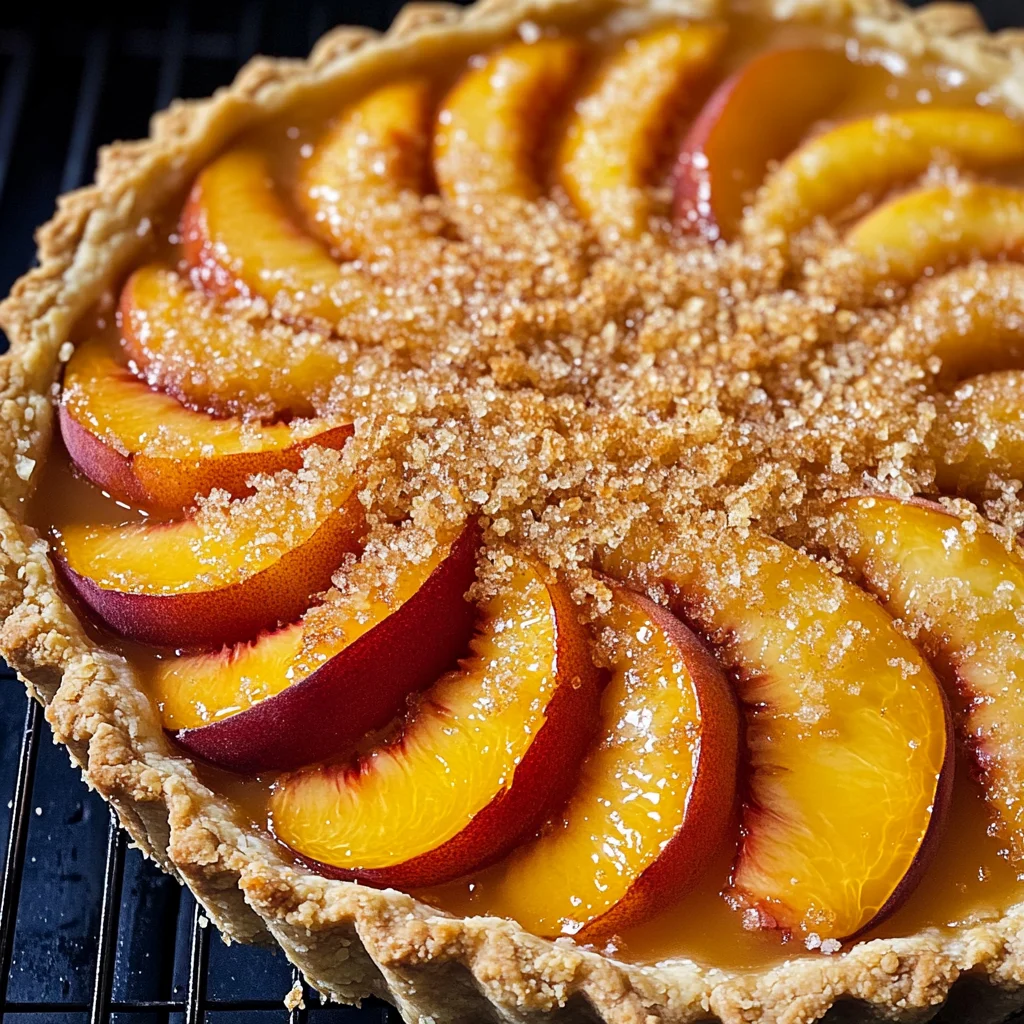
Step 3: Arrange Those Juicy Peaches
Now comes perhaps my favorite part—all those beautiful peach slices await their moment shining brightly atop prepared crust below! Starting from outer edge begin arranging them methodically overlapping slightly inward toward center creating concentric circles—a visual feast unfolding right beneath fingertips as colors playfully entice eyes nearby everyone watching curiously wanting taste-test immediately despite knowing patience rewards most greatly! Fill central space however feels intuitive because each arrangement tells story uniquely yours within layers created…the snugger packed—better results ultimately yield once baked given juices meld fabulously amidst crumbly goodness above…sigh…
Once satisfied sprinkle generously with crumble topping mixture prepared earlier—it may seem generous at first glance but trust me—it’s exactly what this tart deserves—the sheer volume creates crunchy heavenly bites contrasting beautifully soft interiors underneath beckoning eager forks towards them eagerly awaiting release from oven soon enough…
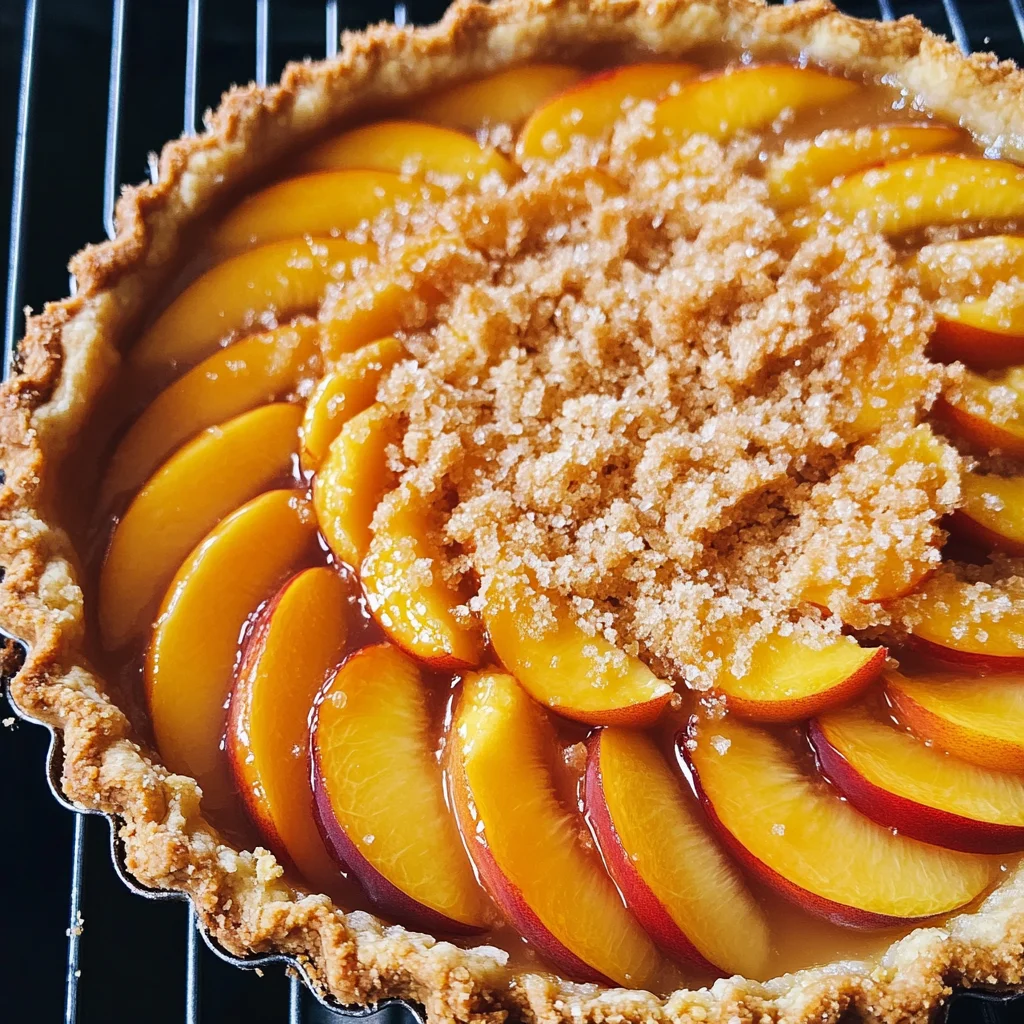
Step 4: Bake Until Golden Brown
Pop your precious creation into preheated oven allowing magic unfold over next thirty-five minutes or so—you’ll know it’s ready when shiny bubbles begin forming beneath surface enveloping beautiful fruit within its embrace alongside edges turning delightfully golden brown signaling success achieved thus far! Keep vigilant though—a watchful eye will prevent burning hazards lurking around corners unexpectedly causing distress amidst excitement building beforehand…the joy awaits patiently just beyond mere minutes now…once finished remove carefully placing atop cooling rack allowing rest period between baking frenzy indulging senses further still ensuring proper slicing later down road too…
And there you have it—the initial steps towards creating an unforgettable Peach Tart filled with love every single bite taken will surely remind everyone why homemade desserts hold such profound significance beyond mere nourishment alone… stay tuned—we’re far from done yet…
Step 5: Creating the Crumble Topping
Now that you have your beautifully pressed tart crust ready, it’s time to prepare the crumble topping—a step that is not only enjoyable but also absolutely crucial for adding texture and flavor to your peach tart. Begin by mixing together 3/4 cup of sugar, 2 tablespoons of flour, and 1/4 teaspoon of salt in a medium bowl. This combination is essential because the sugar sweetens the juicy peaches while the flour absorbs some of their moisture as they bake, ensuring your tart doesn’t turn into a soggy mess. Just imagine how satisfying it will be to bite into a crunchy layer that contrasts with the soft fruit beneath!
Next comes the part where we introduce the butter. You’ll want to add 2 tablespoons of cold, unsalted butter into this mixture. Using your fingers, pinch the butter into the dry ingredients until you achieve a crumbly consistency resembling coarse sand with a few larger pebbles scattered throughout. This process is known as cutting in and is vital because it creates tiny pockets of fat within your topping, which will melt during baking and result in that delightful crispiness we all crave. If your peaches are particularly juicy—think summer-ripened glory—you might consider tossing in an extra tablespoon of flour to help soak up that excess moisture. Trust me on this; you don’t want a soggy tart! Once you’ve achieved that perfect crumble, set it aside while you prepare your peaches.
Step 6: Arranging the Peaches
Now onto one of my favorite parts—arranging those luscious peaches! Grab those freshly sliced beauties and take a moment to appreciate their vibrant colors; this is where the magic truly begins. Starting from the outer edge of your tart crust, begin layering the peach slices in an overlapping pattern, creating concentric circles that spiral inward toward the center. This step may seem trivial, but let me assure you, it’s anything but! This careful arrangement not only looks stunning but also ensures even cooking for each slice; each piece will bask in those radiant oven rays while simultaneously absorbing all those sweet juices from the peaches themselves.
As you fill in the center with whatever leftover slices make sense—maybe even a whimsical fan shape—be sure to snugly fit them together; they should be close enough to hold hands but not so tight they suffocate! The visual appeal is paramount here; think of it as a canvas where each slice plays its part in this delectable masterpiece. Once you’re satisfied with your peach artwork, generously sprinkle that pebbly crumble mixture over top. You might feel like you’re using too much at first—trust me, it’s just right! The crumble will melt down into those gorgeous peaches as they bake, forming a golden crust that transforms this tart into something utterly intoxicating.
Step 7: Baking Your Perfect Peach Tart
With everything layered beautifully and ready to go, it’s time for our peach tart to take its turn in the oven—a crucial phase where science meets art! Preheat your oven to a zesty 425 degrees Fahrenheit. As soon as you slide your tart onto the middle rack (this ensures even heat distribution), keep an eye on it through that oven window; this is when culinary magic happens! You’re looking at about 35 to 45 minutes of baking time—during which time you’ll witness shiny bubbles form around those peach slices and begin to pop up through the crumble topping.
The initial high heat works wonders by setting that lovely short crust and caramelizing the sugars from both the peaches and crumble. As you near that halfway mark, start checking for doneness by looking for two key indicators: first, check if those golden-brown edges are emerging on your crust; second—and perhaps most importantly—watch for those bubbling juices around the fruit. If they’re beginning to escape like little joyful eruptions from their fruity shell, you’re on track! If necessary, consider rotating your tart halfway through baking if your oven tends to have hot spots (and let’s be honest—they often do!).
Step 8: Cooling & Serving Your Tart
Once you’ve achieved that golden-brown perfection (and trust me, you’ll know when you see it!), carefully remove your peach tart from the oven and allow it to cool on a wire rack for at least 15 minutes before slicing into it. Yes, I know it’s tempting to dive right in—the aroma wafting through your kitchen could sell itself as liquid gold—but patience here is absolutely paramount! Cooling allows both flavors to meld beautifully while preventing any potential burns or melty disasters when slicing.
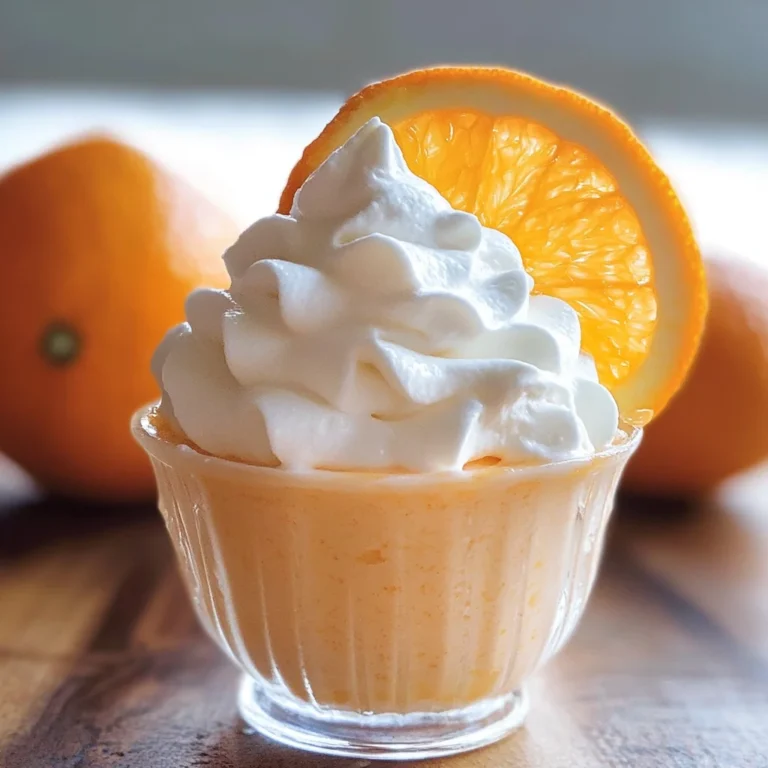
When it’s time to serve up this extraordinary creation, I encourage you to enjoy it warm or at room temperature; both options offer unique experiences! For an added touch of indulgence (because let’s face it—it’s dessert!), consider serving generous dollops of whipped cream alongside each slice—it balances out all that fruitiness with its creamy richness perfectly. Imagine cutting into that crisp crust revealing layers upon layers of sweet, tender peaches glistening with sugary syrup beneath—a truly profound experience for both taste buds and soul alike!
So there you have it—the journey from raw ingredients to an exquisite Peach Tart that will surely become a cherished recipe in your own kitchen adventures. Each bite tells a story filled with warmth and love—one I promise will create beautiful memories shared around any dining table! Enjoy every moment!
Storage and Enjoyment Tips for Your Peach Tart
Now that your Peach Tart has made its grand entrance, it’s time to revel in the joy of sharing this delightful creation with family and friends. The aroma wafting through your kitchen is nothing short of intoxicating, and I can hardly contain my excitement as I think about how the golden peaches glistening under that sugary crumble will bring smiles all around! But what if you find yourself with some leftovers? Don’t worry; this tart is just as delightful the next day, and I have some tips to ensure it stays just as scrumptious.
Storing Leftover Peach Tart
To keep your leftover Peach Tart at its best, simply cover it with plastic wrap or transfer it to an airtight container. This helps to lock in that juicy freshness while keeping unwanted air out. If stored properly at room temperature, it can last for about two days. However, if you want to extend its life a bit further, pop it in the fridge where it will stay delicious for up to a week. Here’s a little tip: placing a slice of bread in the container can help absorb moisture without drying out the tart—this is absolutely paramount for maintaining that perfect texture! After storage, when you’re ready to enjoy another slice (and trust me, you will be!), simply serve it at room temperature or warm it slightly in the oven for a few minutes. The crust will regain its crispness, and those luscious peaches will be perfectly inviting once again.
Freezing Peach Tart for Later
If you find yourself loving this peachy delight so much that you want to save some for later (who could blame you?), freezing is a fantastic option! To properly freeze your Peach Tart, allow it to cool completely first. Then, wrap individual slices in plastic wrap followed by aluminum foil or place them in an airtight container. You can store these treasures in the freezer for up to three months without sacrificing flavor or texture. When you’re ready to indulge again, simply take out a slice and let it thaw in the refrigerator overnight or enjoy it straight from the freezer for a refreshing treat! The convenience of having these delightful slices on hand makes this peach tart even more irresistible—imagine surprising guests with this homemade goodness pulled right from your freezer!
Peach Tart

Indulge in the warmth of summer with this easy-to-make Peach Tart recipe. This delightful dessert features a golden, flaky crust cradling juicy, ripe peaches and topped with a sweet, crunchy crumble. Perfect for any occasion, it’s an experience that combines simple ingredients into an extraordinary treat. Whether enjoyed warm from the oven or chilled, this tart captures the essence of sun-soaked orchards in every bite. Plus, it’s versatile enough to accommodate seasonal fruits, making it a staple in your baking repertoire. Gather your loved ones around the table and let this Peach Tart be the centerpiece of your next gathering!
- Prep Time: 20 minutes
- Cook Time: 35-45 minutes
- Total Time: 0 hours
- Yield: Approximately 8 servings 1x
- Category: Dessert
- Method: Baking
- Cuisine: American
Ingredients
- 1 1/2 cups plus 2 tablespoons all-purpose flour
- 3/4 teaspoon kosher salt
- 3/4 cup plus 1 teaspoon sugar (natural cane recommended)
- 1/4 cup vegetable or canola oil
- 1/4 cup mild olive oil
- 2 tablespoons whole milk or non-dairy milk
- 1/2 teaspoon almond extract
- 2 tablespoons cold unsalted butter
- 3 small ripe peaches (up to 5), pitted and thickly sliced (about 1/2-inch wide)
Instructions
- Preheat the oven to 425°F (220°C).
- In a mixing bowl, whisk together 1 ½ cups flour, ¾ teaspoon kosher salt, and 1 teaspoon sugar.
- In another bowl, mix together ¼ cup vegetable oil, ¼ cup mild olive oil, 2 tablespoons whole milk, and ½ teaspoon almond extract.
- Combine wet and dry ingredients gently until moistened; press into a tart pan.
- For the crumble topping, mix ¾ cup sugar, 2 tablespoons flour, and ¼ teaspoon salt with cold butter until crumbly.
- Slice peaches and arrange them over the crust; sprinkle crumble on top.
- Bake for 35-45 minutes until golden brown and bubbly.
Nutrition
- Serving Size: 1 slice (102g)
- Calories: 205
- Sugar: 12g
- Sodium: 85mg
- Fat: 9g
- Saturated Fat: 1g
- Unsaturated Fat: 7g
- Trans Fat: 0g
- Carbohydrates: 31g
- Fiber: 2g
- Protein: 2g
- Cholesterol: 3mg