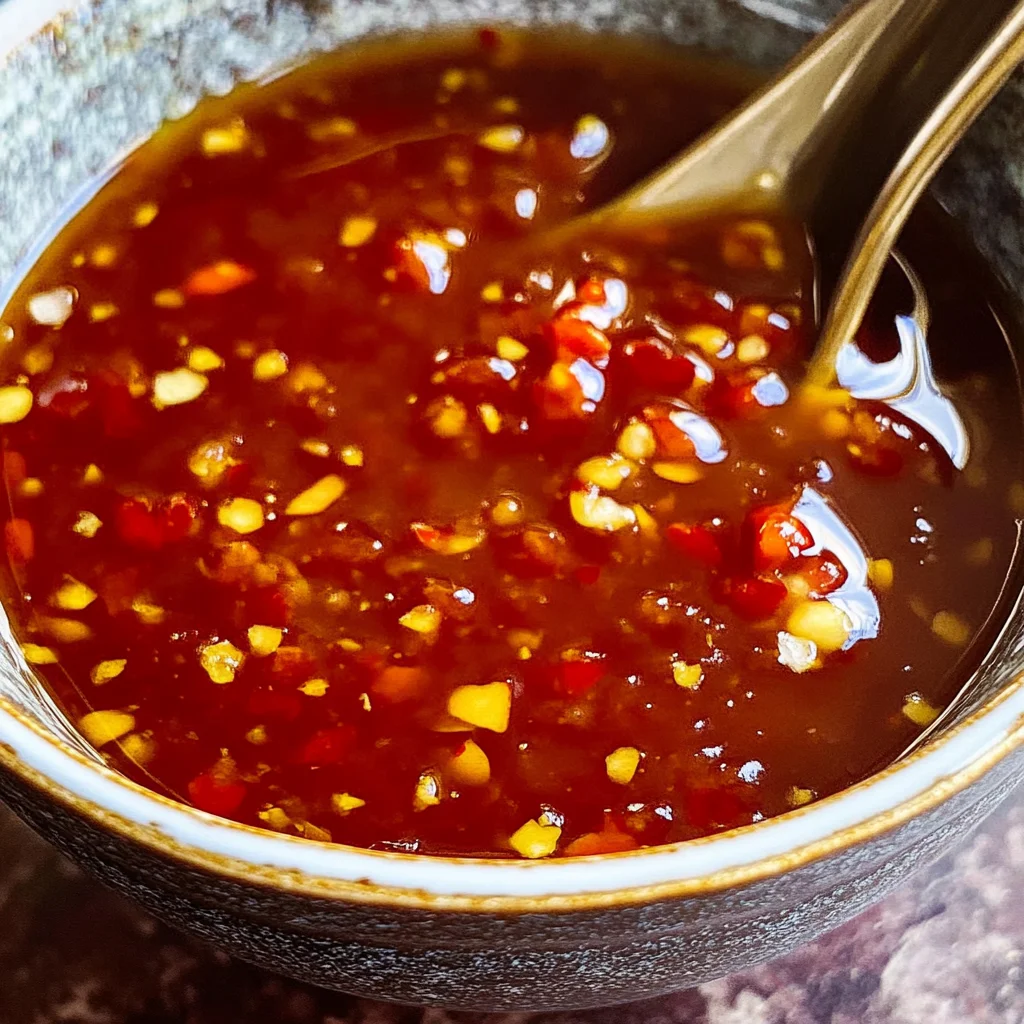
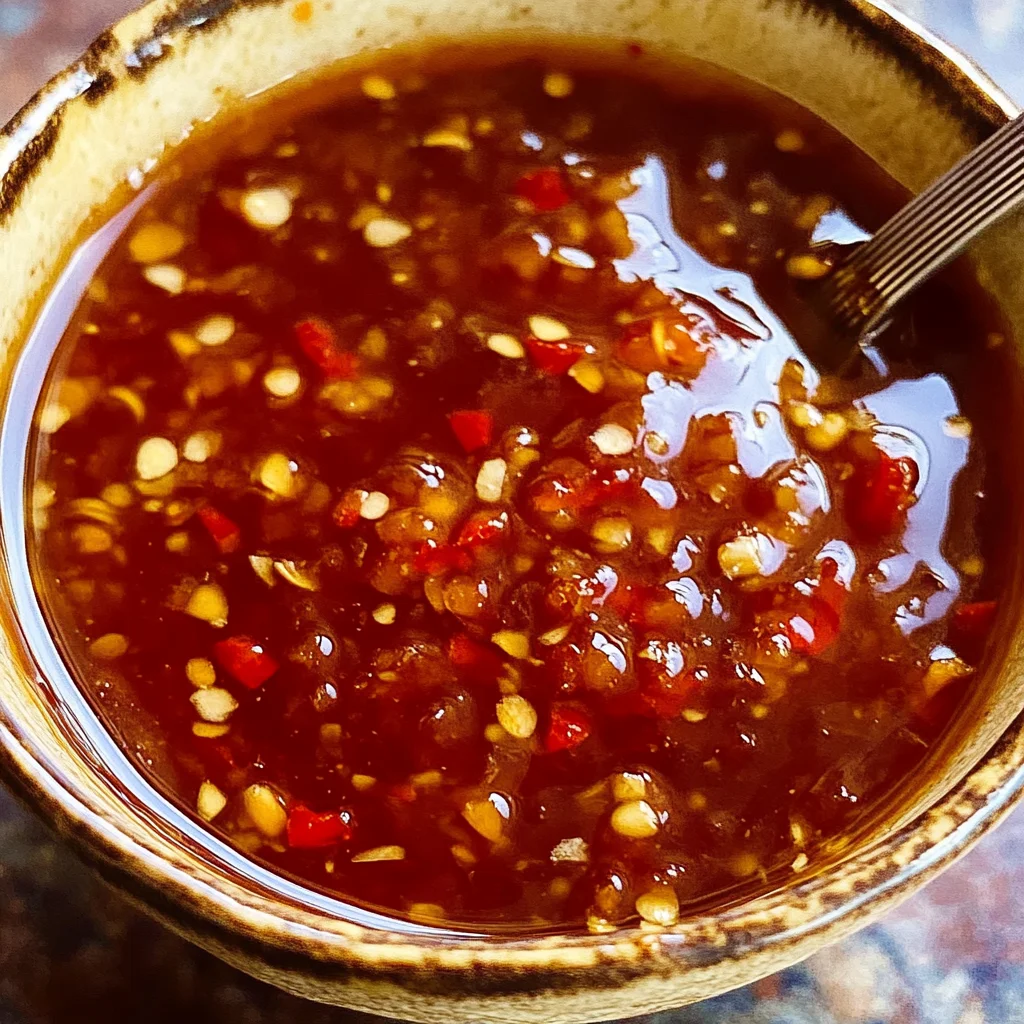
Homemade Sweet Chili Sauce
There’s something truly magical about creating your own sauces at home, isn’t there? The aroma that wafts through your kitchen as you whip together a simple yet deeply flavorful concoction has a way of enveloping you in warmth and nostalgia. This Homemade Sweet Chili Sauce is not just another recipe; it’s an experience, a delightful journey that transforms the ordinary into the extraordinary. Imagine dipping crispy spring rolls or fresh veggies into this luscious, glossy sauce that’s bursting with sweetness and just a hint of heat. With every mouthful, you’re not only tasting the vibrant flavors but also feeling a connection to the age-old traditions of Thai cuisine, where flavor harmony reigns supreme. I promise you, once you’ve made this sauce from scratch, store-bought varieties will never hold the same allure.
This sauce is perfect for elevating your meals—whether drizzled over grilled chicken or served alongside crispy tofu bites. Each ingredient plays its part in creating a symphony of flavors that dances on your palate. If you’re like me and believe that cooking is about bringing people together, this Homemade Sweet Chili Sauce is your go-to recipe for gatherings and celebrations alike. It’s so easy to prepare and so delicious that it’ll soon become an essential staple in your culinary repertoire. So roll up your sleeves, gather some ingredients, and let’s embark on this delightful adventure!
Homemade Sweet Chili Sauce: A Flavorful Journey Awaits
This Homemade Sweet Chili Sauce is not only simple to make but also incredibly versatile! Whether you’re using it as a dipping sauce for appetizers or a glaze for entrees, its sweet yet subtly spicy profile complements so many dishes. With just a handful of ingredients and a few minutes of your time, you can create something utterly intoxicating that will have your friends and family begging for more.
Ingredients:
As we dive into this culinary creation, let’s take a moment to appreciate each ingredient that contributes to our sweet chili masterpiece.
- 1/2 cup rice vinegar (or white grape juice vinegar). The tangy brightness of rice vinegar is non-negotiable here; it balances the sweetness perfectly while adding depth to the flavor profile. If you can’t find rice vinegar, white grape juice vinegar serves as an excellent substitute without compromising taste. This acidity helps cut through the sweetness of the sugar and rounds out the sauce beautifully—creating what I like to call flavor equilibrium.
- 1/2 cup water. Water may seem like an unexciting ingredient, but it plays an essential role in diluting the intensity of the vinegar while allowing all those vibrant flavors to meld together seamlessly. Think of water as the canvas upon which all these beautiful flavors paint their picture; it ensures we achieve just the right consistency without overwhelming any single note.
- 1 cup white sugar. Ah, sugar—the sweet symphony’s conductor! It brings balance and richness to our sauce while acting as a counterpoint to the heat from our chili flakes. While granulated white sugar is traditional, feel free to experiment with alternatives like coconut sugar for a deeper flavor profile; however, be mindful that this might alter the final hue slightly.
- 1 Tablespoon garlic (minced). Garlic adds an aromatic layer that’s simply irresistible! Its savory notes contribute complexity and elevate our sauce from ordinary to extraordinary. Freshly minced garlic releases its oils when cooked, infusing our sauce with warmth and depth—trust me when I say there’s nothing quite like it!
- 1 Tablespoon light soy sauce (or coconut aminos for Gluten-Free version). Soy sauce provides umami richness that rounds out all other flavors beautifully; it’s what makes everything taste just right! For those seeking gluten-free options, coconut aminos offer similar benefits without sacrificing flavor—a win-win situation!
- 4 teaspoons red chili flakes (or red pepper flakes). These tiny flecks pack quite a punch! They introduce warmth without overwhelming heat, making our sweet chili sauce approachable for everyone—even those who shy away from spice. Toasting them briefly enhances their natural oils, releasing their essence into our sauce—a crucial step you won’t want to skip!
- 3 teaspoons corn starch. Corn starch acts as our thickening agent here—it transforms our lovely liquid into a luscious glaze that clings beautifully to whatever you choose to dip! When mixed with water in a slurry before adding it to the sauce mixture, it ensures an even thickness and prevents clumping—a technique worth mastering!
- 2 Tablespoons water (for slurry). This extra bit of water combines with corn starch to create our thickening slurry. It’s essential because adding corn starch directly can lead to lumps instead of that silky-smooth texture we’re after.
Equipment You’ll Need:
Before we get cooking, let’s gather some essential tools that are going to make this process smooth sailing! Having the right equipment on hand can transform your cooking experience from chaotic into delightful.
- Medium saucepan – This trusty vessel is where all the magic happens! A medium saucepan provides enough surface area for evaporation while still containing all those vibrant flavors together as they meld beautifully over heat.
- Whisk – Your whisk will be your best friend throughout this process! It ensures everything gets mixed uniformly—especially when incorporating our cornstarch slurry—and helps prevent any boiling mishaps along the way.
- Measuring cups and spoons – Precision matters in cooking just as much as in baking! Accurate measurements will yield consistent results every time you make this delectable homemade sweet chili sauce.
- Wooden spoon or spatula – These utensils are perfect for stirring things up gently without scratching your saucepan’s surface; plus, there’s something inherently satisfying about mixing by hand!
Now that we’ve gathered our ingredients and equipment let’s dive into preparing this delightful Homemade Sweet Chili Sauce!
Step 1: Whisking Up Our Slurry
First things first: let’s create that all-important cornstarch slurry! In a small bowl or measuring cup, combine three teaspoons of cornstarch with two tablespoons of water—this step is crucial because it prevents lumps from ruining our silky-smooth texture later on! Use your whisk generously here until everything is well blended—this simple combination will ensure we achieve just the right thickness once added later on in cooking.
Step 2: Toasting Chili Flakes
Now onto one of my favorite parts: bringing those chili flakes alive by toasting them! In your medium saucepan over medium heat—not too high or you’ll risk burning them—add four teaspoons of red chili flakes and let them toast gently for about three minutes until fragrant! Trust me; you’ll know they’re ready by how aromatic they become—you’ll detect nutty undertones filling your kitchen air which makes everything feel warm and inviting! This step enhances their natural oils significantly—so don’t rush it!
Step 3: Combining Ingredients
Once toasted perfectly, it’s time to add an ensemble cast of flavors into our saucepan—the mixture of half a cup rice vinegar (or white grape juice vinegar), half a cup water, one cup white sugar, one tablespoon minced garlic—and one tablespoon light soy sauce (or coconut aminos if you prefer!). Stir everything together—and watch how quickly those sugar crystals dissolve into liquid gold before bringing it all up to boil over medium-high heat for about four minutes while occasionally stirring gently so nothing sticks or burns on the bottom!
Step 4: Thickening Our Sauce
With all those beautiful flavors now bubbling away harmoniously together—it’s time for our cornstarch slurry to shine! After four minutes have passed on our boiling concoction—reduce heat down low—to allow us proper control over how thickened we want this magic potion to become! Slowly pour in that well-whisked cornstarch slurry while continuously whisking until fully incorporated—a smooth consistency should emerge almost immediately before us—like pure enchantment unfolding before your eyes!
Stay tuned as we wrap up this delightful homemade adventure shortly; I can’t wait for you all to taste this phenomenal creation soon!
Crafting the Perfect Homemade Sweet Chili Sauce
Oh, my dear friend, we are nearing the finish line of this delightful journey into the realm of flavors! Making this Homemade Sweet Chili Sauce is an act of love, and I can hardly wait for you to experience the joy it brings. But before we dive into those final steps, let’s take a moment to appreciate the transformative magic that happens when we allow our sauce to thicken and cool. This isn’t just a mere condiment; it’s a burst of sunshine in a jar, a sweet embrace for your taste buds! So let’s get right back to it!
Step 5: The Art of Thickening — Cornstarch Magic
Now that you’ve whisked together your cornstarch and water to create a slurry, let’s bring it to life! In this next step, we’re going to gently introduce our cornstarch mixture to the bubbling concoction in our saucepan. This is where the magic really starts to happen. You see, cornstarch acts as a thickening agent—one that transforms your vibrant sweet chili sauce from a thin liquid into something truly luscious and velvety.
As you slowly pour the slurry into your simmering sauce, keep whisking fervently! This action is crucial because it ensures that the cornstarch disperses evenly throughout rather than clumping together. Trust me on this—nobody wants little lumps interrupting their sauce’s silky texture! You’ll notice almost immediately how the sauce begins to take on a thicker consistency as it heats up. Keep an eye on it; you’ll want to whisk until everything is fully incorporated and harmoniously combined—this usually takes just about another minute or so on low heat. If at any point you feel like it’s too thick, don’t hesitate to add a splash more water; balance is key here!
Step 6: Cooling Down — Patience is Key
Once you’ve achieved that rich thickness you were aiming for, it’s time to remove the saucepan from heat and let your masterpiece cool down. Now, I know waiting can be challenging when you’re so close to tasting your creation, but I promise you—it’s absolutely paramount for achieving that perfect flavor profile! Cooling allows all those vibrant ingredients—the zingy garlic, the tangy rice vinegar, and the sweet sugar—to mingle and marry into one profound symphony of flavors.
Set your saucepan aside on a cooling rack or simply let it sit at room temperature for about 10-15 minutes. During this time, pay attention to how the sauce continues thickening as it cools; it’s like watching magic unfold right before your eyes! You’ll notice that what started as a boiling mixture transforms into an enticingly sticky sauce that clings beautifully to whatever you choose to dip or drizzle. Take deep breaths in between—you’ll be rewarded soon!
Step 7: The Taste Test — A Flavorful Validation
After giving your sauce some time to cool and thicken beautifully, it’s now time for one of my favorite moments—the taste test! Grab a clean spoon (we want cleanliness here!) and dip it into this glossy concoction. What do you smell? That aromatic garlic mingled with just enough sweetness should wrap around you like a warm hug. Now take a sip—don’t rush! Close your eyes if you must because this is a moment meant for savoring.
Does it taste balanced? If it’s too sweet for your liking, consider adding just a smidge more vinegar or even a touch more chili flakes if you’re feeling adventurous. Remember that every palate is unique! It’s all about making adjustments until it resonates with your ideal flavor profile. And don’t forget—I’m here rooting for you every step of the way! If you’re happy with what you’ve created, then oh boy—get ready for some delicious meals ahead!
Step 8: Storing Your Liquid Gold — Precision Matters
Now comes one of those non-negotiable steps in preserving your sweet chili sauce: proper storage! After letting it cool completely (which may take about another 30 minutes), transfer your homemade creation into an airtight glass jar or container. Why glass? Glass not only preserves flavors better than plastic but also adds elegance when presenting this beautiful sauce at gatherings.
As you pour the sauce into its new home, use a funnel if you have one—this will help avoid any drips on your countertop (and trust me; nobody wants sticky surfaces!). Seal tightly once filled; this keeps air out and ensures all those wonderful flavors remain intact over time. Store it in the refrigerator where it can last up to three weeks—though I doubt it’ll last that long once everyone gets wind of its existence! Each time you open that jar will be like unearthing treasure—a true testament to what can be created with love and patience.
Final Touches — Elevate Your Experience
Step 9: Unleash Your Creativity!
Now that you’ve crafted this exquisite Homemade Sweet Chili Sauce, let me encourage you not only to use it as intended but also think outside the box! This versatile condiment pairs beautifully with everything from fresh spring rolls and crispy fried tofu to grilled veggies and even drizzled over roasted potatoes. Imagine serving it alongside chicken wings or using it as an ingredient in marinades—it could elevate any dish from ordinary to extraordinary!
I encourage you to experiment with different ways of incorporating this sweet chili wonder into your meals. Perhaps pair it with some crunchy veggies for dipping during movie nights or splash some onto stir-fries for an added punch of flavor—the possibilities are truly endless! Remember, cooking is all about exploration and joy; let your creativity run wild as you discover new combinations.
In closing, I hope this recipe has inspired not only your culinary skills but also a deeper appreciation for homemade sauces—those little jars filled with love can truly transform any meal into something special. So go forth with confidence and enjoy every bite; after all, this sauce was made with passion just for YOU. Happy cooking!
Storage and Enjoyment Tips for Your Homemade Sweet Chili Sauce
Now that you’ve crafted your very own Homemade Sweet Chili Sauce, the delightful aromas wafting through your kitchen are just the beginning of this flavorful adventure! It’s time to think about how to savor this liquid gold long after you’ve made it. This sauce is not only great for dipping but also shines as a marinade or glaze, making it a versatile staple in your culinary repertoire. Let’s dive into some essential storage tips that will keep your homemade creation fresh and ready for whenever those cravings strike.
Storing Leftover Homemade Sweet Chili Sauce
When it comes to storing your precious homemade sweet chili sauce, choosing the right container is key. I recommend using an airtight glass jar or a plastic container; both options will preserve the vibrant flavors beautifully while keeping any unwanted odors at bay. You can store it in the refrigerator, where it will stay fresh for up to two weeks—though I promise you, it’ll be hard to resist finishing it sooner! To maintain optimal quality, you might even consider placing a slice of bread in the jar; it absorbs moisture and helps keep your sauce from becoming too thick or losing its delightful texture. As the days pass and the flavors meld together, you’ll find that this sauce becomes even more profoundly satisfying. When you’re ready to enjoy, simply give it a gentle stir if needed, and voilà—it’s ready to elevate any meal!
Freezing Homemade Sweet Chili Sauce for Later
If you find yourself with a surplus of this extraordinary sauce—or if you’re simply proactive about meal prep—freezing is an excellent option! To do so properly, pour your homemade sweet chili sauce into ice cube trays or freezer-safe containers, ensuring there’s enough space at the top for expansion as it freezes (this is crucial!). It can keep well in the freezer for up to three months without losing its enticing flavor or texture. When you’re ready to use it, just pop out a cube or two and let them thaw in the fridge overnight or warm them gently on low heat in a saucepan. This method not only makes meal planning effortless but also allows you to always have this delicious condiment on hand for impromptu gatherings or quick weeknight dinners. Trust me, having these little portions of happiness at your disposal is a game changer!
Homemade Sweet Chili Sauce

Homemade Sweet Chili Sauce is a delightful blend of sweet and spicy that transforms any dish into a flavorful experience. This easy-to-make sauce captures the essence of traditional Asian cuisine with its vibrant garlic and chili notes, making it perfect for dipping crispy spring rolls, drizzling over grilled chicken, or enhancing stir-fries.
- Prep Time: 10 minutes
- Cook Time: 10 minutes
- Total Time: 20 minutes
- Yield: Approximately 16 servings 1x
- Category: Condiment
- Method: Stovetop
- Cuisine: Asian
Ingredients
- 1/2 cup rice vinegar (or white grape juice vinegar)
- 1/2 cup water
- 1 cup white sugar
- 1 tablespoon minced garlic
- 1 tablespoon light soy sauce (or coconut aminos)
- 4 teaspoons red chili flakes
- 3 teaspoons corn starch
- 2 tablespoons water (for slurry)
Instructions
- In a small bowl, whisk together cornstarch and 2 tablespoons of water to create a slurry. Set aside.
- Toast red chili flakes in a medium saucepan over medium heat for about three minutes until fragrant.
- Add rice vinegar, water, sugar, minced garlic, and soy sauce to the saucepan. Stir well and bring to a boil over medium-high heat for four minutes.
- Reduce heat to low and gradually stir in the cornstarch slurry while whisking continuously until thickened (about one minute).
- Remove from heat and allow to cool before transferring to an airtight glass jar.
Nutrition
- Serving Size: 1 tablespoon
- Calories: 44
- Sugar: 10g
- Sodium: 118mg
- Fat: 0g
- Saturated Fat: 0g
- Unsaturated Fat: 0g
- Trans Fat: 0g
- Carbohydrates: 11g
- Fiber: 0g
- Protein: 0g
- Cholesterol: 0mg