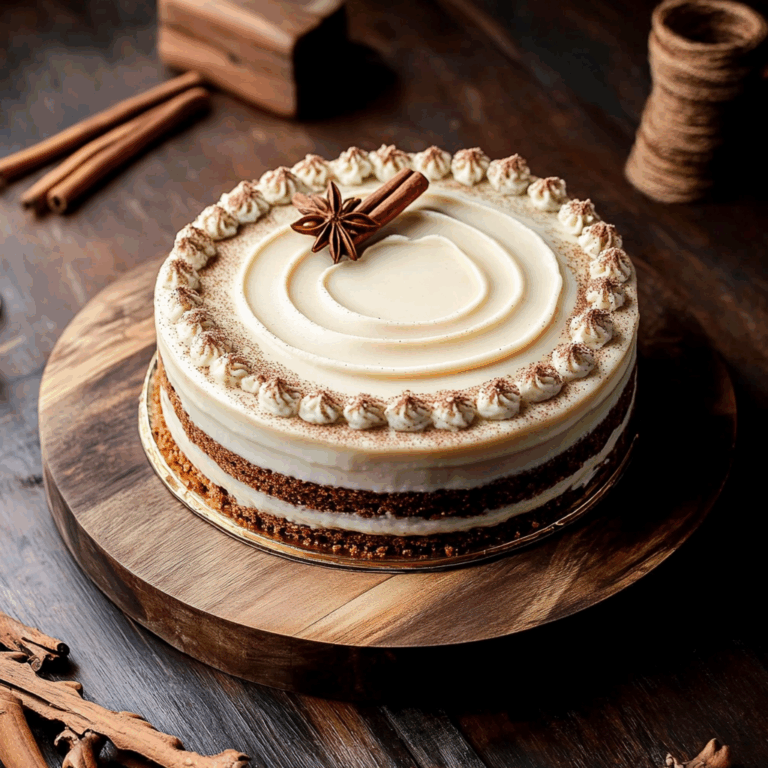
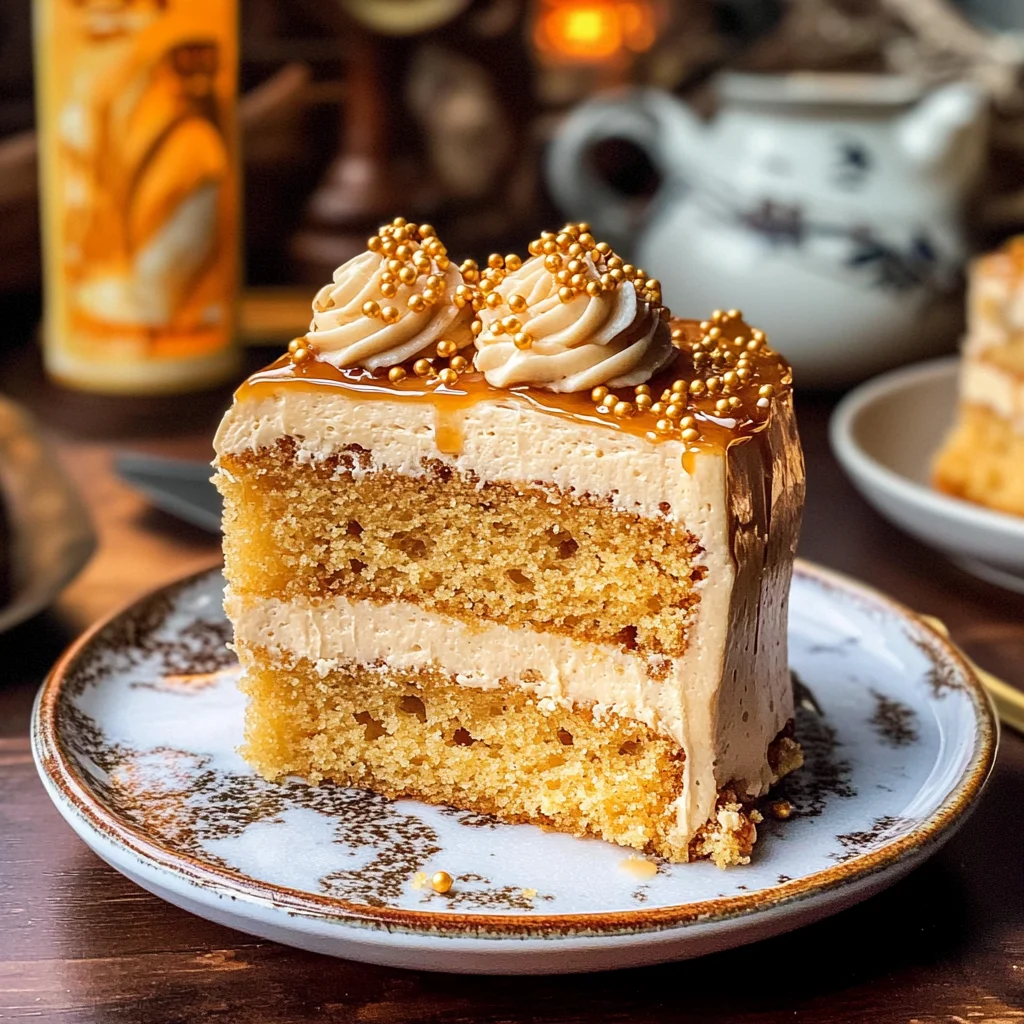
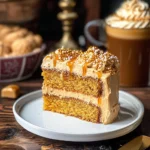
Harry Potter Butterbeer Cake
There’s something utterly magical about baking that evokes a sense of nostalgia and comfort, isn’t there? It’s as if every whisk of the batter and each sprinkle of flour transports us to cherished moments spent in the kitchen, surrounded by the warmth of family and friends. This Harry Potter Butterbeer Cake does just that—it invites you into a realm where flavors dance with whimsy, reminiscent of the enchanting world of Hogwarts. Imagine soft, fluffy layers infused with the sweet essence of butterscotch, crowned with a rich butterscotch buttercream and a drizzle of decadent sauce. Just one bite, and you’ll feel like you’ve stepped through Platform 9¾ into a cozy café filled with laughter and magical delights!
I’ve always been captivated by how food can create experiences that linger long after the last crumb is savored. This cake isn’t merely a dessert; it’s an invitation to share stories, to celebrate little victories, or perhaps to host a dreamy Harry Potter-themed gathering. As we journey through this recipe together, I promise you will discover not only how to craft this delightful cake but also why each ingredient plays an essential role in conjuring up its charm. So grab your mixing bowls and let’s dive into this enchanting culinary adventure!
Harry Potter Butterbeer Cake: A Slice of Wizardry
This whimsical Harry Potter Butterbeer Cake is more than just a treat; it’s a heartfelt tribute to our beloved wizarding world. The soft, moist cake captures the essence of butterbeer—a drink loved by wizards and witches alike—transforming it into something truly extraordinary. With hints of butterscotch enveloping every bite and an ethereal frosting that feels like a hug from your favorite character, this cake brings joy in every slice. Trust me; your friends will be enchanted when they take their first bite!
Ingredients:
As we embark on this delightful culinary journey together, let’s explore the carefully chosen ingredients that will help us create this magical masterpiece. Each component is crucial in crafting the symphony of flavors that makes up our Harry Potter Butterbeer Cake.
- 3 cups (710 ml) butterscotch beef broth (cream soda will work also). This unique ingredient is what sets our cake apart! Butterscotch beef broth provides a rich, caramel-like flavor that infuses moisture into the cake layers while creating that signature butterbeer taste. If you opt for cream soda instead, look for high-quality brands without artificial additives; it will still deliver that effervescent sweetness we adore.
- 1 3/4 cups (219 g) all-purpose flour, spooned and leveled. The foundation of any great cake starts here! Properly measuring your flour is non-negotiable; too much can lead to dense results while too little may cause collapse. Spoon flour gently into your measuring cup rather than scooping directly from the bag—this ensures you’re not packing it down too tightly.
- 1 1/2 tsp baking powder. Think of this as our magic rising agent! Baking powder helps create those fluffy cake layers as it reacts with liquid ingredients during baking to produce carbon dioxide bubbles that make our cake rise beautifully. Always check its expiration date; fresh baking powder is absolutely paramount for optimal results.
- 1/4 tsp baking soda. This little powerhouse works alongside baking powder to enhance browning and flavor development in our cake. It reacts with acidic ingredients (like buttermilk) to produce even more lift and softness in your batter.
- 1/2 tsp salt. While it might seem small, salt is crucial in balancing flavors and enhancing sweetness. It makes all those lovely butterscotch notes stand out even more while ensuring no single flavor overwhelms the others.
- 1/2 cup (112 g) unsalted butter, softened. The luxurious texture we crave in cakes comes from butter! Softening it allows for perfect creaming with sugars—this process incorporates air into our batter, giving rise to lightness in texture. Always use unsalted butter so you can control the salt level throughout the recipe.
- 1/2 cup (110 g) light brown sugar, packed. Brown sugar adds moisture and chewiness thanks to its molasses content while imparting deep caramel undertones—essential for that authentic butterscotch flavor profile in our cake.
- 1/4 cup (50 g) granulated white sugar. This adds sweetness and helps achieve the perfect structure when combined with brown sugar during creaming, resulting in cakes that are beautifully tender yet stable.
- 2 eggs, at room temperature. Eggs are vital for binding ingredients together and providing richness! Room temperature eggs blend more easily into batters compared to cold ones—this step improves emulsification for an even consistency throughout.
- 2 tsp vanilla bean paste or extract. Vanilla lends warmth and depth to our cake’s flavor profile—it’s like a comforting hug amidst all those other wonderful flavors! Opting for vanilla bean paste adds delightful flecks of real vanilla bean throughout your batter.
- 1 tsp butter extract. This ingredient amplifies the buttery notes within our cake without adding extra fat—it’s especially useful if you’re looking for an intensified flavor experience!
- 1/3 cup (66 g) butterscotch chips, melted and slightly cooled. These little morsels provide bursts of sweetness throughout each slice while adding a pleasant gooeyness when melted into the batter—truly indulgent!
- 1/2 cup (120 ml) buttermilk, at room temperature. Buttermilk not only contributes tanginess but also acts as a tenderizer due to its acidity! It creates an incredibly moist crumb while helping our leaveners do their job during baking.
- 1 cup (224 g) unsalted butter, softened (for frosting). Just like before, using softened butter ensures smooth incorporation with powdered sugar later on—no lumps allowed here!
- Pinch of salt (for frosting). Just as before, salt heightens flavors even within sweet frostings by cutting through cloying sweetness!
- 2/3 cup (133 g) butterscotch chips, melted and slightly cooled (for frosting). Adding melted chips into our frosting provides an incredible depth of flavor along with creaminess—perfectly complementing all other components involved!
- 1 1/2 cups (195 g) powdered sugar. Essential for creating fluffy frostings! Powdered sugar dissolves seamlessly allowing us to achieve ideal consistency without grit; always sift beforehand if clumps form!
- 1/2 tsp vanilla bean paste or extract (for frosting). Just like before—the warmth from vanilla enhances overall taste making frosting utterly irresistible!
- 1/2 tsp butter extract (for frosting). Boosts buttery notes just like in the cake itself—it ties everything together beautifully creating harmony among flavors present throughout dessert!
- Gold and white nonpareil sprinkles (optional). While optional—they add an enchanting touch reminiscent of twinkling stars over Hogwarts grounds making presentation truly magical!
- 1/4 cup (50 g) butterscotch chips (for drizzle). When melted down further creates luscious sauce drizzled atop finished product capturing all essence we love about classic desserts enjoyed within films!
- 1 1/2 tbsp (22 ml) heavy cream: Adding richness helps thin out sauce until desired consistency achieved perfect pourability over cakes or cupcakes alike!
- 1/2 tbsp honey: A touch of natural sweetness which binds everything together harmoniously rounding off flavors leaving everyone wanting more!
Equipment You’ll Need:
Now that we have gathered our magical ingredients, let’s talk about the indispensable tools you’ll need—the trusty companions guiding you toward success in crafting this beautiful Butterbeer Cake! Having these tools handy ensures not only efficiency but also elevates your entire baking experience.
- **Mixing Bowls – A set including various sizes is essential for separating dry ingredients from wet ones as well as combining them smoothly later on without messiness ensuing during process! Opt for glass or stainless steel varieties which are durable & non-reactive ensuring cleanliness remains intact throughout usage cycle.”
- **Electric Mixer – Hand mixers or stand mixers do wonders when whipping up batter effortlessly achieving creamy textures faster than manual methods ever could plus saving energy levels during lengthy mixing times.”
- **Measuring Cups & Spoons – Precision matters when baking hence investing quality sets helps ensure accuracy maintaining balance across all components involved yielding best outcomes possible!”
- **Rubber Spatula – A must-have tool for scraping down sides ensuring no remnants left behind preventing wastefulness while incorporating various elements thoroughly!”
With these essentials gathered around us—we’re ready now dive deep into preparing glorious Harry Potter Butterbeer Cake awaiting us ahead filled wonderment excitement guaranteed bring joy hearts souls alike time again once tasted memories created thereafter cherished forevermore!”
Now let’s take a brief pause before continuing on further steps outlining decorating assembly final touches needed get glorious masterpiece presented gracefully guests eagerly awaiting moment indulge taste buds awaken senses heightened through scrumptious offerings laid forth lovingly crafted meticulously following guidance provided thus far happily engaging every individual participating today within journey embarked upon so far leading delightful destination awaits ahead beckoning delve deeper explore mysterious realms hidden treasures reveal themselves soon enough pleasure beyond compare emerges abundantly forthwith expected venture embark upon willingly wholeheartedly embracing joyous occasion shared collectively always remembered fondly long after event concludes pleasantly lingering memories cherished eternally thereafter!
Step 5: Creating the Perfect Cake Batter
Now that our dry ingredients are prepped and waiting patiently, it’s time to create a batter that will be nothing short of magical! Begin by creaming together your softened 1/2 cup (112 g) unsalted butter, 1/2 cup (110 g) light brown sugar, and 1/4 cup (50 g) granulated white sugar in a large mixing bowl. Use an electric mixer on medium speed for about 3-5 minutes until the mixture becomes light and fluffy. This step is crucial because the incorporation of air into the butter and sugars creates a wonderfully tender cake texture. You’re looking for a creamy, pale mixture that feels airy yet substantial; trust me, this will give your cake that delightful melt-in-your-mouth quality.
Once your butter-sugar mixture is fluffy and inviting, it’s time to incorporate the eggs one at a time. Add in your two room-temperature eggs, ensuring each one is fully incorporated before adding the next. Why room temperature? Well, it helps achieve an even emulsification, which leads to a better rise during baking. Next, mix in 2 teaspoons of vanilla bean paste or extract and 1 teaspoon of butter extract. The aroma wafting from your mixing bowl will transport you to Honeydukes Sweetshop! Then comes the star of our show—the 1/3 cup (66 g) melted butterscotch chips. Pour them in gently; they should be slightly cooled so as not to cook your eggs but warm enough to blend seamlessly into this luscious batter.
Step 6: The Buttermilk Magic
With our wet ingredients beautifully mixed, we can now introduce the buttermilk into this enchanting potion! Gradually add in 1/2 cup (120 ml) buttermilk, letting it blend thoroughly with the rest of your batter. This is where our cake gets its moistness and delightful crumb texture! Buttermilk reacts with baking powder to create carbon dioxide bubbles, which help your cake rise beautifully while ensuring every bite remains tender and flavorful. I want you to see those bubbles forming in your batter; it’s like watching magic unfold right before your eyes!
As you mix everything together, be careful not to over-mix; just blend until there are no visible streaks of flour left. It’s perfectly normal if some small lumps remain—this isn’t pancake batter we’re aiming for! Your goal here is a smooth yet slightly thick mixture that looks velvety and smells utterly intoxicating—trust me, you’ll want to dive right in! Once this beautiful concoction is ready, let’s move on to incorporating our dry ingredients.
Step 7: Uniting Wet and Dry Ingredients
Now comes one of my favorite parts—bringing everything together into one harmonious batter! It’s time to slowly fold in our dry ingredient mixture from Step 4 into our wet ingredients from Step 6. I recommend doing this in three parts for optimal results: start by adding about a third of the flour mixture into your wet ingredients and gently fold with a spatula or wooden spoon until just combined. The reason we do this gradually is simple: it allows for better control over the texture of our cake batter without overworking it—overmixing can lead to gluten development which may result in a dense cake instead of that light-as-a-feather fluffiness we crave.
After folding in the first third, repeat the process with another third of dry ingredients followed by half of what’s left of your butterscotch beef broth (or cream soda if that’s what you’re using). Keep folding gently until just incorporated; don’t worry if there are still tiny pockets of flour or liquid present—it’s all part of creating that dreamy consistency! Finish off by adding the remaining flour, followed by the last portion of butterscotch broth. You should end up with a sumptuous batter that’s glossy and has an inviting aroma that fills your kitchen with hints of caramel sweetness!
Step 8: Baking Your Perfect Harry Potter Butterbeer Cake
With our luscious batter ready, it’s time for the pièce de résistance—baking! Preheat your oven to 350°F (175°C) if you haven’t already done so; this ensures an even bake right from the start. While waiting for it to reach temperature, prepare two 9-inch round cake pans by lightly greasing them with non-stick spray or buttering them generously before dusting lightly with flour. This step ensures that when we flip these beauties out after baking, they release effortlessly from their pans—a baker’s dream come true!
Now divide the batter evenly between both prepared pans; don’t rush this step! Use a spatula to smooth out the tops gently for an even bake. Place them into your preheated oven on the middle rack—this position allows for optimal heat distribution throughout baking time. Bake these beauties for 25-29 minutes or until they are golden brown around their edges and a toothpick inserted into the center comes out clean or with just a few moist crumbs attached (but no wet batter!). Remember that each oven behaves differently; keep an eye on them towards the end of baking because you don’t want them overbaked; they should spring back when lightly pressed.
Once baked, allow them to cool in their pans for about 10 minutes before transferring them onto wire racks so they can cool completely. This cooling process is absolutely paramount as it allows steam to escape while locking in moisture—resulting in cakes that aren’t just delicious but also incredibly tender!
Final Touches
Now that we’ve baked our magical Harry Potter Butterbeer Cake, it’s time for those final touches that’ll elevate it from fantastic to truly extraordinary!
Step 9: Crafting the Butterscotch Buttercream Frosting
Let’s move on to creating an ethereal frosting that embodies all things sweet and buttery! In a large mixing bowl, combine 1 cup (224 g) softened unsalted butter with 2/3 cup (133 g) melted butterscotch chips, mixing on medium speed until perfectly blended—a good 3 minutes should do nicely here. You want this frosting to feel like silk as it’s whipped up, turning lighter as air while retaining its rich flavor profile.
Next comes my secret weapon: add 1 ½ cups (195 g) powdered sugar, along with a pinch of salt, ½ teaspoon vanilla bean paste, and another splash of ½ teaspoon butter extract if you’re feeling adventurous! Mix slowly at first so you don’t send sugar flying everywhere—trust me on this one—and then increase speed once combined until fluffy perfection emerges before you! If at any point you find yourself longing for more creaminess or sweetness, feel free to adjust sugar levels according to taste.
Step 10: Assembling Your Magical Creation
Okay friends, we’re almost there—the exciting part where everything comes together like pieces of a wizarding puzzle! Start by placing one cooled cake layer onto your serving platter or cake stand; let those layers shine! Spread an even layer of butterscotch buttercream frosting over top—don’t skimp here because each bite deserves its fair share!
Carefully place your second layer atop this frosted masterpiece and repeat: another generous slathering of frosting awaits! You can get creative here too; swirl decorative patterns using an offset spatula or simply create smooth waves across its surface—the choice is yours! For an added touch of whimsy, consider adorning it with gold and white nonpareil sprinkles—they resemble little stars twinkling against night skies!
Step 11: Drizzling Butterscotch Sauce
Finally comes one last flourish—a drizzle of homemade butterscotch sauce over top will make hearts flutter every time someone lays eyes on this beauty! In a small saucepan over low heat combine ¼ cup (50 g) butterscotch chips, 1 ½ tablespoons (22 ml) heavy cream, and ½ tablespoon honey. Stir continuously until everything melts down into liquid gold—smooth and shiny without any clumps remaining before drizzling generously over your frosted masterpiece.
The warmth brings out flavors like nothing else while creating visual appeal—it’s pure decadence on display! And remember—you’ve poured love into every layer along this journey through Hogwarts flavors… Trust me when I say folks will be enchanted at first bite!
The Grand Reveal
And voilà—you’ve crafted an unforgettable Harry Potter Butterbeer Cake that captures all those whimsical feelings associated with childhood nostalgia wrapped up in every slice offered at feasts within Hogwarts halls! Slice away generously; my friends won’t be able resist coming back for seconds—or thirds—and neither will you once you’ve tasted this heavenly creation! Enjoy sharing these moments filled laughter around family tables as everyone relishes every crumb sprinkled with joy borne from imagination brought alive through baking magic!
Storage and Enjoyment Tips for Your Harry Potter Butterbeer Cake
Now that you’ve crafted this enchanting Harry Potter butterbeer cake, it’s time to let the magic unfold as you and your loved ones dive into its sweet layers of butterscotch bliss! Imagine the laughter and joy around the table, each slice revealing a symphony of flavors that is sure to conjure up smiles. But what happens if there are leftovers? Don’t fret! This cake not only delights on the first day but also holds its charm for days to come, making it perfect for enjoying at your leisure.
Storing Leftover Harry Potter Butterbeer Cake
To ensure your Harry Potter butterbeer cake remains as delightful as the moment it came out of the oven, store any leftovers in an airtight container at room temperature. If you’re looking to preserve its lusciousness even longer, consider refrigerating it; just don’t forget to bring it back to room temperature before serving! Generally, this delectable cake will keep well for about 3-4 days when stored properly. To maintain its moist texture, I recommend placing a slice of bread in the container with your cake. The bread will help absorb any excess moisture without drying out the cake itself—it’s a little trick I swear by! Trust me, after storage, this cake retains its rich flavor and fluffy texture beautifully. If you’re feeling a bit indulgent, gently warm up a slice in the microwave for about 10-15 seconds before enjoying; it transforms into a cozy treat that’s utterly intoxicating!
Freezing Your Harry Potter Butterbeer Cake for Later
If you want to save some of this magical creation for another day—or perhaps you’re preparing for an upcoming gathering—freezing is such a fantastic option! To freeze your delicious cake properly, wrap individual slices tightly in plastic wrap or aluminum foil and then place them in a freezer-safe bag or container. This will help prevent freezer burn and keep all those glorious flavors intact. When frozen correctly, your butterbeer cake can last up to three months—imagine having a slice of magical delight waiting for you during those chilly winter evenings! When you’re ready to indulge again, simply remove a slice from the freezer and let it thaw in the refrigerator overnight or at room temperature for about an hour. The convenience factor here is absolutely paramount; you can enjoy a taste of Hogwarts anytime you desire!
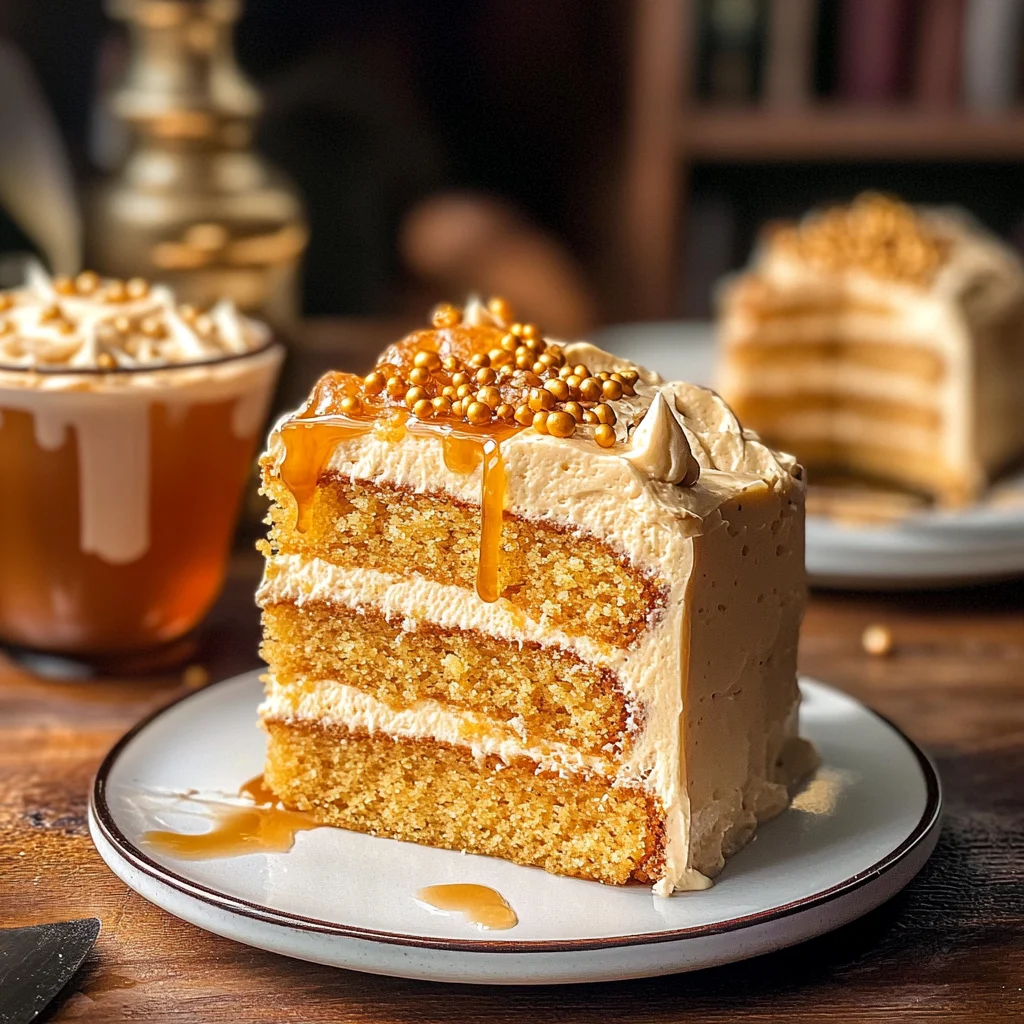
Harry Potter Butterbeer Cake
Indulge in the whimsical world of baking with this enchanting Harry Potter Butterbeer Cake! Soft, fluffy layers infused with rich butterscotch flavors transport you straight to Hogwarts. Topped with a creamy butterscotch buttercream frosting and a decadent drizzle, every bite feels like a magical experience. Perfect for celebrating special occasions or simply delighting friends and family, this cake brings people together to share laughter and joyful memories. Whether you’re hosting a themed party or just craving a sweet treat, this cake is bound to impress!
- Prep Time: 30 minutes
- Cook Time: 29 minutes
- Total Time: 59 minutes
- Yield: Approximately 12 servings 1x
- Category: Dessert
- Method: Baking
- Cuisine: American
Ingredients
- 3 cups butterscotch beef broth (or cream soda)
- 1 3/4 cups all-purpose flour, spooned and leveled
- 1 1/2 tsp baking powder
- 1/4 tsp baking soda
- 1/2 tsp salt
- 1/2 cup unsalted butter, softened
- 1/2 cup light brown sugar, packed
- 1/4 cup granulated white sugar
- 2 eggs, at room temperature
- 2 tsp vanilla bean paste or extract
- 1 tsp butter extract
- 1/3 cup butterscotch chips, melted and slightly cooled
- 1/2 cup buttermilk, at room temperature
- 1 cup unsalted butter, softened (for frosting)
- Pinch of salt (for frosting)
- 2/3 cup butterscotch chips, melted and slightly cooled (for frosting)
- 1 1/2 cups powdered sugar
- 1/2 tsp vanilla bean paste or extract (for frosting)
- 1/2 tsp butter extract (for frosting)
- Gold and white nonpareil sprinkles (optional)
- 1/4 cup butterscotch chips (for drizzle)
- 1 1/2 tbsp heavy cream
- 1/2 tbsp honey
Instructions
- Preheat your oven to 350°F (175°C) and prepare two 9-inch round cake pans by greasing and flouring them.
- In a large bowl, cream together unsalted butter, light brown sugar, and granulated sugar until light and fluffy.
- Add eggs one at a time, mixing well after each addition. Stir in vanilla bean paste and butter extract.
- Gradually add melted butterscotch chips to the mixture.
- Alternate adding the dry ingredients with buttermilk, stirring until just combined.
- Divide the batter evenly between the prepared pans. Bake for 25-29 minutes or until a toothpick comes out clean.
- Allow cakes to cool before frosting with butterscotch buttercream and drizzling with butterscotch sauce.
Nutrition
- Serving Size: 1 serving
- Calories: 310
- Sugar: 28g
- Sodium: 215mg
- Fat: 14g
- Saturated Fat: 8g
- Unsaturated Fat: 5g
- Trans Fat: 0g
- Carbohydrates: 42g
- Fiber: 1g
- Protein: 3g
- Cholesterol: 45mg