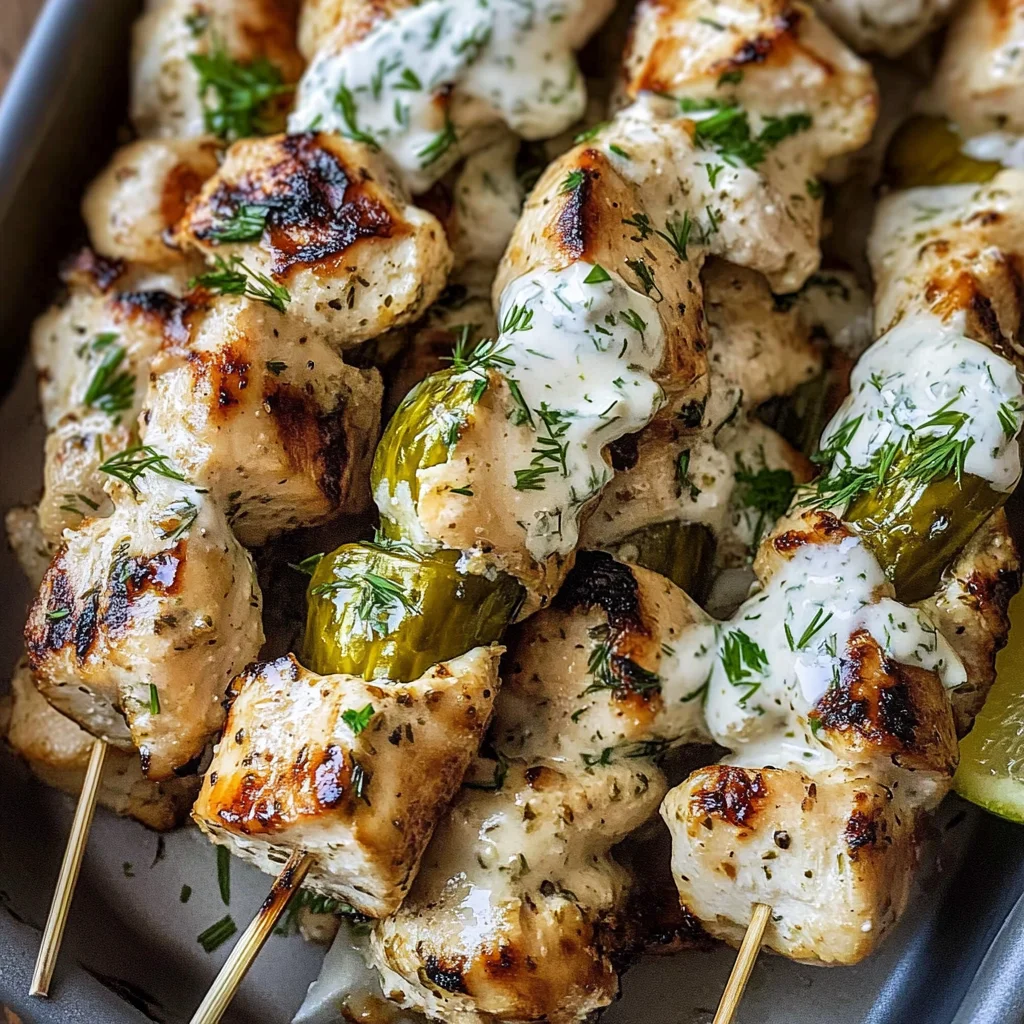
Dill Pickle Ranch Skewers
As I sit here, thinking about the Dill Pickle Ranch Skewers, I can’t help but feel a wave of nostalgia wash over me. This recipe is more than just food; it’s a celebration of flavors that dance together in perfect harmony, creating an experience that transcends the ordinary meal. Imagine biting into juicy, tender chicken that has been marinated in tangy dill pickle juice—each bite bursting with flavor and memories. The marriage of the zesty pickle notes and the creamy ranch dressing brings a delightful balance that reminds us of summer barbecues and gatherings with friends and family. It’s this profound connection to nostalgia that makes these Dill Pickle Ranch Skewers a must-try for anyone who loves making memories around the table.
I promise you, there’s something incredibly satisfying about skewering the marinated chicken pieces, knowing that you’re about to create a dish that will tantalize taste buds and spark conversations. The beauty of these skewers lies not just in their deliciousness but also in their versatility. Whether served as an appetizer at a party or as the centerpiece of a weeknight dinner, they are bound to impress your guests and become a staple in your culinary repertoire. Trust me when I say that once you try these skewers, they’ll quickly become one of your go-to recipes for any occasion—perfect for lazy summer evenings or cozy family nights.
Dill Pickle Ranch Skewers: A Flavorful Adventure Awaits
These Dill Pickle Ranch Skewers are simply irresistible! With juicy chicken marinated to perfection and finished with homemade dill pickle ranch dressing, this recipe is sure to become a favorite at your dinner table. Let’s dive into this culinary adventure together!
Ingredients:
Embarking on this culinary journey means gathering some wonderful ingredients that work together like best friends at a reunion. Each component plays its part in crafting these flavorful Dill Pickle Ranch Skewers, so let’s explore what makes them special.
- 8-10 wooden skewers, soaked in water for 30 minutes: Soaking wooden skewers is absolutely crucial as it prevents them from burning during cooking. This simple step ensures that your skewers remain sturdy while holding all the deliciousness without turning into charred sticks! If you’re looking for alternatives, metal skewers can be used as well; they don’t require soaking and will give you beautifully cooked skewers every time.
- 1 ½ pounds boneless skinless chicken breasts, cut into 1-inch cubes: Choosing high-quality chicken is paramount for achieving juicy results. When selecting your chicken breasts, look for ones that are firm and have no discoloration; freshness makes all the difference! Cutting them into uniform 1-inch cubes ensures even cooking throughout the skewers, allowing each piece to soak up the pickle brine beautifully.
- 2 cups (16 ounces) dill pickle juice: This ingredient is what sets our skewer apart from others—the pickle juice acts as a natural marinade, infusing the chicken with incredible flavor while keeping it moist during cooking. Feel free to use store-bought dill pickle juice or make your own; either way, you’re guaranteed to achieve that tangy zing we all love!
- 1 teaspoon kosher salt: Kosher salt is my go-to seasoning because it dissolves easily and enhances flavors without overpowering them. It draws out moisture from the chicken while helping to create a savory crust during cooking. Remember, this step is essential for ensuring every bite packs a flavor punch!
- ½ teaspoon black pepper: Freshly cracked black pepper adds warmth and depth to our seasoning blend. It complements the dill pickle juice perfectly while giving each skewer an aromatic finish that’s simply divine.
- ½ teaspoon garlic powder: Garlic powder brings a rich umami flavor that elevates our skewer’s profile. It’s versatile enough to enhance almost any savory dish without being overwhelming—trust me when I say it rounds out this recipe beautifully!
- ½ teaspoon onion powder: Just like garlic powder, onion powder contributes subtle sweetness and depth to our marinade without adding any crunch or texture changes. It’s one of those kitchen staples you never knew you needed until you start using it often!
- ½ teaspoon paprika: Paprika offers vibrant color and mild sweetness while enhancing our skewer’s overall appearance—who doesn’t want their dish looking as good as it tastes? Plus, it pairs wonderfully with chicken to create an enticing flavor combination.
- 1 cup dill pickle ranch dressing (divided): Homemade or store-bought—it doesn’t matter! The creamy ranch dressing acts as both a marinade before cooking and a dipping sauce afterward. This is where we bring everything together harmoniously into one delicious package.
- Fresh dill (chopped for garnish): The final touch! Chopped fresh dill adds brightness and freshness while enhancing those delightful pickle flavors we adore so much. Plus, it looks gorgeous sprinkled atop your skewers before serving!
Equipment You’ll Need:
Having the right tools can truly elevate your cooking experience; they’re essential partners in creating something wonderful like our Dill Pickle Ranch Skewers! Let’s gather what we need before diving into preparation.
- Air Fryer: An air fryer is not just trendy; it’s also incredibly efficient! It crisps up food quickly while using less oil than traditional frying methods—resulting in healthier meals without sacrificing taste or texture. Plus, cooking multiple batches becomes a breeze with adjustable temperature settings!
- Large mixing bowl: A spacious bowl allows ample room for marinating those delicate chicken pieces thoroughly in pickle juice while ensuring every piece gets coated evenly with seasonings later on. Choose one that’s easy to clean; trust me—you’ll thank yourself later!
- Whisk: A simple yet powerful tool for combining dry ingredients seamlessly—this helps ensure there are no clumps when seasoning our marinated chicken pieces! Whisks come in various materials; choose one that’s sturdy enough to hold up against tougher ingredients.
- Basting brush: Perfect for applying our creamy dill pickle ranch dressing generously onto those succulent chicken chunks before air frying them! Basting brushes come in silicone or natural bristles—both work well but remember to choose one that’s heat-resistant if you’ll be using it frequently.
Let’s get ready to prepare our delectable Dill Pickle Ranch Skewers by following these steps closely!
Step 1: Marinate That Chicken
To begin this delicious journey towards perfectly seasoned skewer bliss, take those lovely cubed pieces of boneless skinless chicken breast and place them into your large mixing bowl. Pour in two cups of tart dill pickle juice—the magic happens here! Cover tightly with plastic wrap or a lid and let them mingle in the refrigerator overnight (or at least eight hours). Why chill? This lengthy marination allows time for flavors to penetrate deeply into each piece of meat while also tenderizing it—a crucial step if you want juicy results!
Step 2: Seasoning Time
When you’re ready to cook (and I know you’ll be eager!), remove your marinated chicken from its cool resting place—don’t forget to drain off excess liquid first! In another bowl, combine kosher salt, black pepper, garlic powder, onion powder, and paprika using your trusty whisk until well-blended. Here comes my favorite part! Toss those marinated cubes into this flavorful mix until every morsel is coated evenly—it’s essential because each bite needs equal seasoning goodness without leaving any behind for future meals!
Step 3: Threading Those Skewers
Now comes the fun part—skewering! Grab those soaked wooden sticks we prepared earlier (remember how important soaking was?) and thread each seasoned piece of chicken onto them carefully yet firmly so they stay put during air frying. Aim for about four or five pieces per skewer depending on size—you want enough space between them for optimal heat circulation later on! Visual cues here include making sure there aren’t any gaps along each stick since tighter packing gives better browning results overall.
Step 4: Brushing with Love
With all your beautiful skewered creations ready to go now comes another layer of flavor magic thanks largely due diligence put forth earlier regarding our creamy dressing concoction! In addition setting aside half cup worth just prior—we’ll brush generous amounts atop freshly threaded chickens using basting brush mentioned earlier ensuring everything gets coated nicely before heading into air fryer basket awaiting transformation ahead…
Stay tuned as we continue through these mouthwatering steps towards culinary perfection together—a world filled entirely by delightful Dill Pickle Ranch Skewers awaits us both ahead!
The Joy of Air Frying: Perfecting Your Dill Pickle Ranch Skewers
Step 5: Preheat and Prepare Your Air Fryer
Now that your chicken has been beautifully marinated in that delightful dill pickle juice, it’s time to preheat your air fryer. Trust me, this step is absolutely paramount! You want the air fryer to reach the perfect temperature of 400°F before adding your skewers. This allows for that wonderfully crispy exterior while keeping the juicy tenderness locked inside each piece of chicken. While the air fryer is warming up, take a moment to lightly spray the basket with nonstick spray. This simple act creates a barrier that prevents sticking and makes cleanup a breeze later on. It’s all about those small details that transform cooking from just a task into an enjoyable experience.
As you wait for your air fryer to come to temperature—usually around 5-10 minutes—take a deep breath and relish the anticipation. Picture those succulent chicken pieces sizzling away, promising a symphony of flavors with every bite. Don’t rush this step; ensuring that your air fryer is properly heated will yield perfectly cooked skewers every time. When you finally place those skewers in, you’ll hear that gratifying sizzle, and I promise you, it will make your heart skip a beat!
Step 6: Arranging Your Skewers for Optimal Cooking
With the air fryer now preheated, it’s time to add your seasoned chicken skewers to the basket. It’s crucial to arrange them in a single layer without overcrowding—this allows hot air to circulate evenly around each skewer, creating that beautiful golden brown finish we’re all striving for. If you find yourself with too many skewers to fit at once (which can happen if you’re making these for a crowd), don’t worry! Cooking in batches is perfectly fine and ensures that each skewer receives the attention it deserves.
As you gently place them in the basket, take a moment to admire your handiwork—the tender chicken glistening from the dill pickle ranch dressing you brushed on earlier looks utterly intoxicating! Remember, this visual cue isn’t just for show; it indicates moisture retention during cooking, which leads to wonderfully succulent bites. Keep an eye on the time as they cook; you’ll want to set your timer for 11-12 minutes. Halfway through cooking—around the 5-6 minute mark—you’ll need to flip them over using tongs or even carefully shake the basket if you’re feeling adventurous. This flip is essential because it promotes even browning on both sides, so don’t skip this step!
Step 7: The Perfect Cook – Timing and Testing
Ahh, nothing quite compares to that moment when your kitchen fills with the mouthwatering aroma of cooked chicken! As your skewers near completion (remember that timer!), it’s vital to check their doneness carefully. The internal temperature should read an inviting 165°F when measured at the thickest part of the chicken cubes; this guarantees that they are fully cooked yet juicy and tender—nobody wants dry chicken! A quick tip: if you don’t have a meat thermometer handy (though I highly recommend one), look for juices running clear rather than pink when cutting into one of those lovely pieces.
The beauty of air frying is its ability to retain moisture while achieving crispness; however, each appliance can vary slightly in cooking times due to size and power differences. So don’t hesitate to adjust as needed! If you find that they need an extra minute or two but are worried about them drying out, cover them loosely with foil after checking their internal temperature—it’ll help keep them warm while they finish cooking without losing moisture.
Step 8: Brushing on More Flavor – The Finishing Touch
Once those glorious skewers have reached their peak perfection—golden brown, aromatic, and oh-so-inviting—it’s time for what I consider one of the most crucial steps: brushing on more dill pickle ranch dressing. Using that reserved half cup adds another layer of flavor and richness that’s simply divine! With a basting brush (or even just a spoon if necessity dictates), generously coat each skewer after removing them from the air fryer.
This step not only enhances flavor but also helps keep everything moist as you allow them to rest briefly before serving—trust me on this! Resting gives those delicious flavors time to meld together harmoniously while allowing juices within each piece of chicken to redistribute throughout its fibers. A mere five minutes can be transformative! During this time, consider garnishing with freshly chopped dill; it not only elevates presentation but adds an extra pop of freshness that’ll make everyone swoon with delight.
Final Touches: Serving Up Deliciousness
Step 9: Serve With Love – Dipping & Enjoying
Finally, let’s talk about how best to present these fabulous Dill Pickle Ranch Skewers when it’s time for serving! Once they’re beautifully arranged on a platter or individual plates, serve them alongside any remaining dill pickle ranch dressing as an irresistible dipping option. There’s something profoundly satisfying about dipping—it’s interactive and playful—and seeing everyone gather around as they enjoy these succulent bites together creates such warmth in any gathering.
As friends dig in and share their thoughts (and trust me—they will rave about these!), take pride in knowing you’ve crafted something truly extraordinary from scratch! These skewers aren’t just food; they’re an experience—a memory made over shared laughter and stories around your table. So enjoy every bite without reservation; life is too short not to indulge in delicious moments like these!
In summary, whether you’re preparing these Dill Pickle Ranch Skewers as an appetizer for friends or as part of a hearty main course at dinner, remember each step enriches not only the dish but also brings joy into our lives through cooking together—and isn’t that what it’s all about? Happy cooking!
Storage and Enjoyment Tips for Your Dill Pickle Ranch Skewers
Now that you’ve crafted these delightful Dill Pickle Ranch Skewers, it’s time to revel in their deliciousness! But what if you have some leftovers? Don’t worry; there’s plenty of joy to be had even after the last skewer has been savored. These skewers are not just a treat when freshly made; with proper care, they can continue to bring smiles and satisfaction long after your initial feast. Let’s dive into how to store them so that each bite remains as juicy and flavorful as the first.
Storing Leftover Dill Pickle Ranch Skewers
To keep your leftover Dill Pickle Ranch Skewers at their peak flavor, I recommend using an airtight container. This is crucial because it locks in moisture and prevents those glorious flavors from escaping. Simply place the skewers in the container and refrigerate them for up to three days. If you happen to have some extra dill pickle ranch dressing, drizzling a little over the skewers before sealing them up can work wonders in maintaining their juiciness. Trust me on this—when properly stored, these skewers retain their vibrant taste and tender texture, making them just as satisfying on day two (or three!). When you’re ready to enjoy them again, simply reheat in an air fryer or oven until warmed through, which helps maintain that delightful crunch on the outside while keeping the chicken tender inside.
Freezing Dill Pickle Ranch Skewers for Later
If you want to extend the life of your savory creations even further, freezing is an excellent option! To do this right, ensure your skewers are completely cooled before wrapping each one tightly in plastic wrap or aluminum foil. Then place them in a freezer-safe bag or container. They’ll keep beautifully frozen for about three months! When you’re ready for a quick dinner fix or a spontaneous gathering, simply remove the desired number of skewers from the freezer and let them thaw overnight in the refrigerator. When you’re ready to serve, just pop them into an air fryer or oven until heated through. The convenience of having these tasty treasures at your fingertips makes meal planning a breeze and allows you to impress friends or family with minimal effort!
Dill Pickle Ranch Skewers

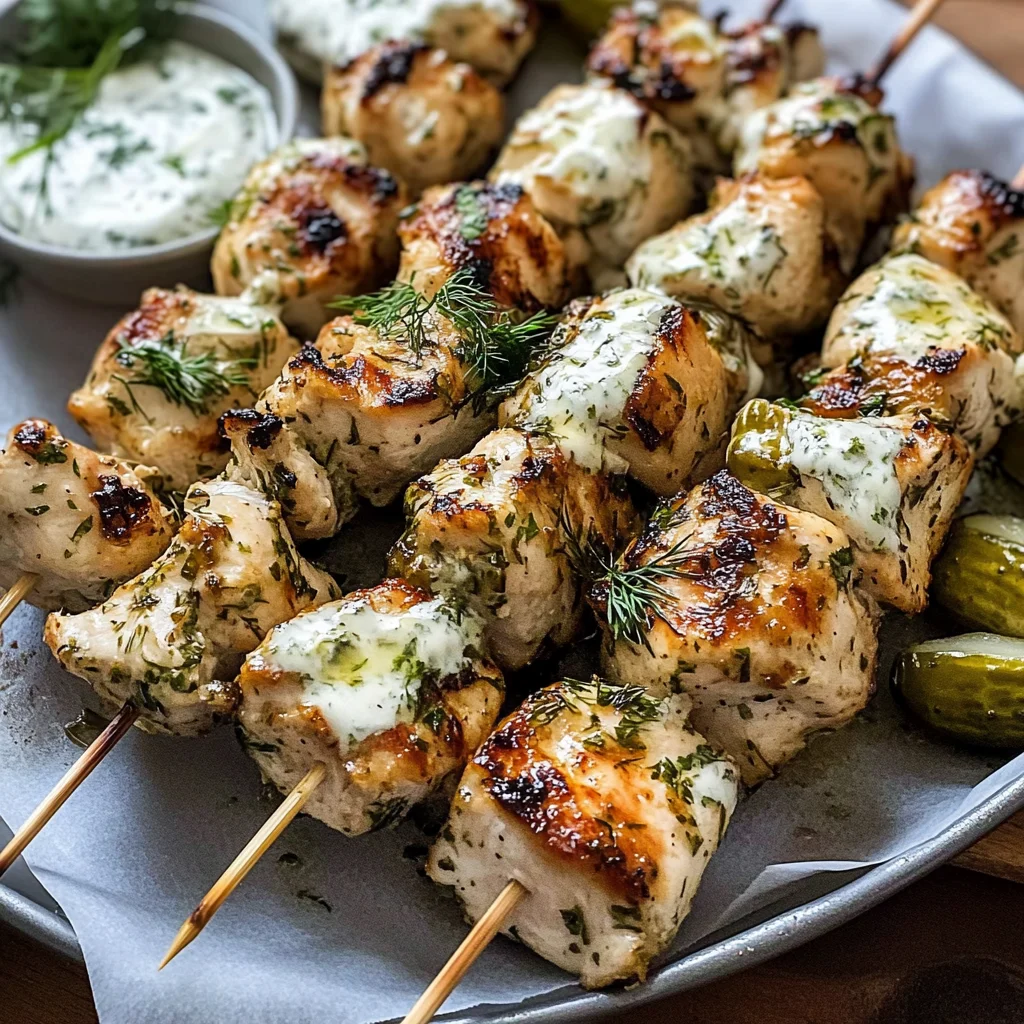
Dill Pickle Ranch Skewers are a delightful fusion of juicy chicken and zesty flavors that will transport your taste buds to summer barbecues and family gatherings. Marinated in tangy dill pickle juice, these skewers are not only moist but also bursting with flavor. Finished off with a creamy dill pickle ranch dressing, they serve as the perfect appetizer or main dish for any occasion. Easy to prepare and cook in an air fryer, these skewers promise to impress your guests while being a fun hands-on meal for everyone to enjoy. Gather around the table and savor the memories created over these delicious bites!
- Prep Time: 15 minutes
- Cook Time: 12 minutes
- Total Time: 27 minutes
- Yield: Approximately 6 servings 1x
- Category: Dinner
- Method: Air Frying
- Cuisine: American
Ingredients
- 1 ½ pounds boneless skinless chicken breasts, cut into 1-inch cubes
- 2 cups dill pickle juice
- 1 teaspoon kosher salt
- ½ teaspoon black pepper
- ½ teaspoon garlic powder
- ½ teaspoon onion powder
- ½ teaspoon paprika
- 1 cup dill pickle ranch dressing (divided)
- Fresh dill (for garnish)
Instructions
- Marinate the chicken in dill pickle juice for at least eight hours or overnight.
- Mix kosher salt, black pepper, garlic powder, onion powder, and paprika in a bowl.
- Drain excess marinade from the chicken and coat evenly with the seasoning mix.
- Thread seasoned chicken onto soaked wooden skewers.
- Preheat air fryer to 400°F and lightly spray basket with nonstick spray.
- Arrange skewers in a single layer in the air fryer; cook for 11-12 minutes, flipping halfway through.
- Brush cooked skewers with reserved ranch dressing and garnish with fresh dill before serving.
Nutrition
- Serving Size: 1 skewer
- Calories: 210
- Sugar: 1g
- Sodium: 650mg
- Fat: 10g
- Saturated Fat: 2g
- Unsaturated Fat: 8g
- Trans Fat: 0g
- Carbohydrates: 6g
- Fiber: 0g
- Protein: 28g
- Cholesterol: 75mg