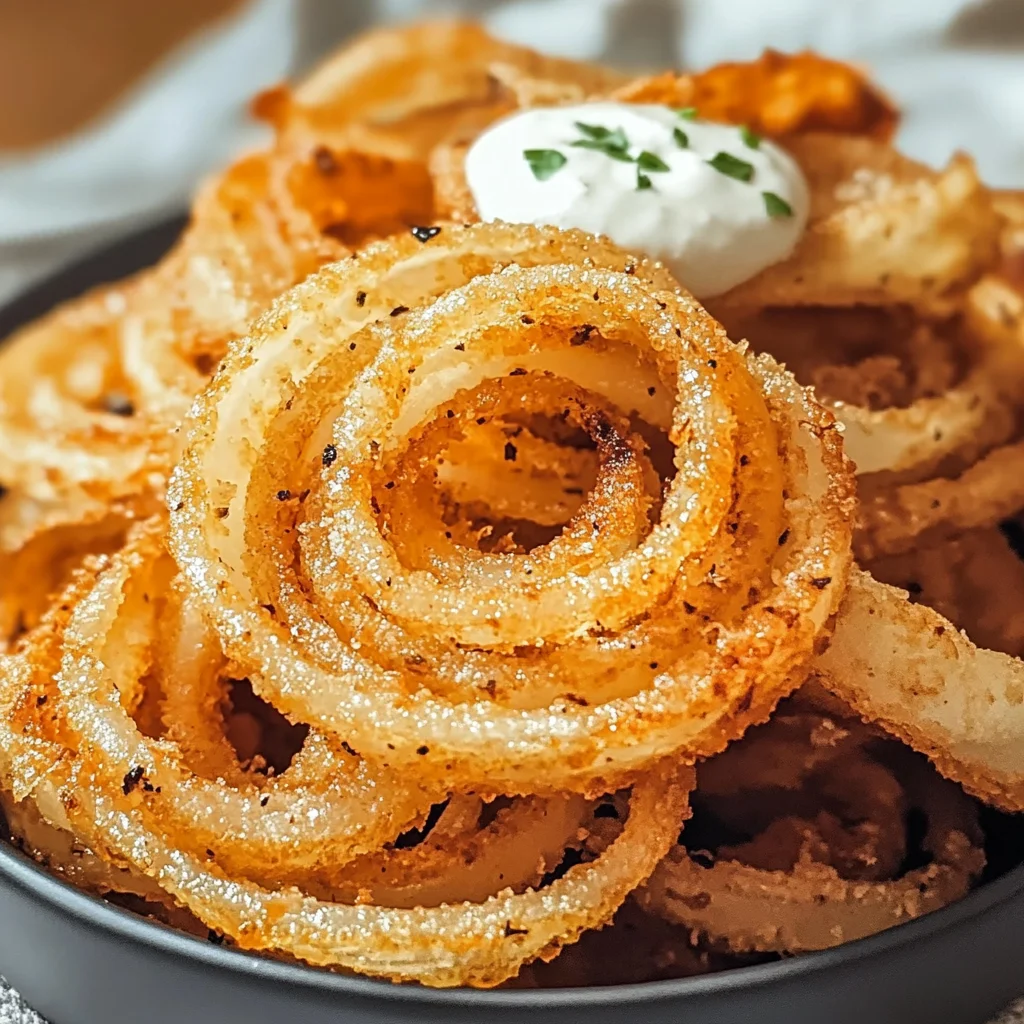
Crispy Onion Ring Chips: Your New Favorite Snack Delight
When it comes to snacks that evoke joy and a sense of comfort, few things can rival the experience of enjoying Crispy Onion Ring Chips. The very thought of biting into one of these golden, crunchy delights is enough to make my heart flutter with excitement! Imagine the sound as you take that first bite – a satisfying crunch followed by an explosion of savory flavor that dances on your taste buds. These chips are more than just food; they’re a celebration of culinary creativity, perfect for sharing with friends during movie nights or gatherings. I promise you, once you try this recipe, it will become your new go-to snack, and you’ll find yourself making them again and again.
What I love so much about these Crispy Onion Ring Chips is their accessibility; they bridge the gap between traditional comfort food and contemporary snacking. The sweetness of the onions combined with the crunchy coating creates a symphony of flavors and textures that’s utterly intoxicating. Plus, they’re incredibly easy to whip up! Whether you’re hosting a gathering or just treating yourself after a long day, these onion rings provide that profound satisfaction we all crave. Trust me when I say they will impress even the pickiest eaters at your table.
Crispy Onion Ring Chips: Your New Favorite Snack Delight
To embark on this delightful culinary journey, you’ll need just a handful of simple ingredients that transform into something truly extraordinary. This recipe is straightforward yet yields results that are restaurant-worthy! Let’s dive into what makes each ingredient special, setting us up for success right from the start.
Ingredients:
As we prepare to create our Crispy Onion Ring Chips: Your New Favorite Snack Delight, it’s essential to understand how each ingredient plays its part in this delicious dance.
- 2 large Onions: Sweet onions like Vidalia are perfect for this recipe because their mild flavor allows them to shine without overwhelming your palate. When selecting onions, look for ones that feel firm and heavy for their size; any soft spots or blemishes might indicate age or spoilage. The natural sugars in sweet onions caramelize beautifully during cooking, providing an irresistibly rich flavor we absolutely adore in our chips.
- 1 cup All-Purpose Flour: This versatile ingredient serves as the foundation for our batter, creating a delightful outer layer that crisps beautifully when fried. If you’re gluten-sensitive or prefer a gluten-free option, swapping this with a gluten-free flour blend works wonders while still giving you that satisfying crunch. The flour helps to absorb moisture from the buttermilk and clings to it perfectly, making sure every bite is packed with flavor.
- 1 teaspoon Garlic Powder: Adding garlic powder infuses our onion ring chips with an aromatic depth that elevates the entire dish! If you’re feeling adventurous or simply love garlic as much as I do, consider using fresh minced garlic instead for an even more robust flavor profile. This subtle enhancement makes each chip taste incredibly savory without overwhelming the sweetness of the onions.
- 1 teaspoon Paprika: This spice brings warmth and color to our onion rings while contributing its own unique flavor—smoked paprika offers an interesting twist if you’re looking to add complexity! The vibrant hue not only makes the chips visually appealing but also provides a lovely depth of flavor that balances beautifully with the sweetness of the onions.
- 1 teaspoon Salt: Salt is essential; it enhances all flavors present in your dish. While regular table salt will do just fine, I recommend sea salt or kosher salt for their larger crystals and purer flavor profile. The salt works hand-in-hand with other spices to create that mouthwatering experience we crave in every bite.
- 1 teaspoon Black Pepper: A pinch of black pepper adds warmth and a slight kick without being intrusive. If you prefer something milder, white pepper can be used as an alternative since it tends to have less pungency while still delivering great flavor.
- 1 cup Buttermilk: Buttermilk not only tenderizes our onion rings but also keeps them moist during frying; it’s like liquid gold! If you don’t have buttermilk on hand, don’t worry! You can easily substitute it by mixing regular milk with vinegar or lemon juice – it will curdle slightly and mimic buttermilk’s tangy goodness perfectly.
- 2 cups Panko Breadcrumbs: For those gloriously crispy edges we all love so much! Panko breadcrumbs are coarser than traditional breadcrumbs and result in an incredible crunch when fried. If you only have regular breadcrumbs at home, they’ll work too; just know they won’t give quite the same texture we’re aiming for here!
- 4 cups Vegetable Oil: Choosing the right oil is crucial here; vegetable oil has a high smoke point which makes frying easier and safer. Canola or peanut oil are excellent alternatives if you prefer something different—they both ensure even cooking without imparting unwanted flavors onto your chips!
Equipment You’ll Need:
Having the right tools in your kitchen can truly make all the difference in cooking experiences like these crispy delights! With quality equipment at hand, you’ll find preparing your Crispy Onion Ring Chips becomes not just easier but also more enjoyable.
- Deep Fryer (or Heavy Pot): While having a deep fryer is fantastic for maintaining consistent temperature during frying (and keeping things tidy!), a heavy pot works well if that’s what you’ve got available. Just ensure it’s deep enough to hold oil without splattering everywhere when adding ingredients – trust me; nobody wants hot oil on their hands!
- Slotted Spoon or Spider Strainer: This handy tool lets you safely remove those crunchy beauties from hot oil without losing any precious chips along the way! It allows excess oil to drain off quickly while ensuring nothing gets left behind in your pot—nobody wants soggy onion rings!
- Baking Sheet lined with Paper Towels: After frying those gorgeous onion ring chips, resting them on paper towels absorbs any excess grease while keeping them crispy until serving time arrives!
Now that we’ve gathered our ingredients and equipment let’s get started on preparing these delightful treats!
Preparing the Crispy Onion Ring Chips: Your New Favorite Snack Delight
Step 1: Slicing the Onions
Begin by peeling those beautiful sweet onions—we’re looking for layers upon layers of flavor here! Once peeled, slice them into thick rings about ½ inch wide; this thickness ensures they hold up during frying and gives us those lovely onion rings we crave. As you cut through each layer, take a moment to appreciate their fragrance—it’s intoxicating! Now comes an essential tip: if you’re prone to tearing up while slicing onions (who isn’t?), consider chilling them in advance or using a sharp knife which minimizes cell damage—trust me on this one!
Step 2: Creating Our Flavorful Batter
In one bowl, whisk together the all-purpose flour (or gluten-free alternative), garlic powder, paprika, salt, and black pepper until fully combined—this blend will coat our onion rings beautifully! In another bowl, pour in your buttermilk; this step is crucial as it acts as both marinade and adhesive for our batter later on. Dip each onion ring into buttermilk first before dredging it generously through your seasoned flour mixture—ensure every crevice gets coated well because this guarantees those fabulous crispy edges we’re after!
Step 3: Dredging in Panko Breadcrumbs
Once coated in flour goodness (we’re talking about layers upon layers here!), take each ring back into buttermilk briefly before rolling in panko breadcrumbs—this double-dipping method creates maximum crunchiness! Gently press down on each ring within panko so they adhere nicely; after all this effort—you’ll want every bite bursting forth with texture! Place dredged rings aside on parchment paper lined baking sheets until ready for frying—they need space so nothing sticks together during cooking!
Step 4: Heating Up That Oil
Now comes perhaps my favorite part—the sizzling sound when those onion rings hit hot oil! In either your deep fryer set around 350°F (175°C) or heavy pot filled with vegetable oil heated over medium-high heat (test temp by dropping small crumbs—if they sizzle immediately—you’re good!), carefully lower several onion rings at once without overcrowding—this helps maintain temperature consistency throughout cooking times which results in even crispiness across batches. Fry until golden brown perfection forms—about 3–4 minutes per batch—but keep an eye out because no one likes burnt offerings!
There you have it—the first steps toward crafting your very own batch of Crispy Onion Ring Chips: Your New Favorite Snack Delight await mastery under loving care—and trust me when I say—they’ll be worth every minute spent preparing them! So gear up because soon enough you’ll be indulging in these addictive bites that’ll leave everyone asking for more!
Step 5: The Flour Coat – A Crucial Foundation
Now that our onions are beautifully sliced into rings, it’s time to talk about the flour coating. This step is truly paramount in achieving that delightful crunch we all crave. Start by taking your all-purpose flour and placing it in a large bowl. You’ll want to add the garlic powder, paprika, salt, and black pepper to this mixture. Why? Well, these spices will infuse the flour with flavor, ensuring each bite of your Crispy Onion Ring Chips is a symphony of tastes that dance on your palate. I recommend mixing these dry ingredients thoroughly with a whisk; this not only combines them well but also aerates the flour, contributing to a lighter texture.
Once you have your seasoning blend ready, take each onion ring and gently dredge it in the seasoned flour. Make sure every crevice and corner is coated! This step might feel mundane, but trust me when I say that a good coating of flour helps create an anchor for the buttermilk and breadcrumbs to adhere to—this is what gives us that wonderfully crispy exterior when they’re fried. As you do this, shake off any excess flour; too much can lead to a clumpy mess later on. You’re looking for a light dusting here—a firm yet gentle embrace of flavor that will set the stage for the next steps.
Step 6: Buttermilk Bath – The Secret to Tenderness
Next up is the buttermilk bath, which is where the magic happens! In a separate bowl, pour in one cup of buttermilk—this rich liquid is crucial as it tenderizes our onions while adding moisture and flavor. If you’re using regular milk with vinegar or lemon juice as a substitute, allow it to sit for about five minutes until it thickens slightly; this simulates buttermilk perfectly! Here’s where we get a little playful: dip each floured onion ring into the buttermilk mixture, making sure they’re completely submerged. The acidity from the buttermilk not only enhances flavor but also activates proteins that help bind everything together.
Don’t rush through this process; allowing those rings to soak for at least 5-10 minutes will yield extraordinary results. This soaking time allows the flavors from your previous step to permeate each ring fully while creating a luscious layer that will hold onto our crunchy breadcrumbs later on. What you want to watch for here is that slight thickening on your onion rings—this means they’re absorbing all that lovely goodness! When you lift them out, let any excess drip off before moving to our next exciting phase.
Step 7: Panko Perfection – The Crunch Factor
Now we arrive at one of my favorite parts—the panko breadcrumb coating! Panko breadcrumbs are like little nuggets of joy; they provide an unbeatable crunch compared to regular breadcrumbs, thanks to their airy and open structure. Prepare another bowl filled with those two cups of panko breadcrumbs—feel free to add another sprinkle of paprika or garlic powder here if you want even more flavor infusion! It’s this slight variation that can elevate your snack from ordinary to utterly intoxicating.
Gently take each buttermilk-soaked onion ring and place it into the panko bowl, pressing down slightly so they adhere well. I encourage you not to skip this step; ensuring an even coat can make or break your chip’s texture. After coating each ring generously with panko, lay them out on a baking sheet lined with parchment paper or lightly greased foil. This resting period allows any lingering moisture from the buttermilk bath to settle and ensures we achieve maximum crunch when frying them up!
Step 8: Frying Time – Achieving Golden Perfection
Ahh—the moment we’ve all been waiting for! It’s frying time! Heat up four cups of vegetable oil in a deep skillet or pot over medium-high heat until it reaches around 350°F (175°C). This temperature is absolutely crucial because if it’s too low, your chips may absorb excess oil and become soggy rather than crispy; too high, and they risk burning before cooking through properly. You can test if it’s hot enough by dropping in a breadcrumb or two; if they sizzle immediately upon contact with oil, you’re good to go!
Carefully lower your onion rings into the hot oil in batches—don’t overcrowd them as they need space to fry evenly. Aiming for about 2-3 minutes per side should yield an enticing golden brown color; turn them gently with tongs halfway through cooking for even browning. As they fry away blissfully, keep an eye on them—this visual cue is essential because once they reach that perfect golden hue, they’re ready! Remove them using a slotted spoon and transfer them onto paper towels placed on a cooling rack; this will help drain off any excess oil while keeping them crisp.
Conclusion:
As we wrap up this delightful journey through making Crispy Onion Ring Chips: Your New Favorite Snack Delight, I hope you feel the same excitement I do each time I whip up this recipe. There’s something truly magical about transforming simple ingredients into such crispy perfection—each chip is a symphony of flavors and textures that dance on your palate. The combination of sweet onions, crunchy panko breadcrumbs, and those subtle hints of garlic and paprika creates an utterly intoxicating experience that’s not just food; it’s pure joy!
This recipe is an absolute must-try—not only for its delectable taste but also for the joy it brings during its creation. It’s perfect for gatherings where laughter fills the room or even as a comforting solo treat while binging your favorite show. Picture pulling these golden beauties out of the oven—the sound of crunching as they hit your plate will have everyone clamoring for more. Whether served at parties or enjoyed on a quiet afternoon, they are sure to steal the spotlight.
Imagine savoring one with a tangy dipping sauce or perhaps alongside a fresh garden salad—it’s all about creating those moments that linger long after the last chip has been devoured! For an extra kick, consider pairing these onion ring chips with spicy salsa or creamy avocado dressing; each bite becomes an adventure filled with flavor contrasts that elevate your snacking game like never before.
Feeling adventurous? This recipe is wonderfully adaptable! You could try different coatings like crushed cornflakes for added crunch or experiment with various spices—perhaps some cumin or chili powder if you’re looking to spice things up a bit! The possibilities are endless when it comes to enhancing this dish further; I encourage you to dive in and make it your own! So go ahead—try out these Crispy Onion Ring Chips today and don’t forget to share your experience with friends and family as well as any unique twists you come up with along the way!
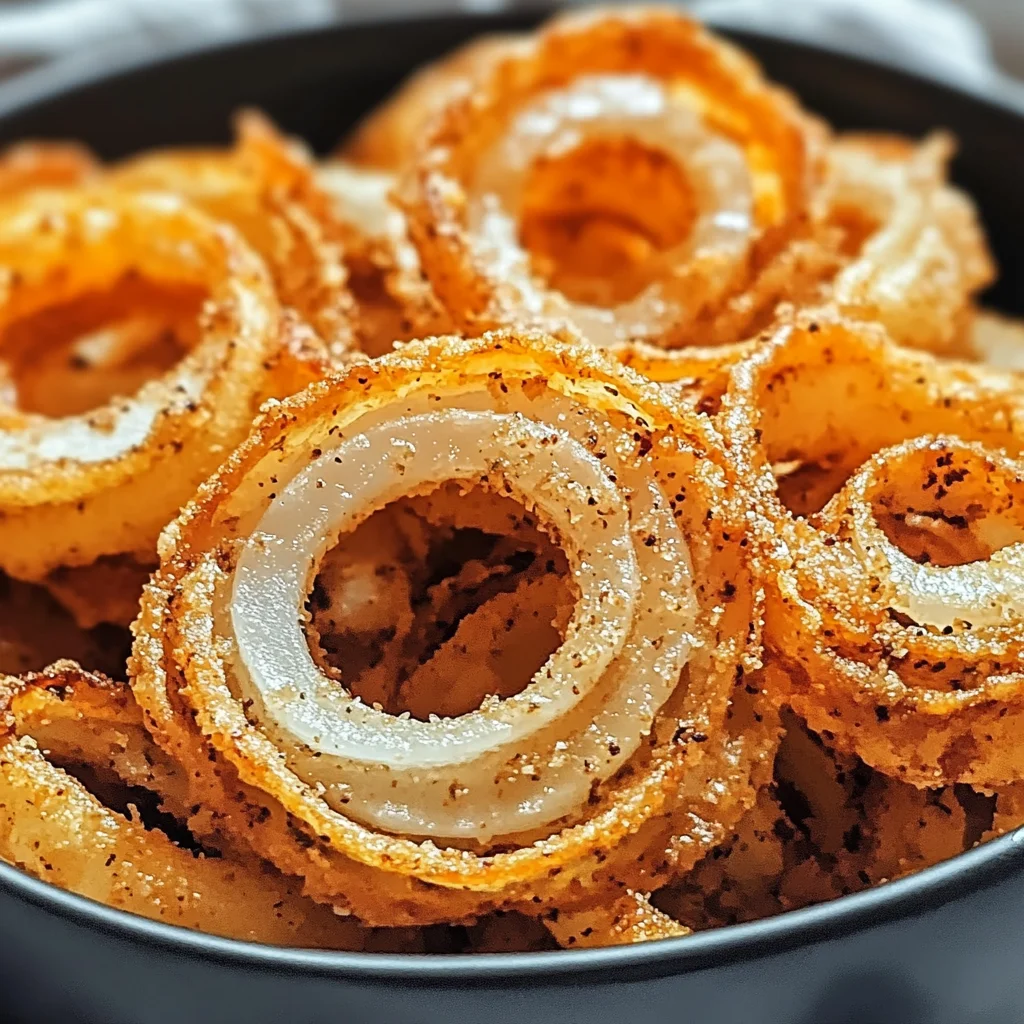
Crispy Onion Ring Chips: Your New Favorite Snack Delight
Experience the joy of Crispy Onion Ring Chips, a delightful snack that perfectly balances flavor and texture. These golden, crunchy treats are made from sweet onions coated in a seasoned batter, then fried to perfection for an irresistible crunch. Ideal for sharing at gatherings or enjoying during a cozy night in, these chips offer a satisfying bite that will leave you wanting more! With simple ingredients and easy preparation, you’ll find yourself making them time and again.
- Prep Time: 15 minutes
- Cook Time: 20 minutes
- Total Time: 35 minutes
- Yield: Approximately 4 servings 1x
- Category: Snack
- Method: Frying
- Cuisine: American
Ingredients
- 2 large sweet onions
- 1 cup all-purpose flour (or gluten-free blend)
- 1 teaspoon garlic powder
- 1 teaspoon paprika
- 1 teaspoon salt
- 1 teaspoon black pepper
- 1 cup buttermilk (or milk with vinegar/lemon juice)
- 2 cups panko breadcrumbs
- 4 cups vegetable oil (for frying)
Instructions
- Peel and slice the onions into thick rings (about ½ inch wide).
- In one bowl, whisk together the flour, garlic powder, paprika, salt, and black pepper.
- Pour buttermilk into another bowl. Dip each onion ring in buttermilk, then dredge in the flour mixture.
- Dip rings back in buttermilk followed by coating in panko breadcrumbs.
- Heat vegetable oil to 350°F (175°C) in a deep fryer or heavy pot. Fry the onion rings in batches until golden brown (about 3–4 minutes per side).
- Remove the chips with a slotted spoon and drain on paper towels.
Nutrition
- Serving Size: 8 chips (50g)
- Calories: 210
- Sugar: 2g
- Sodium: 480mg
- Fat: 12g
- Saturated Fat: 1g
- Unsaturated Fat: 11g
- Trans Fat: 0g
- Carbohydrates: 23g
- Fiber: 1g
- Protein: 3g
- Cholesterol: 0mg