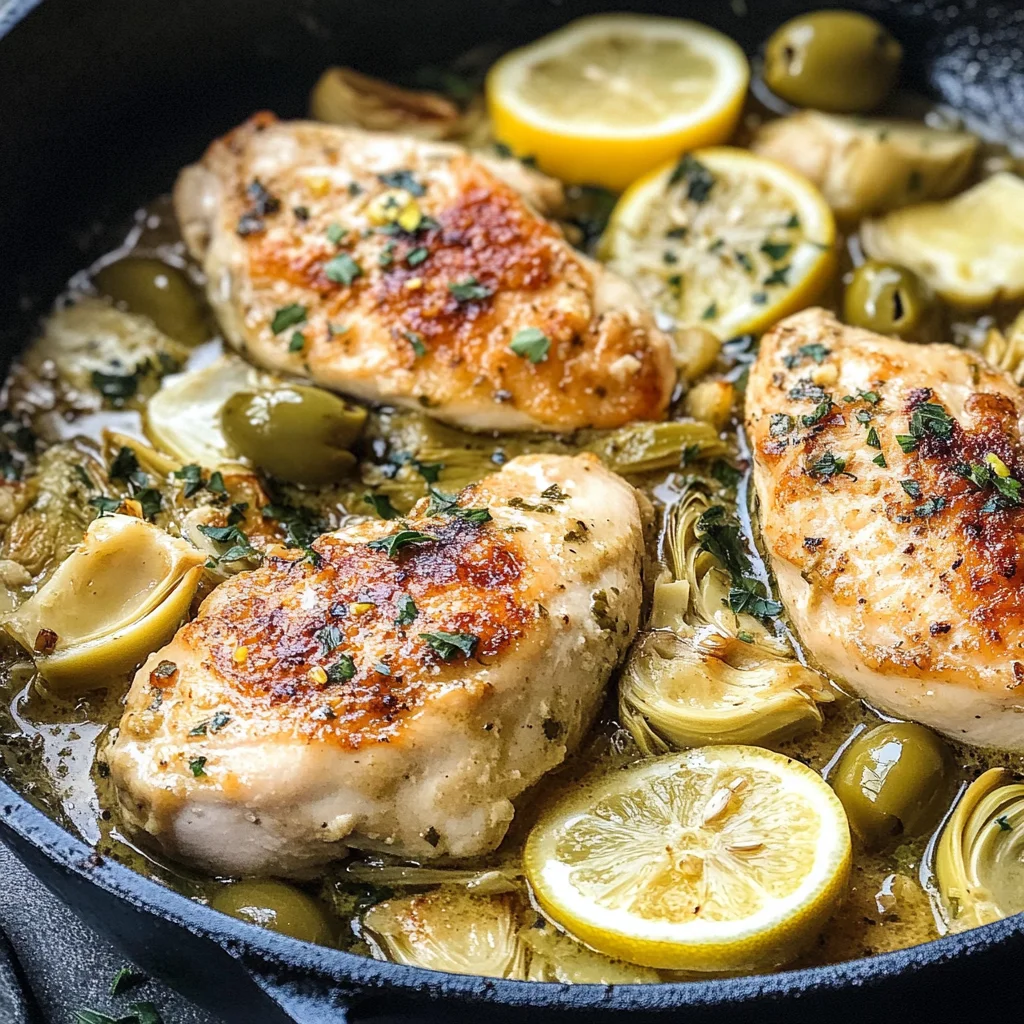
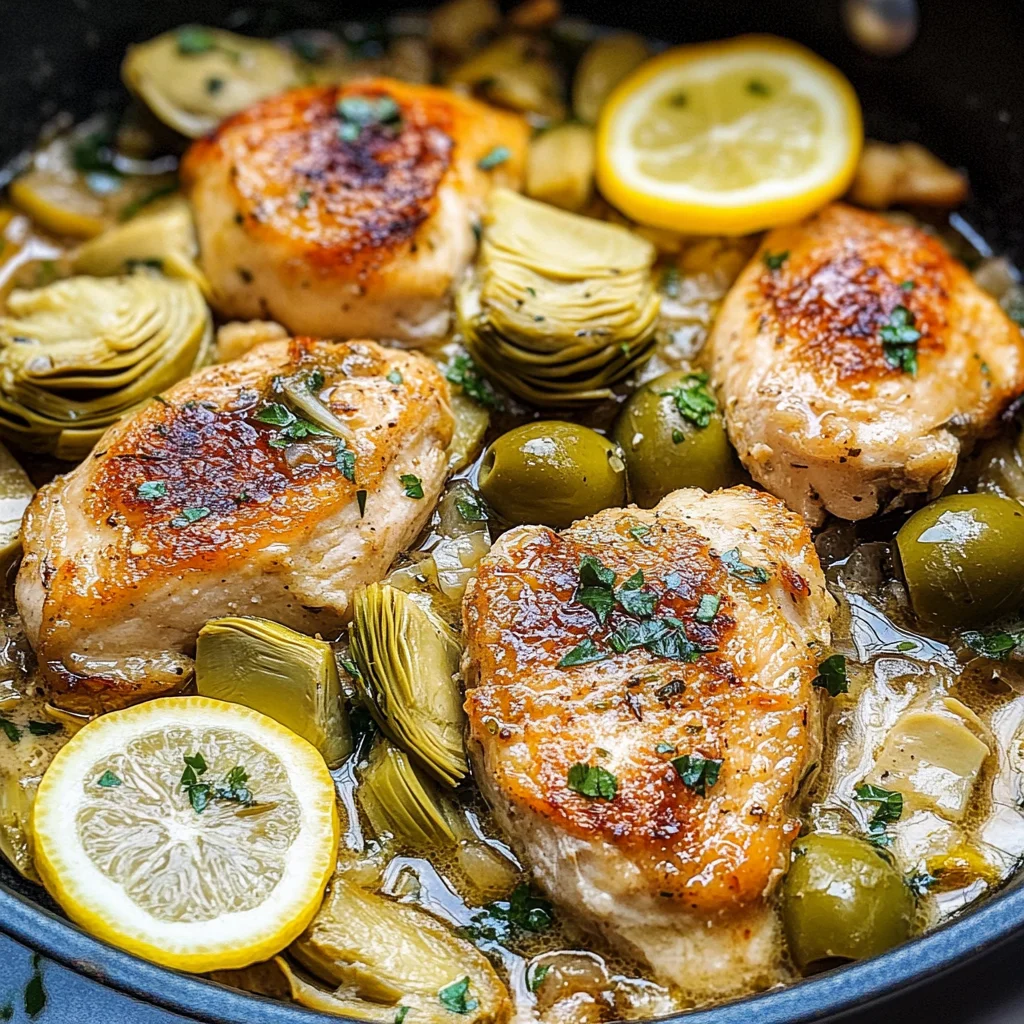
Chicken Artichoke Skillet
There’s something truly magical about gathering around the dinner table, sharing stories, laughter, and a meal that warms not just the body but also the soul. The Chicken Artichoke Skillet is more than just a dish; it’s a heartfelt invitation to experience the delightful fusion of flavors that come alive with each bite. Picture this: tender chicken, perfectly seared to a golden brown, mingling harmoniously with tangy artichokes and briny olives, all brought together by a luscious garlic-lemon sauce that dances on your palate. This recipe is an exhilarating journey through taste and texture, promising to become a cherished staple in your home.
I’ve always been captivated by the way cooking can create memories; it’s like weaving a tapestry of flavors and emotions. Each ingredient tells its own story, contributing to an unforgettable meal that can transport you back to cherished moments. As I prepare my Chicken Artichoke Skillet, I’m reminded of family gatherings where we’d chat for hours over delicious food—each bite an invitation to reminisce and savor life’s simplest pleasures. This dish is perfect for busy weeknights or when you’re entertaining friends; it’s easy to whip up yet sophisticated enough to impress even the most discerning palates.
Chicken Artichoke Skillet: A Flavorful Journey in One Pan
This Chicken Artichoke Skillet embodies everything I adore about cooking—simplicity, flavor, and comfort. It’s warm and inviting, with colors that brighten any table setting. Not only does it come together quickly, but it also allows you to enjoy the process without feeling rushed. Trust me on this: every step is designed to accentuate the flavors while ensuring you have ample time to enjoy your culinary creation.
Ingredients:
Embarking on this culinary adventure requires some fantastic ingredients that each play a pivotal role in creating an extraordinary dish. Let’s dive into what makes each element so special.
- 1 1/2 lbs boneless skinless chicken breast. The star of our show! When selecting chicken breasts, look for ones that are plump and have a fresh appearance—this ensures maximum juiciness and tenderness. I prefer boneless and skinless for this recipe as they cook evenly and soak up all the incredible flavors we’ll be adding later. If you want to elevate the dish further, consider pounding them to an even thickness; this helps them cook uniformly while keeping them incredibly tender.
- Sea salt and freshly ground black pepper, to taste. These two humble ingredients might seem simple but they are absolutely paramount in enhancing every flavor in our Chicken Artichoke Skillet. Sea salt not only seasons but also brings out the natural juices of the chicken while freshly cracked black pepper adds depth with its unique heat. Always start with less; you can adjust as needed during cooking.
- 1/4 cup gluten-free flour or Arrowroot powder. This is crucial for achieving a slight coating on our chicken that creates a beautiful crust when seared. If you’re using gluten-free flour or Arrowroot powder, both will help thicken our sauce later without altering the delicate balance of flavors we’re cultivating here.
- 2 Tbsps grass-fed butter or ghee. Here’s where things get exciting! Butter (or ghee for those who prefer dairy-free) brings richness that elevates our dish from ordinary to extraordinary. It imparts a nutty flavor when browned slightly, which perfectly complements our other ingredients. Make sure it’s at room temperature so it melts evenly upon contact with the hot skillet.
- 3 fresh garlic cloves (minced). Garlic is like music in cooking—it harmonizes all elements beautifully! Fresh minced garlic releases an intoxicating aroma as it cooks, infusing our skillet with warmth and depth that’s simply irresistible. For maximum flavor impact, make sure your garlic is fresh; old garlic can lose its pungency.
- 1 cup chicken bone broth. This ingredient adds layers of flavor while keeping everything moist and succulent as it simmers away in the skillet. Look for high-quality broth made from free-range chickens for optimal taste—it’s worth it! Plus, using bone broth enriches your dish with nutrients that support overall health—a delightful bonus!
- 1 Tbsp gluten-free flour or Arrowroot powder (for thickening). Just like before, this helps us achieve that perfect silky sauce texture without any gluten involved.
- 2 Tbsps fresh lemon juice (or juice of 1 large lemon). Lemon juice brightens everything up! It adds freshness and acidity that cuts through richness beautifully—essentially lifting our dish into new heights of flavor complexity! Freshly squeezed lemon juice is non-negotiable here; bottled versions just don’t have the same vibrancy.
- 1 jar (14 oz water-packed quartered artichoke hearts, drained). Artichokes bring an earthy sweetness that’s unique and utterly enchanting! Their tender texture marries wonderfully with our lean chicken while adding visual appeal as well—they’re like little edible jewels scattered throughout the dish!
- 1/2 cup pitted green olives (sliced diagonally). Olives add briny goodness that contrasts perfectly against our other flavors! They provide another layer of depth; their saltiness complements the creamy sauce we’re about to create while providing textural variety—every bite should be an adventure!
- 2 Tbsps minced fresh oregano or 2 tsp dried oregano. Oregano offers aromatic herbal notes that round out our dish beautifully! Fresh herbs are always best if you can find them—they add brightness—but dried works beautifully too if that’s what you have on hand.
- Fresh lemon slices to garnish—because we eat with our eyes first! Gorgeous garnishes elevate any meal visually while enhancing aromas when served hot off-the-stove—don’t skip this step!
Equipment You’ll Need:
Having the right tools at your disposal makes cooking not just easier but also more enjoyable! Think of these items as essential partners in creating something wonderful—a harmonious symphony that resonates on your dinner table.
- Large skillet – A good quality skillet is vital for searing our chicken perfectly! Look for one that distributes heat evenly; cast iron or stainless steel works best here because they retain heat exceptionally well while allowing for beautiful browning without sticking.
- Meat mallet or rolling pin – If you’re planning on pounding your chicken breasts for even cooking (which I highly recommend!), having one of these handy makes life so much easier! A meat mallet ensures consistent thickness across all pieces so everything cooks at once—no dry spots allowed!
- Sharp chef’s knife – A trusty knife will make prepping ingredients quick and safe—you want precision when slicing garlic and mincing herbs! Keeping it sharp means cleaner cuts which enhance presentation later too!
Preparing the Chicken Artichoke Skillet
Step 1: Prepare Your Chicken
To begin our flavorful journey toward creating this irresistible Chicken Artichoke Skillet, let’s focus on preparing our chicken properly—it sets the stage for success! If your chicken breasts are thick—and sometimes they can be quite hefty—I suggest taking out your meat mallet or rolling pin and gently pounding them until they’re an even thickness throughout; aim for about ¾ inch thick pieces if possible. This technique ensures they cook evenly without drying out during searing—a critical step if you want juicy results!
Once they’ve reached their desired thickness (and perhaps you’ve taken out some frustrations along the way!), season both sides generously with sea salt and freshly ground black pepper—don’t skimp here because seasoning enhances every bite we take later on! Now grab your shallow dish filled with gluten-free flour or Arrowroot powder; lightly coat each piece by dipping both sides into flour before giving them a gentle shake-off to remove excess coating—it should be just enough to help create those gorgeous golden crusts we’re aiming for!
Step 2: Sear Your Chicken
Now comes one of my favorite moments—the actual searing process! Melt two tablespoons of grass-fed butter (or ghee) in your large skillet over medium heat until it becomes liquid gold—it should shimmer invitingly but avoid browning too much at this point because we don’t want burnt bits interfering with our final sauce later on! Once melted confidently place those seasoned breasts into this sizzling embrace; allow them space between pieces so they don’t steam instead of sear—that crispiness matters immensely!
Cook undisturbed for about three minutes per side until they’re gloriously golden brown—you’ll know they’re ready when they release easily from the pan without any sticking drama happening underneath! Carefully flip them over using tongs (to avoid splatter) then give yourself permission—to breathe deeply as those enticing aromas fill your kitchen—it’s part magic show mixed with culinary artistry coming alive right before your eyes!
Step 3: Set Chicken Aside
Once both sides have attained that perfect bronze color reminiscent of sun-kissed beaches—gently transfer those lovely pieces onto a plate momentarily setting aside—we are not done yet friends! This step allows residual juices within each piece to redistribute themselves back inside while we work on building layers upon layers of stunning flavor within this same skillet—we’re merely resting them now…
Take care not rush through this part because resting keeps moisture locked inside rather than leaking out prematurely during subsequent steps—the beauty lies ahead still waiting patiently for us…
Step 4: Create The Flavor Base
Now let’s focus on creating those incredible flavors by making use of all those delicious remnants left behind in our skillet after searing—the fond from earlier holds unparalleled potential awaiting discovery!! With remaining butter still melted warmly within reach add minced garlic directly into hot pan stirring frequently till fragrant—it should take no longer than thirty seconds before wafting aromas transport you straight into heaven itself…
Next pour in one cup worth of rich bone broth alongside additional tablespoonfuls worth gluten-free flour or Arrowroot powder whisking vigorously until combined smoothly—a few bubbles dancing suggests things are heating nicely already! Bring mixture up gently towards simmering stage allowing time for subtle thickening magic happen thanks largely due starches present…
As soon as it begins bubbling away joyfully stir constantly preventing anything from sticking down below whilst simultaneously adding juice extracted freshly from lemons’ zestiness kicking off vibrant acidity balancing all richness surrounding us effortlessly…
Trust me—you’ll hardly resist dipping fingers back into pot sampling this elixir long before completing rest ahead…but do save some sanity folks—we still need finish assembling masterpiece shortly…
Final Touches – Serving Your Chicken Artichoke Skillet
As we approach the final moments before diving into this delicious creation, let’s give our Chicken Artichoke Skillet one last flourish! Once you’ve ensured everything is cooked perfectly and bursting with flavor, remove it from heat but leave it covered for an additional five minutes—you might be wondering why? This resting period allows juices within the chicken to redistribute evenly throughout each piece ensuring moistness with every bite.
When you’re ready to serve—and I promise you will be soon—ladle generous portions onto plates or serve family-style straight from the skillet for an inviting presentation that’s sure to impress everyone gathered around your table! Garnish with fresh lemon slices for that pop of color and extra zing—it makes all the difference visually while enhancing those bright notes we’ve infused throughout.
I hope you enjoy every moment spent savoring this Chicken Artichoke Skillet as much as I have enjoyed sharing this cherished recipe with you! It’s more than just food; it’s comfort on a plate—a true testament to how simple ingredients can come together in profound ways. Bon appétit!
Storage and Enjoyment Tips for Your Chicken Artichoke Skillet
Now that your Chicken Artichoke Skillet is ready to grace your dining table, let’s dive into some tips on how to enjoy this dish even beyond the first serving. I mean, who doesn’t love leftovers that taste just as good, if not better? You’ll find that this dish is not only a delight to prepare but also a joy to savor in the days to come. Let’s talk about how best to preserve those delicious flavors so you can relive the magic of this recipe again and again.
Storing Leftover Chicken Artichoke Skillet
When it comes to storing your leftover Chicken Artichoke Skillet, I recommend using an airtight container—think glass or BPA-free plastic—to keep everything fresh and flavorful. Simply allow your skillet to cool down before transferring it into the container; this helps prevent condensation from forming and watering down those lovely flavors you’ve worked so hard to develop. Stored properly in the refrigerator, it should stay good for about three to four days, though trust me, it probably won’t last that long! To maintain quality, I’ve found that placing a slice of bread in the container can help absorb any excess moisture—what a simple trick! When reheating, a gentle touch is essential; warm it slowly on the stove over low heat or pop it in the microwave for short intervals—this ensures that every bite remains just as juicy and aromatic as the day you made it.
Freezing Chicken Artichoke Skillet for Later
If you find yourself with more than you can eat within a few days (or simply want to prep ahead), freezing your Chicken Artichoke Skillet is an excellent option! Ensure your dish cools completely before portioning it into freezer-safe containers or heavy-duty freezer bags—this helps prevent freezer burn and keeps those vibrant flavors intact. When stored properly, you can enjoy this delightful meal for up to three months! The beauty of freezing is that when you’re ready for a quick weeknight dinner, all you need to do is thaw it overnight in the refrigerator and reheat; you’ll have a comforting meal at your fingertips without any hassle. Just imagine pulling out a container from the freezer on a busy evening—it’s like having a homemade dinner ready without any of the fuss!
Chicken Artichoke Skillet

Indulge in the vibrant flavors of our Chicken Artichoke Skillet, a delicious one-pan dish that brings together tender chicken, tangy artichokes, and briny olives in a luscious garlic-lemon sauce. Perfect for busy weeknights or cozy gatherings, this recipe offers a delightful fusion of tastes and textures that will warm your heart and satisfy your taste buds. With its quick preparation and minimal cleanup, you’ll be savoring each bite in no time. Gather around the table and enjoy this comforting meal that promises to become a staple in your home.
- Prep Time: 15 minutes
- Cook Time: 25 minutes
- Total Time: 40 minutes
- Yield: Serves approximately 4 people 1x
- Category: Dinner
- Method: Skillet
- Cuisine: Mediterranean
Ingredients
- 1 1/2 lbs boneless skinless chicken breast
- Sea salt and freshly ground black pepper (to taste)
- 1/4 cup gluten-free flour or Arrowroot powder
- 2 Tbsps ghee
- 3 fresh garlic cloves (minced)
- 1 cup chicken bone broth
- 1 Tbsp gluten-free flour or Arrowroot powder (for thickening)
- 2 Tbsps fresh lemon juice (or juice of 1 large lemon)
- 1 jar (14 oz) water-packed quartered artichoke hearts (drained)
- 1/2 cup pitted green olives (sliced diagonally)
- 2 Tbsps minced fresh oregano (or 2 tsp dried oregano)
- Fresh lemon slices (to garnish)
Instructions
- Prepare the chicken by pounding it to an even thickness, then season with salt and pepper. Coat lightly with gluten-free flour or Arrowroot powder.
- In a large skillet, melt ghee over medium heat. Sear the seasoned chicken for about 3 minutes on each side until golden brown. Remove the chicken from the skillet and set aside.
- Add minced garlic to the skillet and sauté for about 30 seconds until fragrant.
- Pour in the chicken bone broth, whisk in additional gluten-free flour or Arrowroot powder, and bring to a gentle simmer.
- Stir in lemon juice, artichokes, olives, and oregano; let simmer for another 3-4 minutes.
- Return the seared chicken to the skillet, cover, and simmer on low heat for about 10-12 minutes until cooked through.
- Garnish with fresh lemon slices before serving.
Nutrition
- Serving Size: Approximately 1 cup
- Calories: 380
- Sugar: 2g
- Sodium: 680mg
- Fat: 15g
- Saturated Fat: 6g
- Unsaturated Fat: 9g
- Trans Fat: 0g
- Carbohydrates: 23g
- Fiber: 3g
- Protein: 38g
- Cholesterol: 90mg