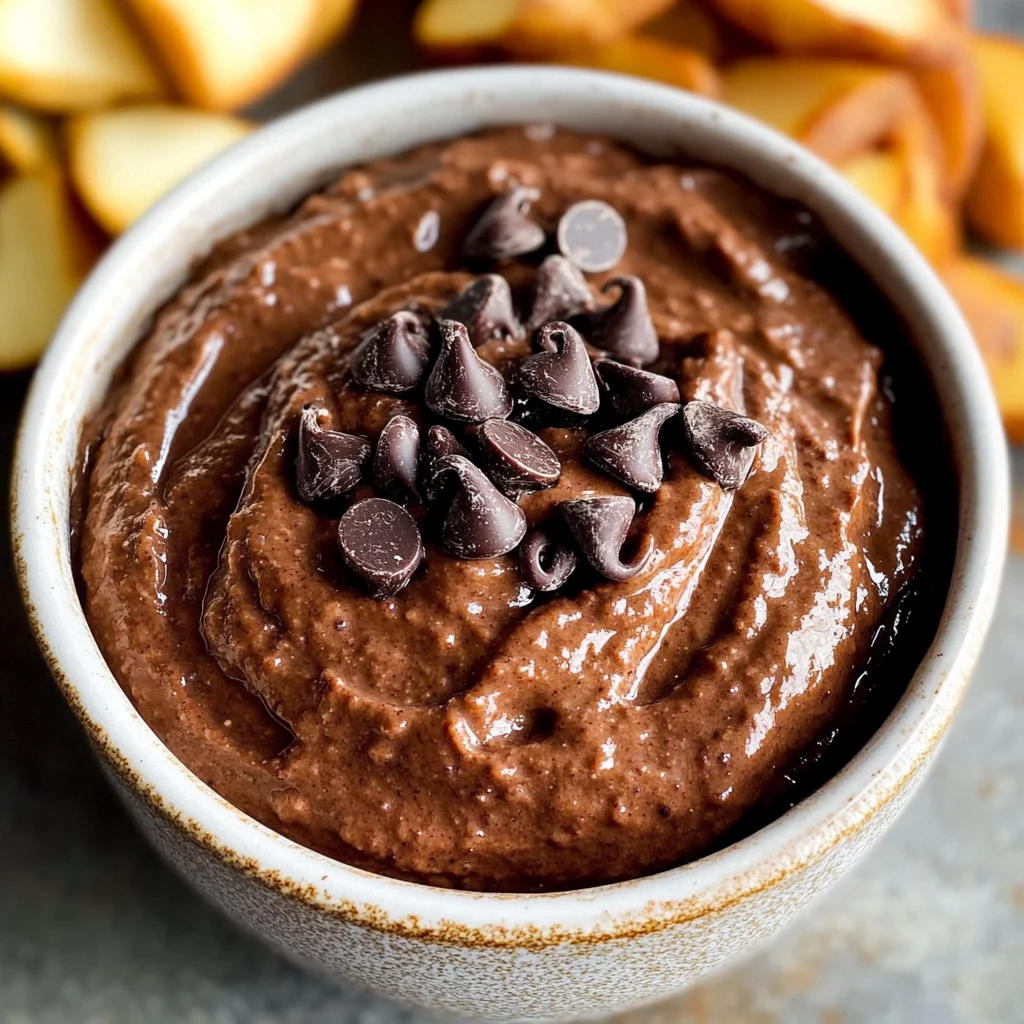
Brownie Batter Chocolate Hummus
There’s something truly magical about creating a dessert that feels indulgent yet is made from wholesome ingredients. Brownie Batter Chocolate Hummus is not just a recipe; it’s an experience, a delightful dance between the rich, fudgy flavors we crave and the nourishing essence of chickpeas or black beans. Picture this: the moment you blend that creamy mixture, the aroma of cocoa wafts through your kitchen, wrapping you in a warm embrace. The first taste? Oh my goodness—the texture is velvety, and the sweetness dances on your palate like a gentle lullaby. This chocolate hummus is more than just food; it’s a bridge connecting our fondest childhood memories of licking the brownie batter bowl to a healthier lifestyle that still allows us to indulge.
What makes this recipe so special is its versatility. Whether you’re serving it at a party, enjoying it as an afternoon snack, or even making it for a cozy movie night, this dish has an uncanny ability to bring people together. It invites joyful conversations and shared moments—the kind where friends dip strawberries or pretzels into that luscious chocolate goodness, savoring every bite. And let’s not forget how easy it is to whip up! In just about 10 minutes, you can create this delightful treat that will have everyone asking for seconds (or thirds!). Trust me when I say that once you try this Brownie Batter Chocolate Hummus, you’ll be hooked!
Brownie Batter Chocolate Hummus: A Guilt-Free Indulgence
Let’s dive into making this heavenly creation together! I promise you’ll feel like a master chef in no time.
Ingredients:
Getting ready to embark on this culinary journey is part of the fun! Each ingredient plays a crucial role in crafting that perfect balance of flavor and texture. Let’s explore what we need.
- 1 can chickpeas or black beans. This choice is absolutely vital as it forms the base of our hummus. Chickpeas offer a slightly nuttier flavor while black beans introduce a richer depth. Whichever you choose, make sure to drain and rinse them thoroughly; this step removes excess sodium and helps achieve that silky-smooth consistency we’re after. If you’re feeling adventurous, try using roasted chickpeas for an added crunch!
- 1/3 cup cocoa powder. Ah, cocoa powder—the star of the show! Opt for high-quality unsweetened cocoa for an intense chocolate flavor that transforms our hummus into something utterly intoxicating. This ingredient not only gives our mix its signature color but also contributes antioxidants that make you feel good about indulging in dessert. If you want to enhance the richness even further, consider using Dutch-processed cocoa for a smoother finish.
- 1/4 cup maple syrup. This liquid gold adds natural sweetness while maintaining an earthy complexity that refined sugars can’t replicate. The maple syrup also helps bind everything together while lending a gentle caramel note to your chocolate hummus. If you’re looking for something with less sugar, agave nectar works beautifully as well—just adjust to taste!
- 1/4 cup coconut sugar (or more to taste). Coconut sugar offers a unique twist with its subtle caramel flavor profile and lower glycemic index compared to traditional sugars. It’s essential to add this gradually; taste testing along the way ensures your hummus reaches your preferred sweetness level without overpowering those chocolatey notes.
- 1/3 cup runny almond butter (or other nut/seed butter). The nutty creaminess of almond butter enriches our hummus and provides healthy fats that keep us satiated longer. Make sure your almond butter is smooth and runny; if it’s thick, use some non-dairy milk to thin it out before adding it in. If you’re allergic or prefer another option, tahini or sunflower seed butter can serve as excellent alternatives!
- 1 tsp vanilla extract. Vanilla extract brings warmth and depth to our dessert hummus—it’s like wrapping everything up in a cozy blanket of flavor! Always choose pure vanilla extract over imitation for the best results; trust me on this one—it’s absolutely paramount!
- 1/4 tsp salt. Don’t underestimate the power of salt; it enhances all those wonderful flavors harmoniously blending together in our dish—think of it as the secret ingredient that elevates the entire experience!
- 1-2 tbsp non-dairy milk (or more as needed to blend/thin). This component allows us to control the consistency of our hummus perfectly—from thick and fudgy to creamy perfection! Start with one tablespoon and add more if necessary during blending until you achieve that dreamy texture that’s just begging to be dipped into.
Equipment You’ll Need:
Having the right tools at your disposal makes all the difference when preparing any recipe—and trust me when I say they are essential partners in creating something wonderful like our decadent Brownie Batter Chocolate Hummus.
- Food processor or high-speed blender – This equipment is key for achieving that ultra-smooth consistency we desire in our hummus! A high-speed blender can whip everything together quickly if you prefer something speedy; however, any good-quality food processor will do wonders too—just be patient while blending until it’s completely smooth.
- Measuring cups and spoons – Precision is crucial when baking or cooking because each ingredient contributes uniquely toward flavor development! Using proper measurements ensures consistency across batches; plus, who doesn’t love neatly organized spoonfuls?
- Rubber spatula – A rubber spatula becomes your best friend here—it not only helps scrape down sides during blending but also ensures nothing gets left behind in bowls or processors! Trust me on this—it will save you from wasting precious ingredients.
Now that we’re fully equipped let’s get started on bringing our Brownie Batter Chocolate Hummus to life!
Preparing the Brownie Batter Chocolate Hummus
Step 1: Drain and Rinse
First things first—grab your can of chickpeas (or black beans) and pour them into a colander over the sink. Give them a thorough rinse under cold water; this step is incredibly important because it washes away any excess sodium used during preservation while also preventing any unwanted grittiness in our final product! Once rinsed well, transfer those lovely legumes into your food processor or high-speed blender—this will be their new home as we transform them into something spectacular!
Step 2: Add Your Ingredients
Now comes the fun part—adding all those delicious ingredients we prepared earlier! Carefully measure out each one: cocoa powder goes in first followed by maple syrup and coconut sugar next—the order matters as it helps create an even blend throughout later stages too! Next up is almond butter—smoothly plop that in there before finishing with vanilla extract and salt like icing on top of cake batter! Resist mixing just yet; instead pause momentarily for one last check—make sure everything looks good before proceeding.
Step 3: Blend Until Smooth
With all ingredients now snugly nestled within their container’s walls (and trust me—they’re eager!), secure its lid tightly before pressing down on those blending buttons! Begin mixing at low speed initially; gradually increase intensity until reaching maximum power—this process should take around 1-2 full minutes depending upon which appliance model you’ve chosen today! Watch closely through transparent parts (if available)—you’ll notice how initially chunky forms morph seamlessly into silky-smooth perfection over time—a true marvel indeed!
Step 4: Adjust Consistency
As blending continues onward towards completion stage two things may arise: either thick gooeyness might happen—or conversely excessive liquidity could occur instead—the latter situation most commonly arises if too much non-dairy milk was added inadvertently earlier on during steps above…not ideal I assure you but fret not—we’ll remedy quickly here now by adding extra tablespoons gradually back inside until desired thickness achieved again successfully within limits set beforehand!! When finished allow mixture cool briefly prior transferring contents safely away from blades’ grip—for best results chill uncovered inside fridge anywhere between thirty minutes up until overnight allowing flavors mingle beautifully too!!
With these steps complete—you’ve already made significant progress towards bringing forth one enticing batch of Brownie Batter Chocolate Hummus worth sharing among friends or family alike!! Trust me—I guarantee each bite will ignite smiles all around making everyone feel grateful they got introduced towards such marvelous delight brought forth effortlessly today!! Stay tuned as we continue uncovering ways elevate both presentation & enjoyment factor ahead next few sections below…
The Magic of Brownie Batter Chocolate Hummus: An Irresistible Treat!
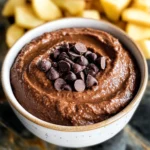
There’s something utterly intoxicating about the idea of indulging in a dessert that not only satisfies your sweet tooth but also nourishes your body. You might be wondering how such a marvelous combination is possible, and that’s where this Brownie Batter Chocolate Hummus shines! This delightful treat captures the rich, fudgy essence of brownie batter while being completely vegan, gluten-free, and refined sugar-free. It’s a dip that feels decadent but is actually a healthier alternative, perfect for sharing at gatherings or simply enjoying on your own. Trust me on this—once you experience the creamy texture and the symphony of chocolate flavors, you’ll never look at traditional hummus the same way again!
Step 5: Chill and Let the Flavors Marry
Now that you’ve blended your ingredients into a luxuriously smooth concoction, it’s time for one of my favorite steps—chilling! While it may seem tempting to dive straight into this chocolatey delight, I promise you that allowing it to rest in the fridge for at least 30 minutes (or longer if you can resist!) will transform its flavor profile dramatically. When you chill your Brownie Batter Chocolate Hummus, it gives all those delicious ingredients time to mingle and harmonize. The cooling process enhances the sweetness from the maple syrup and coconut sugar while allowing the cocoa powder to mellow out beautifully.
What’s happening here is akin to marinating a dish; just as spices meld together over time, so do the flavors in your hummus! As it chills, you’ll notice it thickens slightly, creating an even more decadent texture that makes each bite feel like pure indulgence. So pop your container into the refrigerator and practice a little patience—this step is absolutely paramount for achieving that truly extraordinary taste.
Step 6: Taste Testing – The Final Touches
Once your hummus has chilled and you’re practically bursting with anticipation (I know I always am!), it’s time for my favorite moment: taste testing! Grab a clean spoon and take a small scoop; this is where you can start fine-tuning the flavors to perfection. Depending on your personal palate preferences or even the richness of your cocoa powder, you might find that it needs just a hint more sweetness or perhaps a touch more salt to elevate those chocolate notes.
If you’re adjusting sweetness levels, remember that adding more coconut sugar or maple syrup will also alter the consistency slightly. Don’t be shy about making these tweaks; after all, this is your creation! And here’s another pro tip: if at any point during this step you notice it has become too thick for your liking after chilling, don’t hesitate to whisk in an extra tablespoon of non-dairy milk. This little addition can create an even silkier texture while keeping all those deliciously rich flavors intact.
Step 7: Serve with Style
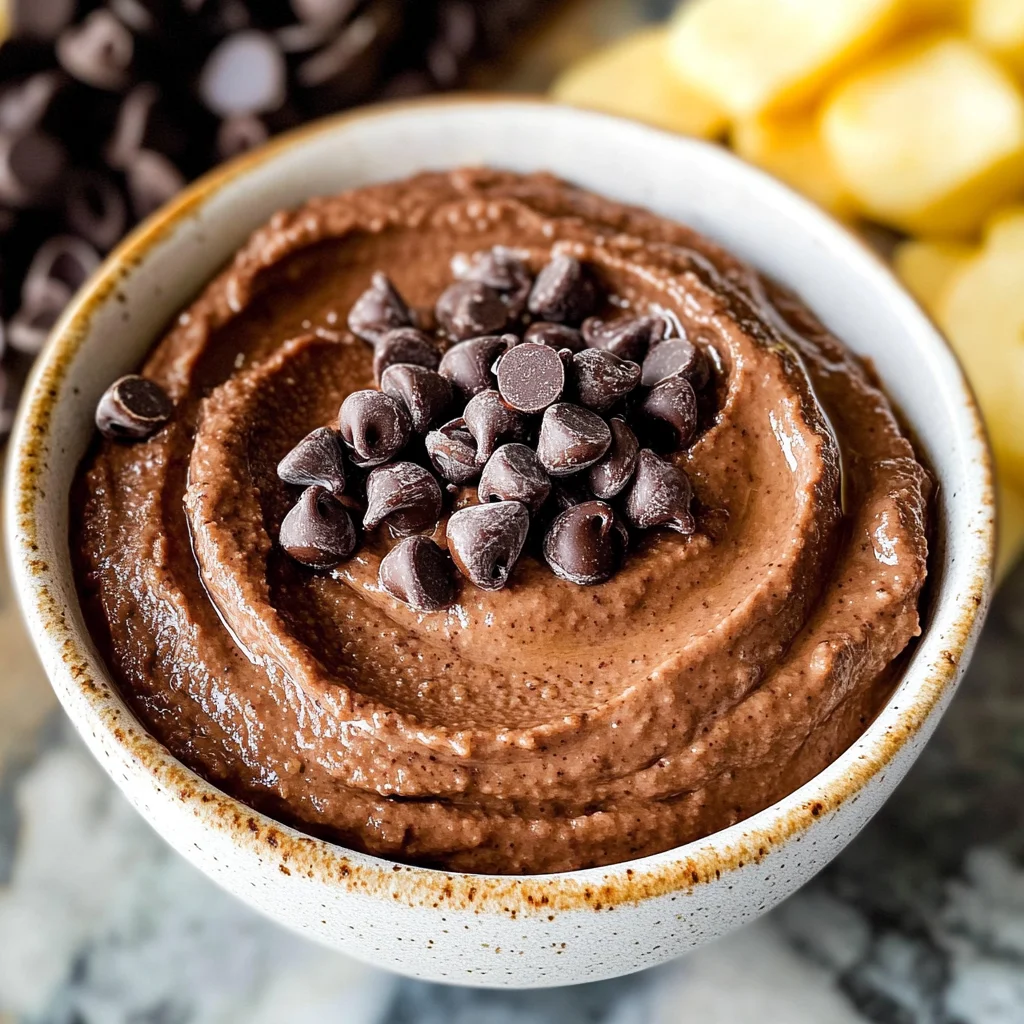
Now comes the part where we get to share this delightful creation with friends and family—or maybe just enjoy it solo (no judgment here!). When serving your Brownie Batter Chocolate Hummus, presentation matters just as much as taste. Think about pairing it with an array of dippables that not only complement its rich chocolatey flavor but also add beautiful colors and textures to your platter. Fresh strawberries are an absolute dream—their tartness cuts through the sweetness perfectly, offering a refreshing contrast with every bite.
Alternatively, you could opt for crunchy pretzels or graham crackers for some delightful texture; imagine dipping into that velvety hummus as it clings lovingly to each piece—a match made in heaven! If you’re feeling particularly indulgent, consider folding in some dark chocolate chips before serving; they’ll melt slightly into the warm hummus upon contact, adding pockets of gooey goodness that enhance each scoop further. Remember—the goal here is pure enjoyment!
Step 8: Enjoying Your Creation
Once everything is set up beautifully on your serving platter and guests are gathered around (or perhaps it’s just you enjoying a quiet moment), take a breath before diving into this divine treat. Allow yourself to savor not just the first bite but every single mouthful of your Brownie Batter Chocolate Hummus. Notice how each ingredient plays its part—the creaminess from almond butter enveloping all those flavors together like a warm hug; the cocoa providing depth while still feeling light enough not to weigh you down; and that hint of vanilla leaving behind an irresistible aftertaste.
And here’s my heartfelt encouragement: don’t rush through this experience! Whether enjoyed during movie night with friends or as an afternoon snack with loved ones who stop by unexpectedly, relish every moment spent enjoying these flavors together. Food is meant to be shared and celebrated—so dig deep into those bowls full of joy because you’ve just created something truly special!
Conclusion:
As we wrap up our delightful journey through crafting this Brownie Batter Chocolate Hummus, I genuinely hope you feel as excited as I do about this recipe! It’s truly extraordinary how simple ingredients come together to create such a symphony of flavors that evoke memories of rich brownie batter—but without any guilt! The velvety texture paired with the deep cocoa notes and subtle sweetness from maple syrup creates a treat that’s not only satisfying but also remarkably versatile. It’s almost as if every bite tells a story of indulgence without compromise.
This recipe is undeniably a must-try because it offers more than just delicious taste; it invites joy into your kitchen as you blend and mix these wholesome ingredients together. Perfect for gatherings with friends or cozy nights binge-watching your favorite shows, this hummus shines bright as both dessert and snack alike. Imagine pulling out your beautifully chilled bowl from the fridge, surrounded by an array of colorful fruits and crunchy pretzels—the anticipation alone is intoxicating!
When it comes to serving suggestions, think outside the box! Imagine savoring a generous dollop atop some warm pancakes for breakfast or swirling it into smoothies for an afternoon pick-me-up that feels indulgent yet nourishing. For an extra decadent experience, consider drizzling melted dairy-free chocolate over the top or sprinkling some crushed nuts for added crunch—each twist brings new layers of flavor and excitement!
Feeling adventurous? This recipe is wonderfully adaptable—you could easily swap out almond butter for sunflower seed butter if nut allergies are an issue or play around with different sweeteners like agave nectar depending on what you have on hand. You could even fold in shredded coconut or espresso powder to give it an extra kick! I invite you to try these variations and make this recipe uniquely yours—share your experiences with me; I’d love to hear how you’ve made it special!
Brownie Batter Chocolate Hummus
Indulge guilt-free with our Brownie Batter Chocolate Hummus—a deliciously healthy dessert that’s vegan and refined sugar-free! Try it today!
- Prep Time: 10 minutes
- Cook Time: None
- Total Time: 0 hours
- Yield: Approximately 4 servings 1x
- Category: Dessert
- Method: Blending
- Cuisine: Vegan
Ingredients
- 1 can chickpeas or black beans
- 1/3 cup unsweetened cocoa powder
- 1/4 cup maple syrup
- 1/4 cup coconut sugar
- 1/3 cup almond butter
- 1 tsp vanilla extract
- 1/4 tsp salt
- 1–2 tbsp non-dairy milk
Instructions
- Drain and rinse the chickpeas (or black beans) thoroughly.
- In a food processor or high-speed blender, combine the chickpeas, cocoa powder, maple syrup, coconut sugar, almond butter, vanilla extract, and salt.
- Blend until smooth. If the mixture is too thick, gradually add non-dairy milk until you reach your desired consistency.
- Taste and adjust sweetness if needed.
- Chill in the refrigerator for at least 30 minutes before serving.
Nutrition
- Serving Size: 1 serving
- Calories: 150
- Sugar: 10g
- Sodium: 120mg
- Fat: 7g
- Saturated Fat: 1g
- Unsaturated Fat: 6g
- Trans Fat: 0g
- Carbohydrates: 20g
- Fiber: 4g
- Protein: 5g
- Cholesterol: 0mg