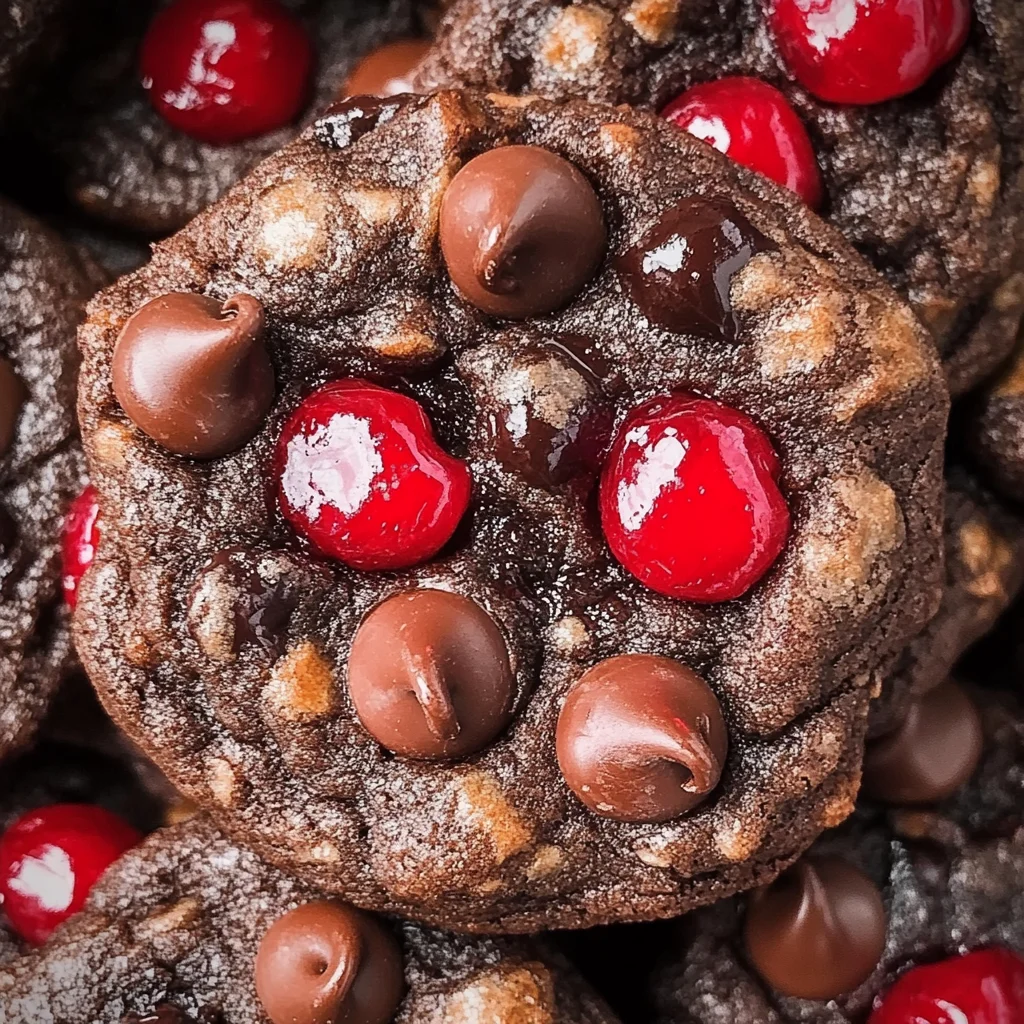
Black Forest Cookies
There’s something truly magical about the combination of chocolate and cherry. It’s a pairing that takes me back to my childhood, where each bite felt like a celebration—a delightful indulgence that was both comforting and exciting at once. When I think of Black Forest Cookies, I’m flooded with memories of family gatherings, laughter, and the sweet aroma wafting through the kitchen as these heavenly treats baked to perfection. Each cookie is a soft, chewy morsel that envelops your senses in a symphony of rich chocolate mingling seamlessly with juicy cherries. This recipe isn’t just about making cookies; it’s about creating moments—those small yet profound experiences we share around the table, where every bite tells a story.
These Black Forest Cookies are not just for special occasions; they’re perfect for any time you want to brighten your day or someone else’s. Whether you’re celebrating a milestone or simply enjoying a quiet evening at home, these cookies bring warmth and joy into any moment. The beauty of this recipe lies in its simplicity and its ability to satisfy cravings without overwhelming you with complex steps. You’ll find that the ingredients come together effortlessly, transforming into something utterly intoxicating that will have you floating on clouds of cherry-chocolate bliss. So let’s embark on this delightful journey together—trust me, your taste buds are in for a treat!
Black Forest Cookies: A Sweet Symphony of Chocolate and Cherry
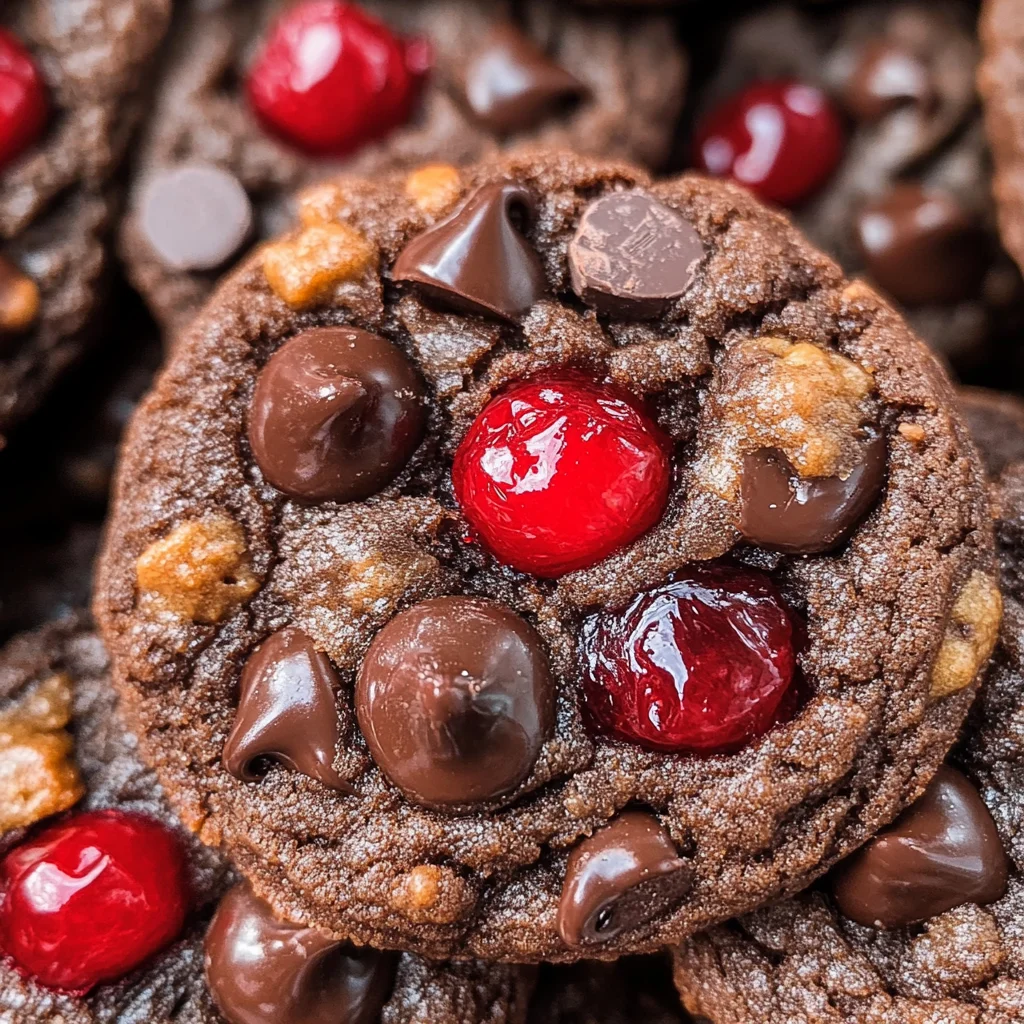
Welcome to the scrumptious world of Black Forest Cookies! This delightful recipe melds the rich bitterness of cocoa with the bright sweetness of maraschino cherries, creating an experience that is as satisfying as it is indulgent. These cookies are not only easy to make but also incredibly rewarding; they’ll fill your kitchen with an aroma that beckons everyone closer, eager to indulge in what you’ve baked. So grab your mixing bowl and let’s get started!
Ingredients:
As we prepare for this delightful baking adventure, let’s take a moment to appreciate each ingredient’s role in our Black Forest Cookies. They are the building blocks that will contribute to the symphony of flavors and textures we’re about to create.
- 1/2 cup (57g) unsalted butter (room temperature): This is crucial for creaming properly and creating that light, airy texture we’re aiming for in our Black Forest Cookies. Room temperature butter blends beautifully with sugar, allowing air to be whipped in effortlessly, which leads to cookies that are both soft and chewy rather than flat and crumbly. If your butter is too cold, it won’t cream effectively; if it’s melted, your cookies will spread too much when baking. Opting for high-quality unsalted butter ensures you have control over the salt content in your recipe.
- 3/4 cup (161g) brown sugar: Brown sugar isn’t just a sweetener; it adds moisture and depth to our cookies thanks to its molasses content. This results in a richer flavor profile while helping retain softness even days after baking. Make sure to pack it firmly into your measuring cup; this increases its density and ensures you’re getting just the right amount for those luscious cookies.
- 1 large egg: Eggs are essential here—not only do they bind all those lovely ingredients together, but they also provide richness and structure. The protein in eggs helps create stability during baking while adding moisture as well.
- 1 tsp vanilla extract: Ahh… vanilla—the unsung hero of many desserts! Its aromatic essence elevates flavors across the board; without it, our cookies would miss that warm comfort note we crave in every bite. Choose pure vanilla extract whenever possible; synthetic versions often lack depth and can introduce unwanted flavors.
- 1 1/3 cups (160g) all-purpose flour: Flour is the backbone of any cookie dough—it provides structure while allowing us to achieve that perfect chewy consistency we desire in our Black Forest Cookies. Be sure not to over-measure! Instead of scooping directly from the bag (which can compact flour), spoon it into your measuring cup gently before leveling off for accuracy.
- 1/4 cup (21g) unsweetened cocoa powder: This ingredient brings us deep chocolate flavor without additional sweetness—essential for balancing out our sugary mix! Always sift it before use if clumps form; this ensures even distribution throughout the dough.
- 1/2 tsp baking soda: This leavening agent works wonders by reacting with acids present (like those from brown sugar), helping our cookies rise slightly while keeping them tender rather than cake-like.
- 1/4 tsp salt: A pinch of salt enhances sweetness by rounding out flavors instead of overpowering them—it’s absolutely paramount! It makes everything taste better—and who wouldn’t want that?
- 1/2 cup drained & finely chopped maraschino cherries (plus extra for garnish): These little gems add bursts of bright color and juicy flavor amidst all that chocolatey goodness! Just be sure to drain them well—excess liquid can disrupt our cookie dough’s consistency.
- 3/4 cup (129g) semi-sweet chocolate chips (plus extra for garnish): Chocolate chips bring richness along with pockets of melted chocolate delight throughout each cookie bite—a true indulgence! I recommend selecting high-quality brands here since they significantly enhance overall taste.
To top off these beautiful creations: additional chopped maraschino cherries and chocolate chips make gorgeous garnishes, inviting anyone nearby to indulge their senses even further!
Equipment You’ll Need:
Before diving into making these heavenly cookies, let’s gather some essential tools that will help streamline our process and enhance our baking experience. Having the right equipment makes everything smoother—think of them as trusty sidekicks on this culinary journey!
- Mixing bowls – A good set of mixing bowls allows you flexibility while working with various ingredients separately before combining them later on. Look for sturdy glass or stainless-steel options; they hold up well against whisking without warping over time.
- Electric mixer – While you could mix everything by hand using a wooden spoon or whisk, an electric mixer speeds up creaming butter and sugars significantly—allowing more air bubbles which contribute towards fluffier cookies! Trust me when I say this tool makes life easier.
- Cookie scoop – This handy tool allows uniform portion sizes across all your cookie dough drops—ensuring even baking times throughout batches so no one gets left out when enjoying their treats! Plus, it minimizes mess—who doesn’t love simplifying cleanup?
- Silicone baking mat or parchment paper – Lining your baking sheet prevents sticking and promotes easier removal after baking while also ensuring even heat distribution during cooking—all vital components behind achieving perfectly textured cookies!
Now that we have everything ready at hand let’s dive into preparing these irresistible Black Forest Cookies!
Step 1: Preheat Your Oven
First things first—we need set our oven temperature right so those beautiful cookies bake evenly from start to finish! Preheating at 350ºF prepares an environment conducive for optimal rising without drying out edges prematurely—a common mistake many novice bakers encounter when rushing ahead too quickly! Allow at least 10 minutes before placing any trays inside so internal temperatures stabilize effectively upon addition.
Step 2: Cream Butter And Sugar Together
In a mixing bowl fitted with an electric mixer (or using elbow grease if you prefer), combine your room-temperature unsalted butter along with brown sugar until they form a smooth paste resembling liquid gold—a process known as creaming! Start on low speed until incorporated before increasing speed slightly… This step is crucial because whipping air into fats creates tiny pockets which lead towards lighter-textured final products—don’t rush through this part!
Step 3: Add Egg And Vanilla Extract
Next comes adding one large egg along with one teaspoonful pure vanilla extract directly into your creamy mixture—we’re introducing moisture alongside flavor now! Beat again until fully combined; there should be no visible streaks left behind indicating successful incorporation has occurred! The egg works wonders by binding everything together while contributing richness essential towards achieving satisfying chewiness later on down the line.
Step 4: Whisk Together Dry Ingredients
In another separate bowl whisk together all-purpose flour alongside unsweetened cocoa powder mixed with baking soda plus salt until uniformly distributed throughout—that means no clumps allowed here folks! Sifting might be necessary if lumps appear especially within dry cocoa powder since uneven distribution could impact overall texture negatively once incorporated later onto wet mixtures—trust me…it matters immensely!
Stay tuned as we continue crafting these delicious Black Forest Cookies together—they’re just getting started!
The Journey to Baking the Perfect Black Forest Cookies
Ah, the magic of baking! It’s a journey that transforms simple ingredients into something extraordinarily delicious and comforting. As we delve deeper into our recipe for Black Forest Cookies, I can almost smell the rich aroma of chocolate mingling with tart cherries. Just imagining that symphony of flavors fills my heart with warmth. So let’s dive right into the next steps that will ensure your cookies are not just good, but truly unforgettable!
Step 5: Bringing Cherry and Chocolate Together
Once you’ve mixed your batter, it’s time to add those delightful maraschino cherries! Begin by draining and finely chopping about ½ cup of cherries. This is a crucial step because excess moisture from the cherries can lead to a soggy cookie—a fate no cookie deserves! Pat those chopped cherries gently with paper towels to absorb any lingering liquid. Trust me on this; it might seem tedious, but it ensures each bite delivers that perfect balance between chewy chocolate and tart cherry without being overly wet. Next, fold those beautiful cherry pieces and ¾ cup of semi-sweet chocolate chips into your thick batter using a spatula. Gently mix until everything is evenly distributed; you want every cookie to be a treasure trove of flavor. Don’t rush this step—take your time to fold carefully so as not to overwork the dough and activate too much gluten, which could result in tougher cookies. You’re aiming for a luscious, thick cookie batter that’s just begging to be scooped!
Step 6: Scooping Out Joy
Now comes one of my favorite parts—scooping out your cookie dough! Using a cookie scoop (or two spoons if you don’t have one), drop generous balls of dough onto a silicone-lined baking sheet. The size matters here; aim for about 1-2 tablespoons per cookie to ensure an even bake and soft center. You should see those beautiful flecks of chocolate and bits of red cherries peeking through—it’s like nature’s confetti! Here’s where you can really elevate your cookies: before they head into the oven, press some extra pieces of chopped maraschino cherries and chocolate chips around the edges of each dough ball. This is absolutely paramount because it not only enhances their visual appeal but also promises an explosion of flavor in every bite. Plus, who doesn’t love that extra touch that makes them look oh-so-inviting?
Step 7: Baking Your Creation
With your oven preheated to a precise 350º F (that’s about 175º C for my friends outside the U.S.), it’s time for these little dollops of joy to become cookies! Slide your baking sheet onto the middle rack—this positioning is important as it allows for even heat circulation throughout the oven, helping each cookie bake consistently. Set your timer for 13-15 minutes, but don’t walk away just yet! Keep an eye on them during the last few minutes; you’re looking for that lovely set edge while the centers remain slightly soft—the hallmark of a perfect cookie! When they’re ready, they should have puffed up beautifully but still retain a slightly underbaked appearance in the center. Remember, they’ll continue cooking on the baking sheet after you take them out due to residual heat, so pulling them out when they still look a tad soft is precisely what you want.
Step 8: Cooling Down with Care
Patience is key at this stage! Once baked, allow your cookies to rest on the baking sheet for about 15 minutes before transferring them to a cooling rack. This resting phase is non-negotiable; it allows them to firm up slightly and makes moving them much easier without crumbling apart—a fate we want to avoid at all costs! As they cool, take a moment to appreciate how they begin to settle into their final shape—a gentle flattening occurs while retaining those glorious chewy edges. If you can’t resist temptation (and honestly, who could?), feel free to sneak one while warm—it’s an utterly intoxicating experience when chocolate melts in your mouth alongside those sweet bursts of cherry!
Conclusion:
As we wrap up our journey through this delightful recipe for Black Forest Cookies, I hope you feel inspired and excited about baking these beauties yourself. Each step we’ve taken together has been infused with love and passion—the combination of rich chocolate and sweet cherries creates a symphony of flavors that’s truly extraordinary. It’s this fusion of textures—the soft cookie enveloping those juicy bits of cherry—that elevates these treats beyond mere dessert; they become little morsels of joy!
I cannot emphasize enough why this recipe is a must-try. Beyond just their delicious taste, making these Black Forest Cookies offers such joy—the experience of mixing flavors, watching them rise in the oven, and ultimately sharing them with friends or family is nothing short of magical. Whether it’s a cozy night in or a festive gathering with loved ones, these cookies shine bright on any occasion. Imagine pulling them from the oven while they’re still warm, the chocolate chips glistening like jewels—it’s a moment that brings everyone together!
Serving suggestions abound for these delightful treats! Picture savoring one alongside your morning coffee as an indulgent pick-me-up or offering them at your next gathering where they will undoubtedly steal the show. For an afternoon treat, pair one with a dollop of whipped coconut cream atop fresh berries—it adds an exquisite touch that complements the chocolatey richness beautifully. And if you’re feeling particularly indulgent? Try warming one slightly and topping it with vanilla bean ice cream; it’s an experience that’s absolutely divine!
Feeling adventurous? This recipe is wonderfully adaptable! If you want to mix things up, consider substituting dried cranberries or raspberries for cherries—each variation brings its own unique twist while preserving that enchanting chocolate essence. You could even experiment with different types of chocolate chips: dark chocolate for an intense flavor or white chocolate drizzled on top for something sweetly decadent! The possibilities are endless! So go ahead—bake these luscious Black Forest Cookies, share your creations with me (I’d love to hear!), and let’s celebrate this beautiful journey called cooking together!
Black Forest Cookies
Black Forest Cookies are a delightful treat that brings together the rich flavors of chocolate and the tart sweetness of cherries. These soft, chewy cookies are a nostalgic reminder of joyful moments spent in the kitchen, creating delicious memories with loved ones. With a simple blend of ingredients and minimal steps, you can whip up these indulgent cookies any time you crave something sweet. Perfect for celebrations or just a cozy evening at home, each bite promises to be a comforting experience filled with the vibrant essence of black forest delights.
- Prep Time: 15 minutes
- Cook Time: 15 minutes
- Total Time: 30 minutes
- Yield: Approximately 24 cookies 1x
- Category: Dessert
- Method: Baking
- Cuisine: American
Ingredients
- 1/2 cup (57g) unsalted butter (room temperature)
- 3/4 cup (161g) brown sugar
- 1 large egg
- 1 tsp vanilla extract
- 1 1/3 cups (160g) all-purpose flour
- 1/4 cup (21g) unsweetened cocoa powder
- 1/2 tsp baking soda
- 1/4 tsp salt
- 1/2 cup drained & finely chopped maraschino cherries (plus extra for garnish)
- 3/4 cup (129g) semi-sweet chocolate chips (plus extra for garnish)
Instructions
- Preheat your oven to 350ºF (175ºC).
- In a mixing bowl, cream together room temperature unsalted butter and brown sugar until smooth.
- Beat in one egg and vanilla extract until fully combined.
- In another bowl, whisk together flour, cocoa powder, baking soda, and salt.
- Gradually incorporate dry ingredients into the wet mixture until just combined.
- Gently fold in the chopped maraschino cherries and chocolate chips.
- Drop tablespoon-sized portions of dough onto a lined baking sheet.
- Bake for 13-15 minutes until edges are set but centers remain slightly soft.
- Allow cookies to cool on the baking sheet for 15 minutes before transferring to a wire rack.
Nutrition
- Serving Size: 1 serving
- Calories: 138
- Sugar: 10g
- Sodium: 97mg
- Fat: 6g
- Saturated Fat: 4g
- Unsaturated Fat: 1.5g
- Trans Fat: 0g
- Carbohydrates: 19g
- Fiber: 1g
- Protein: 2g
- Cholesterol: 16mg