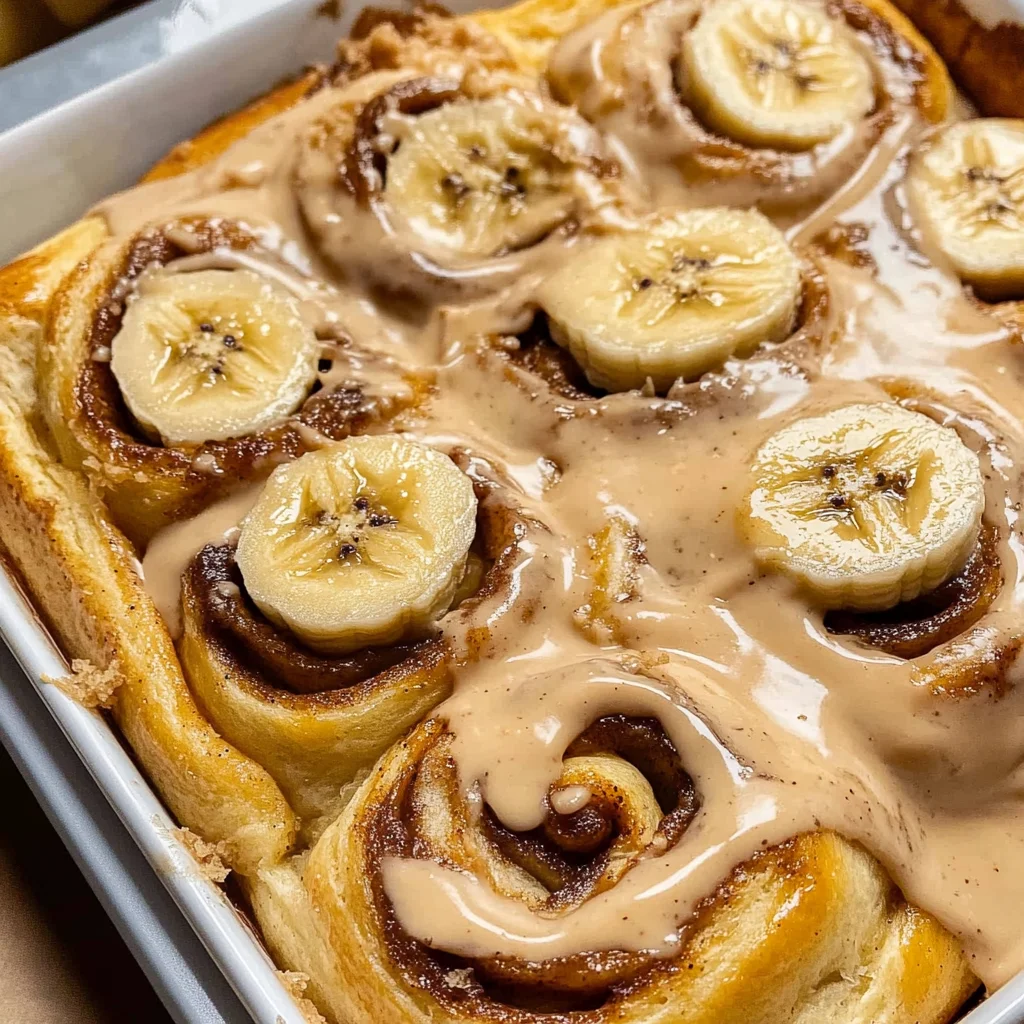
Banana Cinnamon Rolls with Peanut Butter Frosting
There’s something profoundly magical about the aroma of freshly baked banana cinnamon rolls wafting through the kitchen. It’s a scent that transports you back to simpler times, where the act of baking was a cherished ritual shared with loved ones. These Banana Cinnamon Rolls with Peanut Butter Frosting are not just a recipe; they are a heartfelt experience, an edible hug wrapped in dough, filled with the comfort of ripe bananas and warm spices. Imagine sinking your teeth into a fluffy roll that combines the sweetness of bananas, the warmth of cinnamon, and a luscious peanut butter frosting that feels like a treat for both your heart and your taste buds. This is what I promise you: one bite, and you’ll be swept away into a world of pure bliss.
As we embark on this culinary journey together, consider this; these rolls are special not only because they meld tradition with innovation but also because they hold the potential to become part of your own family’s story. The beauty of baking is that it creates moments worth savoring—whether it’s a lazy Sunday morning or a festive gathering with friends. You may find yourself making these again and again, each time discovering new ways to enjoy them or even sharing them with someone who needs a little sweetness in their life. Trust me when I say, once you’ve tasted these delightful rolls, they will find their way into your heart—and your recipe book—for years to come.
Banana Cinnamon Rolls with Peanut Butter Frosting: A Sweet Morning Delight
Let’s dive into this delicious adventure! These Banana Cinnamon Rolls are like taking all the best parts of banana bread—the warm flavors, the comforting sweetness—and transforming them into pillowy rolls that are perfect for breakfast or dessert. Topped with an irresistible peanut butter frosting that adds creamy richness, they’re sure to impress anyone lucky enough to share in this indulgence. I can’t wait for you to try making these at home!
Ingredients:
Before we begin, let’s gather our ingredients and appreciate their roles in crafting these heavenly rolls. Each component contributes its unique flavor and texture, so take a moment to savor what each brings to our creation.
- 1 cup whole milk (warmed to 110℉/43℃): This step is crucial because warm milk activates our yeast and helps it bloom beautifully, leading to those wonderfully fluffy rolls we crave. Make sure it’s just warm enough—too hot can kill the yeast! If you’re unsure about temperature, think about how you’d feel comfortable drinking it; that’s usually just right for baking.
- ½ cup granulated sugar (divided): Sugar does more than sweeten; it helps activate the yeast as well! By dividing it into two portions—one for activating the yeast and another for mixing into the dough—you ensure that each bite of our banana cinnamon rolls has that perfect balance of sweetness without being overly sugary.
- 1 tablespoon active dry yeast: This little powerhouse is responsible for making our dough rise. When mixed with warm milk and sugar, it becomes alive, creating those delightful air pockets we love in soft bread. Always check your yeast’s expiration date before using; fresh yeast means better results!
- 1 large egg (room temperature): Eggs add richness and moisture while also acting as a binding agent in our dough. Using room temperature eggs ensures they incorporate smoothly into the mixture without cooling down other ingredients—a non-negotiable step if you want everything to blend seamlessly!
- ½ cup mashed banana (very ripe): Overripe bananas are not just preferred but necessary here! They provide natural sweetness and moisture while contributing their distinct flavor profile that we adore in baked goods. Plus, using overripe bananas means less added sugar overall—a win-win!
- ½ cup unsalted butter (melted): The melted butter enriches our dough and provides tenderness—creating that melt-in-your-mouth texture we long for in cinnamon rolls. Unsalted is key here so we can control the saltiness ourselves later on.
- 1 teaspoon vanilla paste or extract: Vanilla elevates flavors beautifully; it’s like adding liquid gold to your batter! Use high-quality vanilla paste or extract for an extraordinary depth of flavor that ties all components together harmoniously.
- 5 ½ cups all-purpose flour (+ more as needed): Flour forms the foundation of our dough structure; it provides strength while allowing us to create those beautiful layers later on. Start with this amount but be prepared to adjust slightly depending on humidity levels—it’s okay if you need a little extra!
- ½ teaspoon kosher salt: This might seem small but don’t underestimate its importance! Salt enhances flavors across all ingredients—think of it as nature’s amplifier turning every bite into something truly memorable.
- 1½ cups brown sugar (packed light or dark): Brown sugar introduces moisture due to its molasses content, resulting in richer flavor notes within each roll. Whether you choose light or dark depends on how deep you want those caramel undertones; both work beautifully!
- 2 tablespoons ground cinnamon: Ahh, cinnamon—the quintessential spice that transforms any baked good from ordinary to extraordinary! It adds warmth and depth while complementing our banana filling perfectly.
- ½ cup unsalted butter (very soft): Just like melted butter earlier on allows us to create a rich filling by blending seamlessly with brown sugar and cinnamon for spreading over our dough without tearing it apart—this is another vital element!
- 2-3 large bananas (perfectly ripe, sliced into ¼” rounds): These slices will create pockets of gooey goodness within each roll! Again, overly ripe bananas work wonders here due their enhanced sweetness which pairs perfectly against buttery dough.
- ½ cup heavy whipping cream: Baking these rolls in heavy cream is nothing short of genius—it keeps them moist while ensuring every bite melts away effortlessly in your mouth! Using heavy cream creates an indulgent quality reminiscent of bakery-style treats straight from a café.
- 4 ounces cream cheese (softened): We want our frosting smooth and luscious—and softening cream cheese ahead makes this so much easier! It acts as the base for our peanut butter frosting while providing tangy notes balancing out sweetness beautifully.
- ¼ cup creamy peanut butter: Oh my goodness—peanut butter takes this frosting from good to mind-blowingly great! Choose creamy over crunchy here so every swirl blends effortlessly without any unwanted texture interruptions.
- 2 cups powdered sugar: This is what gives us that dreamy frosting consistency—it sweetens things up while lending structural support so it holds its shape when spread onto warm rolls later on!
- 1 teaspoon vanilla paste or extract: Just like before; adding vanilla enhances overall flavor profiles creating an absolutely scrumptious experience when devoured alongside those decadent rolls!
- 2-3 tablespoons heavy whipping cream: This final splash will help adjust consistency based upon how thick you’d prefer your frosting—add gradually until desired smoothness achieved!
Equipment You’ll Need:
Now that we’ve gathered our ingredients let’s talk about some essential tools that will make this process smoother than ever! Having the right equipment not only sets you up for success but also turns cooking into an enjoyable experience rather than feeling overwhelming.
- Mixing bowls – A set of various sizes is invaluable since you’ll use them throughout different stages—from mixing wet ingredients separately from dry ones initially—to combining everything together seamlessly later on!
- Stand mixer (or hand mixer) – While kneading by hand is possible if you’re feeling adventurous; using either type speeds up processes significantly especially when creaming butter/sugar mixtures effectively without tiring arms too quickly—trust me on this one!
- Rolling pin – Essential for rolling out dough evenly ensuring uniform thickness throughout all sections which leads toward consistent baking results across every single roll made—a crucial piece indeed!
- Baking dish or sheet pan – Choose one large enough yet tall-sided so there’s ample space without risk spilling over during rising phases plus subsequent baking itself later down line—that way nothing gets wasted either!
Step 1: Activating Our Yeast
To begin this lovely journey towards deliciousness, start by warming your milk until it’s just right—not too hot but pleasantly warm at around 110℉/43℃. Pour half of your granulated sugar into this cozy bath along with one tablespoon of active dry yeast. Give it a gentle stir and let it sit undisturbed for about five minutes until bubbles form atop—you’ll know it’s ready when you see frothy magic happening before your eyes! This process known as “proofing” ensures that our yeast is alive and kicking—the essence behind creating those airy rolls we crave so dearly! Remember not rush through; patience pays off beautifully here as activated yeast guarantees fabulous results later down line.
Step 2: Mixing Wet Ingredients
Once proofed beautifully like I described above; transfer this yeasty mixture into your stand mixer bowl alongside melted unsalted butter followed closely by mashed bananas alongside eggs—remember they should be at room temperature too! Add remaining granulated sugar along with vanilla paste/extract next then mix gently until combined smoothly—don’t worry about over-mixing yet since we’re still establishing foundational elements here before diving deeper shortly after mixing dry ingredients together too soon could lead toward dense outcomes which nobody wants at all…
Step 3: Combining Dry Ingredients
In another bowl combine all-purpose flour along with kosher salt then gradually add these dry elements directly towards wet mixture within stand mixer bowl while kneading slowly until cohesive dough forms effortlessly around paddle attachment—this stage carries great weight towards achieving ideal texture throughout entire batch thus avoiding sticky messes altogether later down line too! Feel free adding slight amounts more flour if sticking occurs however keep mindful not overdo as excessive alterations could compromise delicate balance we’re aiming achieve through precise measurements taken earlier…
Step 4: Kneading Dough
Now comes some fun—as well as crucial mechanics behind achieving perfect fluffy consistency within finished product itself; turn out sticky dough onto lightly floured surface then knead gently yet firmly folding edges inward repeatedly until smooth elastic texture develops—it shouldn’t take longer than eight minutes tops so don’t tire yourself unnecessarily here either! A well-kneaded ball should spring back when pressed lightly indicating gluten structure has formed nicely meaning future bites will yield tender delights worth celebrating wholeheartedly together once baked off sufficiently thereafter…
Step 5: Kneading the Dough to Perfection
Now that you’ve mixed your ingredients into a beautiful, lumpy batter, it’s time for one of the most therapeutic steps in the process: kneading the dough. This step is crucial, as it develops the gluten network within your dough, allowing those fluffy rolls to rise beautifully and hold their shape during baking. To knead, turn the mixture out onto a floured surface and sprinkle a little flour on top to prevent sticking. With clean hands, push the dough away from you with the heel of your palm, then fold it back over itself and turn it a quarter turn. Repeat this process for about 8-10 minutes. You’ll know you’re done when the dough is smooth and elastic—almost like a soft pillow waiting to be filled with goodness!
Don’t rush through this step; developing that gluten is absolutely paramount for achieving those light and airy rolls we all crave. The dough should feel slightly tacky but not overly sticky—it’s perfectly normal if you need to add a little more flour along the way, just be careful not to add too much! If you find yourself struggling with stickiness, simply dust your work surface lightly rather than dumping flour directly into the dough. Remember, patience is key here; take your time and enjoy the rhythmic motion of kneading—it’s one of those moments where you can truly connect with your food.
Step 6: Letting Your Dough Rise
Once you’ve kneaded your dough into submission, it’s time for it to take a well-deserved nap! Transfer your lovely ball of dough into a large bowl that has been lightly greased with oil or butter—this will help prevent sticking as it rises. Cover this bowl tightly with plastic wrap or a clean kitchen towel to create a warm environment; think of it as tucking in your dough for some quality beauty sleep! Place it in a warm spot in your kitchen (the oven turned off but light on works wonders) and let it rise until doubled in size—this usually takes about 1 to 1.5 hours.
Why is this step so important? This rising phase allows yeast to work its magic by producing carbon dioxide gas, which gets trapped in those beautiful gluten strands we developed during kneading. The result? A light and airy texture that will make every bite utterly intoxicating! Keep an eye on your dough; watch as it swells and expands—it’s like witnessing a miracle unfolding right before your eyes! Once it’s puffed up nicely and has doubled in size (you can gently press two fingers into the surface—if they leave an indentation, you’re ready), it’s time to roll out that aromatic canvas for our incredible filling.
Step 7: Rolling Out the Dough
Now comes one of my favorite parts—rolling out that gorgeous risen dough! Lightly flour your work surface again and gently punch down the risen dough to release any air bubbles (don’t worry, this won’t hurt its feelings!). Carefully transfer it onto your floured surface and use a rolling pin to stretch it out into a rectangle about ¼ inch thick. Aim for dimensions roughly 18×12 inches; this will allow us plenty of room for our decadent filling! As you roll, keep checking underneath to ensure nothing is sticking; if necessary, add just a few more pinches of flour.
This step is crucial because we’re creating layers upon layers that will become our delightful rolls. The size matters too—too small and you’ll have trouble rolling later on; too big might make filling tricky. Once rolled out, spread that soft butter evenly across the surface like a warm hug—this melts into every nook and cranny during baking! Then sprinkle generously with brown sugar mixed with cinnamon; I promise you, this combination creates an irresistible aroma that fills your kitchen with warmth.
Step 8: Adding Bananas & Rolling Up
Now we get to elevate our banana cinnamon rolls from delicious to extraordinary by adding those perfectly ripe banana slices! After spreading the buttery cinnamon-sugar goodness over your rolled-out dough, scatter those banana slices evenly across its surface. The bananas not only add natural sweetness but also moisture during baking—which means you’ll be rewarded with gooey pockets of flavor throughout each roll. Trust me on this step; there’s something so profoundly satisfying about biting into warm bread studded with caramelized bananas.
Once you’ve laid out those luscious banana rounds, it’s time for the final act: rolling up this decadent masterpiece! Starting at one long edge of the rectangle (it helps if you choose whichever side feels most comfortable), carefully lift and roll tightly towards you until you reach the opposite edge. Use gentle pressure so you don’t squish out all that beautiful filling. When finished rolling, pinch the seam closed firmly but gently—you want everything tucked neatly inside! Now slice the log into even pieces about 1-2 inches thick using unflavored dental floss or a sharp knife; this technique preserves their beautiful spiral without squishing them down!
I hope this recipe fills not only bellies but hearts too! Happy baking my dear friends; I can’t wait for you all to experience these heavenly Banana Cinnamon Rolls with Peanut Butter Frosting at least once—you’ll be hooked forever!
Storage and Enjoyment Tips for Your Banana Cinnamon Rolls with Peanut Butter Frosting
Now that you’ve created these absolutely mouthwatering Banana Cinnamon Rolls with Peanut Butter Frosting, it’s time to revel in the joy of enjoying them! Picture this: the warm, comforting aroma wafting through your kitchen as you take that first heavenly bite, the sweet and creamy frosting melting into the soft, pillowy roll. But just in case you have some leftovers (though I can’t imagine there will be much!), here’s how to keep those delightful rolls fresh and ready for another indulgent moment.
Storing Leftover Banana Cinnamon Rolls with Peanut Butter Frosting
To ensure that your leftover banana cinnamon rolls stay as scrumptious as the day they were baked, I recommend placing them in an airtight container. This is crucial because it prevents moisture from escaping, which keeps those rolls tender and fluffy. You can store them at room temperature for about two days—don’t worry; they won’t go stale that quickly! If you want to keep them for a longer period, pop them in the fridge, where they’ll last up to a week. Here’s a little tip from my own kitchen: place a slice of bread inside the container. That slice will absorb excess moisture and help maintain the softness of your cinnamon rolls. After a few days, they might not be quite as fresh as when they first came out of the oven, but trust me, they’ll still be utterly delicious! When you’re ready to enjoy them again, simply reheat them in the microwave for about 15-20 seconds or pop them in a warm oven for a few minutes. The result? Warm, gooey goodness that feels like a hug in every bite!
Freezing Banana Cinnamon Rolls with Peanut Butter Frosting for Later
If you’re anything like me and love having treats on hand for unexpected guests or simply for yourself on a lazy Sunday morning, freezing these banana cinnamon rolls is an excellent option! To freeze them properly, allow your rolls to cool completely before wrapping each one individually in plastic wrap. Then, place them in a freezer-safe bag or container—this double layer helps protect against freezer burn. These delightful treasures can stay frozen for up to three months without losing their charm! When you’re ready to indulge again, simply take out however many you desire and let them thaw overnight in the fridge or on the counter for a couple of hours. For an even more sensational experience, reheat them gently in the oven or microwave until they’re warm and cozy. It’s such a convenience factor knowing that whenever you crave something sweet and comforting, these banana cinnamon rolls are just waiting patiently to bring joy back into your day!
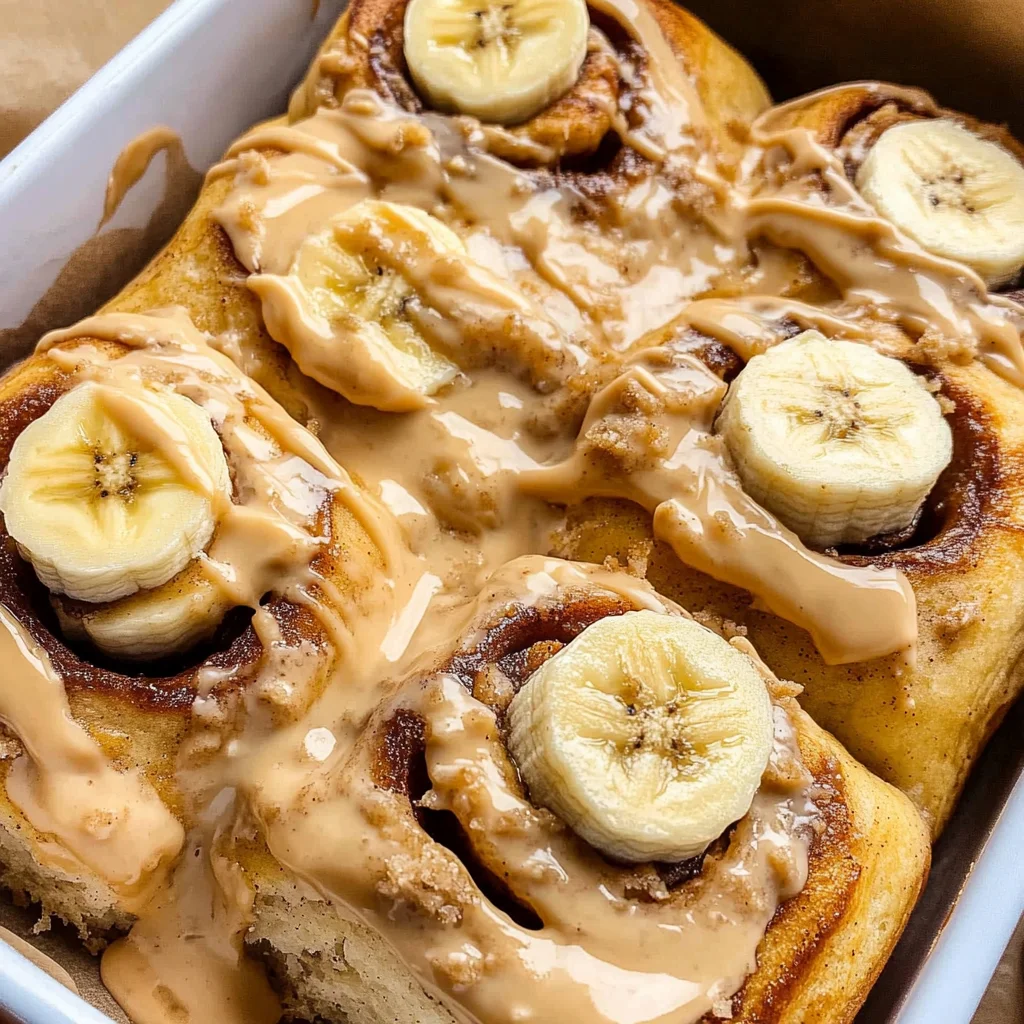
Banana Cinnamon Rolls with Peanut Butter Frosting

There’s nothing quite like the delightful aroma of freshly baked Banana Cinnamon Rolls with Peanut Butter Frosting filling your kitchen. These rolls combine the classic flavors of banana bread with an indulgent twist, creating a fluffy treat that’s perfect for breakfast or as a comforting dessert. With the warmth of cinnamon and the creaminess of peanut butter frosting, each bite envelops you in a cozy embrace, making them an instant favorite for family gatherings or lazy Sunday mornings. This recipe is simple enough for beginners yet delicious enough to impress your guests.
- Prep Time: 30 minutes
- Cook Time: 30 minutes
- Total Time: 1 hour
- Yield: Approximately 12 servings 1x
- Category: Dessert
- Method: Baking
- Cuisine: American
Ingredients
- 1 cup whole milk (warmed)
- ½ cup granulated sugar (divided)
- 1 tablespoon active dry yeast
- 1 large egg (room temperature)
- ½ cup mashed banana (very ripe)
- ½ cup unsalted butter (melted)
- 1 teaspoon vanilla paste or extract
- 5 ½ cups all-purpose flour (+ more as needed)
- ½ teaspoon kosher salt
- 1½ cups brown sugar (packed light or dark)
- 2 tablespoons ground cinnamon
- ½ cup unsalted butter (very soft)
- 2–3 large bananas (perfectly ripe, sliced into ¼” rounds)
- ½ cup heavy whipping cream
- 4 ounces cream cheese (softened)
- ¼ cup creamy peanut butter
- 2 cups powdered sugar
- 2–3 tablespoons heavy whipping cream
Instructions
- Activate the yeast by combining warm milk, half of the granulated sugar, and yeast in a bowl. Let it sit until frothy.
- In a mixing bowl, combine activated yeast mixture with melted butter, mashed bananas, egg, and remaining sugar. Mix until combined.
- Gradually add flour and salt to form a dough; knead until smooth and elastic.
- Allow dough to rise in a greased bowl until doubled in size (about 1 to 1.5 hours).
- Roll out the dough into a rectangle and spread with softened butter, brown sugar, and cinnamon.
- Top with banana slices, roll tightly, slice into individual rolls, and place in a greased baking dish.
- Let rolls rise again for about 30 minutes before baking at 350°F (175°C) for 25-30 minutes.
- While cooling slightly, mix cream cheese with peanut butter and powdered sugar to create frosting; drizzle over warm rolls.
Nutrition
- Serving Size: 1 roll (90g)
- Calories: 320
- Sugar: 18g
- Sodium: 250mg
- Fat: 14g
- Saturated Fat: 7g
- Unsaturated Fat: 6g
- Trans Fat: 0g
- Carbohydrates: 43g
- Fiber: 2g
- Protein: 6g
- Cholesterol: 30mg