Red, White And Blue Bars
When I think about creating something truly special in the kitchen, my mind often drifts to sweet memories of celebrations wrapped in vibrant colors and flavors. There’s something utterly intoxicating about a dessert that not only pleases the palate but also evokes joy and nostalgia. The Red, White And Blue Bars are precisely that—a delightful experience that transcends mere ingredients and transforms into a canvas of emotions. Picture this: a warm slice right out of the oven, with a soft, chewy texture that melts in your mouth, punctuated by bursts of colorful candy. Each bite is like a celebration of life itself, filled with sweetness and a hint of festivity. Trust me, this recipe will bring smiles to faces and warmth to hearts—perfect for gatherings, barbecues, or simply as a treat for yourself!
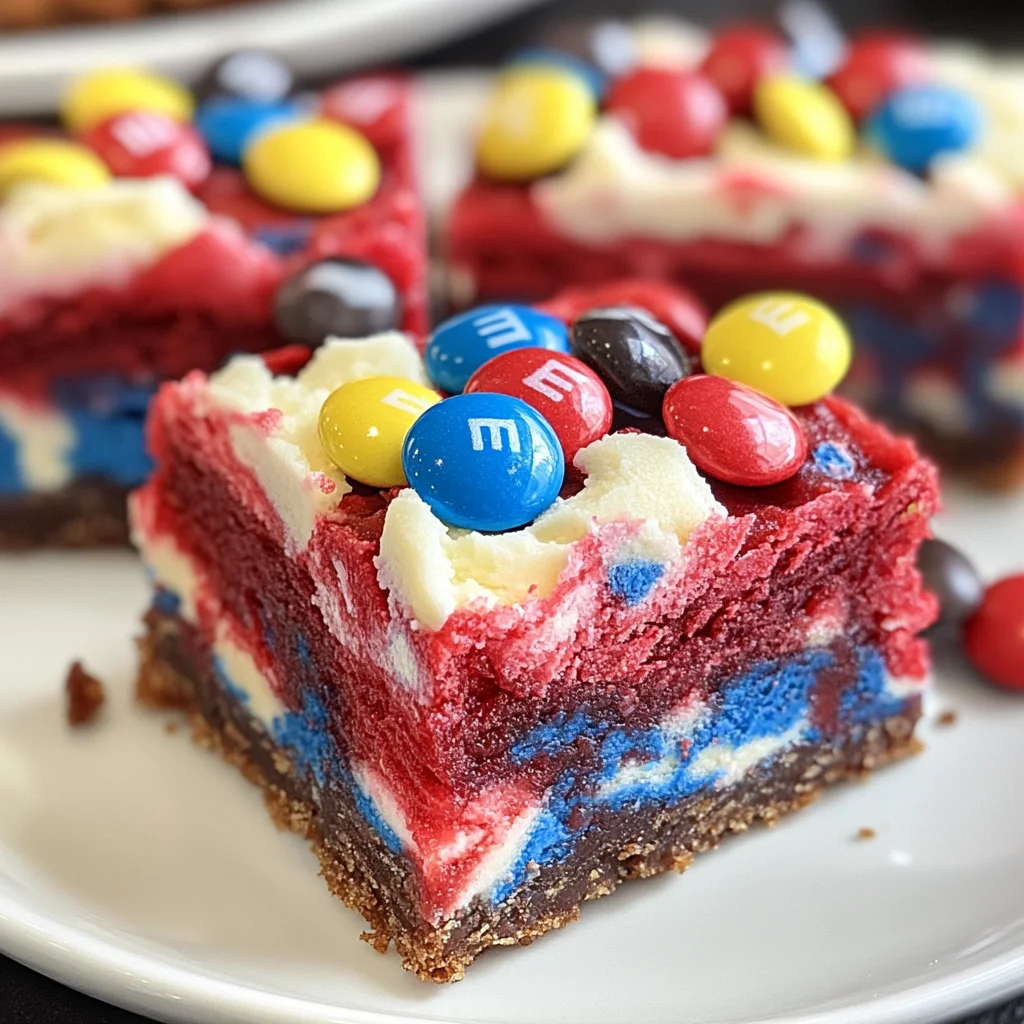
What makes these Red, White And Blue Bars so extraordinary is how they effortlessly blend tradition with modern whimsy. Using red velvet cake mix as the base is not just convenient; it infuses each bar with a unique flavor profile that’s both comforting and nostalgic. The addition of bright M&Ms adds playful pops of color and texture, making them visually stunning while providing that satisfying crunch against the soft backdrop of the cake. These bars are perfect for any occasion—be it Independence Day festivities or cozy family dinners—and they serve as a wonderful reminder that we can create joy through simple acts like baking together.
Red, White And Blue Bars: A Celebration in Every Bite
Baking these Red, White And Blue Bars is an adventure filled with color and flavor that I am excited to share with you! With just a few simple ingredients and easy steps, you’ll be creating something truly beautiful that tastes every bit as good as it looks. It’s like crafting edible art—a delicious masterpiece that’s bound to become a favorite in your home.
Ingredients:
Before we embark on this culinary journey together, let’s take a moment to appreciate each ingredient we’ll be using. Each one plays an essential role in ensuring our Red, White And Blue Bars turn out beautifully.
- 1 oz standard size Red Velvet Cake Mix (I used Duncan Hines 16.5). This vibrant cake mix serves as the foundation for our bars. It brings not only a lovely hue but also an unmistakable flavor profile that’s rich and slightly cocoa-infused—perfectly balanced without being overwhelming. When choosing your cake mix, look for one that promises moistness and richness; this will ensure your bars are soft and chewy rather than dry or crumbly.
- 1/2 cup butter (melted; 1 standard size stick). Butter is often referred to as liquid gold in baking because it contributes so much to texture and flavor. In our case, melted butter helps bind everything together while imparting a luscious flavor that elevates our bars from good to extraordinary. Make sure the butter is fully melted but not bubbling hot when you mix it in; otherwise, it could cook the eggs prematurely—this step is crucial for achieving that perfect consistency!
- 2 eggs. Eggs are vital here—they provide structure and moisture while helping bind all our ingredients together harmoniously. When you crack those eggs into your bowl, you’re adding a silky richness that will contribute to the tender crumb we’re aiming for in our bars. Remember to let your eggs come closer to room temperature before mixing them in; this helps them incorporate more easily into the batter.
- 1 M bag Red (White & Blue M&Ms candies). These colorful candies add an element of fun that makes these bars stand out! They provide delightful bursts of sweetness with every bite while also contributing visual appeal. If you can’t find red, white, and blue M&Ms or prefer different varieties, feel free to get creative! Just keep in mind the balance between color and taste—the idea is to sprinkle joy throughout each piece.
Equipment You’ll Need:
To make our baking experience seamless and enjoyable, having the right tools at hand is paramount! While these items may not be ingredients, they are essential partners in crafting our delicious Red, White And Blue Bars.
- 13×9-inch baking pan – This classic pan size is perfect for creating thick bars with just the right texture without overbaking them—a key factor in achieving gooey centers! If you don’t have one on hand, any similar-sized pan will work; just be sure to adjust your baking time if it’s deeper or shallower than 2 inches.
- Non-stick cooking spray – A light spray on your foil-lined pan ensures easy removal once your delicious creation has cooled down. Trust me on this one: nobody wants their hard work sticking stubbornly to the pan!
- Mixing bowls – A couple of mixing bowls will make combining your ingredients effortless; I recommend one large bowl for mixing everything together and another smaller bowl if you want to melt your butter without making too much mess.
- Spatula or wooden spoon – This trusty tool will help you stir everything together smoothly; choose whichever feels comfortable in your hands! I love using a spatula because it allows me to scrape every last bit from the sides of my bowl—no wasted goodness here!
Step 1: Preheat Your Oven – Setting the Stage
Before we dive into mixing our ingredients together, let’s start by preheating our oven to 350 degrees F (175 degrees C). This step might seem trivial at first glance but trust me—it’s absolutely paramount! Preheating ensures an even cooking temperature right from the beginning so that our bars rise perfectly without developing any unpleasant textures or flavors due to uneven heat distribution. While you’re waiting for that lovely warmth inside your oven, take some time to line your 13×9 baking pan with foil—this will make cleanup much easier later on—and lightly spray it with non-stick cooking spray. You want every inch coated so nothing sticks when it’s time to slice up those beautiful bars!
Step 2: Mixing It All Together – The Heart of Baking
Now comes one of my favorite parts—combining all those marvelous ingredients! In your large mixing bowl, combine the red velvet cake mix with two perfectly cracked eggs and melted butter. As you stir these elements together using either a spatula or wooden spoon until well combined (I promise you’ll know when it’s ready!), notice how each item interacts: The dry mix absorbs moisture from both the butter and eggs slowly transforming into an enticing batter full of promise! Don’t rush this step; let yourself enjoy blending these components seamlessly while imagining how wonderful they’ll taste fresh out of the oven.
Step 3: Adding Sweet Surprises – Make It Colorful
Once you’ve achieved a beautifully smooth mixture packed with rich flavor from our red velvet cake mix base—the fun really begins! It’s time to fold half of those brightly colored M&Ms into your batter. This stage isn’t just about adding sweetness; it’s about creating visual excitement too! As those little gems tumble into their new home within the batter mixture—it’s like watching tiny bursts of joy coming alive among soft swirls! Gently fold them in until they’re distributed evenly throughout before moving onto spooning this delightful dough into our prepared pan.
Step 4: Spreading Joy – Filling Up That Pan
With careful hands guiding you now—you’ll want to gently spoon out generous dollops of your mixed dough straight into your lined baking pan! Press lightly with fingers (or back of spatula) so it fills every corner nicely without being overly compacted—that would lead us astray from achieving those scrumptious chewy edges we crave! As soon as it’s evenly spread across—take those remaining M&Ms candies we set aside earlier—and sprinkle them on top like confetti celebrating what’s about to happen next!
Final Touches – Serving Up Happiness
Step 9: Slicing & Presenting Your Masterpiece
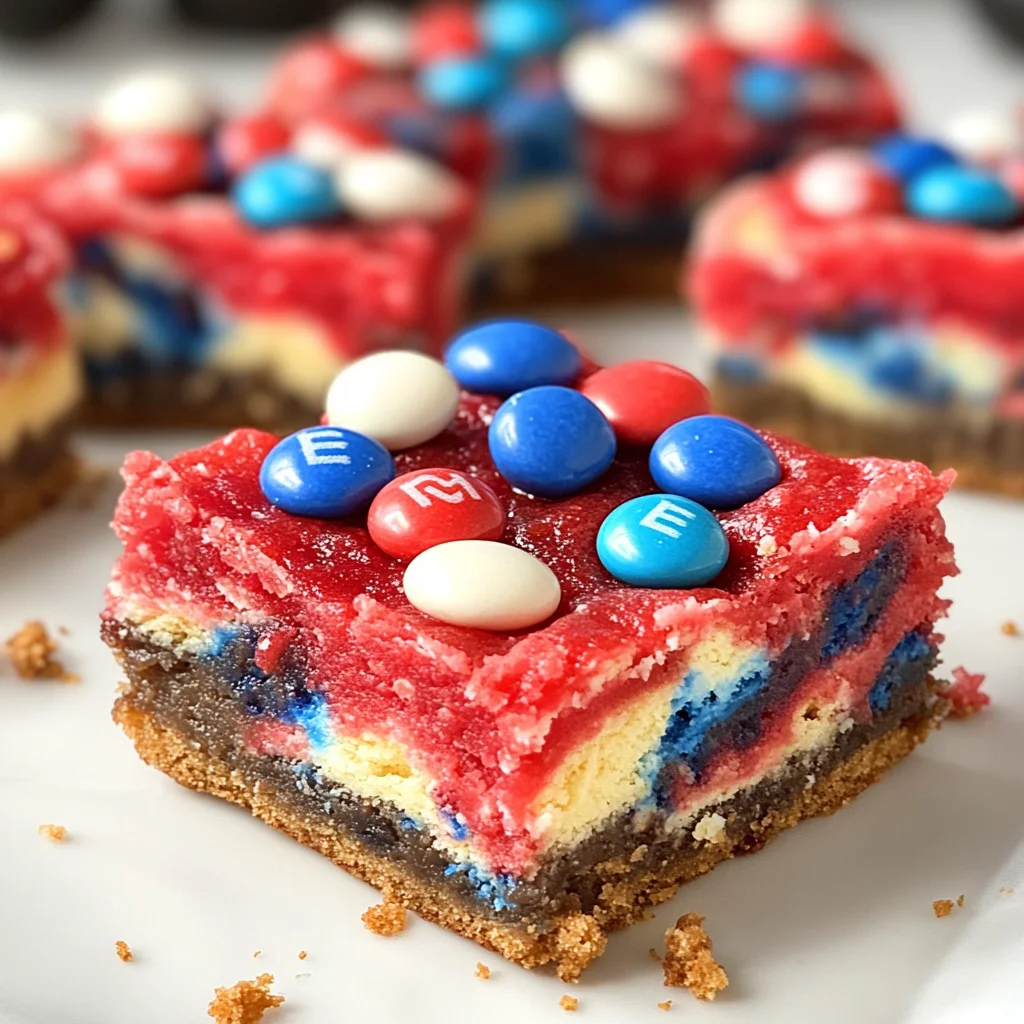
After allowing sufficient cooling time—and believe me when I say it’s worth every second—grab a sharp knife and prepare yourself for one final act of love: cutting these beauties into squares or rectangles. You’ll want to make sure each slice reveals those gorgeous swirls of color along with pops of candy goodness peeking out from within. This presentation is absolutely non-negotiable; after all, we eat first with our eyes!
As you cut through each bar, anticipate that satisfying firmness paired with just enough softness—the texture dance here is what keeps everyone coming back for more! Arrange these delightful treats on a platter or individual plates; serve them up alongside tall glasses of cold milk or perhaps some fresh fruit slices for contrast—it’s such an enticing combo that makes dessert feel extra special.
And there you have it—your homemade Red, White And Blue Bars are ready! Whether you’re sharing them at a family gathering or enjoying them solo during movie night (I won’t judge!), each bite promises happiness wrapped in nostalgia. Celebrate every morsel because you’ve poured love into making something truly unforgettable today! Enjoy every last crumb; you’ve earned it!
Storage and Enjoyment Tips for Your Red, White And Blue Bars
With the aroma of freshly baked Red, White And Blue Bars wafting through your kitchen, it’s hard not to feel a rush of excitement as you prepare to enjoy these delightful treats! The vivid colors of red velvet and the cheerful crunch of M&Ms promise to bring joy in every bite. But what happens when there are leftovers? Don’t worry; I’ve got you covered with some handy storage tips that will keep these bars tasting just as fabulous as the day they were made!
Storing Leftover Red, White And Blue Bars
To keep your Red, White And Blue Bars fresh and scrumptious, store them in an airtight container at room temperature. This simple step ensures they stay moist and prevent any unwanted drying out. If you happen to have a lot left after your get-together (which is always a pleasant surprise!), they’ll last about 3-4 days—trust me, they’ll be gone before you know it! For an extra tip to maintain that lovely softness, add a slice of bread to the container; it works like magic to keep everything delightfully tender. After a couple of days, they may take on a slightly different flavor profile—imagine the M&Ms becoming even more integrated into that rich red velvet base! When you’re ready to indulge again, simply cut them into bars and serve them at room temperature or pop them in the microwave for about 10-15 seconds to enjoy that gooey goodness once more.
Freezing Red, White And Blue Bars for Later
Now let’s talk about freezing those bars for future enjoyment! If you want to make a batch ahead of time or have some leftovers that need saving for later—this method is fantastic. Just slice your bars into individual pieces and wrap each one tightly in plastic wrap before placing them in a freezer-safe container. This will keep them fresh for up to three months! When you’re ready to enjoy one (or two), simply take it out of the freezer and let it thaw at room temperature for about 30 minutes; if you’re feeling impatient, a quick blast in the microwave will do wonders too. The beauty of freezing these bars lies not only in convenience but also in having a delightful treat ready whenever those cravings hit. Trust me, there’s nothing quite like pulling out a piece from the freezer on a cozy afternoon!
Red, White And Blue Bars
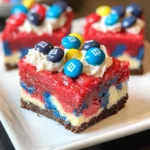
Red, White And Blue Bars are a festive treat that combines the nostalgic flavors of red velvet cake with the playful crunch of colorful M&Ms. Perfect for summer celebrations or any gathering, these bars offer a delightful blend of texture and taste that will bring smiles to faces young and old. With their vibrant colors and rich flavor, they serve as a delicious reminder of joyful moments spent with family and friends. Easy to make and visually stunning, these Red, White And Blue Bars are sure to become a favorite in your dessert repertoire!
- Prep Time: 10 minutes
- Cook Time: 20 minutes
- Total Time: 30 minutes
- Yield: Approximately 12 bars 1x
- Category: Dessert
- Method: Baking
- Cuisine: American
Ingredients
- 1 oz Red Velvet Cake Mix
- 1/2 cup melted butter
- 2 large eggs
- 1 bag Red (White & Blue) M&Ms candies
Instructions
- Preheat your oven to 350°F (175°C). Line a 13×9-inch baking pan with foil and lightly spray with non-stick cooking spray.
- In a large mixing bowl, combine the red velvet cake mix, melted butter, and eggs. Stir until well blended.
- Fold half of the M&Ms into the batter until evenly distributed.
- Spoon the batter into the prepared baking pan, pressing down gently to fill all corners.
- Sprinkle the remaining M&Ms on top.
- Bake for 15-20 minutes or until slight cracks form on top and a toothpick inserted in the center comes out clean.
- Allow to cool in the pan for 10-15 minutes before slicing into bars.
Nutrition
- Serving Size: 1 bar (40g)
- Calories: 180
- Sugar: 12g
- Sodium: 80mg
- Fat: 8g
- Saturated Fat: 5g
- Unsaturated Fat: 3g
- Trans Fat: 0g
- Carbohydrates: 27g
- Fiber: 0g
- Protein: 2g
- Cholesterol: 30mg