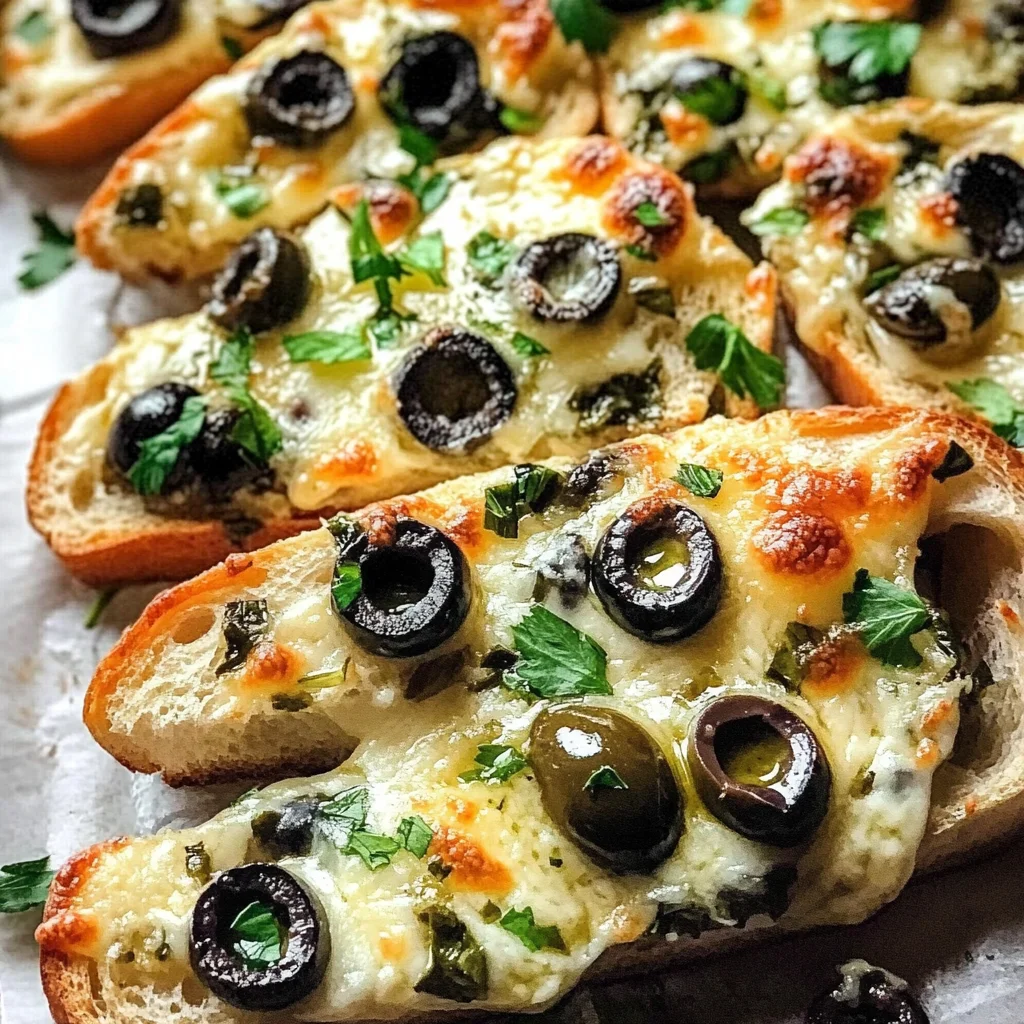
Olive Cheese Bread
Oh, my dear friend, let me tell you about a little treasure in the world of appetizers that will absolutely blow your mind! This Olive Cheese Bread is more than just a dish; it’s a delightful symphony of flavors that dances on your taste buds, drawing everyone to the table like moths to a flame. Picture this: warm, crusty French bread cradling a luscious mixture of creaminess from the sour cream and melted cheese, intermingled with the briny goodness of olives. Each bite is an experience—a celebration of savory richness that brings comfort and joy. I promise you, once you try this recipe, it will become a staple in your kitchen, shared at gatherings and cozy nights in.
But what makes this Olive Cheese Bread so special? Well, it’s not just the combination of gooey cheese and zesty olives; it’s the simplicity wrapped in each layer of flavor. With just a handful of ingredients and minimal fuss, you can create something truly extraordinary. This recipe is perfect for any occasion—whether it’s game day snacks, holiday parties, or even just a simple gathering with friends over wine (or sparkling juice!). The aroma that wafts through your home as it bakes is utterly intoxicating and will have everyone asking for seconds before they’ve even had their first bite!
Olive Cheese Bread: The Perfect Blend of Savory Goodness
Now that I’ve whetted your appetite for this irresistible dish, let’s dive into crafting this masterpiece together! With every step, I’ll guide you through the process like we’re side by side in the kitchen. This Olive Cheese Bread is incredibly easy to whip up and offers such profound satisfaction that you’ll find yourself making it over and over again. So roll up those sleeves; let’s get started!
Ingredients:
As we embark on this culinary journey together, it’s essential to understand not only what we’re using but why each ingredient plays a starring role in creating our Olive Cheese Bread. Each element contributes its unique character to this dish.
- 6 oz. full fat sour cream. This creamy delight adds a rich tanginess that’s nothing short of magical. It serves as the base for our cheese spread, providing moisture while also balancing the saltiness of our olives beautifully. Always opt for full-fat sour cream here; it lends a luxurious texture that low-fat versions simply cannot match. You’ll notice how it melds with butter and cheese to create an utterly decadent filling.
- 4 tablespoons softened butter. Ahh, butter—the liquid gold in our kitchen! Softened butter is crucial here as it helps incorporate air into our mixture when combined with sour cream; this process elevates our spread from merely good to heavenly! If you can manage to grab some high-quality European-style butter with higher fat content, do so—it makes everything richer and more flavorful.
- 7 oz. green olives, drained and sliced. Green olives bring a bright burst of flavor that contrasts beautifully with the creamy elements. Their brininess cuts through the richness while adding a delightful texture to each bite. When choosing olives, look for plump ones without any blemishes; these qualities ensure they’ll stand out in our mix.
- 6 oz. black olives, drained and sliced. Much like their green counterparts but richer in flavor, black olives contribute depth and complexity to our spread. They balance out the sharper notes from green olives while enhancing overall savoriness—an essential element in achieving that perfect harmony within our dish!
- 8 oz. shredded Monterey Jack cheese. Oh my gosh—the star performer! Monterey Jack melts beautifully into gooey perfection while providing a mild flavor that complements rather than overwhelms the other ingredients. Opting for freshly shredded cheese instead of pre-packaged guarantees better melting qualities and avoids additives that can affect texture.
- 1/4 cup thinly sliced green onions. These little gems add freshness and crunch; their subtle onion flavor enhances without being overpowering—a wonderful way to brighten up all those rich flavors we’ve got going on! When slicing them thinly, you unlock their delicate nature allowing them to blend seamlessly into our mix.
- 1/4 teaspoon garlic powder. Garlic powder brings an aromatic warmth that elevates every bite from good to unforgettable! It’s one of those pantry staples that really makes flavors pop without overwhelming—just remember not to go overboard!
- 8-10 oz loaf French bread. The vessel for all your deliciousness! A fresh loaf of French bread offers both structure and softness—perfect for holding all those cheesy delights inside without getting mushy or falling apart upon serving.
- Kosher salt & fresh cracked pepper: Simple yet non-negotiable seasonings! They elevate everything by enhancing natural flavors within our ingredients—and trust me when I say seasoning properly is absolutely paramount to achieving greatness here.
Now that we’ve gathered all our ingredients together like old friends reuniting for dinner, let’s move on to what you’ll need for making this culinary wonder!
Equipment You’ll Need:
Having the right tools can make your cooking experience feel like a breeze rather than an uphill battle! While they may not be ingredients themselves, these essential partners will help you create something wonderful—and trust me when I say they’re worth treating well!
- Mixing Bowl – A sturdy mixing bowl is essential since we’ll be combining several ingredients into one harmonious mixture here! Choose one that’s large enough so everything can blend easily without any overflow drama happening—you know what I mean!
- Spatula or Wooden Spoon – You’ll need something reliable for mixing our luscious filling together smoothly without damaging delicate components like cheese or olives during blending—this tool should feel comfortable in your hands as it’s going to be working hard!
- Baking Sheet – A sturdy baking sheet lined with parchment paper ensures even cooking while making cleanup effortless afterward—trust me; nobody enjoys scrubbing burnt bits off pans at 10 PM after an epic cooking session!
- Sharp Knife – For slicing up both bread and olives cleanly (and safely!), having a sharp knife on hand makes all the difference—don’t skimp here because dull knives lead only toward frustration…and possibly injuries too!
With all your ingredients prepped and equipment ready at hand like loyal companions waiting eagerly alongside you in this culinary adventure—we are now set up perfectly well! Let’s dive deeper into preparing our Olive Cheese Bread masterpiece together step by step…
Step 1: Preheating Your Oven
First things first: let’s heat things up! Preheat your oven to 350 degrees Fahrenheit—a crucial step in ensuring even baking throughout every inch of your Olive Cheese Bread creation later on down the line! While waiting patiently (trust me; don’t rush this step!), take deep breaths filled with anticipation because soon enough those comforting aromas will start wafting throughout your home.
Step 2: Blending Your Base
In a medium bowl—preferably one big enough so we don’t end up wearing half of our mixture—combine the full-fat sour cream along with softened butter (which should be at room temperature by now), garlic powder plus generous pinches of kosher salt & fresh cracked pepper too! Stir gently until mostly smooth—a little bit lumpy is okay since we’re folding more ingredients into this beauty later on—but aim for as few lumps as possible here because nobody wants weird clumps ruining their deliciousness!
Step 3: Adding Flavor Layers
Once you’ve achieved that lovely creamy consistency (doesn’t it already look dreamy?), it’s time to fold in shredded Monterey Jack cheese along with thinly sliced green onions until fully incorporated throughout—this part feels oh-so-satisfying as everything melds together magically before your eyes! Mixing gently prevents breaking apart any delicate bits while creating layers upon layers upon layers…yes please!!
Step 4: Folding In Olives
Here comes one of my favorite parts: gently fold those glorious green & black olive slices into your delightful cheesy mix using quick strokes rather than vigorous stirring (we want them intact!). This technique allows us maximum flavor infusion without losing their delightful textures altogether—it’s important since those briny bites are exactly why we adore this recipe so much in first place!
Stay tuned for more steps where I’ll guide you through transforming these delectable fillings onto fresh bread—and ultimately bringing all these beautiful flavors together into one scrumptious Olive Cheese Bread creation!
Step 5: Slice and Prepare the Bread for a Cheesy Delight
Now that your olive and cheese mixture is a heavenly blend of flavors, it’s time to turn our attention to the star of the show—the bread! For this step, you’ll want to take your loaf of French bread and slice it with care. First, cut the loaf in half widthwise, creating two sturdy pieces that will serve as our canvas for all that deliciousness. Then, slice each half in half again lengthwise; this will give you four beautiful pieces of bread ready to be topped. The reason we slice the bread this way is simple: it maximizes surface area for all that scrumptious olive cheese mix while allowing for even cooking.
Make sure your knife is sharp—this isn’t just about aesthetics; a clean cut helps maintain the structure of the bread, preventing any unnecessary crumbling when we start layering on our flavors. You want those edges to stay intact to hold onto every last bit of cheese and olive goodness. As you make these cuts, take a moment to breathe in the fragrant aroma of fresh bread—it’s one of life’s simple pleasures! After slicing, lay those pieces cut-side up on a baking sheet, ensuring they have plenty of space between them for heat circulation. This might seem trivial, but trust me on this: giving each piece room allows them to crisp up beautifully in the oven.
Step 6: Generously Spread the Olive Cheese Mixture
With your bread lovingly prepared and resting on the baking sheet, it’s time to showcase that creamy, cheesy ensemble we so painstakingly crafted earlier. Take a generous spoonful of your olive cheese mixture and spread it evenly across each piece of bread using a spatula or the back of a spoon. It’s crucial not to skimp here; we want every bite bursting with flavor! As you spread, think about how each dollop of that rich mixture will melt into every nook and cranny of the warm bread—pure magic!
This step is vital because it ensures that every single bite delivers that delightful combination of cheesy goodness paired with briny olives and aromatic green onions. Each layer contributes not just flavor but texture as well; you want some gooey cheese mixed with crunchy bits from those olives and perhaps even some freshness from the green onions popping through. Don’t rush this process! Take your time to ensure an even layer—this attention to detail truly makes a difference in the final taste experience. You can’t rush perfection!
Step 7: Bake Until Golden Perfection
Now comes one of my favorite parts—the baking! Preheat your oven to a cozy 350 degrees Fahrenheit (about 175 degrees Celsius). Once it’s nice and warm, slide your baking sheet loaded with those gorgeous open-faced sandwiches right into the oven. Set your timer for 20-25 minutes; during this time, something magical happens—the aroma fills your kitchen like an inviting hug, making everyone wonder what delightful treat you’re concocting.
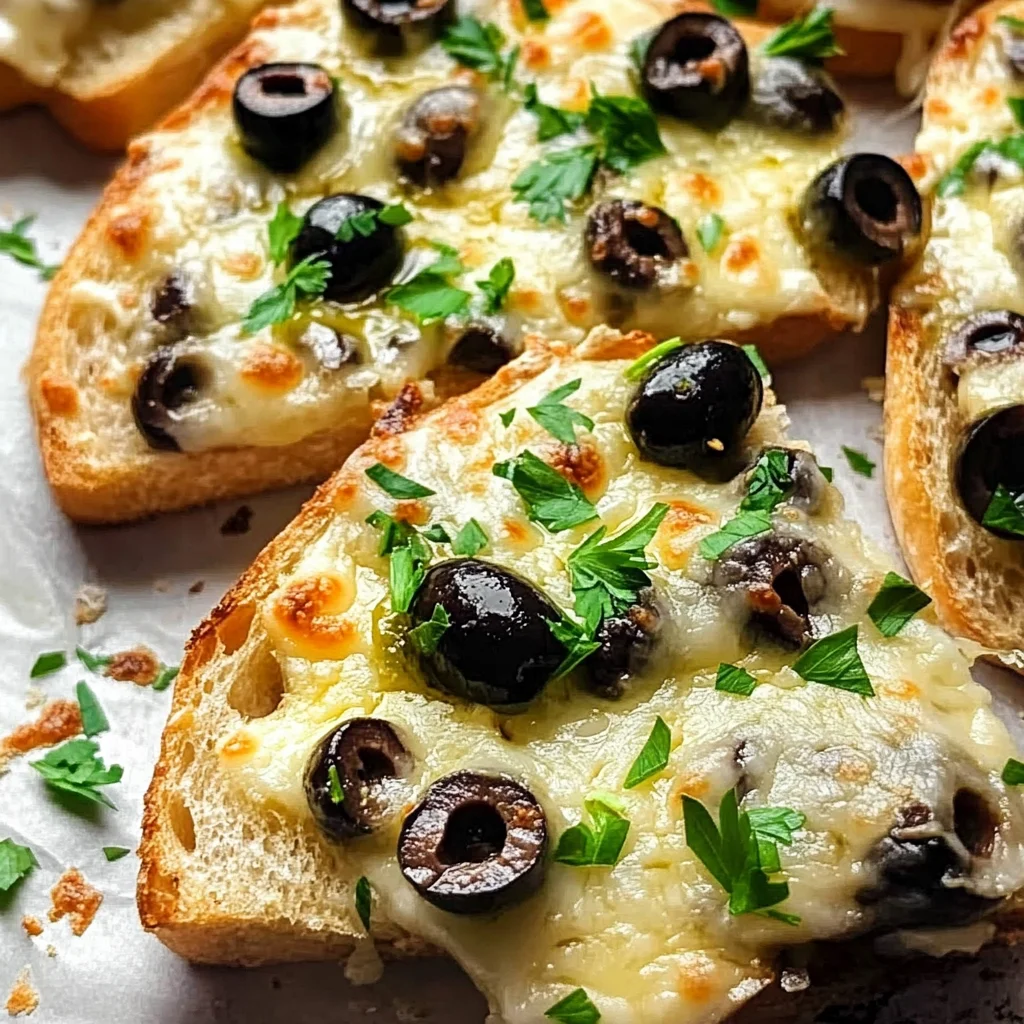
You’re looking for visual cues here: keep an eye out for melted cheese bubbling gently and edges just starting to turn golden brown—this means you’re on track for perfection! The heat transforms our ingredients into an utterly intoxicating symphony of flavors as everything melds together beautifully. If you see any signs that things are browning too quickly—like dark spots forming—don’t hesitate to adjust your oven temperature or cover them loosely with aluminum foil until they finish baking evenly.
Step 8: Broil for That Irresistible Finish
Once you’ve achieved that beautiful golden color after baking (and I promise it will be hard not to drool at this stage), it’s time for the finishing touch—a quick broil! Set your oven’s broiler to high and allow those slices to bask under its intense heat for just 1-2 minutes. This step is absolutely paramount because broiling will give you those dark golden brown spots on top that add depth and complexity both visually and in terms of flavor.
However, be vigilant during this process! The broiler is powerful, and things can go from perfectly caramelized to burnt in mere seconds if you’re not watching closely. I recommend standing by that oven door peeking through—and don’t worry; nobody will judge you if you do a little happy dance while waiting! The result? A breathtakingly crispy topping with gooey cheese beneath that beckons you closer. This final touch elevates our Olive Cheese Bread from deliciously good to truly extraordinary.
Conclusion:
As we wrap up this delicious journey through my beloved recipe for Olive Cheese Bread, I can’t help but feel excited about sharing something so truly special with you. Each bite of this appetizer is like a warm hug from an old friend—a beautiful blend of creamy cheese mingling with briny olives all nestled on crusty bread. The textures dance together harmoniously, creating an utterly intoxicating experience that goes beyond mere sustenance; it’s comfort food at its finest! I hope my enthusiasm has inspired you to gather your ingredients and create this masterpiece in your own kitchen.
This recipe isn’t just about taste; it’s about joy—the joy of cooking something simple yet magnificent that can effortlessly elevate any gathering or quiet evening at home. Picture pulling this beauty from the oven, the aroma wafting through your space as everyone gathers around. It’s approachable enough for novice cooks yet impressive enough to make seasoned chefs proud. Whether it’s game night with friends or a cozy family dinner, this Olive Cheese Bread shines brightly as an appetizer that sparks joy and conversation alike.
Imagine savoring one warm slice alongside a crisp salad drizzled with balsamic vinaigrette or pairing it with a chilled glass of sparkling water infused with lemon slices for an afternoon pick-me-up. For an extra indulgent experience, why not serve it alongside a rich tomato basil soup? The combination is simply divine! The beauty of this recipe lies not only in its flavors but also in its versatility—you’ll find yourself reaching for it time and again!
Feeling adventurous? This recipe is wonderfully adaptable! Try swapping out Monterey Jack cheese for pepper jack if you’re craving a little heat or even mixing in some sun-dried tomatoes for an added burst of flavor. You could also experiment with different olives—kalamata olives would lend a gorgeous color and depth that would truly elevate your creation! I encourage you to make this recipe your own: tweak it, enhance it, enjoy every moment of crafting something beautiful from simple ingredients. I can’t wait to hear how yours turns out—so please try it out and share your experiences!
Olive Cheese Bread

Olive Cheese Bread is the ultimate crowd-pleasing appetizer that combines the rich creaminess of cheese with the briny goodness of olives, all nestled on warm, crusty French bread. This delightful dish is not only easy to make but also perfect for any occasion—be it game nights, holiday gatherings, or cozy evenings at home. With its inviting aroma and melt-in-your-mouth texture, Olive Cheese Bread is sure to become a favorite among family and friends. Get ready to impress your guests with this irresistible treat that’s bursting with flavor!
- Prep Time: 15 minutes
- Cook Time: 25 minutes
- Total Time: 40 minutes
- Yield: Approximately 8 servings 1x
- Category: Appetizer
- Method: Baking
- Cuisine: Mediterranean
Ingredients
- 6 oz full-fat sour cream
- 4 tablespoons softened butter
- 7 oz green olives, drained and sliced
- 6 oz black olives, drained and sliced
- 8 oz shredded Monterey Jack cheese
- 1/4 cup thinly sliced green onions
- 1/4 teaspoon garlic powder
- 8–10 oz loaf French bread
- Kosher salt and fresh cracked pepper to taste
Instructions
- Preheat your oven to 350°F (175°C).
- In a mixing bowl, combine sour cream, softened butter, garlic powder, salt, and pepper; mix until smooth.
- Fold in Monterey Jack cheese and green onions until well combined.
- Gently fold in green and black olive slices.
- Slice the French bread in half lengthwise; place cut-side up on a baking sheet.
- Spread the olive cheese mixture evenly over the bread halves.
- Bake for 20-25 minutes until cheese is melted and edges are golden brown.
- Broil on high for 1-2 minutes for a crispy finish.
Nutrition
- Serving Size: 1 slice (approximately 50g)
- Calories: 180
- Sugar: 1g
- Sodium: 350mg
- Fat: 12g
- Saturated Fat: 6g
- Unsaturated Fat: 5g
- Trans Fat: 0g
- Carbohydrates: 14g
- Fiber: 1g
- Protein: 5g
- Cholesterol: 30mg