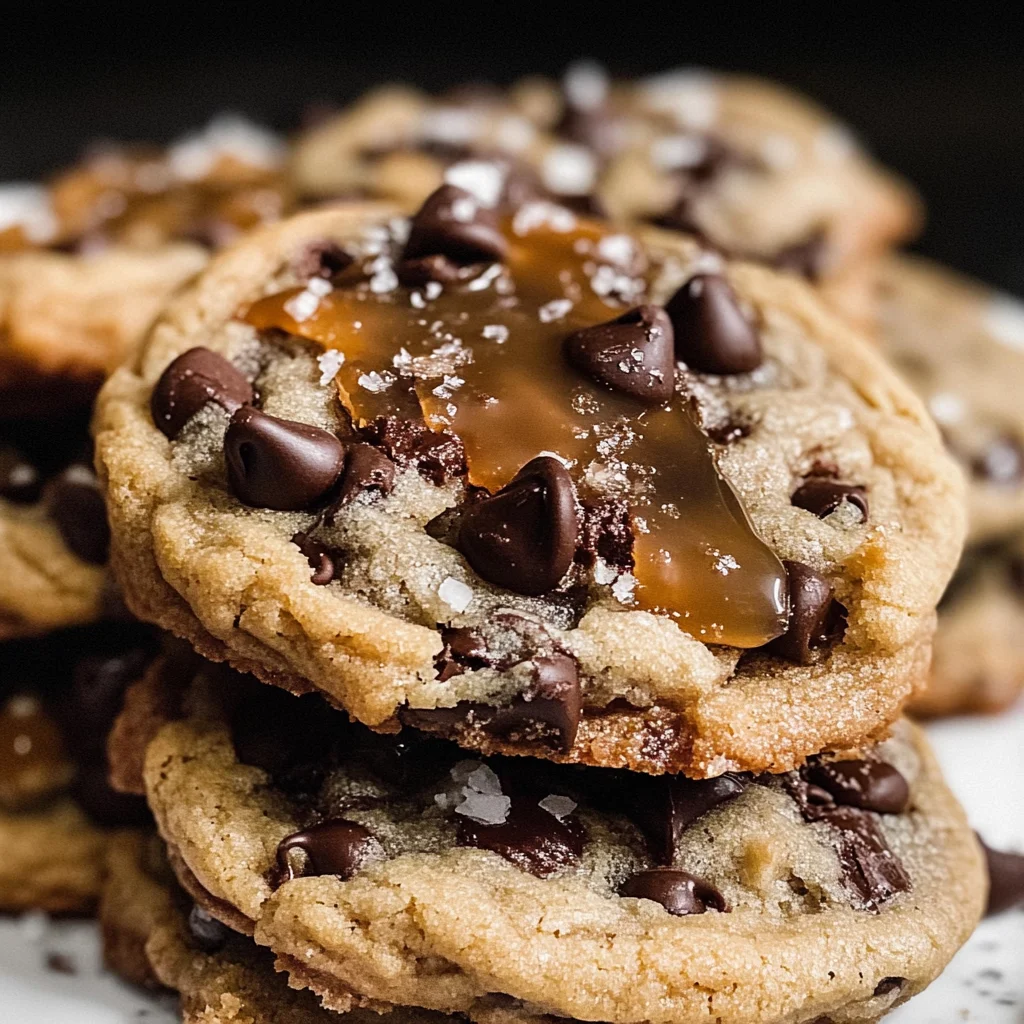
Salted Caramel Chocolate Chip Cookies
There’s something beautifully transformative about baking, isn’t there? It’s more than just mixing ingredients; it’s a heartfelt experience that fills your home with warmth and that intoxicating aroma of sweetness wafting through the air. When I think of cozy evenings spent in the kitchen, I can’t help but be drawn to these Salted Caramel Chocolate Chip Cookies, a recipe that represents the perfect blend of nostalgia and innovation. Each bite is a journey into a world where soft, chewy cookie goodness collides with rich, gooey caramel and luscious chocolate chips. Trust me when I say this—these cookies are not just treats; they’re an experience waiting to unfold.
As you embark on this culinary adventure, imagine yourself standing in your kitchen, surrounded by the comforting clatter of bowls and spoons. The process is simple yet deeply rewarding. You’ll melt butter until it becomes liquid gold, whisk sugars until they meld into something extraordinary, and watch as flour transforms into a dough that promises bliss. And let’s not forget the pièce de résistance—the salted caramel that adds just the right touch of decadence! The balance between sweet and salty is what makes these cookies truly irresistible. Picture them fresh from the oven, their edges crisp yet tender centers holding onto pockets of molten caramel—sheer perfection.
Salted Caramel Chocolate Chip Cookies: A Sweet Symphony of Flavor
This recipe for Salted Caramel Chocolate Chip Cookies is one you’ll cherish forever. It combines beloved elements from classic cookies with a twist—a tantalizing surprise inside! Imagine biting into a warm cookie and discovering that gooey caramel embraced by rich chocolate chips; it’s an experience meant to be shared with friends and family (or savored all on your own!). Whether you’re celebrating a special occasion or simply indulging in a sweet moment after dinner, these cookies are sure to bring smiles all around.
Ingredients:
As we dive into this delightful recipe, let’s take a moment to appreciate each ingredient’s role in creating these Salted Caramel Chocolate Chip Cookies. From the richness of butter to the magic of caramel, every component plays its part in crafting something truly special.
- 14.5 tbsp salted butter, melted & cooled slightly (206 grams). Butter is at the heart of our cookies; it brings richness and depth to flavor while contributing to that coveted melt-in-your-mouth texture. Melting the butter allows it to blend seamlessly with sugars during mixing, creating an emulsion that leads to smooth dough consistency. If you can find high-quality European-style butter, go for it! The higher fat content will elevate your cookies even further.
- 3/4 cup dark brown sugar, packed (163 grams). This sugar adds not just sweetness but also moisture due to its molasses content, which keeps our cookies soft and chewy. Using dark brown sugar imparts a deeper flavor profile compared to light brown sugar—think hints of caramel and toffee dancing on your palate! Make sure it’s packed firmly so you get all those delightful flavors in every bite.
- 3/4 cup granulated sugar (156 grams). Granulated sugar is essential for crispness in our cookie edges while providing structure within the cookie itself. It helps achieve that beautiful golden brown color as they bake. Together with brown sugar, they create a balanced sweetness that’s utterly irresistible!
- 1 and 1/2 tsp vanilla extract. Ahh, vanilla—this fragrant essence elevates our cookies by adding warmth and complexity to their flavor profile. Opt for pure vanilla extract if possible; its rich aroma is unmatched compared to artificial versions.
- 2 large eggs, at room temperature. Eggs bind the ingredients together while contributing moisture and richness to our dough. Bringing them to room temperature ensures they incorporate smoothly into your mixture without cooling down your melted butter too much—a step worth taking for optimal results!
- 3 cups all-purpose flour, spooned & leveled or weighed (390 grams). Flour forms the backbone of our cookie dough; its gluten creates structure while allowing those heavenly chocolate chips to stay suspended within each cookie! Spoon and level your flour carefully or weigh it out for precision—too much flour can lead to dry cookies!
- 1 tsp baking powder. This leavening agent helps our cookies rise slightly as they bake without making them cake-like—just enough lift for a lovely texture! Make sure it’s fresh; old baking powder loses potency over time.
- 1 tsp baking soda. Similar yet different from baking powder, baking soda works by reacting with acidic components in our sugars (like brown sugar) during baking. This reaction aids in browning while creating tenderness within each bite.
- 1/4 tsp salt. Salt enhances flavors across the board—it deepens sweetness while balancing flavors harmoniously throughout every morsel! Don’t skip this step; it’s crucial for letting all those delicious notes shine through.
- 2 cups semi-sweet chocolate chips. Chocolate is what makes everything better! These chips will melt ever so slightly as they bake into pockets of blissful goodness within each cookie—richly decadent yet perfectly balanced against that subtle saltiness from earlier steps.
- 35 pieces Werther’s soft caramels (see note below). These delightful little treasures are what elevate this recipe from ordinary chocolate chip cookies into something magical! Their creamy texture melts beautifully inside your cookie dough creating pools of sweet surprises awaiting discovery with every bite.

Equipment You’ll Need:
Before diving into baking bliss, let’s ensure you’ve got all the right tools at hand! Having quality equipment not only makes the process smoother but also enhances your overall experience in creating these delightful treats.
- Mixing bowl: A large mixing bowl is essential for combining ingredients efficiently without splattering everywhere! Look for one that’s sturdy enough to withstand vigorous whisking—you want something that can handle both wet and dry mixtures seamlessly.
- Whisk: A good whisk allows you to blend wet ingredients together smoothly without lumps—a crucial step when combining melted butter with sugars and eggs here!
- Wooden spoon or spatula: You’ll need this trusty tool for folding dry ingredients into your wet mixture gently so as not to deflate any air bubbles formed during whisking!
- Baking sheets: Choose heavy-duty baking sheets lined with parchment paper or silicone mats—they promote even browning while preventing sticking issues down the line!
- Oven thermometer: Ensuring accurate temperature while baking ensures perfect results every time! An oven thermometer guarantees you’re hitting those ideal temperatures necessary for your cookies’ success.
Now that we’ve gathered everything we need let’s jump headfirst into preparing these Salted Caramel Chocolate Chip Cookies!
Step 1: Prepare Your Gooey Goodness
Start by unwrapping those luscious Werther’s soft caramels—you’re going to want 15 whole ones saved just for stuffing inside those heavenly cookie dough balls later on! The remaining pieces should be sliced into 2 or 3 smaller bits; these will adorn each cookie once they’re ready for their trip into the oven! Taking time here sets up anticipation—a visual treat that promises delightful bites filled with molten caramel surprise nestled within classic chocolate chip goodness awaits us ahead!
Step 2: Create Your Cookie Dough
Next comes one of my favorite parts—the creation of our cookie dough! In a large mixing bowl, melt your salted butter until it takes on a beautiful liquid form (but don’t let it boil!). Whisk together both sugars until fully combined; this process encourages air incorporation which leads us closer toward fluffy cookies rather than dense bricks later on—a crucial distinction when aiming for soft-baked perfection! Add in vanilla extract followed by room-temperature eggs before whisking vigorously until everything melds beautifully together—about 30 seconds should do nicely here!
It’s important not only because we want everything blended smoothly but also because introducing air at this stage provides great texture later on during baking—trust me on this one!
Step 3: Combine Dry Ingredients
Now comes perhaps one of my favorite moments—the joining together of dry ingredients with their wet companions! Gradually sprinkle flour over your mixture alongside baking powder & soda plus salt before folding gently using either a wooden spoon or spatula until just incorporated—a few lumps are perfectly fine here since gluten development isn’t desired yet either way…
Remember—not rushing through this step allows us maximum enjoyment as we turn basic elements like flour & leaveners into something magical when mixed properly together—don’t skip out on giving yourself permission at least once during mixing moments like these!
Step 4: Fold In Chocolate Chips
The grand finale approaches as we stir in those semi-sweet chocolate chips last—it’s always best practice adding them last so they won’t break apart too much during mixing phases prior… This way each bite will have perfectly intact chunks bringing joyful bursts amidst lovely caramel pools hidden underneath layers upon layers leading up toward ultimate indulgence levels achieved via patience throughout preparation processes today …
Feeling excited? Just wait until you see how everything comes together next!
Stay tuned as we continue exploring how best shape these beauties before sending them off towards oven miracles ahead…
Step 5: Crafting the Perfect Cookie Dough Balls
Now that we have our dough resting, let’s dive into the fun part—shaping our cookies! This step is where you can really let your creativity shine and ensure each cookie is a delightful surprise. Start by scooping out about 90 grams of dough for each cookie; I find that using a kitchen scale helps me achieve uniformity, which is key to even baking. Once you have your portioned dough, gently roll it into a ball in your palms. Trust me on this one—how you handle the dough makes all the difference! A gentle touch will keep the butter from melting too much and help maintain that soft, thick texture we’re aiming for.
Next, flatten each ball slightly to create a little disk. This is crucial because it gives us enough room to tuck in our gooey caramel center without it spilling out. Place one of those whole caramel candies right in the middle and then carefully wrap the dough around it, pinching it closed so the caramel is completely encased within the dough. This process not only ensures a luscious molten core but also keeps that sweet surprise hidden until you take your first bite. The anticipation builds as you press 1-2 pieces of the sliced caramels on top of each cookie ball along with a few extra chocolate chips—this little garnish not only adds visual appeal but also enhances that heavenly caramel flavor with every nibble.
Step 6: Prepping for Baking Bliss
With your cookie dough balls all shaped and stuffed, it’s time to prep for baking! Preheat your oven to 365°F (185°C)—that’s just hot enough to create a crispy edge while keeping the inside delightfully chewy. While waiting for your oven to reach the perfect temperature, line several baking sheets with parchment paper; this non-stick surface is non-negotiable when it comes to easy removal and clean-up after baking. Now, here’s where patience comes into play again: arrange about 5-6 cookie dough balls on each sheet, ensuring there’s ample space between them—roughly 2-3 inches apart is ideal. Why? Because these cookies are going to spread as they bake, transforming from adorable mounds into mouthwatering rounds!
As you place those trays in the oven, watch closely during the last couple of minutes of baking. You want those edges to be set and lightly golden brown while the centers should look just a tad underdone—that’s precisely how we achieve that soft-baked texture we crave. Remember, they’ll continue cooking slightly as they cool on the pan, so don’t rush this step! The aroma wafting through your kitchen will be utterly intoxicating—it’s like wrapping yourself in a warm hug from heaven!
Step 7: The Art of Shaping Cookies
Once you’ve allowed those cookies to bake for about 10-12 minutes (depending on your oven’s quirks), it’s time for one final flourish—the art of shaping! As soon as they come out of the oven, you might notice they aren’t perfectly round or may have spread more than expected; fear not! Here’s where an essential technique comes into play: using a round cutter or even a large glass that’s slightly larger than your cookies can work wonders. Simply place it around each cookie while they’re still warm and gently swirl it around—this action encourages them back into shape while also giving them that beautiful thickness we all adore.
This technique doesn’t just make them visually appealing; it helps re-contain any melted caramel that might be trying to escape during baking. It’s truly magical how such a simple action can elevate your cookies from good to extraordinary! Allow them to cool on the pan until they’re no longer piping hot; trust me—you want them warm but not scalding before diving in.
Step 8: Indulging in Your Creation
Now comes arguably the most rewarding part: enjoying your Salted Caramel Chocolate Chip Cookies! Once they’ve cooled enough so you can handle them comfortably (about 5-10 minutes), grab one or two and take that first bite—you’ll experience an explosion of flavors as gooey chocolate mingles beautifully with rich caramel, all wrapped in a buttery soft cookie shell. It’s purely divine! If you’re feeling adventurous, try pairing these cookies with a glass of almond milk or some homemade oat milk for an utterly delightful treat.
But wait—there’s more! To store these beauties (if there are any left!), simply place them in an airtight container at room temperature where they’ll stay fresh for about 4-5 days. Alternatively, if you want that freshly baked warmth every time, consider storing them in the fridge—a quick reheat in either the microwave or oven will bring back their glorious gooeyness!
Next Major Phase – Freezing for Future Enjoyment
If you’re like me and can’t resist baking batches upon batches of these delights, let’s explore how freezing can become your best friend! After you’ve shaped those cookie dough balls filled with caramel goodness but before they hit the oven, lay them out on a baking sheet lined with parchment paper and freeze until solid—this usually takes about 30-60 minutes. Once frozen firm, transfer them into an airtight freezer-safe container or bag.
What makes this step absolutely paramount? You now have an instant dessert at your fingertips! These frozen gems can be stored for up to 2-3 months and can be baked straight from frozen whenever cravings strike—just follow our original baking directions without missing a beat! Trust me when I say there’s something profoundly satisfying about having homemade cookies ready at a moment’s notice.
As you embark on this sweet journey making Salted Caramel Chocolate Chip Cookies—a recipe steeped in love and tradition—I hope you find joy not only in indulging but also in sharing these delectable treats with friends and family. The magic of cooking lies not just in following steps but in creating memories together over delicious bites that linger long after they’ve disappeared!
Storage and Enjoyment Tips for Your Salted Caramel Chocolate Chip Cookies
Now that you’ve prepared a batch of these utterly irresistible Salted Caramel Chocolate Chip Cookies, I can hardly contain my excitement! The warm aroma wafting through your kitchen is simply intoxicating, and trust me, every bite will feel like a little hug from the inside. But what happens when you have some leftover cookies (if that’s even possible)? Let’s dive into how to store these beauties so that every last crumb remains as delightful as the first!
Storing Leftover Salted Caramel Chocolate Chip Cookies
To ensure your cookies stay fresh and delectable, you’ll want to store them in an airtight container—this is absolutely paramount for maintaining their soft, chewy texture. A glass or plastic container works wonders; just make sure it seals tightly! You can leave them at room temperature for about 4-5 days. If you’re looking for a little pro tip to keep them extra moist, consider adding a slice of bread to the container; this will introduce just the right amount of moisture without making the cookies soggy. How do they taste after storage? Even better! The flavors have a chance to meld together beautifully, creating a profoundly satisfying treat that’s hard to resist. When you’re ready to indulge again, simply reheat them in the microwave for a few seconds or pop them in the oven until warmed through—your taste buds will thank you!
Freezing Cookie Dough for Later
If you want to elevate your cookie game even further, freezing your cookie dough is an absolute game-changer! After you’ve formed your dough into balls and stuffed them with those luscious caramel pieces, lay them out on a baking sheet lined with parchment paper and freeze until solid. Once they’re frozen through, transfer them into an airtight freezer-safe container or bag. This method keeps your cookie dough fresh for about 2-3 months, and here’s the best part: you can bake them straight from frozen! Just add a minute or two to the baking time, and voila—you’ll have warm, gooey cookies ready at a moment’s notice. This convenience factor makes it so easy to satisfy those late-night cravings or impress friends unexpectedly without the hassle of starting from scratch.
Let’s face it: having these Salted Caramel Chocolate Chip Cookies on hand—whether freshly baked or frozen—brings joy not just in their taste but also in their sheer availability.
Salted Caramel Chocolate Chip Cookies

Indulge in the delightful experience of baking with these Salted Caramel Chocolate Chip Cookies. Each bite transports you to a world of soft, chewy cookie bliss, where rich chocolate chips meet gooey caramel for a truly unforgettable treat. Perfect for sharing or enjoying solo, these cookies are a must-have for any occasion—from cozy evenings at home to festive gatherings. The balance of sweet and salty creates an irresistible flavor profile that will leave everyone craving more. Warm from the oven or stored for later, these cookies promise to deliver joy in every bite.
- Prep Time: 15 minutes
- Cook Time: 12 minutes
- Total Time: 27 minutes
- Yield: Approximately 24 cookies 1x
- Category: Dessert
- Method: Baking
- Cuisine: American
Ingredients
- 14.5 tbsp salted butter (206 grams), melted
- 3/4 cup dark brown sugar (163 grams), packed
- 3/4 cup granulated sugar (156 grams)
- 1 and 1/2 tsp vanilla extract
- 2 large eggs
- 3 cups all-purpose flour (390 grams)
- 1 tsp baking powder
- 1 tsp baking soda
- 1/4 tsp salt
- 2 cups semi-sweet chocolate chips
- 35 pieces Werther’s soft caramels
Instructions
- Preheat your oven to 365°F (185°C) and line baking sheets with parchment paper.
- In a large mixing bowl, melt the butter and whisk in both sugars until combined.
- Add vanilla extract and eggs; whisk until smooth.
- In a separate bowl, combine flour, baking powder, baking soda, and salt. Gradually fold into the wet mixture until just incorporated.
- Stir in chocolate chips gently.
- Scoop about 90g of dough for each cookie, flatten slightly, insert a whole caramel piece in the center, and encase it with dough. Top with additional sliced caramels and chocolate chips.
- Place on prepared baking sheets with adequate space between cookies.
- Bake for approximately 10-12 minutes until edges are golden but centers remain soft.
- Allow cooling before enjoying.
Nutrition
- Serving Size: 1 cookie (45g)
- Calories: 205
- Sugar: 13g
- Sodium: 150mg
- Fat: 10g
- Saturated Fat: 6g
- Unsaturated Fat: 3g
- Trans Fat: 0g
- Carbohydrates: 29g
- Fiber: 1g
- Protein: 2g
- Cholesterol: 30mg