Apple Pie by Grandma Ople
There’s something magical about the aroma of an apple pie baking in the oven, isn’t there? It’s a scent that dances through the air, wrapping around you like a warm hug, calling to mind memories of family gatherings and cozy evenings spent sharing laughter over dessert. This isn’t just any recipe; this is Apple Pie by Grandma Ople – a beloved family classic that transcends mere food to become an experience, a tradition, and a cherished memory. As you gather your ingredients and prepare to embark on this culinary journey, I promise you’ll find yourself captivated by the sweet, buttery aroma of caramelizing apples mingling with hints of cinnamon and nutmeg. Each slice reveals a tender lattice crust cradling perfectly spiced apples, making every bite an utterly intoxicating moment.
What makes this apple pie truly special is not just the delightful layering of flavors but also the love and warmth infused into every step of its preparation. It’s as if each ingredient is whispering its secrets to you – from the tartness of Granny Smith apples dancing harmoniously with the rich sweetness of brown sugar to the flaky, buttery crust that cradles it all together. This dessert is perfect for fall evenings or holiday celebrations when comfort food reigns supreme. So, grab your apron and let’s dive into this heartfelt recipe that has been passed down through generations – a recipe filled with love, nostalgia, and undeniable deliciousness.
Apple Pie by Grandma Ople: A Slice of Home
This Apple Pie by Grandma Ople is more than just dessert; it’s a symbol of home and comfort. The moment you pull it from the oven, golden and bubbling, you’ll understand why it’s such a cherished recipe. The combination of sweet apples enveloped in that beautifully caramelized lattice crust creates an irresistible treat that will have everyone asking for seconds! So let’s get started on crafting this incredible pie together.
Ingredients:
As we embark on our pie-making adventure, let’s take a moment to appreciate each ingredient that contributes to this masterpiece. Every element plays its role in creating that symphony of flavors we all crave.
- 8 small Granny Smith apples (or as needed). These apples are essential for our pie due to their tart flavor, which beautifully balances out the sweetness from the sugars. When selecting your apples, look for firm fruits with vibrant green skin – they should feel heavy for their size and have no soft spots or blemishes. If Granny Smiths aren’t available, you can mix in some Honeycrisp or Braeburn apples for added sweetness while still retaining that necessary tartness.
- 0.5 cup unsalted butter. This creamy delight is where our flaky crust begins! Using unsalted butter allows you to control the overall saltiness of your pie while contributing rich flavor and tenderness to both the filling and crust. It’s crucial that your butter is at room temperature before using it in any pastry; this helps achieve that delicate texture we’re aiming for in our lattice crust.
- 3 tablespoons all-purpose flour. Flour is what gives structure to our filling mixture; without it, we’d be left with a soupy mess instead of the luscious filling we desire. I recommend using all-purpose flour here because it strikes the perfect balance between strength and tenderness—making sure everything holds together beautifully without being too dense.
- 0.5 cup white sugar. This sugar adds sweetness to our apple filling while helping to create that gorgeous caramelization as it cooks down with the fruit. When selecting sugar for your pie, opt for granulated white sugar—it dissolves easily within the mixture and blends seamlessly with those juicy apples.
- 0.5 cup packed brown sugar. Brown sugar brings depth and warmth into our pie thanks to its molasses content! This adds another layer of flavor—think hints of caramel—that pairs perfectly with tart apples. Make sure it’s packed tightly into your measuring cup so you get every last bit; trust me on this one!
- 0.25 cup water. Water may seem like a simple addition here but it plays an important role in creating steam during baking which helps soften our apples while keeping them juicy without becoming mushy.
- 1 (9 inch) double-crust pie pastry, thawed. A good pastry can make or break your pie experience! Opt for a high-quality double-crust pastry for convenience if you’re short on time—though there’s nothing quite like making your own from scratch if you have the chance! Ensure it’s properly thawed before use so it rolls out smoothly without cracking or tearing.
Equipment You’ll Need:
Before we dive into making this delightful pie, let’s gather our tools! Having the right equipment not only makes cooking easier but also enhances your overall experience in creating something truly wonderful.
- 9-inch pie pan – This will hold all your delicious filling and crispy crust! Choose one made from glass or ceramic for even heat distribution; metal pans can sometimes cause uneven cooking or browning.
- Peeler & corer – A good peeler will save time when prepping those lovely Granny Smith apples! A corer ensures you’re removing all seeds without losing precious fruit flesh—both tools make prep much smoother!
- Saucepan – You’ll need a medium-sized saucepan to cook down your buttery filling mixture until it’s bubbling with flavor! Look for one with thick sides to help retain heat evenly.
- Rolling pin – Essential for rolling out your dough evenly so it fits perfectly into your pie pan without tears or holes—this tool helps create perfectly flaky layers!
- Pastry brush – A must-have for brushing butter over your lattice crust before baking! It ensures even coverage which encourages beautiful browning while adding richness at every bite.
With all these ingredients and tools ready at hand, we’re well on our way toward crafting an unforgettable Apple Pie by Grandma Ople!
Preparing the Apple Pie by Grandma Ople
Step 1: Prepping Your Apples
The first step toward achieving apple perfection starts with peeling and coring those beautiful Granny Smith apples! Grab a sturdy peeler; as you glide it along their skin’s surface, imagine how each slice will soon blend harmoniously within our warm filling. Once peeled, carefully cut them into thin slices—aiming for about 1/4 inch thickness so they cook evenly but still retain some texture when baked! Set aside these lovely slices in a bowl while we whip up some magic in our saucepan.
Step 2: Creating Liquid Gold
Now onto my favorite part: melting butter in a saucepan over medium heat until it’s bubbly goodness fills your kitchen! As it melts away into liquid gold (and trust me—this step is absolutely paramount), sprinkle three tablespoons of flour directly into the pan once melted—you’ll want to stir vigorously until they form what’s known as a roux. Allowing this paste-like concoction to cook just until fragrant (about 1-2 minutes) develops flavors that will permeate every layer of our pie later on—a little patience goes such long way here!
Step 3: Sweetening Things Up
Next comes adding both white sugar and packed brown sugar along with that quarter-cup water into our roux mixture—it’s magical watching them melt together as they dissolve completely under gentle heat! Bring everything up to boil before reducing back down onto low heat where it’ll simmer softly for about three minutes until slightly thickened—the result should be glossy syrupy goodness ready to pour over those sliced apples later on!
Step 4: Assembling Our Crust
While waiting patiently during simmering time (because who doesn’t love multitasking?), let’s focus on rolling out our double-crust pastry dough! Start by pressing one half gently into bottom edges of your greased nine-inch pan—it should rise up slightly along sides too—that way every bite captures all juicy goodness contained within! Roll out remaining pastry until it’s about 1/8 inch thick then cut eight strips measuring one inch wide each; these will form our iconic lattice design atop those luscious apples lying beneath them!
Oh my goodness—just thinking about how incredible this pie is going to taste gets me excited! Trust me on this journey—each step unfolds layers upon layers of deliciousness leading us closer towards pure bliss when serving warm slices topped off with whipped cream or vanilla ice cream… bliss indeed awaits us ahead!
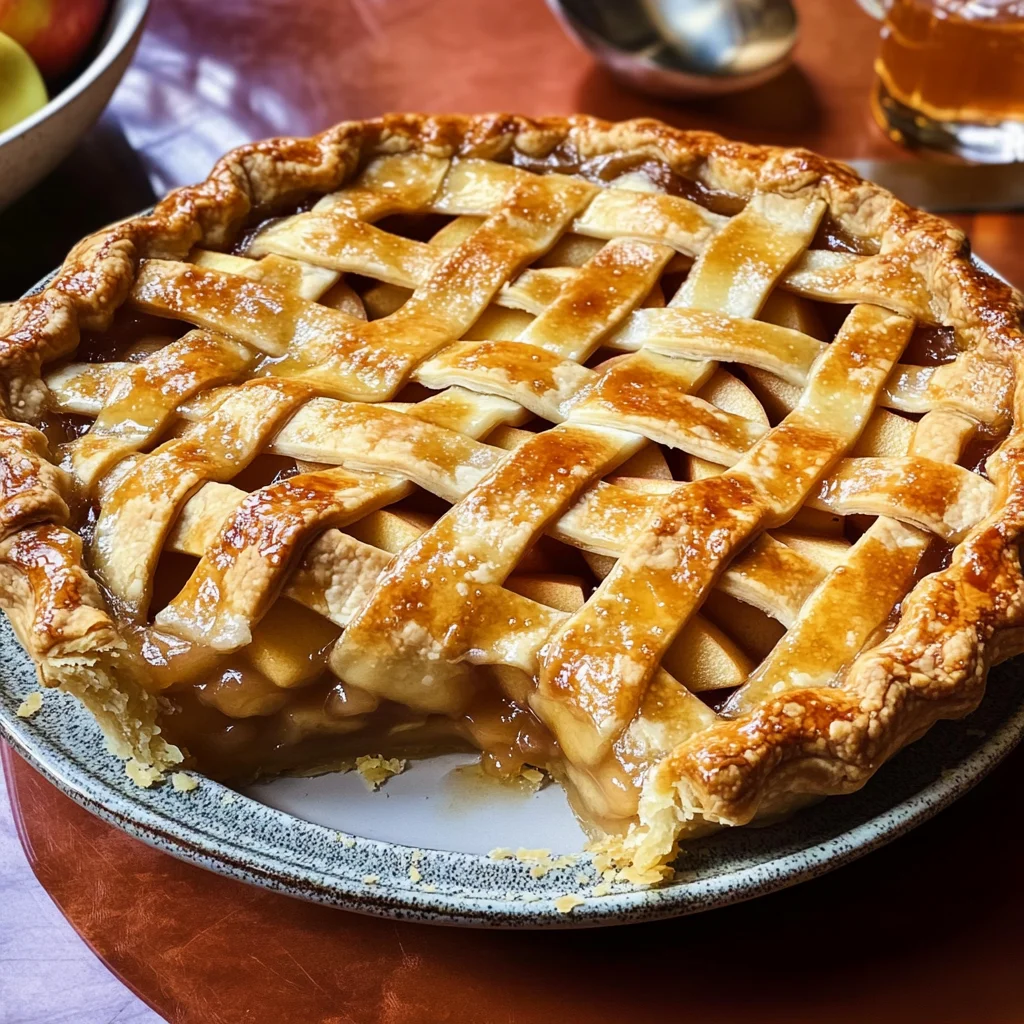
The Art of Weaving Your Lattice Crust
Step 5: Creating Beautiful Patterns with the Lattice
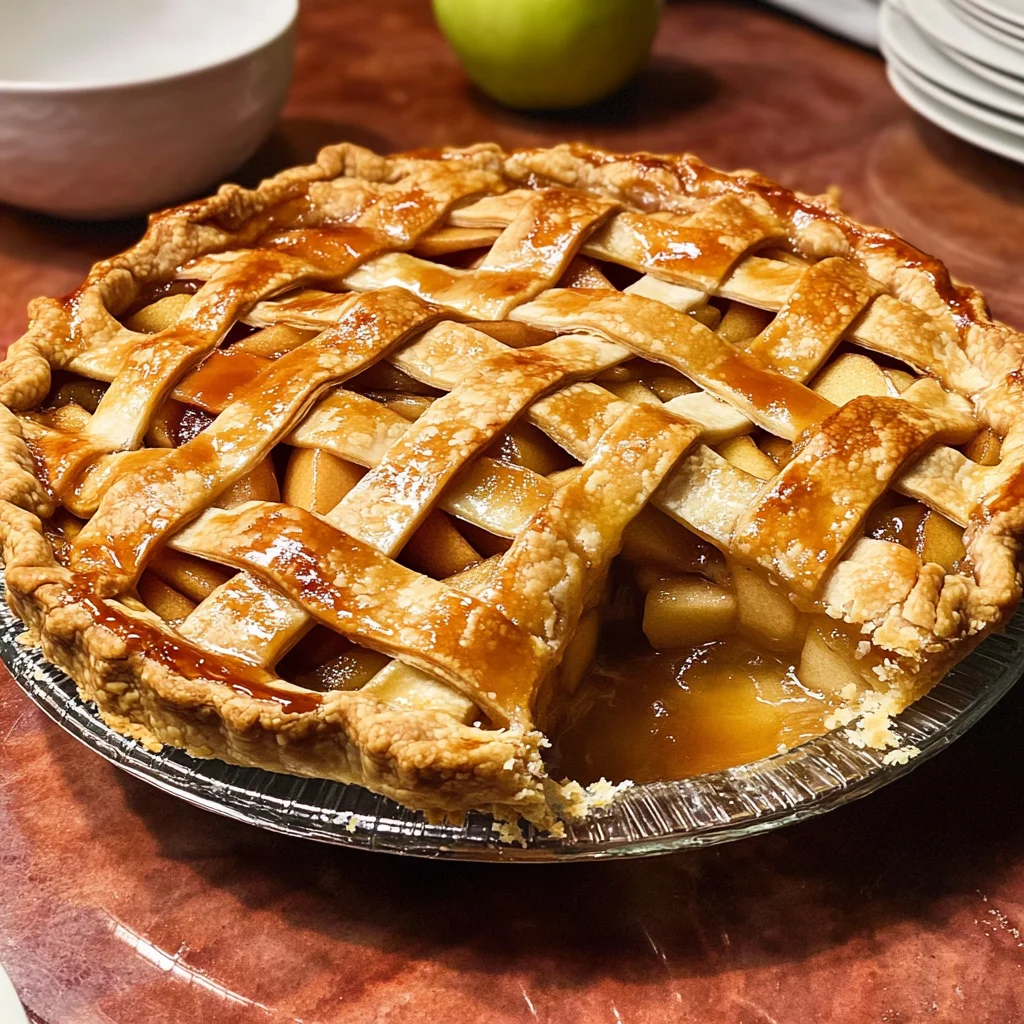
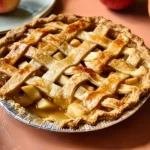
Now that your apples are nestled in their buttery embrace, it’s time to weave the lattice—the crowning glory of your Apple Pie by Grandma Ople. This step is where your pie transforms from a simple dessert into a stunning centerpiece. Begin by rolling out the remaining pastry into long strips—about 1 inch wide will do just fine. You’ll want these strips to be about twice the length of your pie’s diameter so they can drape gracefully over the apples. As you cut, take a moment to admire how each piece has its own character, much like each apple slice that awaits within.
Once you have your eight strips, lay four of them across the apples vertically, ensuring they’re evenly spaced apart. It’s crucial to use longer strips for the center and shorter ones at the edges; this creates a balanced look that draws the eye and invites guests to take a slice. Now comes the fun part! To form the lattice pattern, fold back every other vertical strip—this is where patience plays a role. You want to gently lift those strips as if you’re unveiling a precious treasure beneath. Place one of the horizontal strips across those folded-back pieces and then unfold them back into place, securing that lovely strip in between.
Trust me on this: this technique allows steam to escape while also showcasing those gorgeous apple slices peeking through! Repeat this process until all strips are woven together. Don’t rush; give yourself grace as you work through this process. Each fold and weave not only enhances the visual appeal but also ensures that each bite will be infused with that heavenly caramelized flavor we’re after.
Step 6: Sealing in Flavor and Beauty
After you’ve woven your lattice, it’s time to get serious about sealing in all those flavors. Fold any excess dough hanging over the edges of your pie crust back under itself, creating a thicker edge that can withstand the baking process without burning away or leaking juice everywhere. Pinching these edges together is non-negotiable—it not only gives your pie a polished look but also keeps all that luscious filling from escaping during baking.
This is where texture comes into play; I love to create a fluted edge by pressing my thumb against the crust and using my other fingers to pinch around it for added flair. The more intricate your crust looks, the more pride you’ll feel when presenting it! And let’s not forget about what happens next—the sugar-butter mixture will be poured over shortly, enriching every crevice of that lattice with sweetness as it bakes into golden perfection.
Step 7: Bathing Your Pie in Sweetness
Now comes one of my favorite parts—the pouring of that luscious sugar-butter mixture over your beautifully crafted lattice crust. This sweet concoction is like liquid gold; it seeps gently into every nook and cranny between those apple slices and infuses them with an utterly intoxicating flavor profile as they bake together. Carefully pour this mixture over your lattice crust, watching as it cascades down like a warm shower on a sunny day—don’t worry if some pools at the bottom; that’s where all those glorious juices will mingle!
While you brush some of this syrupy goodness onto the lattice itself for an extra sheen, be cautious not to let anything drip off the sides—this could lead to a burnt mess at the bottom of your oven! Ensuring that every part of your pie receives its share of this sweet glaze is paramount because each bite deserves that perfect balance between buttery richness and tangy apple flavor.
Step 8: Baking Your Masterpiece
With everything beautifully assembled and drizzled with that sweet nectar, it’s time for our pie to bask in the warmth of the oven—a magical transformation awaits! Preheat your oven to 425 degrees F (220 degrees C) so it’s ready for action right away; this initial high temperature helps set our crust quickly and gives it that delightful flaky texture we crave. Bake for about 15 minutes at this temperature until you see a lovely golden hue beginning to emerge.
Then comes an essential tip: lower your oven temperature to 350 degrees F (175 degrees C) after these first crucial minutes. This step allows for gentle cooking without burning our precious crust while giving ample time for those apples inside to soften beautifully—trust me when I say patience pays off here! You’ll want to keep an eye on it during this stage; bake for another 35-45 minutes until you can see bubbling juices bursting through those cracks in your lattice—this visual cue tells you everything is going according to plan.
To ensure perfect doneness, stick a knife through one of those peek-aboo spots between your lattice strands—it should glide through tender apple slices with ease but still maintain enough structure not to turn mushy; nobody wants applesauce masquerading as apple pie! If you find they need just a few more minutes, don’t hesitate—the goal here is soft yet defined apple slices enveloped in caramelized goodness.
Conclusion:
As we wrap up this delightful journey through making Apple Pie by Grandma Ople, I hope you’re feeling as excited as I am! There’s something truly magical about crafting this pie—it’s more than just combining ingredients; it’s about creating memories and sharing warmth with family and friends. The burst of tart Granny Smith apples mingled with rich caramelized sugars enveloped in that perfectly flaky lattice crust elevates this dessert beyond ordinary fare into something profoundly satisfying. It captures the essence of fall celebrations and cozy evenings spent huddled together around the table.
This recipe is undoubtedly a must-try for anyone seeking joy in their kitchen or wanting to impress guests at gatherings. Beyond its delectable taste, there’s an unparalleled satisfaction in preparing such a cherished family classic. Whether it’s Thanksgiving dinner or just a casual weekend treat, pulling this gorgeous pie from the oven fills your home with an utterly intoxicating aroma that beckons everyone near. The anticipation builds as you slice into its golden-brown crust, revealing tender apple slices glistening with sweetness—each bite promises comfort and nostalgia.
Imagine savoring one warm slice topped with a scoop of creamy vanilla ice cream melting down its sides—a combination that’s nothing short of heavenly! For an afternoon pick-me-up, pair it with a cup of spiced chai tea, allowing those rich flavors to dance together in harmony. And let’s not forget how fantastic it is served cold straight from the fridge—there’s something special about enjoying those flavors chilled on a hot summer day!
Feeling adventurous? This recipe is wonderfully adaptable! You could swap out some of those Granny Smith apples for sweet Honeycrisps or even toss in some juicy berries for an unexpected twist! Want to elevate it even further? Try adding fragrant spices like nutmeg or cardamom for warmth or sprinkle some chopped nuts into the filling for added crunch. The possibilities are endless! So I invite you all—take this beloved recipe from my heart to yours, try it out, share your experiences, and let’s keep those wonderful connections alive through food!
Apple Pie by Grandma Ople
Indulge in the nostalgic warmth of Apple Pie by Grandma Ople, a classic dessert that evokes cherished memories and the comforting scents of home. This delightful pie features tart Granny Smith apples perfectly balanced with sweet sugars, all embraced by a flaky, buttery lattice crust. As it bakes, the aroma fills your kitchen, inviting everyone to gather around and savor each slice. Whether served warm with a scoop of vanilla ice cream or enjoyed chilled, this pie is sure to become a beloved staple in your home. With simple ingredients and straightforward instructions, you can craft this timeless recipe any day of the year!
- Prep Time: 30 minutes
- Cook Time: 1 hour
- Total Time: 1 hour 30 minutes
- Yield: Serves 8
- Category: Dessert
- Method: Baking
- Cuisine: American
Ingredients
- 8 small Granny Smith apples
- 0.5 cup unsalted butter
- 3 tablespoons all-purpose flour
- 0.5 cup white sugar
- 0.5 cup packed brown sugar
- 0.25 cup water
- 1 (9 inch) double-crust pie pastry
Instructions
- Preheat your oven to 425°F (220°C).
- Peel, core, and slice the apples into thin pieces.
- In a saucepan over medium heat, melt butter and stir in flour until fragrant.
- Add white sugar, brown sugar, and water; bring to a boil and simmer until thickened.
- Roll out the double-crust pastry; place one half in a greased pie pan and fill with apple slices.
- Pour the syrup mixture over the apples.
- Create a lattice with remaining pastry strips on top; pinch edges to seal.
- Bake for 15 minutes at 425°F (220°C), then lower temperature to 350°F (175°C) and bake an additional 35-45 minutes until golden and bubbly.
Nutrition
- Serving Size: 1 slice (125g)
- Calories: 290
- Sugar: 24g
- Sodium: 90mg
- Fat: 12g
- Saturated Fat: 7g
- Unsaturated Fat: 4g
- Trans Fat: 0g
- Carbohydrates: 43g
- Fiber: 2g
- Protein: 2g
- Cholesterol: 30mg