Apple Butter Pie with Cinnamon Whipped Cream — Classic Apple Butter Apple Pie delight
There’s something so profoundly comforting about the smell of apples wafting through the kitchen, isn’t there? It’s a fragrance that wraps around you like a warm hug, inviting you to take a moment and savor the simplicity of life. This Apple Butter Pie with Cinnamon Whipped Cream — Classic Apple Butter Apple Pie delight is not just another dessert; it’s an experience, a celebration of flavors that dances on your palate and stirs memories from family gatherings and cozy autumn evenings. Imagine sinking your fork into a slice, the silky custard-like filling embracing the rich taste of concentrated apple butter, all enveloped in a buttery crust that shatters delicately with each bite. This is more than food; it’s nostalgia served on a plate.
I’ve always been captivated by how certain recipes can become time capsules, transporting us back to simpler times. The combination of warm spices and sweet apples evokes not just flavor but emotion, reminding us of laughter shared around the dinner table or chilly afternoons spent baking with loved ones. This pie is destined to become a staple in your home just as it has in mine — perfect for holidays, potlucks, or simply as a treat to brighten any day. Trust me when I say that once you make this pie, it will earn a permanent spot in your recipe repertoire. Let’s embark on this culinary adventure together!
Apple Butter Pie with Cinnamon Whipped Cream — Classic Apple Butter Apple Pie delight: A Cozy Slice of Autumn
This delightful pie captures the essence of fall with each creamy, flavorful bite.
Ingredients:
As we dive into this delightful recipe, gather your ingredients and let the excitement build! Each component plays a vital role in achieving that perfect balance of flavors and textures.
- 3¼ cups (390 g) all-purpose flour. Flour serves as the backbone of our pie crust, providing structure and stability. When choosing flour, go for all-purpose as it strikes an ideal balance between strength and tenderness. For best results, spoon it into your measuring cup rather than scooping directly from the bag to avoid packing it down too tightly — we want our crust flaky and light!
- 1 cup + 6 tbsp (311 g) unsalted butter, very cold, cut into ½” cubes. Cold butter is absolutely paramount for creating that luscious flaky texture we crave in pies. The reason behind this? When cold butter hits the hot oven, it melts away, leaving pockets of air within the dough that create those delightful layers. If you can find European-style butter with higher fat content, go for it — it adds an extra layer of richness that elevates our pie even further.
- 1 tsp kosher salt. This simple yet powerful ingredient enhances every other flavor in our pie while balancing sweetness beautifully. Kosher salt has larger grains than table salt, making it easier to control its addition during cooking; however, feel free to adjust based on your preference. Remember that salt isn’t just for savory dishes; it can truly elevate desserts.
- ⅔ cup (5.3 oz) ice-cold water (plus a few ice cubes on hand). Water helps bind our dry ingredients into dough without overworking them — which could result in tough crusts if we’re not careful! Using ice-cold water is crucial because heat activates gluten in flour; by keeping everything chilled until baking begins, we maintain tenderness in our crust.
- 1½ cups (482 g) apple butter, plus a little extra for topping. This luscious spread is where much of our flavor comes from! It’s made by slow-cooking apples until they’re soft and concentrated into velvety goodness — think liquid gold! When purchasing apple butter, look for varieties without added sugars or preservatives to keep things wholesome and delicious.
- 3 large eggs, room temperature. Eggs act as binding agents in our filling while contributing richness and color to the final product. Room temperature eggs mix more uniformly into batters than cold ones straight from the fridge; if you’ve forgotten to take them out beforehand—no worries! Just place them in warm water for about 10 minutes.
- ¼ cup (50 g) dark brown sugar. This sugar brings depth with its caramel undertones while also helping achieve that beautiful golden color on top as it bakes. If you don’t have dark brown sugar on hand, light brown sugar can be used instead—just know that you’ll miss out slightly on some complexity!
- 1 Tbsp all-purpose flour. A small amount goes a long way here! This bit of flour helps stabilize our custard-like filling during baking by absorbing excess moisture while keeping everything silky smooth.
- 1 tsp vanilla paste or extract. Vanilla adds warmth and depth—a non-negotiable element when creating sweet dishes! I love using vanilla paste because those tiny specks add visual appeal alongside robust flavor; however, pure vanilla extract works beautifully too.
- 14 oz (1 can) sweetened condensed milk. This ingredient is magic for our filling! Sweetened condensed milk lends creaminess while providing sweetness without needing extra granulated sugar—truly extraordinary! Be sure to scrape every last bit out of the can; waste not!
- 1 cup (240 ml) heavy whipping cream. Heavy cream whips up beautifully to create clouds of rich texture atop our pie — trust me when I say there are few things better than homemade whipped cream!
- 2 Tbsp powdered sugar (about 15 g). Powdered sugar dissolves easily into whipped cream while adding just enough sweetness without grittiness—it’s perfect for enhancing flavors without overwhelming them.
- 1 tsp ground cinnamon. Ground cinnamon brings warmth reminiscent of cozy fall days—this spice is essential for stirring up nostalgia with every bite!
- 1 tsp vanilla paste or extract (yes again!). We’re layering flavors here! Adding vanilla both inside our filling and again with whipped cream creates coherence throughout this dish—brilliant!
Now that we have gathered all these lovely ingredients together let’s venture onward!

Equipment You’ll Need:
Before we dive into making this remarkable pie together, let’s talk about some essential tools you’ll want to have at your side during this journey! Having the right equipment makes everything smoother and more enjoyable — think of them as trusty companions guiding us toward success.
- Food processor – A food processor makes quick work of blending together our dough components efficiently while ensuring uniformity—perfect for avoiding overmixing which could lead to tough crusts later on! If you don’t own one yet or prefer working old school style by hand—don’t fret! Just ensure you keep everything cold throughout mixing time.
- Rolling pin – An essential tool for rolling out your dough evenly so that each slice looks just as beautiful as it’s meant to taste! Choose one that’s comfortable in your hands because you’ll be wielding it quite often during your baking adventures.
- 9-inch pie dish – The vessel where all magic happens! A glass or ceramic pan ensures even heat distribution helping prevent burnt crusts while allowing those beautiful golden edges to shine through.
- Parchment paper & pie weights/dry beans/rice – These help keep your crust intact while blind-baking—don’t overlook their importance here! Parchment ensures easy release after baking; weights prevent puffing up or shrinking during cooking time.
With these tools prepped and ready at hand along with mouth-watering ingredients waiting patiently—we’re set up perfectly to dive right into preparing this gorgeous Apple Butter Pie with Cinnamon Whipped Cream!
Step 1: Chill Your Butter Like It’s Winter
Let’s kick off our journey by giving ourselves some time management: stick those cubes of very cold butter into the freezer while prepping other ingredients—about 15 minutes should do nicely! Why chill? Cold butter is crucial because when mixed with flour during preparation—and then baked—it creates flakiness due to steam generated from melting fat leaving behind little pockets within pastry layers instead turning everything dense or chewy!
Step 2: Mix Your Dry Ingredients
Now grab your food processor (or mixing bowl if you’re going old school!) Toss together all-purpose flour and kosher salt before pulsing briefly until combined—that’s right—a quick pulse will do just fine here since we’re aiming merely at merging these two elements without developing any gluten yet! Next scatter those chilled butter cubes over top like little snowy mountains across an expansive landscape before pulsing again until they resemble small peas mixed within sandy terrain—it should feel crumbly but still hold together when squeezed gently between fingers—this indicates we’re on track towards achieving greatness!
Step 3: Hydrate Your Dough
Here comes where magic happens: measure out⅔ cup ice-cold water (remove ice cubes first!) With machine running steadily drizzle most through chute gradually allowing mixture time absorbing liquid before adding remaining tablespoon only if necessary—we want rough shaggy clumps forming rather than having dough turn into one cohesive ball inside machine—that’s not what we’re after today folks!
Step 4: Shape & Chill Your Dough
Once you’ve reached desired consistency turn out pastry onto lightly floured surface before dividing equally into two portions—flatten each portion gently forming discs approximately one inch thick wrapped securely within plastic wrap headed straight towards fridge awaiting their next adventure ahead waiting patiently anywhere from one hour up until two hours maximum—the longer chilling allows gluten relaxation ultimately leading towards tenderness once baked later down line—it pays off trust me here folks!
And there you have it—the first steps toward creating this delightful Apple Butter Pie with Cinnamon Whipped Cream are complete! As we continue through this process together we’ll unlock layers upon layers deliciousness awaiting discovery ahead… so stay tuned my friends!
Step 5: Chilling Your Dough for Perfect Flakiness
Now that you’ve shaped your dough into those lovely little discs, the next step is crucial for achieving that coveted flaky crust. You see, dough needs time to rest and chill, allowing the gluten to relax and the butter to firm up. It’s a simple yet transformative phase that pays off in texture—trust me on this. Wrap each disc tightly in plastic wrap and pop them in the refrigerator for at least one to two hours. I know waiting can be tough, but this resting period is absolutely paramount. It ensures that when you roll it out later, your dough will be pliable yet sturdy enough to hold its shape during baking.
While your dough chills, take a moment to savor the anticipation of the delicious pie that awaits you. This is also a great time to gather any additional ingredients or tools you might need for later steps. Just imagine how amazing your kitchen will smell as the pie bakes! If you’re feeling adventurous, consider making a second pie crust with the other disc, which you can freeze for future use—nothing beats having homemade pie crust ready at a moment’s notice.
Step 6: Rolling Out Your Crust Like a Pro
Once your dough has chilled and firmed up beautifully, it’s time to roll it out! This step is like an artist preparing their canvas; it requires care and attention. Remove one disc from the fridge and let it sit on your counter for about 10–15 minutes. You want it cool but not rock-hard; this makes rolling much easier while ensuring you don’t have a tough crust at the end. As you begin this process, lightly flour your work surface and rolling pin; this prevents sticking and allows the dough to glide smoothly.
Roll out the dough gently until it reaches about 1/8 thickness; aim for it to be approximately 2 inches wider than your pie dish. It’s important not to press too hard; instead, think of using gentle pressure as if coaxing the dough into shape rather than forcing it. The goal here is a smooth, even layer without overworking it—overworking can cause gluten development that leads to toughness instead of flakiness. Once rolled out, carefully transfer your lovely crust into a 9 pie dish. This is where you’ll trim any excess hanging over the edges to about an inch before folding that overhang underneath itself for a lovely finished edge—it not only looks beautiful but also adds extra sturdiness!
Step 7: Prepping Your Crust for Baking
With your pie shell nestled snugly in its dish, we’re moving on to par-baking—a key technique that gives our crust that golden finish while preventing sogginess from our filling later on. First things first: place your newly shaped crust into the freezer for about 15 minutes; this helps set everything in place before hitting the heat. Preheating your oven is next—crank it up to 375°F (190°C) while you prepare for baking.
Now comes an exciting part: docking! Using a fork, poke holes all over the bottom and sides of your chilled pie crust; this allows steam to escape during baking and prevents those unsightly bubbles from forming. Line your crust with parchment paper and fill it with pie weights or dry beans/rice—this is known as blind baking, which keeps everything flat while cooking! Bake on the middle rack for about 15 minutes until just set before removing those weights and parchment paper; then return it for another 5 minutes until lightly golden around the edges. Keep an eye out—overbaking can lead to dryness!
Step 8: Creating That Heavenly Filling
As your crust cools slightly on a wire rack, let’s focus on what makes this Apple Butter Pie truly extraordinary: its velvety filling! In a large bowl, whisk together an impressive lineup of ingredients: apple butter (which infuses delightful concentrated apple flavor), room temperature eggs (which help create that custard-like texture), dark brown sugar (for depth of flavor), one tablespoon of flour (to help bind everything beautifully), and vanilla paste or extract (because who doesn’t love a hint of aromatic goodness?). Whisk until smooth—don’t skip this step because incorporating air here creates lightness in your final filling.
Next up is adding sweetened condensed milk—the magic ingredient that transforms our mixture into something indulgently creamy! Pour in that luscious milk slowly while whisking robustly until everything becomes glossy and unified—this step is essential as it thickens our filling without any lumps or clumps ruining its silky nature. And remember: scrape every last bit from that can—waste not, want not! Once mixed well, we’re ready to pour this divine concoction into our pre-baked shell.
Step 9: Baking Your Perfect Apple Butter Pie
Now comes one of my favorite parts—the actual baking of our Apple Butter Pie with Cinnamon Whipped Cream! Pour that gorgeous apple butter mixture carefully into your warm par-baked crust; watching it settle into every crevice is truly satisfying! Then slide that beauty back into the center rack of your oven and bake at 325°F (163°C) for approximately 30 minutes before carefully moving it down to the bottom third of the oven for an additional 10–15 minutes. Why change positions? The lower shelf ensures even cooking without risking over-browning on top.
Keep an eye on those edges—they should look set but still jiggle slightly in the center when done; think of it as a gentle dance rather than being fully liquid—that slight jiggle means perfection! Once baked beautifully, remove your pie from the oven and allow it to cool on a wire rack until reaching room temperature—a transformation happens here as flavors meld together beautifully during cooling time—about three hours should do just fine if patient!
Step 10: The Finale – Whipping Up That Cinnamon Cream
While we wait for our pie to cool down comfortably, let’s whip up some cinnamon-flavored whipped cream—a heavenly finishing touch! In either a stand mixer fitted with a whisk or using a hand mixer (your choice!), combine heavy whipping cream with powdered sugar, ground cinnamon, and vanilla paste or extract in a mixing bowl—that aroma alone will have everyone swooning! Start whipping on high speed—you’re looking for soft-stiff peaks here—not too stiff or grainy because we want luscious cream dolloped atop our silky filling!
Once you reach those dreamy peaks after just one or two minutes (don’t overbeat!), grab your cooled pie once more. Spread that whipped cream generously across the surface like frosting on cake—it brings such joy seeing that fluffy cloud cover every inch of dessert glory beneath! For an artistic flair—and who doesn’t love showing off?—spoon some extra apple butter over top before swirling gently with a spatula creating elegant ribbons through what will soon be slices savored by family and friends alike.
And there you have it—the classic Apple Butter Pie with Cinnamon Whipped Cream—a truly extraordinary dessert worthy of celebrating life’s sweetest moments! Every bite promises warmth wrapped snugly within flaky layers contrasted by creamy apple goodness topped with airy sweetness—a symphony of flavors if ever there was one! Enjoy savoring each delicious slice knowing all love poured into crafting this delightful creation makes every forkful profoundly satisfying. Happy baking!
Storage and Enjoyment Tips for Your Apple Butter Pie with Cinnamon Whipped Cream — Classic Apple Butter Apple Pie delight
Now that your kitchen is filled with the warm, inviting aroma of freshly baked Apple Butter Pie with Cinnamon Whipped Cream, it’s time to celebrate this stunning dessert! Trust me when I say that every bite is a hug for your taste buds, and the joy doesn’t have to end once the pie is cooled. This delightful creation is perfect for savoring right away or storing for later indulgence. Whether you’re treating yourself to a slice after a long day or sharing it with friends and family during a cozy gathering, let’s dive into how to keep this masterpiece at its best.
Storing Leftover Apple Butter Pie with Cinnamon Whipped Cream — Classic Apple Butter Apple Pie delight
To preserve the heavenly flavors of your pie, I recommend using an airtight container for storage. If you don’t have one handy, simply cover it tightly with plastic wrap or aluminum foil. Place your pie in the refrigerator where it will stay fresh and delicious for about 3 to 4 days. The flavors continue to meld together beautifully during this time, making each slice even more decadent than the last! To ensure maximum freshness and prevent any soggy crust situations, consider placing a slice of bread on top of the pie before sealing it up—this little trick helps absorb excess moisture. When you’re ready to enjoy another slice, you might find that the filling tastes even richer after sitting a bit! Simply serve it chilled or let it come to room temperature for that comforting experience we all crave.
Freezing Apple Butter Pie with Cinnamon Whipped Cream — Classic Apple Butter Apple Pie delight for Later
If you want to extend the joy of your apple butter pie even further, freezing is an excellent option! To do this, allow the pie to cool completely before wrapping it tightly in plastic wrap followed by aluminum foil—this double-layered approach prevents freezer burn while keeping those wonderful flavors intact. You can keep it frozen for up to 2 months without sacrificing quality. When you’re ready to indulge again, simply remove it from the freezer and let it thaw in the refrigerator overnight. The convenience of having such a delightful dessert on hand makes life easier—and trust me, nothing beats pulling out this gem when unexpected guests arrive or when you’re just craving something sweet!
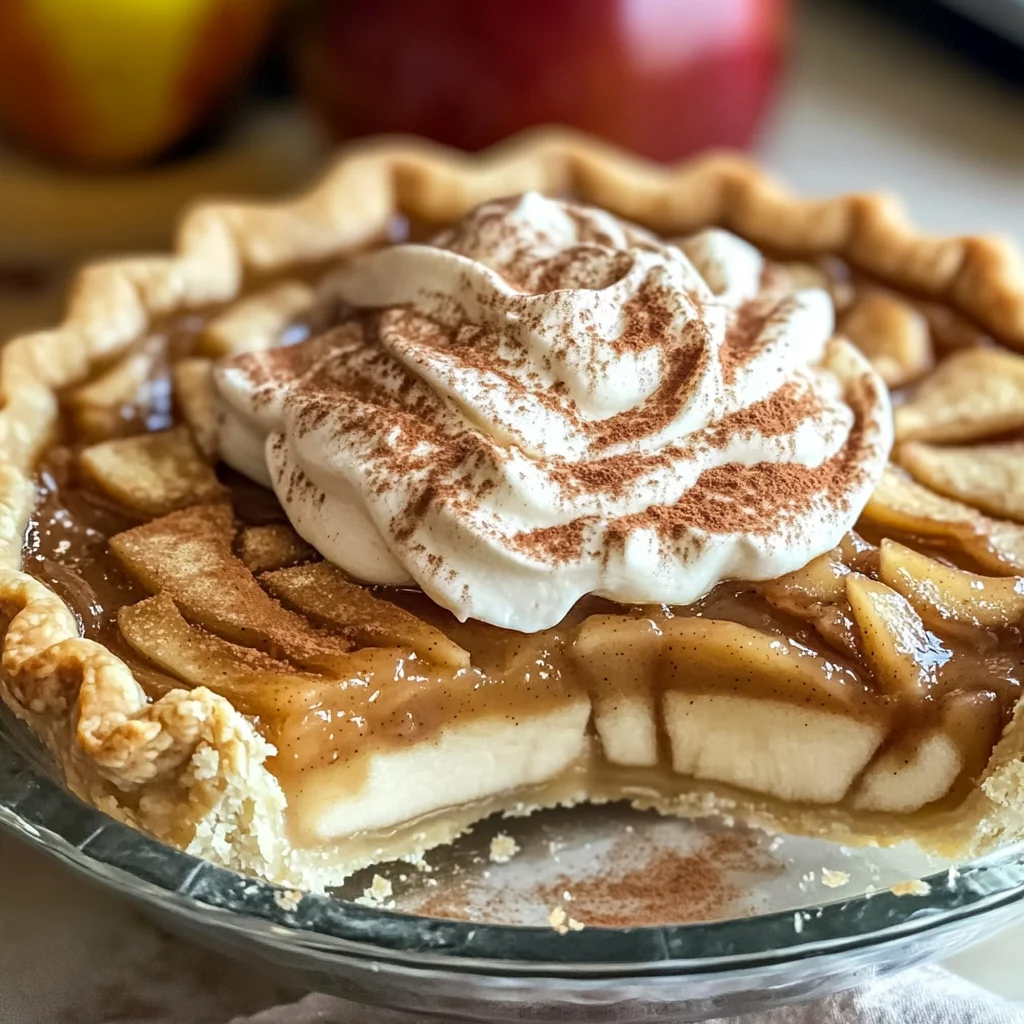
Apple Butter Pie with Cinnamon Whipped Cream — Classic Apple Butter Apple Pie delight

Savor the comforting embrace of autumn with our Apple Butter Pie with Cinnamon Whipped Cream. This delightful dessert combines a luscious custard-like filling made from rich apple butter, sweetened condensed milk, and warm spices, all nestled within a flaky, buttery crust. Topped with clouds of cinnamon-infused whipped cream, each slice encapsulates the essence of cozy gatherings and cherished memories. Perfect for family dinners, holiday celebrations, or simply indulging on a quiet afternoon, this pie is destined to become a staple in your kitchen. Join us in creating a dish that is not just dessert but an experience—a celebration of flavors that will have everyone asking for seconds.
- Prep Time: 30 minutes
- Cook Time: 40 minutes
- Total Time: 1 hour 10 minutes
- Yield: Serves approximately 8 slices 1x
- Category: Dessert
- Method: Baking
- Cuisine: American
Ingredients
- 3¼ cups all-purpose flour
- 1 cup + 6 tbsp unsalted butter, very cold, cut into ½” cubes
- 1 tsp kosher salt
- ⅔ cup ice-cold water (plus a few ice cubes on hand)
- 1½ cups apple butter
- 3 large eggs, room temperature
- ¼ cup dark brown sugar
- 1 Tbsp all-purpose flour
- 1 tsp vanilla paste or extract
- 14 oz sweetened condensed milk
- 1 cup heavy whipping cream
- 2 Tbsp powdered sugar
- 1 tsp ground cinnamon
- 1 tsp vanilla paste or extract
Instructions
- Chill the butter in the freezer for 15 minutes.
- In a food processor, combine flour and salt. Add chilled butter and pulse until crumbly.
- Gradually add ice-cold water until mixture forms shaggy clumps.
- Shape dough into discs, wrap in plastic, and refrigerate for 1–2 hours.
- Roll out one disc to fit a 9-inch pie dish; freeze for 15 minutes.
- Preheat oven to 375°F (190°C). Dock the crust with a fork and blind-bake for 15 minutes with weights, then remove weights and bake another 5 minutes until lightly golden.
- In a bowl, whisk together apple butter, eggs, sweetened condensed milk, dark brown sugar, flour, and vanilla until smooth.
- Pour filling into the cooled crust and bake at 325°F (163°C) for about 40 minutes or until set but jiggly in the center.
- Let cool to room temperature before adding whipped cream topping made by whipping heavy cream with powdered sugar and cinnamon.
Nutrition
- Serving Size: 1 slice (120g)
- Calories: 290
- Sugar: 22g
- Sodium: 150mg
- Fat: 18g
- Saturated Fat: 11g
- Unsaturated Fat: 7g
- Trans Fat: 0g
- Carbohydrates: 30g
- Fiber: 1g
- Protein: 3g
- Cholesterol: 80mg