Coffee Cookies
There’s a magic that happens in the kitchen when you combine simple ingredients, turning them into something extraordinary. Every time I bake, I feel this delightful thrill, as if I’m stirring up not just flavors, but memories and warmth that fill my home. Today, I want to share with you a recipe that embodies this very sentiment—Coffee Cookies! These delightful treats are more than just dessert; they are a sweet embrace on a cool evening, the comforting aroma of cinnamon mingling with rich coffee notes, and the joyful crunch of chocolate chips melting in your mouth. I promise you, once you’ve taken a bite, it’ll be hard to resist going back for another.
What makes these Coffee Cookies truly special is their perfect harmony of flavors: the robust instant coffee elevates each cookie while the semi-sweet chocolate chips add a touch of indulgence. And let’s not forget about the warm whisper of cinnamon that dances throughout each bite—it’s like a cozy hug from an old friend! This recipe is not only easy to make, but it also requires no mixer; it’s simply you and your love for baking bringing this creation to life. So grab your apron and let’s embark on this delicious journey together!
Coffee Cookies: A Warm Hug in Cookie Form
At first glance, you might think these are just another chocolate chip cookie recipe. But trust me, once you take your first bite of these Coffee Cookies, you’ll realize they are anything but ordinary! The chewy texture combined with the rich flavor profile creates an experience that’s profoundly satisfying. As someone who has always been captivated by the art of baking, I can assure you that the combination of coffee and chocolate is simply divine. It’s almost magical how these two flavors complement each other so beautifully—it’s like they were meant to be together!
Now, let’s dive right into making these cookies! Whether you’re planning to impress guests or treat yourself after a long day, this recipe will surely become one of your go-to favorites. The process is straightforward and enjoyable—perfect for both novice bakers and seasoned pros alike. Are you ready? Let’s get started!
Ingredients:
As we gather our ingredients, let’s take a moment to appreciate each one and its unique role in crafting our Coffee Cookies. Every element here contributes to the symphony of flavors we’re about to create!
- 2 TBSP Instant coffee (good quality, measured then blended): This isn’t just any instant coffee; it’s what transforms these cookies from simple treats into an exhilarating experience. Choosing a high-quality instant coffee is non-negotiable because it packs a punch and intensifies that beloved coffee flavor without adding bitterness. When you blend it into a fine powder, you’re ensuring it incorporates seamlessly into your dough, giving every cookie that rich aroma and taste we adore.
- 2 1/2 cups All-purpose flour: It forms the backbone of our cookies, providing structure while still allowing for that coveted chewy texture. When selecting flour, look for unbleached all-purpose flour; it offers better flavor and nutritional value compared to bleached varieties. Sifting it helps aerate the flour and prevents clumps—this step is crucial for achieving perfectly textured cookies.
- 1/2 tsp Baking soda: This little powerhouse helps our cookies rise perfectly while contributing to that wonderful chewiness we crave. It’s essential for balancing out our ingredients; without it, we’d end up with dense dough instead of light and fluffy cookies.
- 1/2 tsp Baking powder: Similar to baking soda but different in function—baking powder provides an extra lift! It works beautifully alongside baking soda to create cookies that are soft yet sturdy enough to hold those generous chunks of chocolate.
- 1 tsp Salt: A touch of salt enhances all the flavors in our cookies—it may seem small but trust me on this one! It brings out sweetness while tempering any bitterness from the coffee.
- 1 tsp Ground cinnamon: Cinnamon pairs exquisitely with coffee—its warm spice adds depth and complexity. When measuring out your cinnamon, be sure it’s fresh; stale spices can dull your flavor palette.
- 1 cup Unsalted butter (melted and cooled): Butter is where we find richness; using unsalted allows us better control over our final flavor since we’ll be adding salt separately. Make sure it’s cooled before mixing—it needs to be at room temperature so as not to cook the eggs when added—a crucial aspect in achieving the perfect texture.
- 1 cup Brown sugar (packed light brown sugar): Brown sugar brings moisture and richness thanks to its molasses content—which lends those delightful chewy bites we all love! Light brown sugar will impart more subtle caramel notes without overpowering our coffee flavor.
- 1/2 cup White granulated sugar: This adds sweetness and helps achieve a slight crispness around the edges while maintaining chewiness at the core—a balance we strive for in every bite!
- 1 tsp Pure vanilla extract: Vanilla has this magical ability to enhance all other flavors present in baked goods; it rounds out sweetness beautifully. Opting for pure over artificial vanilla ensures authenticity—you want genuine taste!
- 2 Large eggs (room temperature): Eggs provide structure along with richness—their proteins help bind everything together while contributing moisture. Room temperature eggs mix more evenly into your batter than cold ones straight from the fridge—don’t skip this step!
- 1 1/2 cups Semi-sweet chocolate chips: These gems are what dreams are made of! They melt slightly during baking creating pockets of gooey goodness amidst our cookies’ chewy texture. Choosing high-quality semi-sweet chocolate ensures indulgence with every bite!
Equipment You’ll Need:
Before we dive headfirst into creating these delightful Coffee Cookies, let’s gather some essential tools that will make our baking adventure smoother and more enjoyable! Having the right equipment at hand can truly enhance your experience—you’ll find things flow better when you’re well-prepared.
- Mixing bowls (medium & large) – You’ll need two mixing bowls—a medium one for combining dry ingredients and a larger one for creaming together wet ingredients. Using glass or stainless steel bowls ensures durability and ease when mixing; they won’t retain odors or colors like plastic might.
- Measuring cups & spoons – Accurate measurements are paramount in baking! A good set allows you precision when measuring both liquid and dry ingredients—trust me when I say investing in quality tools pays off immensely in your results.
- Rubber spatula – This handy tool is perfect for folding your ingredients together gently without deflating them too much; plus, it’s great for scraping down sides of bowls ensuring nothing goes wasted!
- Food processor or grinder – We’ll use this nifty gadget for blending our instant coffee into powder form—having finely ground coffee ensures even distribution throughout dough which results in maximum flavor impact!
- Cookie scoop (2oz) – Using a cookie scoop gives uniformity to size resulting in even baking—nobody wants unevenly sized cookies where one is burnt while another remains raw! Plus they’re fun to use!
- Parchment paper – Lining cookie sheets with parchment paper prevents sticking without needing extra grease—it also makes cleanup easier afterward which is always welcome after indulging in such sweet creations!
With all our ingredients prepped and equipment ready at hand—let’s proceed towards creating delectable Coffee Cookies that will fill your home with warmth and comfort!
Step 1: Blending Magic
Our first step involves transforming those lovely granules of instant coffee into fine powder using either a food processor or grinder. As you pulse away, watch as they morph into silky smoothness—the aroma wafting through your kitchen is nothing short of intoxicating! Once you’ve achieved that velvety texture, grab a medium bowl where we’ll sift together our flour along with baking soda, baking powder, salt, ground cinnamon—and now sprinkle in that freshly ground instant coffee! Combining these dry ingredients ensures even distribution throughout our dough later on which directly impacts their final texture—the last thing we want are pockets devoid of flavor or airiness!
Step 2: Creaming Together
In another large bowl (the bigger one!), pour in melted butter—remember it must be cooled so as not to scramble those beautiful eggs we’re adding next! Then add both brown sugar and white granulated sugar into this buttery bliss before drizzling in pure vanilla extract followed by two large eggs at room temperature. Now here comes my favorite part—the creaming process begins! Use your rubber spatula (or whisk if preferred) vigorously mix until everything melds together smoothly—a creamy mixture should form which looks glossy yet velvety soft—a sign things are coming together beautifully! Why do we cream? This step incorporates air into batter creating lift allowing cookies rise nicely during baking resulting ultimately yielding soft yet chewy delights packed full flavors!
Step 3: Merging Worlds
Now it’s time bring those vibrant dry components from earlier into play—we want them gently folded rather than mixed aggressively since gluten overdevelopment leads toughened results contrary what we aim for here! Carefully add dry mixture bit by bit making sure no streaks remain visible before introducing scrumptious semi-sweet chocolate chips last minute ensuring every cookie bursts forth molten goodness upon first bite! Mix until everything’s just incorporated—that’s key because overmixing could result undesirable outcomes such dense rocks instead heavenly morsels awaiting enjoyment ahead!
Step 4: Rest & Prepare
While preheating oven at 350°F (175°C), allow dough sit cozy within its bowl letting gluten absorb moisture from various wet ingredients which further enhances chewiness down line—don’t rush this step folks; patience pays off big time especially when striving perfection with chewy textures desired here today! Line two separate cookie sheets lined parchment paper which acts as protective barrier preventing stickage while providing easy removal post-baking—you’ll thank yourself later during cleanup phase trust me on this one too…
And there you have it so far dear friend—we’ve begun crafting something truly special already filled joy created alongside love leading up delicious outcome right around corner stay tuned as things heat up next steps await revealing warm treats soon enough!!
Continuing Your Coffee Cookies Journey
Step 5: Forming the Perfect Dough Balls
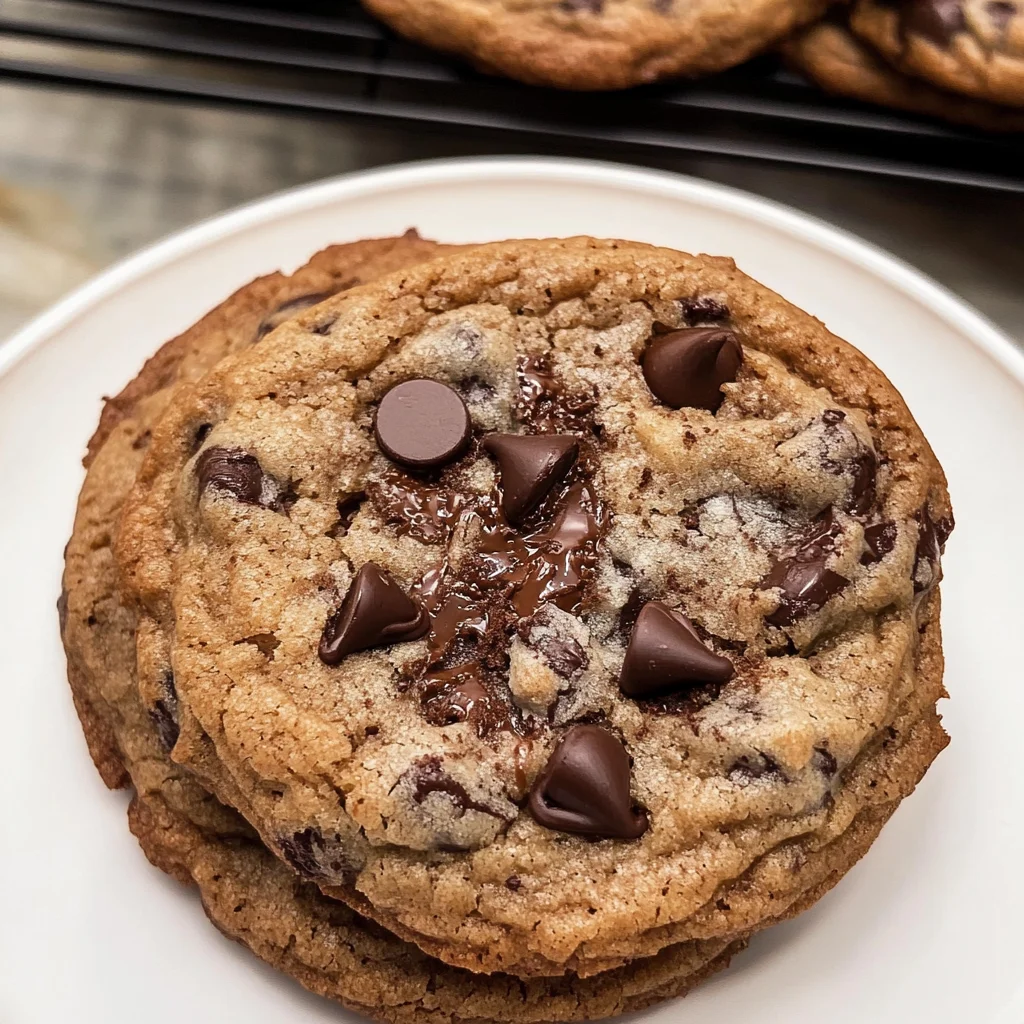
Now that your dough has had a moment to rest and soak in those delightful flavors, it’s time to bring them to life! Using a 2oz cookie scoop, gently portion out the dough, which should feel soft yet slightly sticky between your fingers. I absolutely love this step because it’s where the magic begins—the transformation of simple ingredients into something utterly intoxicating! As you place each cookie dough ball on your lined baking sheets, make sure to leave enough space—about 2 inches apart—allowing each cookie room to spread into its chewy self while baking.
Just before you pop them into the oven, take a moment to sprinkle a few extra chocolate chips on top of each ball. This isn’t just for aesthetics; it ensures that every bite is bursting with rich chocolate goodness, creating an irresistible allure that will have everyone asking for seconds. Trust me on this one; those little details make a world of difference! It’s like adding a final brushstroke to a beautiful painting—every little enhancement counts toward that masterpiece we’re creating together.
Step 6: Baking Your Coffee Cookies
Preheat your oven to 350°F (175°C), an essential step that ensures even baking and helps develop those golden edges we all adore. While the oven warms up, let your cookie dough balls hang out on the counter; this resting period allows the gluten in the flour to relax and absorb moisture from the wet ingredients. Don’t rush this step! Giving those cookies time to mingle with their ingredients will contribute significantly to their texture—resulting in that perfect chewy center surrounded by slightly crisp edges that we crave.
Once your oven is ready and those glorious dough balls are formed, it’s time for them to meet their fate! Bake one sheet at a time for about 12-14 minutes. As they bake, keep an eye on them; you’re looking for golden-brown edges and a center that appears just slightly underbaked—that’s the sweet spot! The reason we want them slightly underbaked is so they’ll continue cooking from residual heat once removed from the oven. This technique gives you cookies with that coveted chewy texture rather than a dry bite. Each minute counts here, so set your timer and be vigilant!
Step 7: The Perfect Cooling Technique
Ah, patience truly is a virtue when it comes to cooling our coffee cookies! Once your timer goes off and those delicious cookies emerge from the oven, resist the urge to dive right in. Allow them to sit on the hot baking pan for about 5 minutes before transferring them onto a cooling rack. Why wait? This step is crucial because it allows the cookies’ structure to firm up without collapsing into gooey puddles of deliciousness.
As they cool on the baking sheet, you’ll notice how they continue to puff up ever so slightly—a beautiful phenomenon known as carryover cooking. The heat retained in the pan solidifies their shape and locks in all those warm flavors we’ve worked so hard for! If you find yourself staring at these beauties wondering if they’re cool enough to eat yet—trust me, they’ll be worth every second of anticipation.
Step 8: Savoring Every Bite
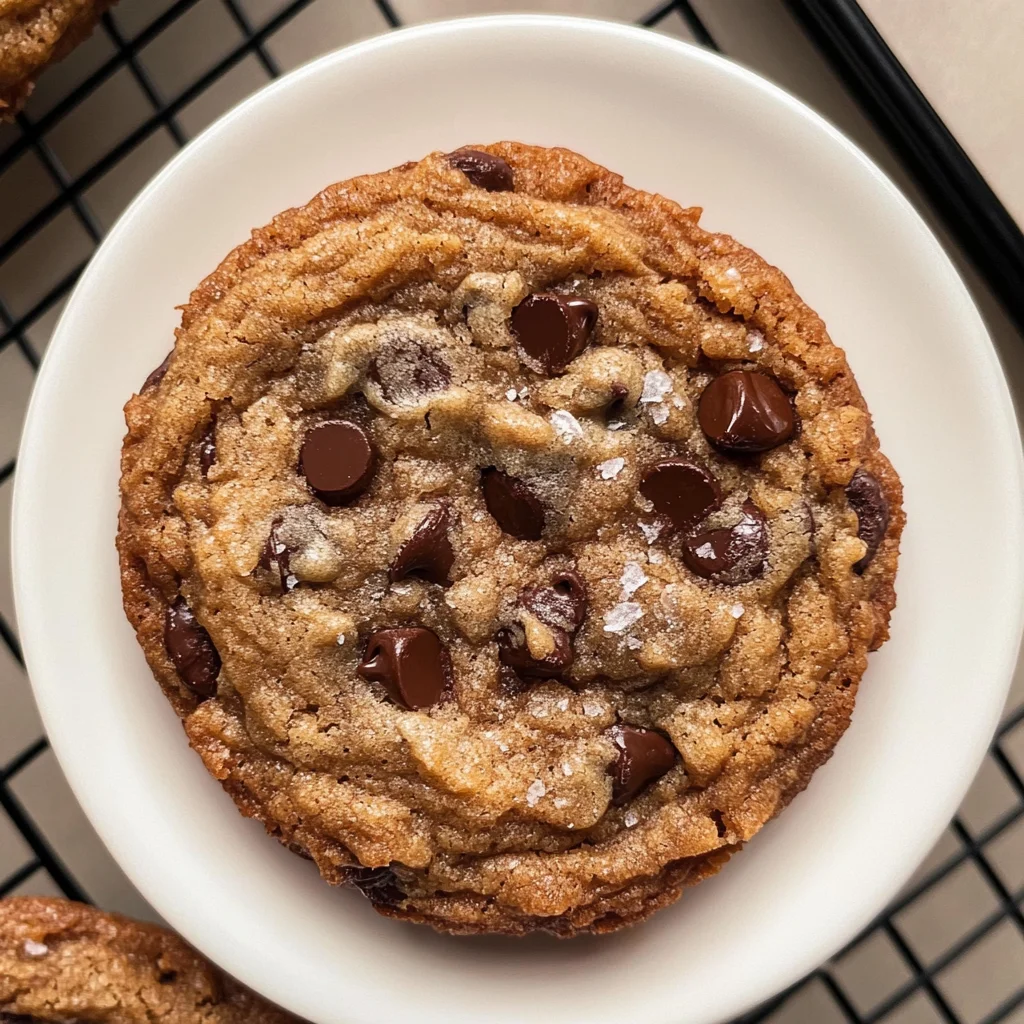
Now comes my favorite part—the moment when you finally get to indulge in these delectable coffee cookies! Once they’ve cooled completely on the rack (which I know feels like an eternity), grab one (or two!) and take a moment to appreciate their beauty. Notice how they glisten under light with that inviting sheen from melted chocolate chips? That sight alone is enough to trigger taste buds! But don’t just dive in blindly; take a deep breath first. Inhale that intoxicating aroma of coffee mingled with warm spices—it’s like taking a comforting hug right through your senses.
When you finally take your first bite, prepare yourself for an explosion of flavors: rich chocolate balanced perfectly with robust coffee undertones and warming cinnamon notes dancing across your palate. Each chew brings back memories of cozy evenings spent around the kitchen table or sharing stories over coffee with friends—a truly extraordinary experience rooted in comfort food traditions. Enjoy every single crumb because you’ve earned it!
Final Touches: Sharing Your Creation
These chewy coffee cookies aren’t just desserts; they’re vessels for connection—moments waiting to happen as you share them with family or friends over laughter and good conversation. Remember, food has an incredible way of bringing people together; there’s something profoundly satisfying about watching others relish what you’ve created with love and care.
Feel free to experiment with variations too! Perhaps add some chopped nuts or swap out semi-sweet chocolate chips for dark chocolate if that’s more your style—the possibilities are endless! I can’t wait for you all to try these incredible coffee cookies—make sure you let me know how yours turn out! Happy baking!
Storage and Enjoyment Tips for Your Coffee Cookies
Now that your kitchen is filled with the intoxicating aroma of freshly baked coffee cookies, it’s time to revel in the joy of sharing them (or hoarding them all to yourself—I won’t tell!). Picture this: a warm cookie, just slightly crisp on the edges and chewy in the center, melting in your mouth while you sip on a cup of your favorite brew. The experience is not only about indulging in something delicious but also about how to preserve that magic for days to come. So let’s talk about how to store those delightful cookies and keep their flavor intact.
Storing Leftover Coffee Cookies
To ensure your glorious coffee cookies stay fresh and irresistibly chewy, place them in an airtight container—this is absolutely paramount! You can use a glass or plastic container with a snug lid; it will create a little cozy atmosphere for your cookies. They’ll keep beautifully at room temperature for up to a week, but trust me, they won’t last that long if you’re anything like me! If you want to maintain their incredible texture, consider placing a slice of bread in the container; it acts like a moisture magnet and keeps your cookies from drying out. The flavors deepen as they sit, creating a wonderfully complex taste that somehow gets even better. If you want them warm again later, just pop them in the microwave for 10-15 seconds—like magic, they’re back to their gooey glory!
Freezing Coffee Cookies for Later
If you find yourself with an abundance of these magnificent treats—or you’re simply planning ahead—freezing them is an excellent option! Just allow the cookies to cool completely before placing them in an airtight freezer bag or container. This method can preserve their delightful charm for up to three months. When you’re ready to indulge again, simply let them thaw at room temperature or reheat them straight from frozen in the oven at 350°F for about 5-7 minutes. Imagine pulling out a homemade cookie from the freezer on a rainy day—now that’s convenience at its finest! The thrill of having homemade baked goods at your fingertips is truly extraordinary.
Coffee Cookies
Indulge in the warm embrace of homemade Coffee Cookies, where the rich flavors of instant coffee meld perfectly with semi-sweet chocolate chips and a hint of cinnamon. These delightful treats are perfect for cozy evenings or as a sweet pick-me-up during the day. With their chewy texture and aromatic notes, each bite offers a comforting experience that will transport you back to cherished moments spent in the kitchen. Best of all, this easy recipe requires no mixer—just your hands and love for baking! Grab your apron and let’s create these irresistible cookies that will surely become a favorite in your home.
- Prep Time: 15 minutes
- Cook Time: 12 minutes
- Total Time: 27 minutes
- Yield: Approximately 24 cookies 1x
- Category: Dessert
- Method: Baking
- Cuisine: American
Ingredients
- 2 TBSP Instant coffee (good quality)
- 2 1/2 cups All-purpose flour
- 1/2 tsp Baking soda
- 1/2 tsp Baking powder
- 1 tsp Salt
- 1 tsp Ground cinnamon
- 1 cup Unsalted butter (melted and cooled)
- 1 cup Brown sugar (packed light)
- 1/2 cup White granulated sugar
- 1 tsp Pure vanilla extract
- 2 Large eggs (room temperature)
- 1 1/2 cups Semi-sweet chocolate chips
Instructions
- Preheat your oven to 350°F (175°C).
- In a food processor or grinder, blend the instant coffee into a fine powder.
- In a medium bowl, sift together flour, baking soda, baking powder, salt, ground cinnamon, and the blended coffee.
- In a large bowl, combine melted butter, brown sugar, white sugar, pure vanilla extract, and eggs. Mix until smooth.
- Gradually fold the dry ingredients into the wet mixture until just combined. Gently stir in chocolate chips.
- Using a cookie scoop, portion out dough onto lined baking sheets, leaving about 2 inches between cookies.
- Bake for 12-14 minutes until edges are golden brown but centers remain slightly underbaked.
- Cool on the baking sheet for about 5 minutes before transferring to a cooling rack.
Nutrition
- Serving Size: 1 cookie
- Calories: 150
- Sugar: 10g
- Sodium: 95mg
- Fat: 7g
- Saturated Fat: 4g
- Unsaturated Fat: 3g
- Trans Fat: 0g
- Carbohydrates: 20g
- Fiber: 1g
- Protein: 2g
- Cholesterol: 25mg