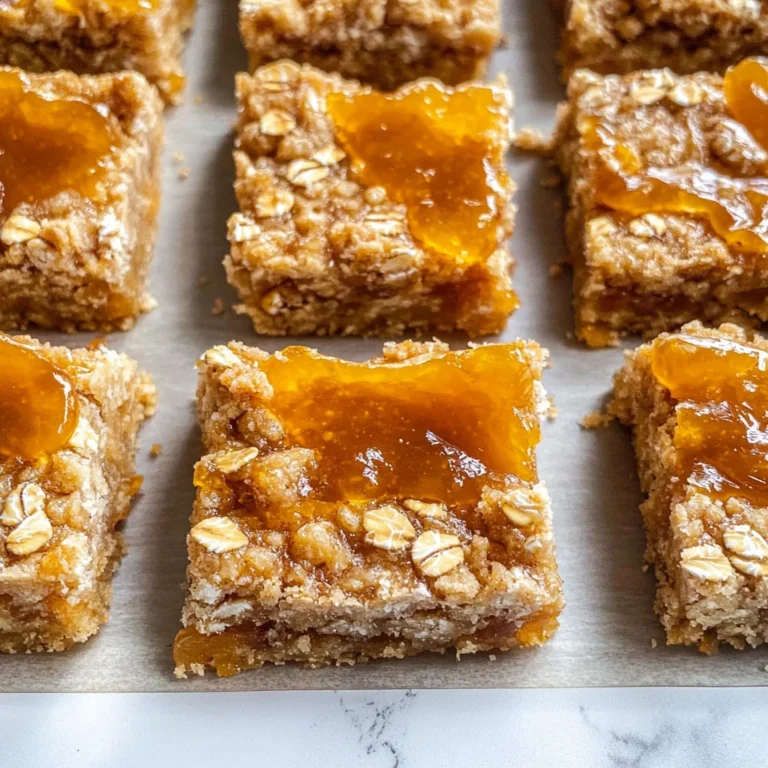
Peach Crisp with Canned Peaches
There’s something incredibly magical about a dessert that brings warmth and comfort, and my Peach Crisp with Canned Peaches is just that. The aroma of sweet peaches mingling with the scent of cinnamon wafting through your kitchen is like a warm hug from an old friend. Each bite is a symphony of flavors: the juicy sweetness of the peaches, perfectly complemented by the crunchy, buttery oat topping. This isn’t just a recipe; it’s an experience—an invitation to slow down and savor the simple pleasures in life. I promise you, once you taste this delightful crisp, you’ll find yourself dreaming up reasons to make it again and again.
What makes this dish so special is its ease and versatility. With just seven ingredients, many of which you may already have in your pantry, it transforms canned peaches into something truly extraordinary. This recipe embodies the essence of comfort food—it’s quick enough for a weeknight treat yet impressive enough for gatherings with friends and family. It’s perfect for those moments when you want to create something delicious without spending hours in the kitchen. Trust me when I say that this Peach Crisp will become a cherished staple in your dessert repertoire!
Peach Crisp with Canned Peaches: A Sweet Hug in a Dish
This dessert is not only a celebration of flavors but also an ode to simplicity. With every spoonful, you’ll relish the harmony between the juicy peaches and the crispy topping that beckons you back for more. As we embark on this delightful culinary journey together, let’s gather our ingredients and get ready to whip up some happiness!
Ingredients:
As we dive into this recipe, let’s take a moment to appreciate each ingredient that’s going to play a pivotal role in creating our Peach Crisp with Canned Peaches. Each one has its own story and contributes uniquely to our dish.
- 58 ounces canned peaches (sliced and drained). These luscious peaches are the star of our show! Using canned peaches not only saves time but also ensures that you’re able to enjoy this sweet treat any time of year, regardless of peach season! When selecting canned peaches, look for those packed in juice rather than syrup if possible; it adds natural sweetness without added sugars. Draining them well is crucial because excess liquid could make your crisp soggy instead of delightfully crunchy.
- ¾ cup brown sugar (packed). Brown sugar adds that rich depth of flavor that white sugar simply cannot match. Its molasses content brings a hint of caramel undertone that enhances everything from baked goods to savory dishes. This is particularly important here because it complements the natural sweetness of our canned peaches while also helping to create that irresistible golden crust as it bakes.
- ¾ cup all-purpose flour. Flour serves as the backbone for our crisp topping, lending it structure while absorbing moisture from both the butter and the peaches below. It’s essential for achieving that perfect crumbly texture we all crave when enjoying desserts like this one. If you’re looking to mix things up or need gluten-free options, consider using almond flour or a gluten-free all-purpose blend; just be sure they are suitable for baking!
- ⅔ cup quick oats. These oats add heartiness and texture that balance out the sweetness beautifully while providing a satisfying crunch on top of our juicy peach layer. They’re quick-cooking oats, which means they will soften slightly during baking but still retain their delightful chewiness—creating that perfect contrast against the tender fruit beneath.
- 1½ teaspoon ground cinnamon. Ahh, cinnamon—the warm spice that elevates our peach crisp from ordinary to extraordinary! This fragrant addition not only enhances flavor but also adds an aromatic quality that fills your kitchen with nostalgic warmth as it bakes away in the oven. Remember, fresh spices work wonders; if you can find freshly ground cinnamon, do treat yourself!
- ½ teaspoon salt. Often overlooked in desserts, salt plays an absolutely paramount role in balancing flavors! It enhances sweetness while rounding out all other components beautifully, making sure no single flavor overpowers another. Trust me on this one: don’t skip it!
- ½ cup unsalted butter (softened). Butter is what brings everything together—it’s crucial for creating that rich flavor we all love in desserts! Softened butter allows us to cream it properly into our dry ingredients; this step introduces air into our mixture for lighter results rather than simply melting it down—which can lead to overly dense toppings.
Equipment You’ll Need:
Having the right tools makes all the difference when whipping up something delicious! The following equipment will help ensure your cooking experience is smooth and enjoyable:
- 9×9-inch baking pan – This size is ideal for containing our peach crisp while allowing ample room for even cooking. If you don’t have one on hand, feel free to use an equivalent size—just keep an eye on baking times as they may vary slightly based on shape or material used.
- Mixing bowls – A set of mixing bowls in various sizes will serve you well in combining ingredients seamlessly without making too much mess! Having at least two bowls allows you to mix dry ingredients separately before incorporating wet ones—a technique that helps achieve even distribution.
- Measuring cups and spoons – Precision matters when baking! Accurate measurements ensure that flavors meld beautifully together instead of competing against each other during cooking.
- Spatula or wooden spoon – You’ll need something sturdy yet gentle enough not to damage your mixing bowls while combining ingredients—this helps achieve proper texture without overworking any component.
Now armed with these ingredients and tools, let’s dive into preparing this delightful Peach Crisp with Canned Peaches!
Step 1: Preheat Your Oven & Prepare Your Baking Pan
Before anything else, let’s get our oven preheating at 350°F (175°C). This step is crucial because starting with a hot oven ensures even cooking right from the beginning—if you place your dish in before it’s heated adequately, you risk uneven baking which can affect both texture and flavor dramatically! While that’s happening, reach for your trusty 9×9-inch baking pan and give it a light spray with non-stick cooking spray—this simple act prevents sticking later on when it’s time to serve up those golden brown edges after baking!
Once you’ve done this preparation work—and trust me; don’t rush this step—you can pour those beautifully drained canned peaches directly into the bottom of your pan in an even layer—a process which fosters even distribution throughout every bite later on.
Step 2: Create Your Oat Topping
Now comes my favorite part: crafting that delectable oat topping! In a medium bowl (you can absolutely use one you’ve already dirtied), combine ¾ cup brown sugar (packed), ¾ cup all-purpose flour, ⅔ cup quick oats, 1½ teaspoons ground cinnamon, and ½ teaspoon salt until everything’s well combined—this mixture should resemble sandy crumbs once blended completely together! The key here isn’t just stirring mindlessly but really taking some time here so each ingredient melds together harmoniously; those little flecks of cinnamon should weave their way through every bit evenly so no bite lacks flavor later!
Once that’s mixed thoroughly like I described above (I promise it’s worth taking extra care!), gently add ½ cup softened unsalted butter into your bowl—the softened state allows us effortlessly incorporate it without melting down first—which creates more air pockets leading us toward higher rise during baking! Use either clean hands or fork tines—not too aggressively—to combine until everything’s just brought together; don’t overmix here since clumping leads us away from achieving optimal crumbly texture—we want some larger chunks alongside smaller bits!
Step 3: Assemble Your Crisp
With both layers ready now—the juicy peach base waiting beneath—that scrumptious oat topping eagerly awaiting its turn above those beauties—it’s finally time for assembly! Pour your newly created oat mixture evenly over those lovely sliced peaches below; use your fingers or spatula gently spread along so there’s no bare spots left showing through peeking out anywhere underneath—that way every mouthful captures both components simultaneously harmoniously intermingling together once baked off properly.
Step 4: Bake That Beauty!
Now place your assembled peach crisp lovingly into preheated oven—set timer for approximately 25 minutes but keep close watch after around twenty-five minutes elapsed time passes by since ovens vary quite widely depending on age/brand/etc.—what we’re looking for here visually? An enticing golden-brown hue adorning top surface alongside bubbling juices escaping ever-so-slightly around edges should be perfectly evident signaling readiness at last! Also consider aroma wafting through home during bake-time—it’ll be utterly intoxicating—you’ll know dinner guests won’t be able resist asking what’s cooking long before plates hit table awaiting their arrival!
Once out from hot embrace inside oven allow cooling slightly before diving headfirst towards serving warm alongside ice cream drizzled atop if desired—I promise friends won’t soon forget experiencing such profound satisfaction upon indulging within every bite taken afterward shared amongst gathered company creating lasting memories filled laughter joy surrounding simple yet extraordinary moments spent together enjoying homemade goodness served straight from heart itself!
Stay tuned as we wrap things up by discussing serving suggestions along with storage tips ensuring freshness lasts longest possible time thereafter following initial creation journey enjoyed thoroughly ahead previously mentioned steps taken closely followed throughout process leading success achieved ultimately culminating delicious results now ready enjoyed fully ahead too soon won’t regret trying either way promised exciting experience awaits ahead upon diving deeper further exploring realm beyond basics laid previously discovered right here today shared moments treasured forevermore ahead each single crumb left lingering behind.
Baking Your Perfect Peach Crisp with Canned Peaches
Step 5: The Magic of Mixing the Topping
Now that your luscious peaches are patiently waiting for their moment in the spotlight, it’s time to turn your attention to the topping—a glorious blend that will crown our dessert and transform it into something truly extraordinary. In a medium mixing bowl, take that packed ¾ cup of brown sugar and combine it with ¾ cup of all-purpose flour, ⅔ cup of quick oats, 1½ teaspoons of ground cinnamon, and ½ teaspoon of salt. As you stir these ingredients together, take a moment to inhale the sweet aroma rising from the bowl—this is the essence of comfort food. The purpose behind this step is not just to combine; we are aiming for a texture that will create a delightful contrast when baked—think crisp on top and soft beneath.
Once everything is well mixed, it’s time to introduce our softened unsalted butter. I recommend using your fingers or a pastry cutter for this part because you want to incorporate the butter without overworking the mixture. Gently pinch and mix until you see small clumps form—this is crucial! Those little bits of butter will melt during baking, creating pockets of richness throughout the topping. You should end up with a crumbly texture, almost like wet sand. If it feels too dry or powdery, don’t hesitate to add a tiny bit more butter; trust me, this texture will ensure that every spoonful is profoundly satisfying.
Step 6: Layering Love
With your topping ready, it’s time to bring everything together in the most heartwarming way possible. Carefully pour your crumbly mixture over the layer of peaches nestled at the bottom of your greased baking pan. This step may seem simple, but how you do it matters immensely! Use a spatula or your hands to spread the topping evenly across the peaches—make sure no peach piece is left uncovered because every bite deserves that symphony of flavors we’ve been crafting together. This balance between sweet peaches and crunchy topping is what makes each forkful an experience worth savoring.
Once you have an even layer over those juicy peaches, step back and admire your handiwork for just a moment. It’s incredible how something so simple can evoke such warmth and nostalgia. This layering technique not only ensures that each bite has a perfect ratio but also allows those flavors to meld beautifully during baking. Remember, this dish is all about harmony—the buttery topping should complement the sweetness of the canned peaches without overpowering them.
Step 7: Into the Oven We Go!
Now comes one of my favorite parts: baking! Slide your baking pan into that preheated oven set at 350°F (175°C). The anticipation that fills your kitchen as this beauty bakes is simply intoxicating! Set your timer for 25 minutes but keep an eye on it as we approach this magical threshold. You’ll notice that as it cooks, the top begins to turn golden brown—a visual cue signaling that everything is coming together beautifully.
The importance of baking cannot be overstated; this process transforms our raw ingredients into something utterly divine! As those oats toast and caramelize with brown sugar under gentle heat, they become delightfully crisp while releasing aromas that waft through your home—trust me when I say it will be hard not to sneak a taste before it’s fully baked! And while you’re waiting, I encourage you to resist peeking too often; opening the oven door can interrupt that beautiful heat distribution we need for even cooking. Keep yourself busy by thinking about how you’ll serve this hot dessert once it’s done!
Step 8: The Perfect Finish
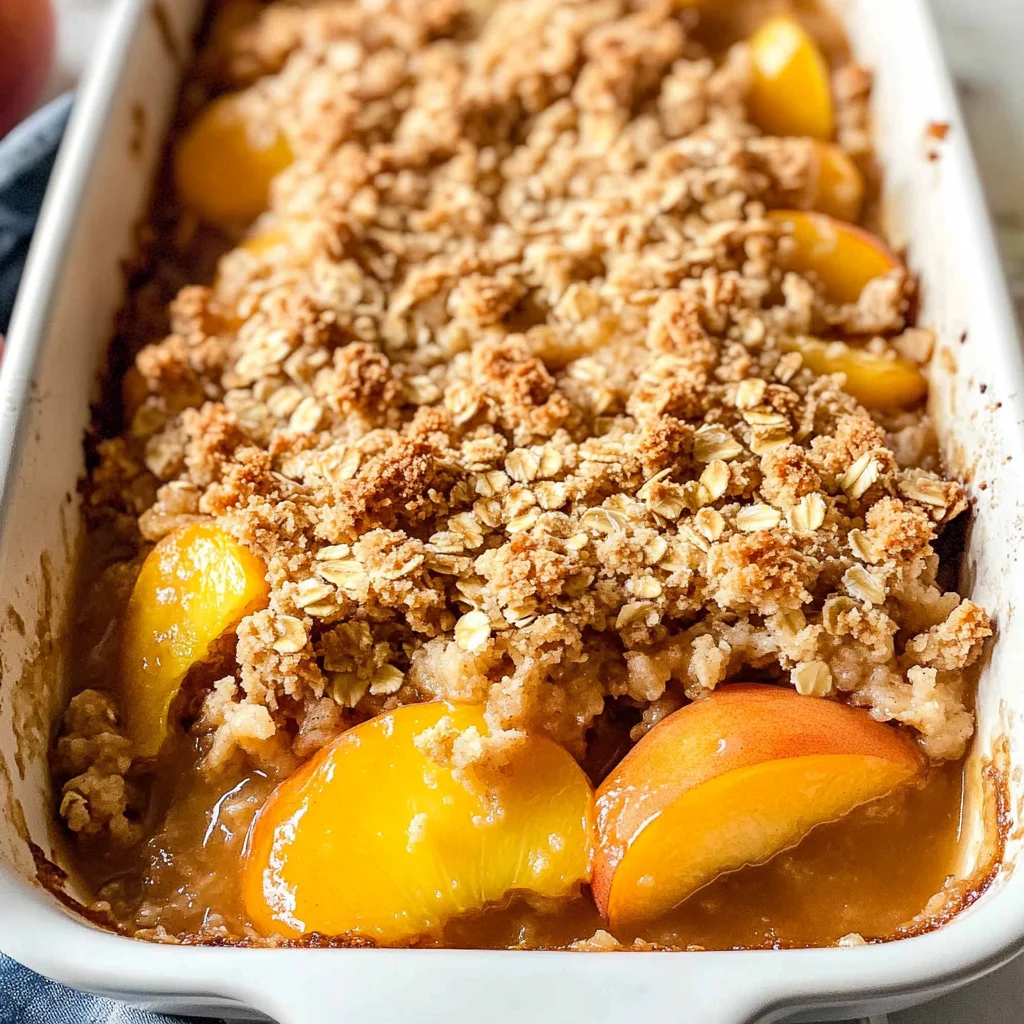
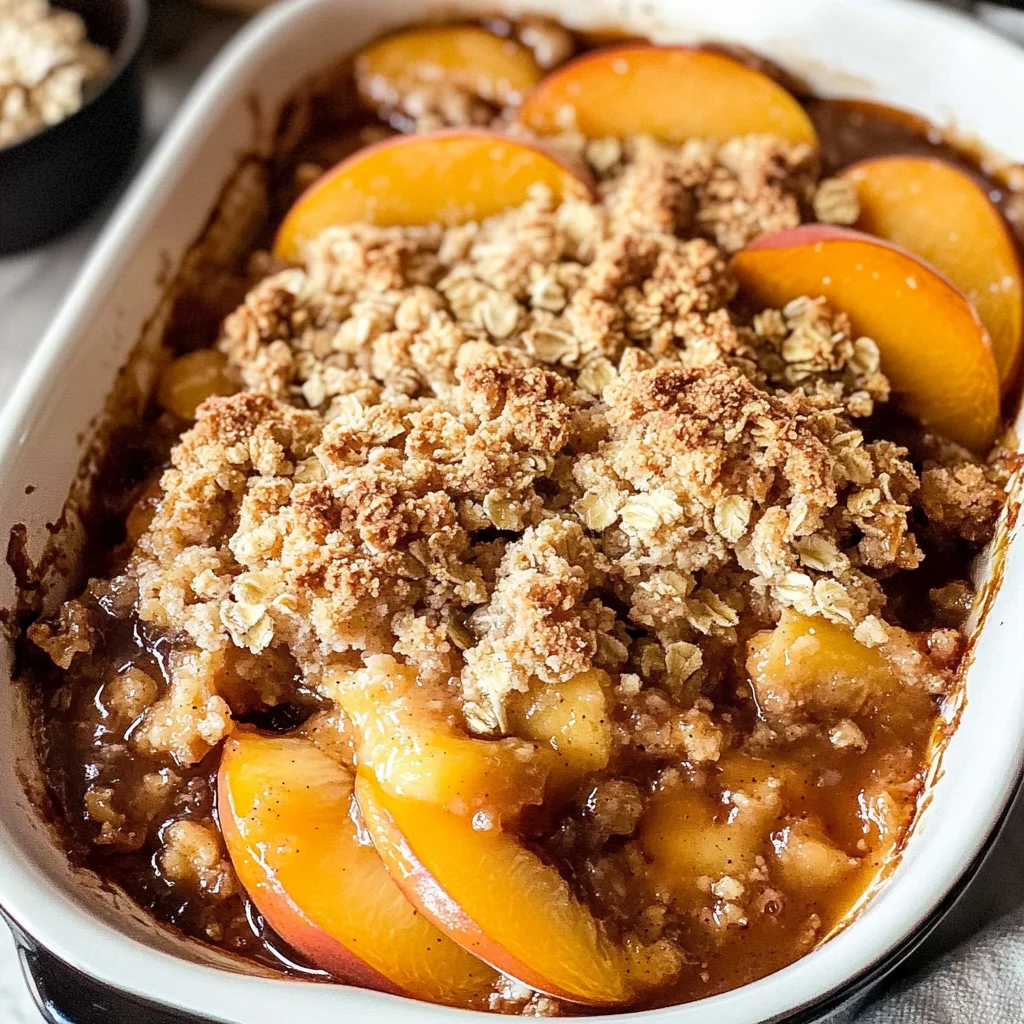
As you near the end of those tantalizing 25 minutes, start preparing yourself for what’s about to come. When you pull out your peach crisp from the oven, you should see a perfectly golden-brown top with bubbling juices peeking through from underneath—that’s where all those delicious flavors are colliding! Let it sit for at least five minutes before serving; I know patience can be tough here especially when it looks so heavenly! But resting allows those juices to settle slightly so when you scoop into it later, you’re not just getting juice flooding everywhere—it keeps each serving cohesive yet indulgent.
While it’s tempting to dive right in with spoons at hand (and I wouldn’t blame you!), trust me on this one: allowing those first few moments after baking really enhances the eating experience. It gives time for flavors to meld further and creates a dessert that’s not only comforting but also downright exquisite with every mouthful. Just imagine scooping up warm peaches topped with crispy oat goodness—it’s nothing short of bliss!
Final Touches
Step 9: Serving Up Joy
When you’re ready to indulge in this Peach Crisp with Canned Peaches, consider how you’ll serve it up—it’s one of my favorite parts! Picture this: warm portions served in cozy bowls alongside a scoop (or two!) of vanilla ice cream or perhaps some freshly whipped coconut cream if you’re looking for something dairy-free yet decadent. The cold creaminess contrasts beautifully against warm peaches and crunchy topping—a match made in heaven!
As you dig in with friends or family gathered around sharing stories or laughter (because let’s face it—food always brings us together), take note of how satisfying each bite feels both physically and emotionally. This isn’t just dessert; it’s an experience steeped in warmth and love—a testament to your skill in creating something special from simple ingredients.
Make sure to grab extra napkins because things might get messy—but isn’t that part of enjoying food? With its inviting aroma still lingering in the air long after you’ve finished indulging, I promise you’ll find yourself dreaming about making this again soon! So go ahead—make another batch next week or serve some at gatherings—you’ll be known as “the peach crisp guru” before you know it!
What are you waiting for? Dive into this delightful journey filled with flavor and warmth today—I can’t wait for you to taste how amazing Peach Crisp with Canned Peaches truly is!
Storage and Enjoyment Tips for Your Peach Crisp with Canned Peaches
Ah, the moment you’ve been waiting for has arrived—your Peach Crisp with Canned Peaches is ready to be enjoyed! The warm, inviting aroma wafting through your kitchen promises a dessert that’s not just a treat for the taste buds but also a hug for the soul. As you dive into that golden-brown, cinnamon-scented topping, I can guarantee it will bring a smile to your face. But what if you have leftovers? Fear not! This delightful dessert can be savored for days to come with just a little care.
Storing Leftover Peach Crisp with Canned Peaches
To keep your Peach Crisp as delicious as it was fresh from the oven, transfer any leftovers to an airtight container. Glass or plastic both work beautifully; just ensure it’s sealed tightly to prevent moisture from sneaking in. Store it in the refrigerator where it will stay fresh for up to five days—though trust me, it likely won’t last that long! One pro tip I love is placing a slice of bread in the container; this helps maintain moisture levels and keeps the topping from becoming too dry. The flavors only deepen after storage, creating an even more profound satisfaction as they meld together over time. When you’re ready to indulge again, simply pop it in the oven at 350°F for about 10-15 minutes until warmed through and crispy on top. Or if you’re in a hurry, a quick zap in the microwave will do—just remember to cover it loosely so steam can escape!
Freezing Peach Crisp with Canned Peaches for Later
If you’re looking to preserve that heavenly Peach Crisp goodness for later enjoyment, freezing is an excellent option! To freeze, allow your crisp to cool completely, then portion it out into freezer-safe containers or wrap it tightly in aluminum foil. It will keep beautifully frozen for up to three months—perfect for those moments when you need a little comfort food pick-me-up! When you’re ready to enjoy your frozen masterpiece, simply transfer it from the freezer to the fridge overnight to thaw before baking again at 350°F until bubbly and golden. Trust me on this: having homemade Peach Crisp at your fingertips is an absolute game changer when unexpected guests show up or when you’re craving something sweet after dinner!
Peach Crisp with Canned Peaches
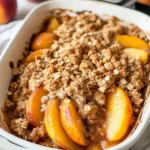
Peach Crisp with Canned Peaches is more than just a dessert; it’s a nostalgic experience that fills your home with warmth and comfort. This delightful recipe transforms simple canned peaches into a luscious treat topped with a crunchy, buttery oat mixture, creating the perfect balance of sweet and crispy. With just seven ingredients, this dish is as easy to make as it is delicious, making it ideal for both weeknight desserts and special gatherings. The aroma of cinnamon mingling with juicy peaches will have everyone eagerly anticipating their first bite. Serve it warm with a scoop of ice cream or enjoy it on its own; either way, this Peach Crisp will quickly become a cherished favorite in your dessert lineup.
- Prep Time: 15 minutes
- Cook Time: 25 minutes
- Total Time: 40 minutes
- Yield: Serves 8
- Category: Dessert
- Method: Baking
- Cuisine: American
Ingredients
- 58 ounces canned peaches (sliced and drained)
- ¾ cup brown sugar (packed)
- ¾ cup all-purpose flour
- ⅔ cup quick oats
- 1½ teaspoon ground cinnamon
- ½ teaspoon salt
- ½ cup unsalted butter (softened)
Instructions
- Preheat your oven to 350°F (175°C) and lightly grease a 9×9-inch baking pan.
- Spread the drained canned peaches evenly in the bottom of the prepared pan.
- In a medium bowl, mix together brown sugar, flour, oats, cinnamon, and salt until combined.
- Add softened butter to the dry mixture and blend until you achieve a crumbly texture.
- Evenly distribute the topping over the peaches in the baking pan.
- Bake for about 25 minutes until golden brown and bubbly.
- Allow to cool slightly before serving warm.
Nutrition
- Serving Size: 1/8 of the crisp (approximately 130g)
- Calories: 225
- Sugar: 18g
- Sodium: 135mg
- Fat: 9g
- Saturated Fat: 5g
- Unsaturated Fat: 4g
- Trans Fat: 0g
- Carbohydrates: 34g
- Fiber: 2g
- Protein: 2g
- Cholesterol: 20mg