Lemon Curd Cookies Recipe
It’s funny how certain recipes can evoke memories that feel like they were just yesterday, even if those moments were years ago. The Lemon Curd Cookies Recipe is one of those delightful treasures that transcends time and space, wrapping you in a warm embrace of nostalgia and joy. Picture a sun-drenched afternoon; the air is filled with laughter, and your loved ones are gathered around, eagerly anticipating something sweet to tie the entire day together. These cookies aren’t just ordinary treats; they are little bites of sunshine, bursting with zesty lemon flavor and the kind of sweetness that makes your heart smile. Each cookie is like a tiny hug, a reminder that food has the incredible power to bring us all together.
What makes these Lemon Curd Cookies so special? Well, it all begins with the preparation of homemade lemon curd—a luscious concoction that’s both tangy and sweet. Imagine stirring that golden mixture on the stovetop as the aroma of fresh lemons fills your kitchen. The sensation is utterly intoxicating! It’s this very curd that turns these cookies from simple sugar cookies into profound little masterpieces. And trust me when I say, once you bite into them, you’ll agree they’re perfect for any occasion—baby showers, weddings, or just soaking up some summer sun with friends. So grab your apron and let’s embark on this culinary journey together!
Lemon Curd Cookies Recipe: A Little Slice of Sunshine
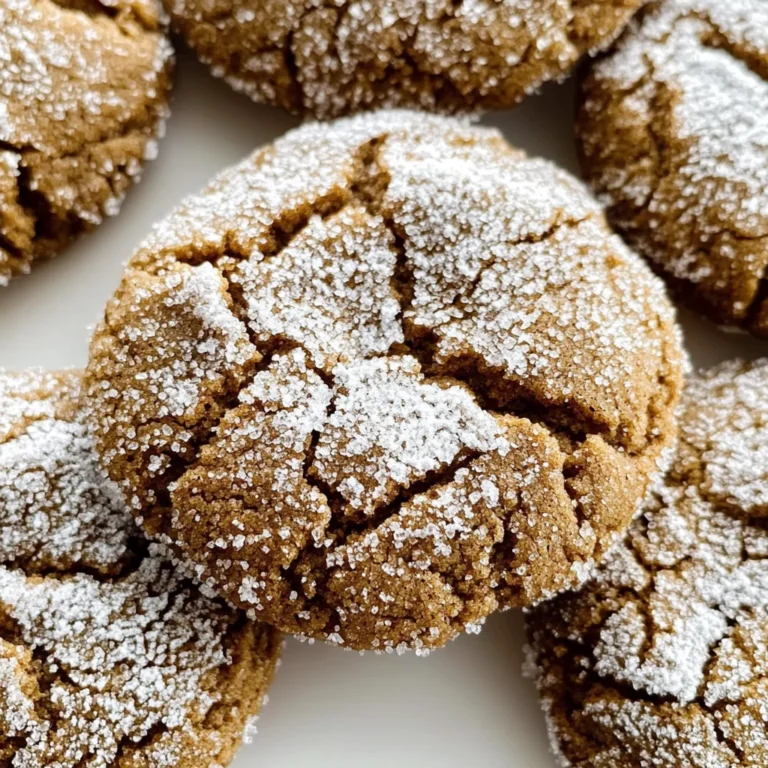
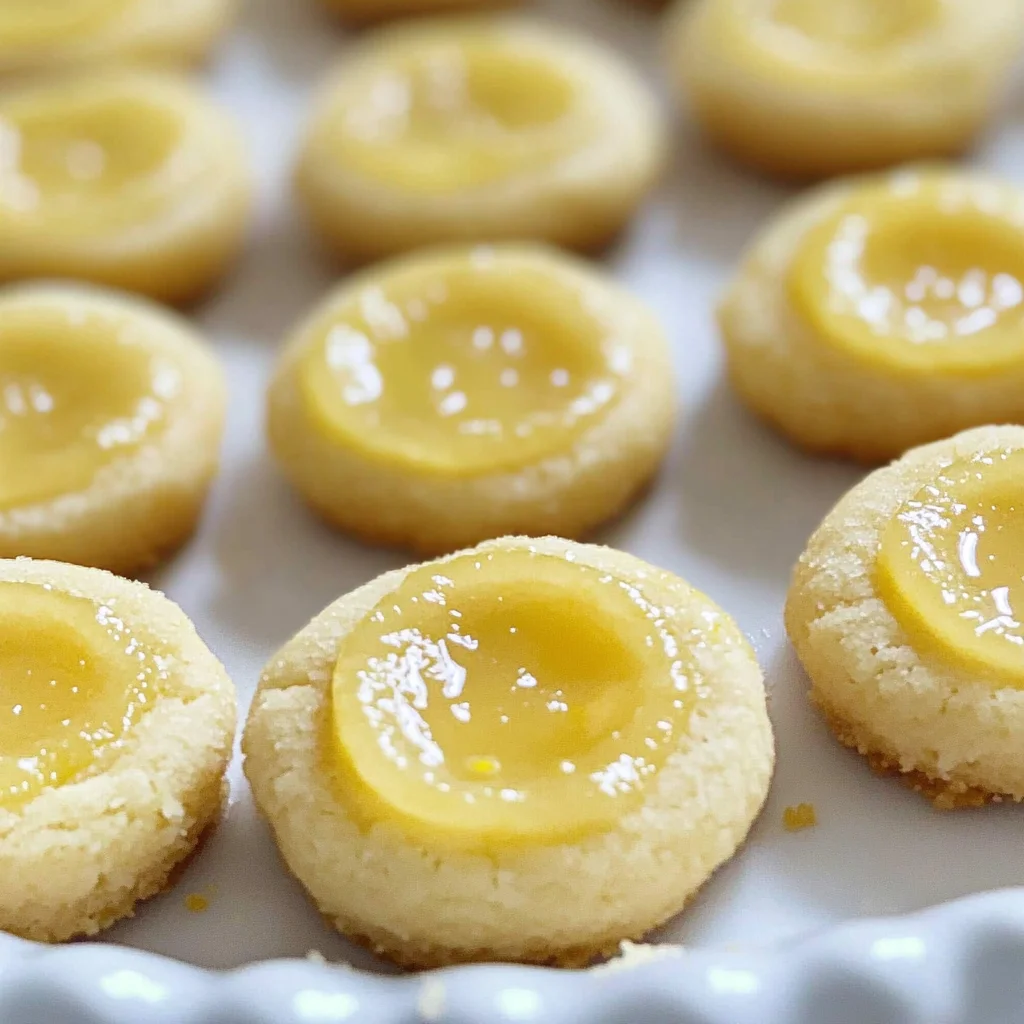
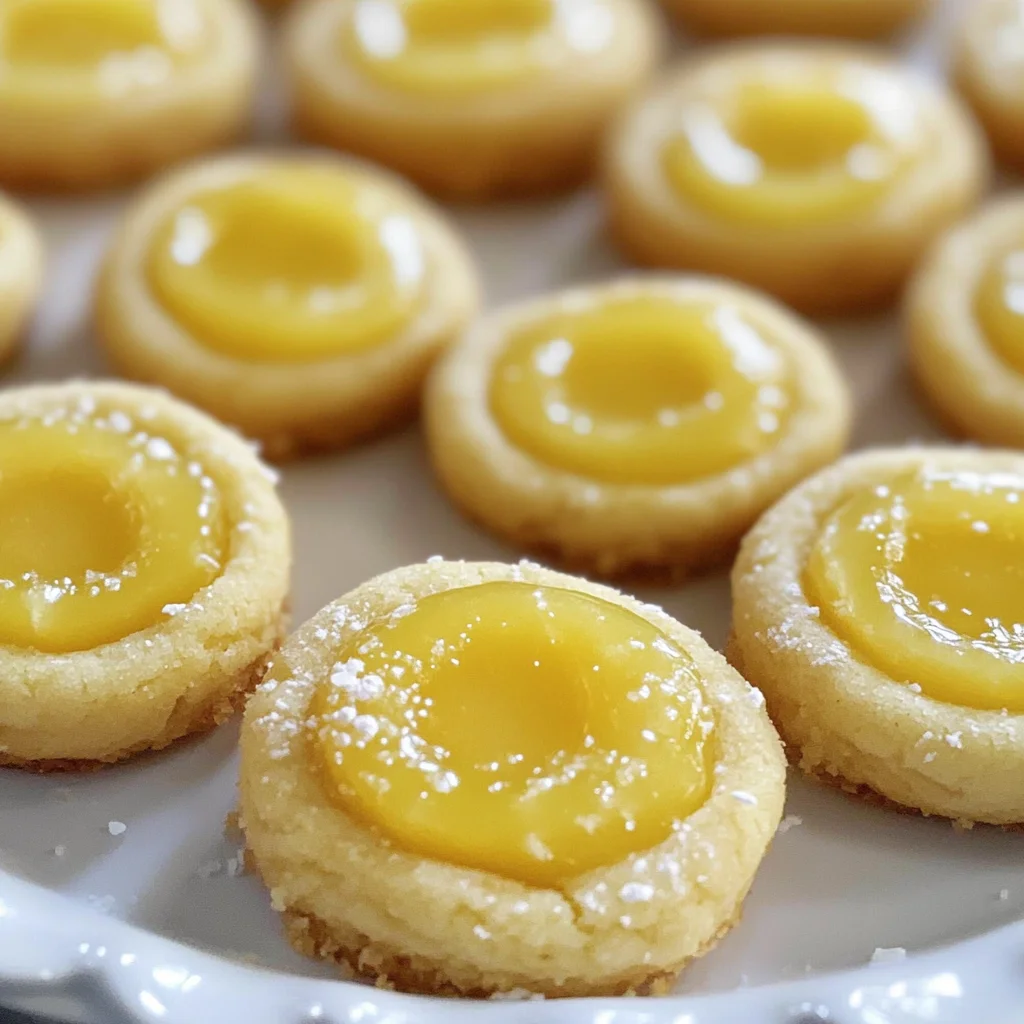
These adorable Lemon Thumbprint Cookies will soon become your go-to treat for any gathering. With a soft sugar cookie base cradling rich lemon curd in each thumbprint, they’re reminiscent of bite-sized lemon pies that will have everyone asking for seconds.
Ingredients:
As we embark on this delicious journey, let’s take a moment to appreciate each ingredient that plays its part in creating these delectable delights.
- 1 cup (2 sticks or 226g) unsalted butter, softened to room temperature. This is absolutely paramount for achieving that light and airy texture we crave in our Lemon Curd Cookies Recipe. When the butter is at room temperature, it creams beautifully with sugar to create a fluffy base for our cookies. If it’s too cold, you’ll struggle to incorporate it properly; too warm, and you’ll end up with flat cookies! Opt for high-quality butter—European varieties are rich in creaminess and will enhance the overall flavor profile significantly.
- 2 cups granulated sugar. Sugar does more than just sweeten; it also plays a critical role in texture. In this recipe, sugar helps achieve that lovely caramelization during baking while contributing to the overall chewiness of each cookie. Don’t skimp on this ingredient! The right amount ensures your cookies are perfectly balanced between sweet and tart.
- 2 tablespoons lemon zest. Here’s where we introduce our star ingredient! Zest brings out vibrant citrus notes without adding moisture—it’s like capturing sunshine in tiny flecks! Use fresh lemons for zesting; they’ll provide an unparalleled depth of flavor compared to dried versions. When selecting lemons, look for ones that feel heavy for their size and have bright skin.
- 2 large eggs (room temperature). Eggs are essential in binding our ingredients together while contributing moisture and richness to our dough. Using room-temperature eggs ensures they mix evenly into the batter rather than causing the butter to seize up during mixing—trust me; it makes all the difference!
- 2 teaspoons vanilla extract. This is where we layer in another dimension of flavor! Vanilla harmonizes beautifully with lemon’s brightness while adding a comforting warmth. Always reach for pure vanilla extract instead of imitation varieties—your taste buds will thank you!
- 3/4 teaspoon salt. Salt might seem counterintuitive when making sweets, but it’s crucial! It enhances flavors across the board by balancing sweetness and elevating every other flavor present in the cookie.
- 1 teaspoon baking powder & 1 teaspoon baking soda. These two leaveners work hand-in-hand to give our cookies lift and structure as they bake. Baking powder ensures immediate leavening action while baking soda helps browning due to its alkaline nature—together, they result in perfectly puffy cookies without compromising texture.
- 3 cups all-purpose flour. Flour is the backbone of any baked good; it provides structure while allowing other ingredients to shine through. Make sure to measure carefully—spooning flour directly from the bag can lead to dense cookies due to compacting! Instead, fluff it up before scooping.
- 1 cup freshly squeezed lemon juice. This is where we bring in that tartness! Freshly squeezed juice has an entirely different flavor than bottled stuff—it’s bright, zesty, and unadulterated—a true revelation when combined with our curd.
- 3 egg yolks (for curd). Using just yolks creates a rich custard-like consistency for our lemon curd—it’s indulgent without being overly heavy or cloying!
- 1 cup granulated sugar (for curd). Just like before, sugar adds sweetness but also helps balance out our tart lemon juice beautifully.
- 1½ tablespoons cornstarch. This thickening agent works wonders when making curds or custards by giving them stability without altering their flavor profile—it’s practically magic!
- 2 tablespoons lemon zest (for curd). Yes! We’re repeating this because more zest means more flavor! Infusing layers upon layers of lemon goodness – who could resist?
- 1/4 cup cold butter (cubed). Cold butter is essential here as it helps create a smooth texture within your curd while resisting separation during cooking—it adds richness without overwhelming flavors.
Equipment You’ll Need:
Cooking can be such an adventure! Having the right tools not only makes everything easier but also transforms cooking into an enjoyable experience rather than a chore. Think of these pieces as essential partners in crafting something truly wonderful.
- Mixing bowls – various sizes: A good set allows you to measure out ingredients accurately while providing enough space for whisking or mixing without spilling overboard!
- Whisk: Whether you’re blending dry ingredients or whipping up eggs and sugar until frothy—the whisk is indispensable here!
- Rubber spatula: Perfect for scraping down sides of bowls ensuring no bit goes uncaptured; it’s also fantastic when working with sticky mixtures like cookie dough!
- Baking sheets: You’ll want sturdy aluminum sheets lined with parchment paper—not only do they prevent sticking but ensure even baking as well!
- Cookie scoop: If you want uniform-sized cookies every time (and who doesn’t?), this tool is non-negotiable—it eliminates guesswork while speeding up prep time significantly!
Now let’s dive into preparing these delightful Lemon Curd Cookies Recipe step-by-step so you can make them yourself!
Step 1: Creaming Butter and Sugar
Begin by placing your softened butter into a large mixing bowl—a stand mixer works wonders here if you have one available! Start mixing on medium speed until it’s light and fluffy—this typically takes about 2 minutes or so if you’re using an electric mixer or about double if you’re going old school by hand whisking away diligently like I often do when feeling nostalgic about simpler times! This process known as creaming is crucial because it’s how air gets incorporated into our dough which ultimately affects texture during baking—you want those cookies tender yet sturdy enough not to crumble apart at first bite!
Once you’ve achieved a pale yellow color with fluffy peaks forming from your mixture resembling whipped cream clouds—now it’s time for sugar’s grand entrance into this mix! Gradually add in both cups whilst continuing to mix until fully combined—you’ll notice everything turning glossy—that’s exactly what we’re aiming for here! Don’t rush this step; patience pays off immensely by ensuring perfect results later on down the line.
Step 2: Adding Eggs & Vanilla
With our butter-sugar mixture at its peak performance level now comes what I consider one of my favorite parts—the addition of eggs along with fragrant vanilla extract! Crack those room-temperature beauties right into your bowl alongside two teaspoons of pure vanilla—as they blend together marvelously transforming into luscious liquid gold—their job here is vital since they’ll enrich both moisture content while aiding structure development during baking cycles ahead!
Mix again until fully integrated—you’ll know you’ve hit success once everything looks shiny yet cohesive—remember not too over-mix though otherwise structural integrity may falter leading us toward drier outcomes instead of heavenly softness we desire deeply within each cookie bite blissfully melting away upon consumption!
Step 3: Incorporating Dry Ingredients
Now onto what might seem mundane but trust me holds immense importance: combining all dry components seamlessly together before folding them gently into our wet mix thereafter… Let’s start by sifting three cups worth all-purpose flour alongside baking powder alongside baking soda along with salt straight into another bowl—we’re establishing base foundation here folks—and believe me when I say taking time doing so yields dividends regarding creating consistently textured outcomes later down road amidst final results emerging fresh out oven moments away from delightfulness awaiting eager taste buds ready take center stage soon enough!
After sifting everything thoroughly combine well prior moving onto next steps where patience rewards us richly through results yielding perfectly balanced flavors throughout entire cookie batch—all thanks due diligence exerted upfront ensuring no lumps remain lingering behind unnecessarily disrupting harmony amongst textures desired once baked golden brown perfection arrives forthwith…
Step 4: Forming Cookie Dough Balls
Finally after folding dry ingredients gently ensuring no streaks remain visible throughout mixture—it’s time transform this fragrant concoction into tangible dough balls ready prepped towards journey heading oven direction soon enough—but hold tight folks because here comes another pivotal moment requiring attention: using either clean hands or trusty cookie scoop begin portioning out generous amounts roughly rounded tablespoonfuls rolling between palms gently shaping each ball neatly forming cohesive surfaces devoid cracks appearing as signs indicating undue stress placed upon delicate structures involved…
Now place these formed beauties onto prepared baking sheet lined previously waiting patiently nearby spaced evenly apart allowing ample expansion room whilst navigating heat distribution evenly across surfaces yielding uniform results once placed inside hot oven preheated beforehand allowing anticipation build higher yet still maintaining calm poised demeanor knowing success lurks around corner merely moments ahead…
I hope you’re feeling inspired already because the next steps are equally rewarding as we guide ourselves towards creating luscious homemade lemon curd destined fill those thumbprint divots waiting eagerly… Let me know how excited you are as we continue creating magic together through culinary artistry unfolding gracefully right before eyes…
Step 5: Creaming the Butter and Sugar – A Dance of Textures
The next step in our Lemon Curd Cookies Recipe is a delightful process known as creaming, where we combine the room temperature butter and sugar into a fluffy, pale mixture. This step is absolutely paramount because it introduces air into the dough, which helps create those soft, tender cookies we crave. Start by placing your one cup of butter in a large mixing bowl and adding two cups of granulated sugar. With an electric mixer on medium speed, beat the mixture until it transforms into a light and airy concoction—this usually takes about 3 to 5 minutes. You’ll know it’s ready when you can see a noticeable puffiness, and the color has lightened to a creamy pale hue.
Don’t be tempted to rush this step; it’s crucial for achieving that melt-in-your-mouth texture. As you mix, take a moment to savor the sweet, buttery aroma wafting through your kitchen—it’s like liquid gold! If you notice any stubborn lumps of butter remaining, don’t hesitate to scrape down the sides of your bowl with a spatula; ensuring everything is well mixed will help create that uniform cookie dough. Remember, this isn’t just about combining ingredients; it’s about creating a wonderful base for your cookies that will elevate them beyond ordinary treats.
Step 6: Adding Eggs and Zest – Brightness in Every Bite
Now comes the exciting part—adding our eggs and lemon zest! Crack those two large eggs into your creamed mixture one at a time, allowing each egg to fully incorporate before introducing the next. This step is essential because eggs serve as both binding agents and leaveners; they provide structure while also helping the cookies rise ever-so-slightly during baking. As you mix in those eggs, you’ll notice the batter becoming smoother and shinier—a beautiful transformation that signals you’re on the right track.
Next, let’s bring out that bright lemon flavor! Add in your two tablespoons of freshly grated lemon zest and two teaspoons of vanilla extract. The zest adds an extraordinary burst of citrus fragrance and flavor that’s simply uplifting. Trust me when I say that this combination will have everyone guessing what makes these cookies so special! Mix until everything is well combined—about another minute should do it—and don’t forget to pause for a moment to inhale deeply; you’ll be captivated by that intoxicating aroma filling your kitchen.
Step 7: The Dry Ingredients – Building Flavor and Structure
With our fragrant mixture ready, it’s now time to introduce the dry ingredients. In a separate bowl, whisk together three cups of all-purpose flour, ¾ teaspoon salt, one teaspoon baking powder, and one teaspoon baking soda until they are well combined. This step might seem simple but is incredibly important because each ingredient plays a key role in the final texture and flavor of your cookies. The flour provides structure while the baking powder and soda ensure they rise beautifully without being too dense.
Gradually add this dry mixture to your wet ingredients using a spatula or wooden spoon—don’t use your mixer here! Gently fold until just combined; it’s vital not to overmix at this stage as doing so can lead to tough cookies instead of the tender morsels we desire. Look for clues that indicate readiness: the dough should come together without any dry pockets of flour remaining but still appear slightly shaggy—that’s exactly how we want it! This gentle blending allows for some gluten development but keeps things tender—a delicate balance worth achieving.
Step 8: Making Your Luscious Lemon Curd – A Zesty Delight
Now let’s shift gears from cookie dough to making our luscious lemon curd—a truly extraordinary filling that will elevate these cookies from delightful to divine! In a saucepan over medium heat, combine one cup of freshly squeezed lemon juice (the fresher, the better!), three egg yolks (discarding or saving those whites for another recipe), one cup of sugar, 1½ tablespoons of cornstarch (which acts as our thickening agent), and two tablespoons more lemon zest for added zing! Stir these ingredients together until they are well blended before bringing your mixture to a gentle simmer.
As you cook this over medium heat—continuously stirring—you’ll notice it begins to thicken after about five minutes; keep an eye on it! This cooking process is crucial because it activates the cornstarch and allows all those flavors to meld together beautifully. You want it thick enough so that when you dip a spoon into it, it coats the back nicely—this luscious consistency will give you that delightful filling we’re aiming for in our thumbprint cookies. Once thickened to perfection (think pudding-like), remove from heat and stir in ¼ cup of cold cubed butter until melted—the result is nothing short of magical! Let this curd cool slightly before using; trust me on this—it’ll smell heavenly!
Conclusion:
As we wrap up our delicious journey through this Lemon Curd Cookies Recipe, I can’t help but feel excited about sharing this experience with you! From the moment flour meets butter and sugar in the mixing bowl to the intoxicating aroma wafting through your kitchen as they bake, there’s something profoundly satisfying about crafting these cookies. The bright zing of lemon zest mingling with smooth homemade curd creates a symphony of flavors that elevates each bite beyond ordinary sugar cookie territory—it’s pure bliss!
Why is this recipe such a must-try, you ask? Beyond just taste, there’s pure joy found in making them. Whether you’re baking for yourself or preparing treats for loved ones during special occasions like baby showers or summer picnics, each cookie tells a story filled with warmth and affection. And let me tell you—the moment you pull that golden pan from the oven is nothing short of magical; watching friends’ eyes light up when they take their first bite is simply priceless.
Imagine savoring one of these zesty delights alongside your afternoon tea or coffee—a perfect match made in heaven! For an extra touch of decadence, pair them with whipped coconut cream topped with toasted coconut flakes; it’s an utterly intoxicating experience that will transport your taste buds straight to paradise! Or how about enjoying one after dinner while curled up on the couch with your favorite book? Whatever your choice may be, these cookies are sure to bring joy.
Feeling adventurous? This recipe is wonderfully adaptable! You could swap out the classic lemon flavor for other citrus fruits—think tangy lime or sweet orange zest—for a unique twist. Or perhaps fold in some white chocolate chips for an added layer of richness that complements the tartness beautifully. You could even experiment by adding dried cranberries or blueberries into the dough before baking—each variation enhances this delightful treat while giving it your own personal flair! So grab those ingredients and dive into this culinary adventure—I can’t wait to hear how yours turn out!
Lemon Curd Cookies Recipe

Indulge in the delightful world of Lemon Curd Cookies, a vibrant treat that combines the zesty brightness of fresh lemons with a soft, tender cookie base. These charming lemon thumbprint cookies are filled with luscious homemade lemon curd, making each bite a burst of sunshine. Perfect for summer gatherings, tea parties, or simply as a sweet pick-me-up, this recipe is sure to become a favorite among family and friends. With easy-to-follow steps and readily available ingredients, baking these refreshing cookies is not only satisfying but also an enjoyable experience. Get ready to create a batch that will have everyone asking for seconds!
- Prep Time: 20 minutes
- Cook Time: 12 minutes
- Total Time: 32 minutes
- Yield: Approximately 24 cookies 1x
- Category: Dessert
- Method: Baking
- Cuisine: American
Ingredients
- 1 cup unsalted butter, softened to room temperature
- 2 cups granulated sugar
- 2 tablespoons lemon zest
- 2 large eggs, room temperature
- 2 teaspoons vanilla extract
- 3/4 teaspoon salt
- 1 teaspoon baking powder
- 1 teaspoon baking soda
- 3 cups all-purpose flour
- 1 cup freshly squeezed lemon juice
- 3 egg yolks (for curd)
- 1 cup granulated sugar (for curd)
- 1 1/2 tablespoons cornstarch
- 2 tablespoons lemon zest (for curd)
- 1/4 cup cold butter, cubed
Instructions
- Preheat your oven to 350°F (175°C) and line baking sheets with parchment paper.
- In a large bowl, cream together softened butter and granulated sugar until light and fluffy.
- Add eggs one at a time, mixing until combined. Stir in lemon zest and vanilla extract.
- In another bowl, whisk together flour, baking powder, baking soda, and salt. Gradually fold into the wet mixture until just combined.
- Scoop tablespoon-sized portions of dough onto prepared sheets; make an indentation in each cookie.
- Prepare lemon curd by cooking lemon juice, egg yolks, sugar, cornstarch, and zest until thickened. Stir in cold butter until smooth.
- Fill each cookie’s indentation with lemon curd.
- Bake for 10-12 minutes or until lightly golden around the edges.
Nutrition
- Serving Size: 1 cookie (30g)
- Calories: 150
- Sugar: 12g
- Sodium: 65mg
- Fat: 7g
- Saturated Fat: 4g
- Unsaturated Fat: 2g
- Trans Fat: 0g
- Carbohydrates: 20g
- Fiber: 0g
- Protein: 2g
- Cholesterol: 35mg