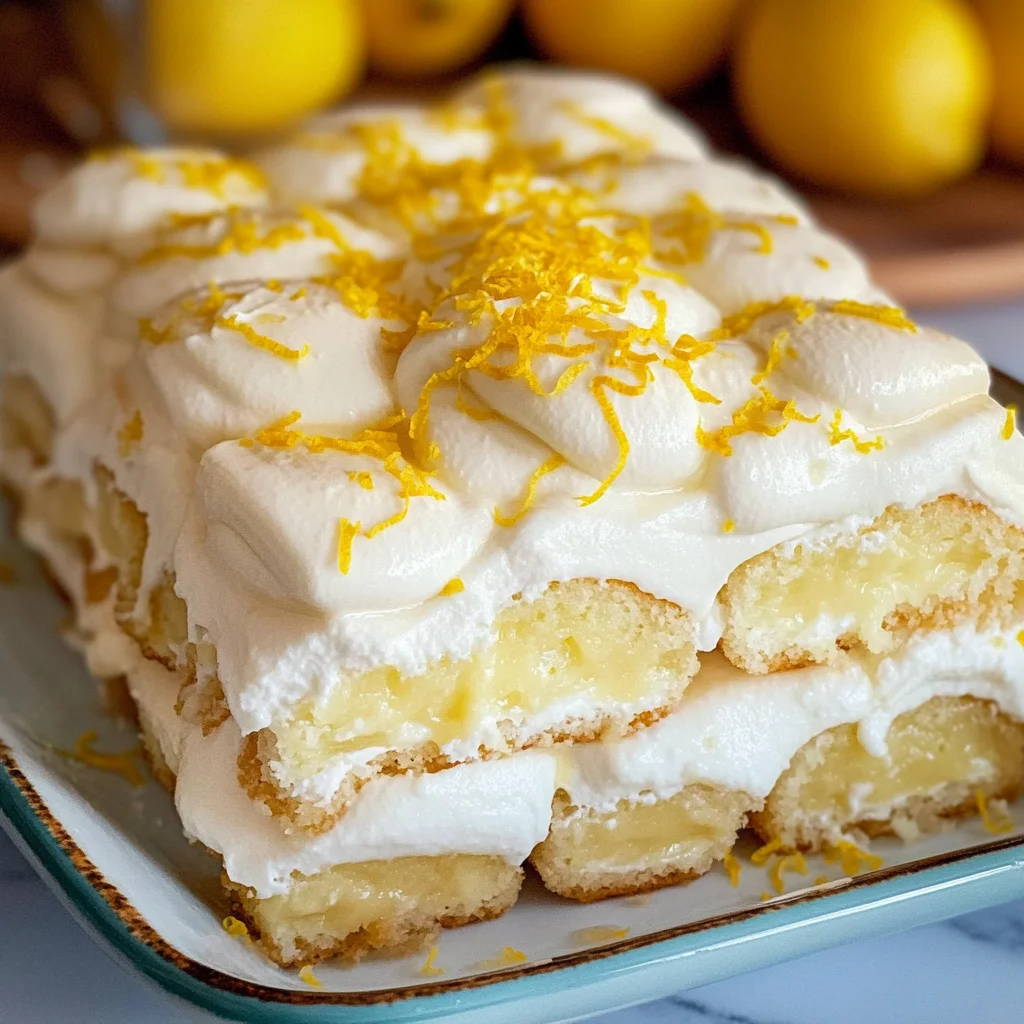
Limoncello Tiramisu
There’s something utterly magical about the way food can transport us to different times and places, isn’t there? This Limoncello Tiramisu is not just a dessert; it’s a vibrant celebration of flavors that evoke sun-soaked Italian summers, laughter shared with friends, and the sweet nostalgia of family gatherings. The moment you take a bite, you’re greeted with a symphony of citrus brightness from the fresh lemons and the luscious limoncello. It’s as if each layer whispers its secrets: the crisp ladyfingers soak up that intoxicating syrup, while the whipped mascarpone cream envelops your senses in a delightfully airy embrace. I promise you, this dessert is more than just a treat; it’s an experience—one that invites you to savor every moment.
Now, let’s talk about what makes this Limoncello Tiramisu truly special. Traditionally, tiramisu has been known for its coffee-infused layers, but why not shake things up a bit? By bringing in zesty lemon and limoncello, we’re creating something new yet rooted in the classic Italian spirit. It’s perfect for warm evenings when you’re seeking a refreshing end to your meal or for celebrations where you want to impress your guests with something both elegant and comforting. Picture it: a warm evening breeze, laughter floating through the air, and you serving this beautiful dessert that looks as stunning as it tastes. Trust me on this—everyone will be asking for seconds!
Limoncello Tiramisu: A Citrus Dream Come True
This Limoncello Tiramisu is an easy-to-make dessert that will have everyone raving about its bright lemon flavor and creamy textures. It’s layers of happiness wrapped in a light and fluffy embrace, perfect for sharing (or not!). Let’s dive into this culinary journey together!
Ingredients:
As we embark on this delightful culinary adventure, let’s gather our ingredients. Each one plays a pivotal role in crafting our Limoncello Tiramisu masterpiece.
- 1 1/4 cups water. Water might seem simple, but it’s essential here as it forms the base for our syrup. We’ll be using it to balance sweetness with acidity when combined with sugar and limoncello. Always use filtered water if possible—it ensures that no unwanted flavors disrupt our delicate creation.
- 1/3 cup granulated sugar. This sugar is vital for sweetness but also serves to create that gorgeous syrup when dissolved in water. Opt for fine granulated sugar; it dissolves easily without leaving any graininess behind. The right amount of sugar enhances all those bright flavors without overpowering them.
- 1 cup limoncello. This Italian liqueur is like liquid sunshine! Its citrusy flavor gives our tiramisu its signature zing while adding depth with its slightly sweet undertones—truly an irreplaceable ingredient! If you prefer non-alcoholic options or need an alternative due to dietary preferences, consider using lemon-flavored soda or lemon juice mixed with additional sugar; just remember to adjust sweetness accordingly.
- 3 tablespoons lemon juice. Freshly squeezed lemon juice adds an incredible tartness that brightens each bite of our creamy layers. Always go for fresh lemons instead of bottled juice if you can; the difference in flavor is worth it! The acidity from the lemon works harmoniously with the rich mascarpone cheese, balancing out richness beautifully.
- 48 crisp ladyfinger cookies (about two 7 oz packages). These delightful little cookies are essential—they soak up all that wonderful limoncello syrup while retaining their shape and providing structure to our tiramisu. Look for high-quality crisp ladyfingers; they should feel dry and firm rather than soft or stale.
- 24 oz mascarpone cheese (chilled). This creamy cheese is the backbone of our tiramisu’s luscious filling—rich yet light at the same time! Ensure it’s chilled before use; room temperature mascarpone can become too runny, affecting texture dramatically. When choosing mascarpone, look for brands without additives for a purer taste.
- 15 oz prepared lemon curd. Lemon curd brings another layer of intense citrus flavor along with a smooth silkiness that complements the mascarpone beautifully! You can either buy high-quality store-bought curd or make your own—if you choose homemade, I promise it’ll make your tiramisu even more special!
- 1/3 cup limoncello (again!). Here we go again—this second dose will be used within our cream mixture to enhance flavor further! Remember to adjust accordingly if using any non-alcoholic alternatives mentioned earlier.
- 4 tablespoons lemon juice (yes, more!). Just like before, this fresh juice enhances tartness in our cream mixture while keeping everything well balanced—don’t skip this step!
- 2 cups heavy whipping cream. This cream is crucial because whipping it creates volume and airiness within our layers. When selecting heavy cream, look for one labeled heavy whipping cream which contains at least 36% fat—this ensures stability when whipped!
- 1/3 cup granulated sugar (once more!). We’ll fold some sugar into our whipped cream mixture to enhance sweetness without taking away from those vibrant citrus notes already present.
- 1 cup heavy whipping cream (yes!). Another layer of whipped cream means even more lusciousness—we’re creating clouds of delightful texture here!
- 2-3 tbsp powdered sugar. Powdered sugar blends seamlessly into whipped cream without adding grittiness at all—it promotes sweetness without being overpowering!
- 1 lemon zested. Zest is where so much aromatic goodness lies! Adding freshly grated zest brightens everything up while imparting floral notes into your dish—don’t overlook this!
Equipment You’ll Need:
Having the right tools can make all the difference between cooking feeling like a chore and feeling like pure joy! With these essentials by your side, you’ll find yourself gliding through each step smoothly as you create this delightful dessert.
- Mixing bowls – Good quality mixing bowls are paramount; they should be sturdy enough to handle vigorous whisking without warping or slipping around on the counter! I recommend having various sizes so you can mix ingredients comfortably without splashing everywhere.
- Electric mixer or whisk – An electric mixer saves time and energy when whipping cream or blending mascarpone; however, if you’re feeling adventurous (and have strong arms!), whisking by hand adds a charming personal touch too!
- Spatula – A rubber spatula is non-negotiable here—it allows you to gently fold whipped cream into your mascarpone mixture without deflating those precious air bubbles we’ve created.
- 9×13 inch baking dish or trifle dish – Choose whatever vessel speaks most to you! A trifle dish showcases beautiful layers artistically while providing ample space for all those delicious components to shine through—a baking dish works just as well if presentation isn’t your primary concern!
Preparing the Limoncello Tiramisu
Step 1: Crafting Your Limoncello Syrup
Let’s kick things off by making our limoncello syrup—a crucial element that will infuse those lovely ladyfingers with flavor! Begin by combining your water and granulated sugar in a small saucepan over medium heat. Stir gently until the sugar completely dissolves—this process allows us to create that sweetened base which acts as a sponge for absorbing all those fragrant notes later on! Once dissolved, remove it from heat and stir in 1 cup of limoncello along with 3 tablespoons of fresh lemon juice—it should smell absolutely divine at this point! Allow this concoction to cool completely before moving on; trust me when I say patience pays off here because hot syrup will quickly break down ladyfingers instead of giving them time to soak nicely!
Step 2: Soaking Those Ladyfingers
Now comes one of my favorite parts—the soaking! Take your crisp ladyfinger cookies and line them up neatly in either your baking dish or trifle dish based on what you’ve chosen earlier—and oh boy does it get exciting now! Using either a pastry brush or simply dipping each cookie directly into that cooled limoncello syrup mixture provides maximum flavor infusion while keeping them intact (we don’t want mushy cookies). Soak them briefly—around 2 seconds per side should do nicely—to ensure they’re flavored throughout without becoming overly soggy! Once soaked perfectly golden brown but still holding form beautifully—you’re ready for layering magic ahead!
Step 3: Whipping Up Creamy Goodness
Onward we go into making our luxurious whipped mascarpone filling—a glorious combination sure to steal hearts everywhere! In another large mixing bowl fitted with an electric mixer (or using arm strength if needed), add chilled mascarpone cheese along with prepared lemon curd followed by additional limoncello and fresh lemon juice mentioned earlier—the tanginess paired beautifully against richness creates balance galore! Start mixing on low speed until smoothly combined then gradually increase speed until soft peaks form—it should be light yet stable enough not collapsing back down immediately upon lifting beaters out—this indicates perfection achieved!
Step 4: Folding In Whipped Cream
Now it’s time we introduce heavenly clouds into our mascarpone mixture—the star performer being heavy whipping cream beaten separately until stiff peaks arise once again ensuring optimal fluffiness throughout every layer ahead! Gently fold half of this whipped cream into mascarpone blend first using gentle motions—this helps lighten up dense base so everything combines effortlessly together creating such delightful airy texture awaiting us later on during enjoyment phases too… Repeat folding remaining half carefully now ensuring no streaks remain visible once complete mixing achieved sighs contentedly watching creamy creation come alive right before eyes…
Stay tuned as we continue building upon these layers filled with sunshine-kissed flavors—you won’t want to miss out on what comes next!
The Joy of Assembling Your Limoncello Tiramisu
Step 5: Crafting the Limoncello Syrup
Now that we have our luscious layers prepared, it’s time to create the syrup that will infuse our ladyfingers with that delightful limoncello flavor. Start by pouring 1 1/4 cups of water into a medium saucepan and add in 1/3 cup of granulated sugar. Heat this mixture over medium heat, stirring gently until the sugar is completely dissolved. This step is crucial because it ensures that every bit of sugar contributes to the sweetness and texture of your dessert. You’re looking for a clear liquid—think of it as a sweet elixir that will transform those ladyfingers into sponges of flavor.
Once your sugar is dissolved, remove the saucepan from the heat and let it cool for just a few moments before adding in 1 cup of limoncello and 3 tablespoons of fresh lemon juice. This combination creates a vibrant syrup that’s not just about sweetness; it’s about crafting an experience with bright acidity that balances beautifully with the creaminess to come. Let this syrup sit for a minute or two so all those flavors meld together—trust me, patience here pays off tenfold!
Step 6: Soaking the Ladyfingers
Now comes one of my favorite parts: soaking those delicate ladyfingers! Arrange your cookies in a single layer on a large plate or shallow dish. Using a pastry brush or even just your hands (there’s something so satisfying about getting up close and personal!), generously soak each side of the ladyfingers in the limoncello syrup. Don’t rush this step; allow them to absorb enough syrup without becoming mushy—you’re aiming for them to be moist but still holding their shape. A quick dip should suffice—about 5 seconds per side should do the trick.
This technique, often called sponge soaking, is where the magic happens! The ladyfingers will plump up, absorbing that incredible lemony flavor which will ultimately elevate your tiramisu to extraordinary heights. As you soak each cookie, take in that intoxicating aroma—it’s like sunshine captured in a jar! If they feel too soft while soaking, just remember they’ll firm up again in the fridge once assembled.
Step 7: Layering Like a Pro
With your soaked ladyfingers ready and waiting, it’s time to bring everything together into layers of creamy goodness! Start by spooning half of your beautiful mascarpone mixture into an elegant rectangular dish—something about layering looks so inviting in glass! Spread it evenly across the bottom, giving yourself a smooth canvas for those lovely cookies. Then, lay half of your soaked ladyfingers on top, packing them closely but not squashing them down; you want each bite to deliver both creamy and cookie delights.
Afterward, spread another layer of mascarpone over these cookies—this time using all but one cup left from your earlier preparation. The key here is to be generous; you want every inch covered because this is what brings richness and depth to each forkful. Don’t hesitate to get creative with how you present this; there’s beauty in imperfection! Repeat this process with another layer of soaked ladyfingers followed by the last bit of mascarpone cream on top. Each layer contributes different textures—a symphony of flavors coming together beautifully!
Step 8: Chilling Your Masterpiece
Now comes one of the most important steps: chilling! Cover your assembled tiramisu with plastic wrap (be gentle—you don’t want to disturb those lovely layers!) and place it in the refrigerator for at least 4 hours, but overnight is even better if you can wait that long. Why chill? Well, during this resting phase, all those fabulous flavors meld together into something profoundly satisfying. It’s during these hours that the mascarpone firms up slightly while also softening those ladyfingers further into creamy bliss.
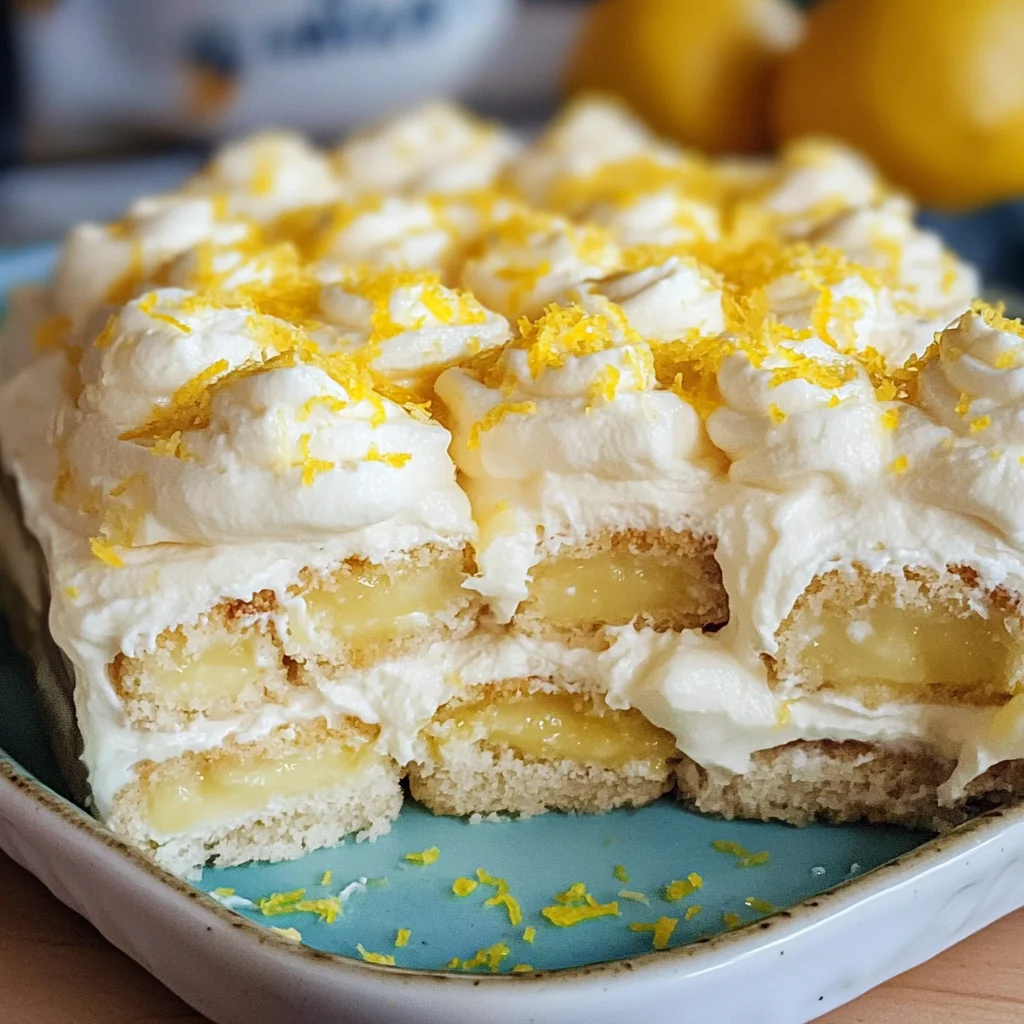
As tempting as it may be to dive right in after assembling—resist! I promise you, allowing it to rest transforms this dessert into something truly extraordinary. When you finally cut into it after chilling, you’ll see beautiful defined layers reveal themselves—a treat for both eyes and taste buds! If you happen to have leftovers (which I highly doubt), know that they’ll only get better with time as those flavors continue mingling!
Conclusion:
As we wrap up this delightful journey through crafting your very own Limoncello Tiramisu, I hope you feel as excited as I do about making this extraordinary dessert! The combination of bright lemon flavors mingling with velvety mascarpone creates an experience that transcends the ordinary. Each layer tells a story—of warmth, joy, and simply indulging in life’s sweetest moments. This recipe isn’t just about food; it’s about creating connections and memories with those we love around us.
Why should you give this recipe a try? Beyond its exquisite taste lies an experience filled with laughter and joy as you gather friends or family around the table. Whether it’s for a festive occasion or simply an afternoon pick-me-up after a long week, serving this Limoncello Tiramisu will undoubtedly elevate any gathering into something truly special! Imagine pulling it from the fridge on a warm day—the tantalizing aroma wafting through the air as everyone eagerly anticipates their first spoonful.
For those moments when you’re looking to impress or spoil yourself a little bit more, consider pairing your tiramisu with fresh berries bursting with flavor or perhaps a cup of aromatic herbal tea that will complement its zesty notes beautifully. Picture enjoying one alongside your favorite gelato or even drizzling some homemade lemon sauce on top—each bite becomes an adventure worth savoring!
Feeling adventurous? This recipe is wonderfully adaptable! Why not swap out some lemon curd for other fruit curds like raspberry or passionfruit? Or add layers of crushed biscuits instead of ladyfingers for added texture and crunch? You could even fold in some fresh herbs like mint into the mascarpone mixture for an unexpected twist. Whatever direction you choose to take, I encourage you to experiment and make this tiramisu truly yours. Share your experiences or variations with me—I would love to hear how you made this recipe even more special!
Limoncello Tiramisu

Indulge in the refreshing delight of Limoncello Tiramisu, a vibrant twist on the classic Italian dessert that captures the essence of sun-soaked summers. This no-bake treat layers delicate ladyfingers soaked in a zesty limoncello syrup with creamy mascarpone and lemon curd, creating an irresistible combination of flavors and textures. Each bite offers a perfect balance of sweetness and tartness, making it the ideal dessert for gatherings or warm evenings. Impress your guests with this elegant yet easy-to-make dessert that promises to transport them straight to an Italian café.
- Prep Time: 30 minutes
- Cook Time: None
- Total Time: 0 hours
- Yield: Approximately 12 servings 1x
- Category: Dessert
- Method: No-bake
- Cuisine: Italian
Ingredients
- 1 1/4 cups water
- 1/3 cup granulated sugar
- 1 cup lemon-flavored soda (or lemon juice mixed with sugar)
- 3 tablespoons fresh lemon juice
- 48 crisp ladyfinger cookies (about two 7 oz packages)
- 24 oz chilled mascarpone cheese
- 15 oz prepared lemon curd
- 2 cups heavy whipping cream
- Zest of 1 lemon
- Powdered sugar for dusting
Instructions
- In a saucepan, combine water and granulated sugar over medium heat, stirring until dissolved. Remove from heat and let cool.
- Stir in lemon-flavored soda (or lemon juice) and fresh lemon juice.
- Soak ladyfingers briefly in the syrup and line them in a baking dish.
- In a bowl, mix mascarpone cheese, lemon curd, additional soda or juice until smooth.
- Fold whipped cream into the mascarpone mixture until well combined.
- Layer half of the cream mixture over soaked ladyfingers, followed by another layer of soaked ladyfingers and then the remaining cream mixture.
- Chill for at least 4 hours before serving. Dust with powdered sugar and sprinkle with lemon zest before serving.
Nutrition
- Serving Size: 1 slice (approximately 113g)
- Calories: 305
- Sugar: 22g
- Sodium: 55mg
- Fat: 21g
- Saturated Fat: 12g
- Unsaturated Fat: 8g
- Trans Fat: 0g
- Carbohydrates: 28g
- Fiber: <1g
- Protein: 3g
- Cholesterol: 67mg