Indulge in Goat Cheese Grilled Cheese with Honey Bliss
There’s something magical about the simple act of making a grilled cheese sandwich. It transcends mere nourishment and becomes a canvas for creativity, a bridge connecting us to cherished memories of home and warmth. As I sit here reminiscing, I’m reminded of lazy Sunday afternoons spent in my kitchen, crafting the perfect gooey delight that is the Goat Cheese Grilled Cheese with Honey Bliss. The way the creamy goat cheese melts into a luscious pool, mingling with the sweet honey, creates an utterly intoxicating experience that elevates this classic comfort food to a new level of sophistication. Trust me when I say that every bite is like a warm hug on a plate—it’s pure bliss.
This recipe is not just about combining ingredients; it’s about embracing the flavors that dance harmoniously together—sweetness from honey, tanginess from goat cheese, and the satisfying crunch of toasted bread. The beauty lies in its simplicity yet profound satisfaction it delivers. You’ll find yourself savoring each bite as if you were indulging in a fine delicacy at a quaint café rather than at your own kitchen table. Plus, it only takes 15 minutes from start to finish! So grab your apron, and let’s embark on this delightful culinary journey together.
Indulge in Goat Cheese Grilled Cheese with Honey Bliss: A Sweet and Savory Delight
If you’re looking for a quick lunch idea that feels indulgent yet light, look no further than this Goat Cheese Grilled Cheese with Honey Bliss. It’s more than just a sandwich; it’s an experience that will entice your taste buds while filling your heart with joy. Whether you’re enjoying it solo or sharing it with loved ones, this dish brings comfort and satisfaction like no other.

Ingredients:
As we embark on this culinary adventure together, let’s take a moment to appreciate each ingredient we’ll be using. Each one plays a vital role in creating the symphony of flavors that makes our Goat Cheese Grilled Cheese with Honey Bliss truly extraordinary.
- 4 oz Goat Cheese. This creamy delight is the star of our dish! I recommend choosing herbed goat cheese for an unexpected twist; those little flecks of herbs add depth and complexity to every bite. Goat cheese boasts a tangy flavor profile that pairs beautifully with the sweetness of honey—it’s a match made in culinary heaven! When selecting goat cheese, look for fresh options at your local market; they should be soft and spreadable but not overly crumbly. If you can find it, consider trying flavored varieties infused with garlic or herbs to elevate this dish even further.
- 2 slices Bread. The foundation of our sandwich deserves careful consideration! Opt for sturdy sourdough or whole grain bread to ensure that it holds up beautifully against the melting cheese and honey drizzle without falling apart. Sourdough offers a delightful tanginess and crunchy crust that complements the creaminess of goat cheese perfectly, while whole grain adds additional fiber and nutrients—a win-win! Make sure your bread slices are thick enough to provide that satisfying chewiness we all crave from a grilled cheese sandwich.
- 2 tbsp Honey. Here comes the liquid gold! Honey brings an enchanting sweetness that balances out the rich flavor of goat cheese so wonderfully. Its floral notes can vary based on the type you choose—from wildflower to clover—and these subtle differences can lead to an utterly unique experience each time you make this recipe. If you’re interested in exploring alternatives, agave syrup is an excellent substitute; it has a similar consistency but offers its own distinct flavor profile that adds diversity to our dish!
- 2 tbsp Butter. Ah, butter—the secret ingredient that makes everything better! Spread generously on both sides of your bread before grilling, butter creates that golden-brown crust which is absolutely paramount in achieving grill marks and enhancing flavor through browning—the Maillard reaction works wonders here! While I love traditional butter for its richness, consider using olive oil for a lighter option if you’re aiming for something slightly healthier without sacrificing taste.
Equipment You’ll Need:
Before diving into cooking bliss, having the right tools on hand will make this process smoother and more enjoyable. These essential partners are crucial in helping us create something truly wonderful!
- Non-stick skillet or griddle – This is where all the magic happens! A non-stick surface ensures our sandwiches cook evenly without sticking or burning—a must-have to achieve that perfect golden crust we’re after!
- Spatula – A good spatula will become your best friend during this process! Use it carefully to flip your sandwiches without squishing them down too much—this will maintain all those glorious layers inside while getting everything crispy outside.
- Knife – To slice through your beautiful creations once they’re done grilling—it’s important for presentation (and yes, perhaps even Instagram-worthy photos)! Choose one that’s sharp enough to cut through crusty bread easily without tearing apart the fillings inside.
Now that we have our ingredients laid out and equipment ready to go, let’s roll up our sleeves and begin preparing this delightful sandwich!
Step 1: Preparing Your Ingredients
First things first: let’s get organized! Start by gathering all our ingredients so they are within reach—it’ll make cooking feel effortless as we progress through each step together. While you’re at it, take out your goat cheese and allow it to come closer to room temperature; softening it just slightly ensures it’s easier to spread later when assembling our sandwiches. Remember: don’t rush this step! Taking time now will save us hassle later on when we want everything perfectly gooey inside!
Step 2: Buttering Up
Next comes one of my favorite steps: buttering the bread! Generously spread about one tablespoon of butter onto one side of each slice—this is crucial because creating that flavorful crust depends heavily on how well we coat our slices before hitting the heat. If you’d rather use olive oil instead (which I support wholeheartedly); simply drizzle some over both sides before placing them onto your skillet or griddle instead! Just remember: whether using butter or oil—we want enough fat so nothing sticks during cooking while still allowing flavors from each component shine through beautifully.
Step 3: Crafting Your Sandwich
With everything prepped nicely now comes perhaps my favorite part—assembling those tasty sandwiches! Place one slice of bread (butter side down) onto your preheated skillet (medium heat works wonders). Now generously layer half of your goat cheese directly atop this piece; don’t hold back here—allow those creamy morsels to melt into every nook possible while ensuring coverage across all edges since no one likes dry bites! Next up: drizzle approximately one tablespoon of honey across those cheesy dreams before gently placing another slice (buttered side up) right on top… oh boy—it’s already looking divine!
Step 4: Sizzling Away
Now we enter into beauty itself—the cooking phase begins as we let these masterpieces sizzle away beneath gentle heat! Allow them around three minutes undisturbed until golden brown appears beneath—it’s essential not too rush this stage as patience leads us toward perfection here—a rushed sandwich could result in uneven browning instead—and trust me—a feast for eyes should equal pleasure upon consumption too! Once you see little bubbles forming along edges peeking out from underneath? That’s when it’s time for flipping… gently slide underneath with spatula lifting carefully—not pressing down hard enough yet again so keep fluff intact inside!
Stay tuned as we continue creating delicious magic together—you’ll find yourself indulging soon enough!
Step 5: Crafting the Perfect Sandwich Base
Let’s dive into the heart of our Goat Cheese Grilled Cheese with Honey Bliss. Take those lovely slices of bread, and let’s make them sing! I recommend using sturdy sourdough or a hearty whole grain bread. These types will not only provide a beautiful structure but also a delightful chewiness that contrasts beautifully with the creamy goat cheese. Start by spreading about one tablespoon of butter on one side of each slice. This is crucial because the butter acts as a protective barrier during grilling, ensuring that the bread gets golden brown and crisp without burning too quickly.
Now, here’s where things get exciting: it’s time to layer on that luscious goat cheese! You’ll want to use about 2 ounces of goat cheese per slice, generously smearing it across the unbuttered side. Trust me when I say this is where your sandwich transforms from simple to extraordinary. The creamy texture of the goat cheese melts beautifully as it heats up, becoming utterly intoxicatingly rich and flavorful. It’s vital to spread the cheese evenly so every bite is a delightful symphony of flavors! Don’t rush this step; take your time to ensure an even layer.
Step 6: The Sweet Surprise – Honey Bliss
Now comes one of my favorite parts – drizzling on the honey! Grab that liquid gold and pour about 1 tablespoon onto each slice of goat cheese. If you’re opting for agave syrup instead, go ahead; it provides an equally delightful depth of sweetness. This isn’t just a sweet addition; it creates a perfect balance with the tangy goat cheese, elevating your grilled cheese experience to extraordinary heights. Remember that sweet and savory is a match made in culinary heaven! The honey will seep into the warm goat cheese as it melts, creating an irresistible gooeyness that you won’t be able to resist.
At this point, you might be wondering if too much honey could overpower the dish. I promise you, it’s all about balance! You want enough honey to enhance the flavors without overwhelming them. The contrast between the sharpness of goat cheese and the sweetness of honey is what makes this combination truly special. Carefully sprinkle a pinch of sea salt over both slices after adding your honey—this little touch will heighten all those beautiful flavors and create layers upon layers of taste that dance on your palate.
Step 7: Building Your Grilled Cheese Masterpiece
With our delicious fillings ready, it’s time to bring these sandwiches together! Place one slice on top of another—cheese and honey facing each other—creating a lovely little sandwich that’s just begging to be grilled. Now, let’s head over to our stovetop! Preheat your skillet over medium heat; patience here is key since rushing can lead to uneven cooking or burnt bread while waiting for that gooey goodness inside to melt properly.
Once your skillet feels invitingly warm (a spritz of water should sizzle away instantly if you’re unsure), carefully lay down your sandwich in the pan—this is where magic happens! Allow it to cook undisturbed for about 3-4 minutes until you see golden brown edges peeking out from beneath. This step is important because it allows the exterior crust to form—a crucial element for achieving that satisfying crunch when you take your first bite.
Step 8: Flip It Like You Mean It!
Now comes my favorite moment—the flip! Using a spatula (and some gentle confidence), carefully turn your sandwich over. You should see a beautifully toasted side staring back at you, promising all sorts of deliciousness within! Cook for another 3-4 minutes on this side until golden brown as well. Feel free to press down lightly with your spatula; this encourages even melting while giving you that sought-after crispy exterior.
As you grill away, don’t forget to keep an eye on heat levels—if things are browning too quickly or if you’re not getting enough melt from within, adjust accordingly by lowering or increasing heat slightly. Each stove varies slightly in temperature and effectiveness, so being attentive will help ensure perfection every time!
And here’s another tip: if you find yourself craving extra flavor, consider sprinkling some fresh herbs like thyme or rosemary into the molten cheesiness right before closing up the sandwich—these tiny additions can make all the difference!
Final Touches: The Grand Reveal
Step 9: Slicing Into Pure Joy
Ahh… once both sides are perfectly bronzed and crispy, remove your masterpiece from the pan and let it rest on a cutting board for just a minute or two—trust me here; allowing your sandwich to rest helps maintain its structure when slicing while giving those molten centers time to cool slightly so they don’t ooze out everywhere at first bite (as tempting as that may sound!).
After resting patiently (I know how hard this can be!), grab a sharp knife and slice through that glorious creation diagonally—it opens up beautifully to reveal layers upon layers of creamy goat cheese intertwined with sweet honey blissfulness waiting inside. At this moment, take a deep breath and revel in those enticing aromas wafting around you; you’ve just created something truly extraordinary!
Serve immediately while still warm alongside fresh fruit slices or perhaps a light salad—the refreshing crunch complements everything so well! And there you have it—a comforting yet sophisticated Goat Cheese Grilled Cheese with Honey Bliss that will leave everyone who tries it feeling happy and satisfied.
So go ahead, indulge yourself—you’ve earned every cheesy bite!
Storage and Enjoyment Tips for Your Indulge in Goat Cheese Grilled Cheese with Honey Bliss
Now that you’ve crafted this heavenly creation, I can almost hear the sizzle as you take your first bite! The gooey goat cheese and sweet honey meld together in a delightful union, bringing comfort like no other. But what about those moments when you find yourself with leftover sandwiches? Fear not! I’m here to guide you on how to preserve this indulgent masterpiece without compromising its divine flavors.
Storing Leftover Indulge in Goat Cheese Grilled Cheese with Honey Bliss
To ensure your leftovers remain as delicious as the day they were made, wrap each sandwich snugly in parchment paper or place them in an airtight container. This will help maintain that perfect crunch while preventing any unwanted sogginess. If stored properly, your Goat Cheese Grilled Cheese with Honey Bliss will keep well for about 2-3 days in the refrigerator. A little pro tip: if you’re worried about the bread getting too soft, you can place a piece of parchment paper between the sandwiches to absorb excess moisture. This small step is crucial for keeping that delightful crispy exterior intact! When it comes to taste after storage, trust me, it still holds up remarkably well—just a quick reheat in a skillet or toaster oven will bring back that melty goodness and crunchy texture we all adore.
Freezing Goat Cheese Grilled Cheese Sandwiches for Later
If you want to take your meal prep game up a notch, consider freezing your Goat Cheese Grilled Cheese sandwiches! To do this, assemble them as usual but skip the cooking part. Wrap each sandwich tightly in plastic wrap or foil and then pop them into a freezer-safe bag or container. They’ll stay fresh for up to three months in the freezer—simple and practical! When you’re ready to indulge again, there’s no need to thaw; just throw them directly onto a hot skillet or griddle and cook until golden brown and heated through. This is such a fantastic option for busy weeknights or lazy weekends when you crave something comforting without spending hours in the kitchen. Imagine pulling one out on a chilly evening, knowing you have that warm, cheesy delight waiting for you—it’s pure bliss!
Goat Cheese Grilled Cheese with Honey Bliss

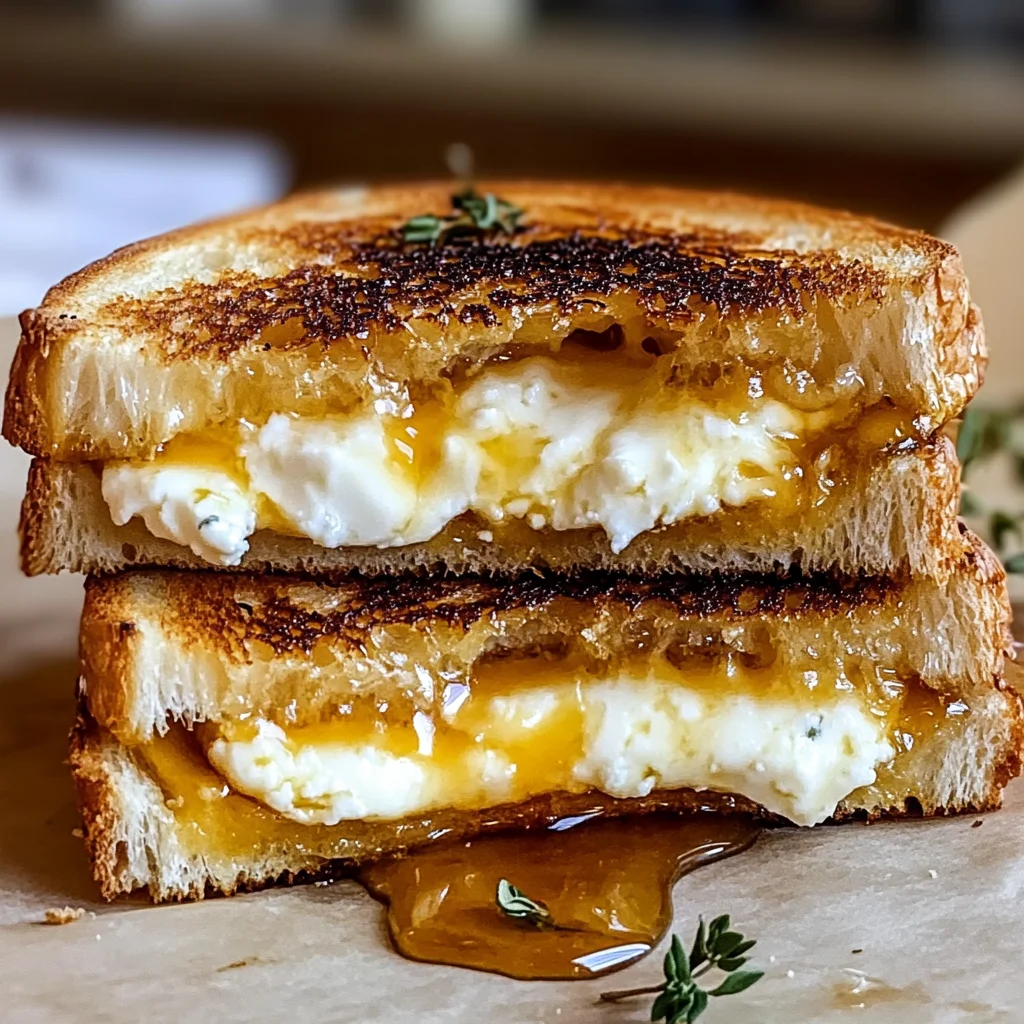
Indulge in a culinary delight with the Goat Cheese Grilled Cheese with Honey Bliss. This irresistible sandwich combines creamy goat cheese and sweet honey, nestled between two slices of crusty sourdough or whole grain bread. The result is a comforting yet sophisticated dish that elevates the classic grilled cheese experience to new heights. Each bite offers a perfect balance of flavors—the tangy richness of goat cheese harmonizes beautifully with the floral notes of honey, all encased in a golden, crispy crust. Ideal for a quick lunch or a cozy dinner at home, this easy recipe takes just 15 minutes from start to finish, making it a splendid choice for any occasion.
- Prep Time: 5 minutes
- Cook Time: 10 minutes
- Total Time: 15 minutes
- Yield: Serves 1
- Category: Dinner
- Method: Grilling
- Cuisine: American
Ingredients
- 4 oz Goat Cheese (herbed recommended)
- 2 slices Sourdough or Whole Grain Bread
- 2 tbsp Honey (or agave syrup)
- 2 tbsp Butter (or olive oil)
Instructions
- Preheat a non-stick skillet over medium heat.
- Spread butter on one side of each bread slice.
- Place one slice butter-side down in the skillet, layer with goat cheese, drizzle honey on top, and cover with the second slice (butter-side up).
- Grill for 3-4 minutes until golden brown, then flip and cook the other side until toasted.
- Let it rest briefly before slicing to serve.
Nutrition
- Serving Size: 1 sandwich (150g)
- Calories: 450
- Sugar: 16g
- Sodium: 650mg
- Fat: 24g
- Saturated Fat: 12g
- Unsaturated Fat: 10g
- Trans Fat: 0g
- Carbohydrates: 43g
- Fiber: 3g
- Protein: 14g
- Cholesterol: 40mg