How to Pickle Red Onions
I’m so excited to share with you a little gem of a recipe that has transformed my meals and added a burst of color and flavor to everything from tacos to salads: pickled red onions! Now, I know what you might be thinking—how could something so simple make such a difference? Well, let me tell you, there’s magic in those vibrant slices. When you take a bite, the tangy crunch dances with the sweetness of the onion, creating an utterly intoxicating experience. This isn’t just food; it’s an adventure for your taste buds, an experience that brings life to even the simplest of dishes.
Learning how to pickle red onions is incredibly easy and requires only about five minutes of your time—yes, just five! You probably have all the ingredients right in your pantry. Imagine opening your fridge and finding a jar filled with these jewel-toned beauties, ready to elevate your meals at a moment’s notice. Whether you’re topping off some avocado toast for breakfast or adding them to your favorite taco night spread, these pickled wonders are sure to impress everyone at the table. Trust me on this; once you try them, they’ll become a staple in your kitchen!
The Irresistible Allure of Pickled Red Onions
There’s something truly special about pickled red onions that goes beyond their taste. They carry with them a sense of nostalgia—reminding many of family gatherings where food was more than a meal; it was love served on a plate. The bright acidity cuts through rich flavors and adds brightness to any dish, making them perfect for summer barbecues or cozy winter dinners alike. A few years back, I stumbled upon this quick pickling method while trying to jazz up my weeknight meals. The result was nothing short of revolutionary! Not only do these onions complement savory dishes beautifully, but they also bring out hidden flavors in foods you might not expect.
As we dive into this recipe together, I want you to feel empowered and enthusiastic. I promise you that once you’ve mastered how to pickle red onions, you’ll find yourself experimenting with different spices and flavors in no time. It’s not just about following steps; it’s about playing with tastes and discovering what makes your palate sing! So grab your apron and let’s embark on this culinary journey together!
How to Pickle Red Onions: A Vibrant Addition to Your Table
Let’s gather our ingredients and get started on this delightful endeavor! Pickling is such an enriching process that transforms ordinary ingredients into something extraordinary.
Ingredients:
As we embark on this culinary adventure, each ingredient plays an essential role in creating that perfect balance of sweet and tangy goodness.
- 1 red onion (thinly sliced). Ah, the star of our show! Red onions are known for their slightly sweet flavor and beautiful hue. When thinly sliced (and I highly recommend using a mandoline for uniformity!), they absorb the pickling liquid beautifully while still retaining their crisp texture. If you’re looking for alternatives due to availability or preference, shallots can offer a similar sweetness but will have a milder flavor profile.
- 1/2 cup apple cider vinegar. This ingredient is like liquid gold in our recipe—it brings acidity that balances out the sweetness of the sugar and cuts through the sharpness of the onion. Apple cider vinegar has its own unique fruity notes that enhance the overall flavor profile without overwhelming it. If you’re out of apple cider vinegar, white wine vinegar can work as an excellent substitute while still delivering that necessary tang.
- 1 tablespoon granulated sugar. Sweetness is absolutely paramount here! The sugar helps mellow out the sharp bite of the onion while working in harmony with the vinegar’s acidity. This sweet-tangy balance is what makes pickled onions so irresistible! For those who prefer alternatives due to dietary restrictions or preferences, feel free to use honey or agave syrup; just remember it may alter the flavor slightly.
- 1 1/2 teaspoons salt. Salt is not merely seasoning here; it plays a crucial role in enhancing flavors while also aiding in preservation by drawing moisture from the onions. This step ensures we get those perfectly crunchy bites everyone loves! Sea salt is preferable as it dissolves easily—just avoid table salt if possible since its additives can affect taste.
- 1 cup hot water (not boiling). This step helps dissolve both the sugar and salt efficiently while ensuring that our pickling mixture cools down quickly enough for our onions to soak up those vibrant flavors without wilting away. It’s vital not to use boiling water as it could cook our delicate onions instead of properly pickling them!
Equipment You’ll Need:
Having the right tools makes all the difference when preparing our delightful pickled red onions! These tools will help ensure that everything goes smoothly as we create this delicious condiment together.
- Mandoline slicer – While you can certainly use a sharp knife for slicing your onions, a mandoline provides consistent thickness with minimal effort—this guarantees even absorption during pickling! Take care when using it though; those blades are incredibly sharp!
- Measuring cups and spoons – Precision matters when balancing flavors; having reliable measuring tools ensures your ratios remain spot-on every time you make these lovely pickles.
- Jar (or bowl) – Choose whatever fits best in your fridge! A glass jar with an airtight lid is ideal for storing your pickles as it keeps everything fresh while allowing easy access at mealtime. If using a bowl instead, cover it tightly with plastic wrap.
- Stirring utensil – A simple spoon will do wonders here! You’ll need this tool for mixing up our brine—ensure it’s one that won’t scratch any surfaces if you’re using non-stick materials.
Now that we’ve gathered our ingredients and equipment together let’s dive into preparing these scrumptious pickled red onions!
Step 1: Slice Your Onions with Care
To begin our journey into pickling perfection, we start by slicing our lovely red onion thinly—aiming for transparency rather than thick chunks will yield better results in terms of flavor absorption later on! Using a mandoline slicer guarantees uniformity and speed; however, if you’re more comfortable wielding a knife instead, just take your time ensuring each slice remains as even as possible since this affects how well they’ll pickle over time. As you slice through those layers of purple goodness, inhale deeply—the smell is both pungent yet sweet—a tantalizing prelude to what’s coming next!
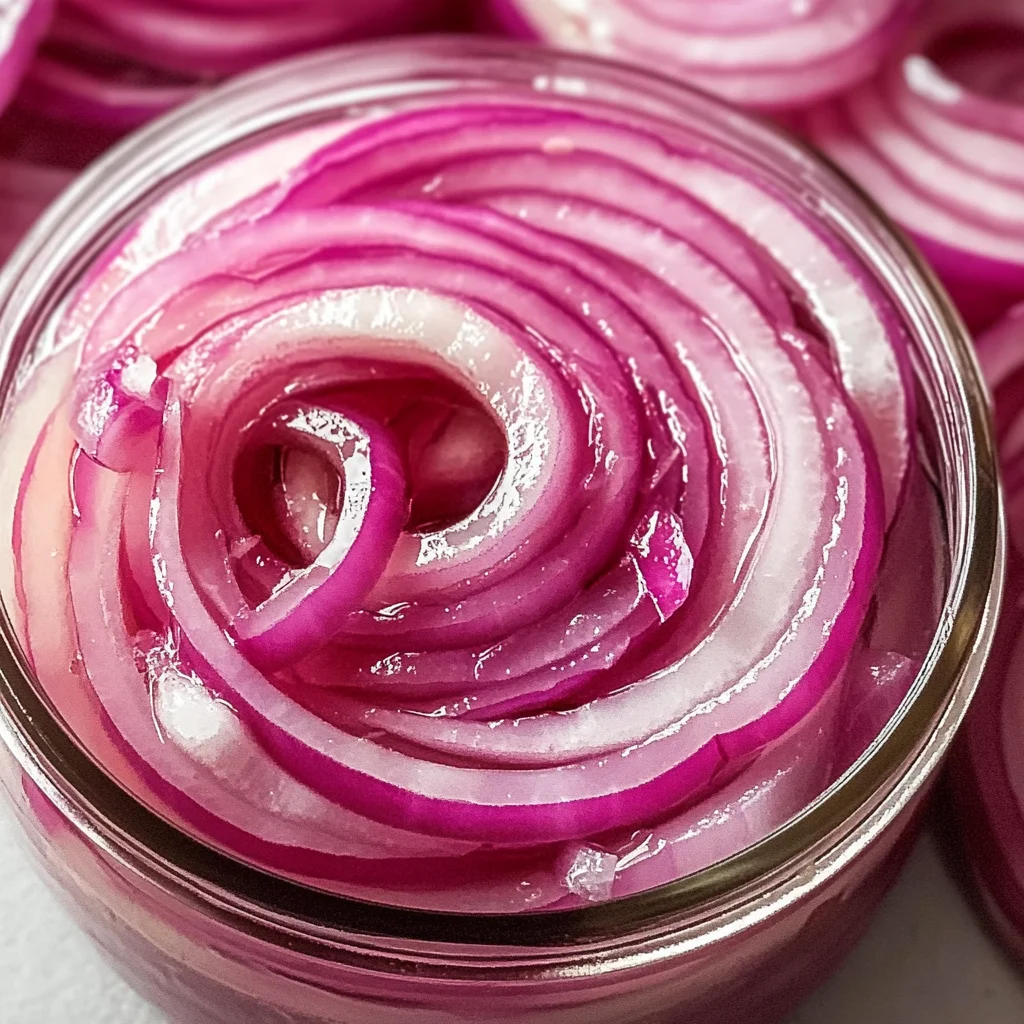
Step 2: Pack Your Jar
Next up comes one of my favorite parts: packing those vibrant onion slices tightly into your chosen jar! As you stuff them in there lovingly (don’t be shy!), think about how each piece will soak up all that magical brine we’re about to create together. Feel free to layer them nicely or simply toss them in haphazardly; either way works wonders—just make sure they’re snug enough so none float above the liquid later on because submerged equals optimal flavor infusion!
Step 3: Create Your Brine
Now let’s whip up our brine—it’s where all the alchemy happens! In a measuring cup (or bowl), combine apple cider vinegar, sugar, salt, and hot water before giving it all good stir until both salt crystals dissolve entirely along with any granules from sugary bliss lingering nearby too—this process sets us up perfectly for infusing bold flavors into every bite later on down the line! Remember: patience pays off here—you want everything incorporated seamlessly without any lingering particles messing around within our mix!
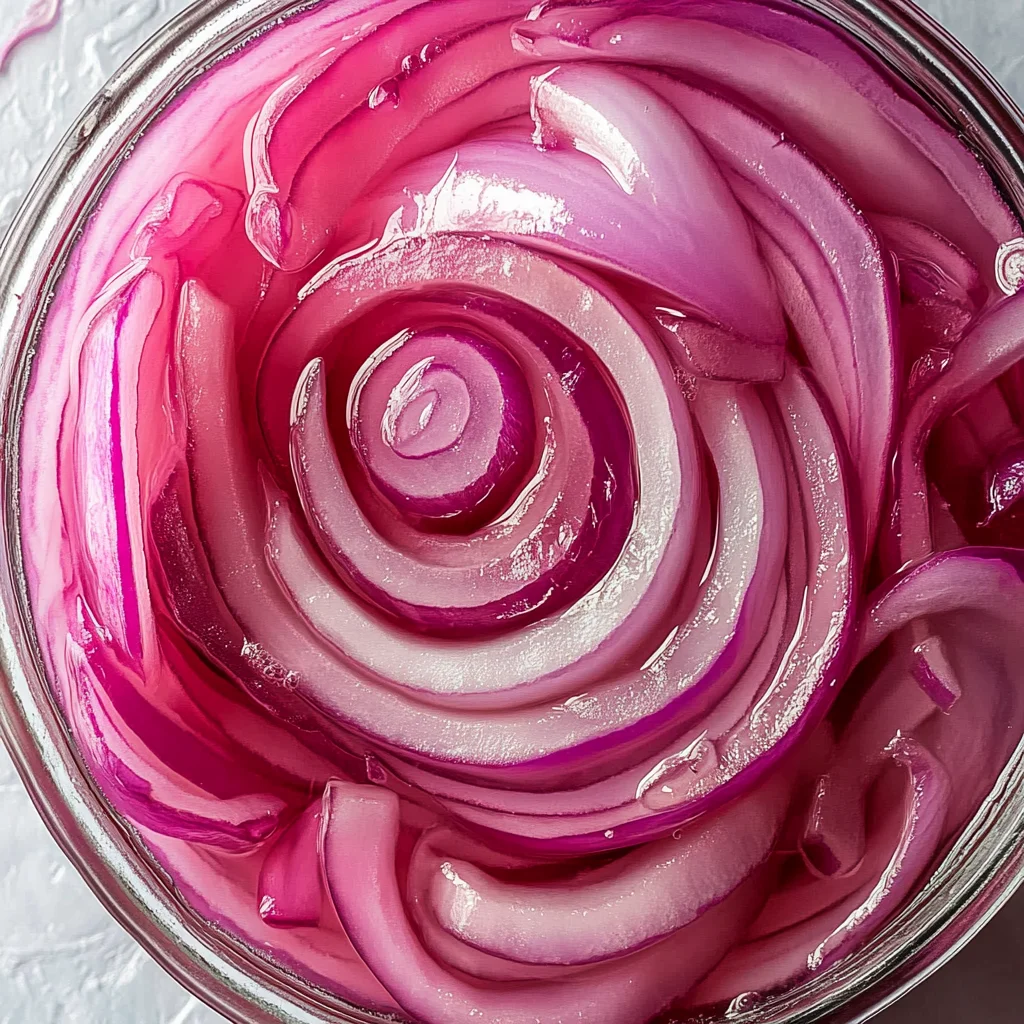
Step 4: Pour Over Your Onions
With brine ready and waiting patiently by its side comes perhaps one of my most cherished moments—the pouring ceremony! Gently pour this fragrant concoction over those packed onion slices until they’re completely submerged beneath its surface—this step is absolutely non-negotiable because if any bits peek above water level…well then they might spoil instead of getting delightfully tangy like their submerged friends below! Once poured over adequately (and trust me when I say watching those colors swirl together feels almost poetic), set aside covered tightly at room temperature for one hour before transferring straight into fridge storage where they’ll continue developing flavor profiles beautifully over time!
I hope you’re feeling inspired by now—we’re crafting something truly extraordinary here together every step along way—and soon enough these remarkable picks will grace countless dishes ahead bringing joy along every bite shared amongst family friends alike! Stay tuned because there’s so much more goodness coming soon…
How to Pickle Red Onions: The Final Steps
Step 5: Time to Immerse – Making the Magic Happen
Now that your beautifully sliced red onions are snugly packed in their jar, it’s time to craft that enchanting pickling liquid that transforms these vibrant rings into a culinary masterpiece. In a measuring cup, combine 1/2 cup of apple cider vinegar, 1 tablespoon of granulated sugar, and 1 1/2 teaspoons of salt. This combination is not just about flavor; it’s a science! The acidity from the vinegar is pivotal as it acts as a preservative while adding that delightful tang that we adore in pickled items. Sugar plays its own role here, balancing out the sharpness of the vinegar and enhancing the natural sweetness of the onions themselves. Trust me, this delicate balance is what makes your pickled red onions utterly intoxicating!
Next comes the hot water—1 cup of it, but remember, it should be hot, not boiling. This temperature isn’t just for show; it helps dissolve the sugar and salt quickly, allowing them to meld seamlessly into the mixture. Stir everything well until you see those granules disappear into the liquid like they were never there. Pour this enchanting concoction over your onions, ensuring every ring is submerged in this fragrant potion. It’s crucial that all the onions are completely covered because exposure to air could lead to spoilage or uneven pickling. If you happen to have any leftover liquid, don’t worry; it’s always better to have extra than not enough! Seal up your jar tightly and let it sit for an hour at room temperature—this step is essential for letting those flavors mingle and penetrate every layer of onion.
Step 6: Patience is Key – Letting Them Rest
Ah, waiting can be so hard sometimes! But I promise you, this hour will feel like magic as your kitchen fills with an aroma that’s both refreshing and tantalizing. During this time, something extraordinary happens—the vinegar starts to work its wonders on those crisp onion slices. The color will deepen from a vivid purple to a softer shade, creating a visual feast that’s just as appealing as the taste! Don’t rush this step; give those onions time to absorb all that tangy goodness and let them become more than just raw vegetables—they’re transforming into something profoundly satisfying.
If you’re wondering why we let them rest at room temperature instead of tossing them straight into the fridge, it’s because warmth accelerates the infusion process. You want those onions to soak up every bit of flavor before they chill out in their cool home. After an hour has passed (though I know you might be tempted to sneak a taste!), it’s time for their next adventure—into the refrigerator for proper storage.
Step 7: Chill Out – Storing Your Creation
Once your hour of patience has finally come to an end, you can confidently cover your jar with its lid and place it in the fridge where they will continue their transformation in a cooler environment. These pickled red onions can last up to three weeks if stored correctly—though I doubt they’ll stick around that long because they’re simply too good! The cooling process enhances their crisp texture while allowing those flavors to deepen even further. Over time, you’ll notice how each bite becomes more complex—a beautiful interplay between tartness and sweetness that brings life to any dish.
As you’re storing them away, make sure they’re packed tightly but not overly squished; you want air circulation for optimal pickling without risking mushiness. And here’s a little insider tip: If you find yourself needing a burst of flavor during meal prep or dinner time, just reach for these stunning beauties anytime—be it on tacos, alongside grilled vegetables, or even atop a simple salad!
Step 8: Enjoying Your Pickled Red Onions
Now comes the best part—enjoying your creation! When you’re ready to indulge in these delectable pickled red onions after their chill session (which should preferably be at least four hours later), grab a fork and dig in! You’ll immediately notice how they’ve transformed into colorful gems bursting with flavor—a true testament to how simple ingredients can create something extraordinary.
I encourage you to experiment with different dishes using these vibrant toppings. They can elevate anything from avocado toast topped with creamy goodness and fresh herbs to being an essential addition on top of spicy tacos or grilled meats (or plant-based options!). The versatility is fantastic—you might even find yourself coming back for more every day! Remember that sharing food is sharing love; so don’t hesitate to whip up another batch when friends come over or when family gathers around the dinner table.
Conclusion:
As we wrap up this delightful journey through learning how to pickle red onions, I hope you feel as excited as I do about bringing this simple yet profoundly satisfying recipe into your kitchen! It’s not just about the technique; it’s about infusing your meals with vibrant flavors that dance on your palate and bring joy to those around you. The balance of sweetness from the sugar paired with the tangy apple cider vinegar creates a symphony of tastes that elevates any dish from ordinary to extraordinary. And let’s not forget those gorgeous hues—every layer of onion glistens like jewels waiting to be savored!
This recipe is an absolute must-try for anyone who loves cooking as much as I do—not only because it’s super easy but also because it opens up a world of possibilities in your culinary repertoire. Think about how versatile these pickled red onions can be: serve them atop grilled veggies at summer barbecues or toss them into salads for an added crunch that makes every bite sing! Picture yourself pulling open that refrigerator door on a hectic evening, grabbing your jar of pickled red onions, and transforming a simple meal into something magical.
Imagine savoring one with tacos bursting with flavor or spooning some onto creamy avocado toast for an afternoon pick-me-up; they’re simply irresistible! For a truly decadent experience, pile these tangy morsels onto burgers or sandwiches where their crispness provides such an enjoyable contrast against richer ingredients. The possibilities are endless!
Feeling adventurous? This recipe is wonderfully adaptable—you could introduce spices like cumin or coriander into the brine for an extra layer of complexity or even experiment with adding sliced jalapeños for some heat. You might consider substituting white vinegar if you’re looking for something sharper or try using different types of sweeteners like honey or agave syrup for distinct flavor notes. Each variation presents its own personality while still providing that unforgettable crunch we all crave! So go ahead—experiment boldly! I invite you to try this recipe today, share your experiences with loved ones, and connect over food that’s made with love.
How to Pickle Red Onions
Experience the vibrant flavor of pickled red onions, a simple yet transformative condiment that can elevate any dish! In just five minutes, you can create tangy, crunchy slices that add a burst of color and taste to tacos, salads, or sandwiches. This quick pickling method infuses the onions with a delightful balance of sweetness and acidity from apple cider vinegar, making them a must-have in your kitchen staples. Imagine reaching for a jar filled with these jewel-toned beauties whenever you need an instant flavor boost—once you try this recipe, you’ll never look back!
- Prep Time: 5 minutes
- Cook Time: N/A
- Total Time: 0 hours
- Yield: Approximately 1 cup (serves about 4) 1x
- Category: Condiment
- Method: Pickling
- Cuisine: American
Ingredients
- 1 red onion (thinly sliced)
- 1/2 cup apple cider vinegar
- 1 tablespoon granulated sugar
- 1 1/2 teaspoons salt
- 1 cup hot water (not boiling)
Instructions
- Thinly slice the red onion using a mandoline or sharp knife.
- Pack the onion slices tightly into a glass jar.
- In a measuring cup, combine apple cider vinegar, sugar, salt, and hot water; stir until dissolved.
- Pour the brine over the onions until fully submerged.
- Let sit at room temperature for one hour, then refrigerate.
Nutrition
- Serving Size: 1/4 cup (40g)
- Calories: 15
- Sugar: 3g
- Sodium: 280mg
- Fat: 0g
- Saturated Fat: 0g
- Unsaturated Fat: 0g
- Trans Fat: 0g
- Carbohydrates: 4g
- Fiber: 0g
- Protein: 0g
- Cholesterol: 0mg