Hot Honey Pickled Carrots: A Sweet and Spicy Delight!
There’s something truly enchanting about the way food can connect us, isn’t there? The kitchen transforms into a sacred space where memories are made and flavors meld into something utterly intoxicating. Hot Honey Pickled Carrots: A Sweet and Spicy Delight! is more than just a recipe; it’s a celebration of contrast—sweet honey meeting fiery red pepper flakes in a dance that ignites the senses. Imagine biting into a crisp carrot stick that has soaked up the harmony of tangy apple cider vinegar and the warmth of garlic, all while that sweet heat lingers on your tongue. It’s not just nourishment; it’s an experience that brings joy to your palate and warmth to your heart.
I’ve always been captivated by how pickling, a time-honored technique, allows us to preserve not just vegetables but also moments in time. Each jar of these vibrant carrots tells a story—a story of simplicity, creativity, and the beauty of homemade goodness. Whether you’re looking to jazz up your weeknight meals with an exciting side dish or seeking a crunchy snack that packs a punch, these Hot Honey Pickled Carrots are your answer. They’re versatile, easy to prepare, and simply irresistible. I promise you they’ll become a staple in your kitchen—trust me on this!
Hot Honey Pickled Carrots: A Sweet and Spicy Delight!: Elevate Your Snack Game
Let’s dive into this delightful recipe together! Making Hot Honey Pickled Carrots is not only straightforward but also incredibly rewarding. The colors alone will brighten your day—the vibrant orange of fresh carrots paired with the rich amber hue of honey makes for an inviting presentation. As we embark on this culinary journey, you’ll soon find yourself weaving these pickled beauties into salads, sandwiches, or simply enjoying them straight from the jar.
Ingredients:
Before we get started, let’s gather our ingredients! Each one plays its own essential role in crafting these sweet and spicy sensations.
- 1 pound carrots: Freshness is key here; opt for firm, vibrant carrots that snap crisply when broken—these will provide the best texture for our pickles. Choose organic if possible; their flavor tends to shine brighter without the interference of pesticides. When preparing them, you can either slice them into sticks or rounds depending on your preference—both shapes absorb those delicious pickling flavors beautifully.
- 1 cup apple cider vinegar: This tangy liquid gold is crucial for balancing out the sweetness of honey and creating that tangy bite that makes pickles so addictive. Look for raw apple cider vinegar with the mother if you can; it contains beneficial bacteria that contribute to gut health while enhancing flavor complexity. Apple cider vinegar’s acidity helps preserve our carrots while infusing them with its distinctive taste.
- 1/2 cup honey: Ahh, honey—the sweet elixir that ties everything together! It brings warmth and depth to our pickles while also acting as a natural preservative. Choose high-quality local honey if you can; each variety carries its own unique flavor notes depending on the flowers visited by bees. If you prefer less sweetness or have dietary restrictions, feel free to substitute with maple syrup or agave nectar—both work wonderfully!
- 1 teaspoon red pepper flakes: This ingredient adds just the right amount of heat to create that tantalizing kick! Adjusting the amount allows you to customize the spice level based on your taste preferences—don’t hesitate to start small if you’re sensitive to spice! These flakes also bring vibrant color and texture to our pickles.
- 1 teaspoon salt: Salt isn’t just seasoning here; it plays an integral role in drawing out moisture from our carrots while enhancing their natural flavors. Use kosher salt or sea salt for the best results—they dissolve easily and don’t contain additives like regular table salt.
- 1 teaspoon black peppercorns: Whole black peppercorns contribute aromatic complexity and subtle warmth throughout our pickling mixture. You’ll enjoy discovering these little bursts of flavor as they gently infuse their essence into the carrots over time.
- 2 cloves garlic: Garlic is transformative—it adds depth and richness while providing a pungent kick that contrasts beautifully with sweetness. Feel free to slice or crush them before adding them to ensure their flavor permeates every bite!

Equipment You’ll Need:
To make our Hot Honey Pickled Carrots truly shine, having some essential tools at hand will make everything smoother and more enjoyable.
- Saucepan: A good-quality saucepan is vital for combining our liquid ingredients evenly over heat. Opt for one with a heavy bottom which prevents scorching—this ensures even heating as we simmer our pickling mixture together.
- Cutting board & knife: A sturdy cutting board and sharp knife are non-negotiable for safely preparing those delightful carrot sticks. The right knife can make quick work of slicing—just be sure your blade is sharp enough for clean cuts without bruising or damaging the produce.
- Jar or airtight container: Once we’ve prepared those stunning pickles, storing them properly is crucial! A mason jar works wonderfully here; its wide mouth makes filling easy while allowing air circulation during cooling time. Ensure it’s clean and dry before transferring your pickles in!
- Measuring cups & spoons: Accurate measurements help ensure success! Using standard measuring tools will guarantee consistency each time you whip up this recipe—and who doesn’t want perfect results?
Preparing the Hot Honey Pickled Carrots: A Sweet and Spicy Delight!
Step 1: Create Your Flavorful Brine
Start by adding 1 cup of apple cider vinegar along with ½ cup of honey into your saucepan over medium heat—a delightful marriage waiting to happen! As they mingle, sprinkle in 1 teaspoon each of red pepper flakes, salt, and black peppercorns alongside those aromatic cloves of garlic (whole or sliced according to preference). This initial simmering step allows all those flavors to meld beautifully before introducing our star ingredient—the carrots! Stir gently as it heats until everything dissolves harmoniously into one cohesive brine; this process should take about 5 minutes—but keep an eye on it! You want just enough heat so things come together without boiling away those delicate flavors we worked hard to extract from each ingredient.
Step 2: Add Your Carrots
Once complete, lower the heat slightly (this is crucial!) before introducing freshly prepared carrot sticks into this fragrant potion bubbling away before you! Gently stir them about ensuring every piece gets coated thoroughly in that syrupy goodness—we want every carrot stick infused with all those glorious flavors we created earlier! Allow them to simmer lovingly for another 3-5 minutes until they soften slightly but maintain some crunch—after all, nobody wants mushy pickles! This momentary cooking brings out their natural sweetness as well while still retaining some satisfying texture—you’ll thank yourself later when biting into one!
Step 3: Let Them Cool
Once done simmering, remove from heat but don’t rush this step—patience pays off here! Letting these marvelous carrot sticks cool down for about ten minutes means they absorb even more flavor from their surroundings—and trust me; skipping this could mean missing out on half their potential deliciousness later when it comes time to munch down on them!
Step 4: Transfer Into Jars
Now comes my favorite part—the transformation into beautiful jars full of vibrant color! Carefully transfer both carrots AND brine into your chosen mason jar or airtight container (make sure it’s clean!). As you do so ensure those lovely sticks remain fully submerged beneath liquid—we want maximum contact for optimal flavor penetration throughout every bite later on down the line! If needed add additional vinegar until everything is covered completely—it’s absolutely paramount!
I can already tell you’re going to love these Hot Honey Pickled Carrots as much as I do! With each step taken thoughtfully along this journey towards deliciousness—you’re bound for success ahead! Keep an eye out because next we’ll cover how long they should pickle before indulging…
Step 5: The Art of Simmering the Flavor Symphony
Now that your magical blend of apple cider vinegar, honey, red pepper flakes, salt, black peppercorns, and garlic is ready to go, it’s time for the simmering stage. This step is absolutely paramount in transforming these simple ingredients into a truly extraordinary pickling liquid. Pour everything into a medium saucepan and turn your heat to medium. I want you to keep an eye on it—this isn’t just about bringing it to a boil; it’s about coaxing the flavors together gently. You’ll know you’re on the right track when you see tiny bubbles forming around the edges and the aroma begins to fill your kitchen with that utterly intoxicating scent of sweet and spicy notes mingling together.
Let this mixture simmer for about 5-7 minutes, stirring occasionally—not too much though! We want to allow the flavors to develop without over-agitating them. The magic happens when the honey dissolves completely into the vinegar, creating what I like to call liquid gold. At this point, take a moment to breathe in deeply—the warm, inviting scent is a precursor to what’s about to come! Once this simmering potion has had its moment, remove it from the heat and let it cool slightly before moving on. This cooling period is essential as it allows all those lovely flavors to meld even further.
Step 6: The Carrot Preparation Ritual
While your infusion cools down ever so slightly, let’s talk about those carrots. Choosing the right ones can make or break your Hot Honey Pickled Carrots experience! You’ll want fresh, firm carrots—think about those vibrant orange beauties that crunch delightfully under your knife. Grab a cutting board and peel them if you prefer that cleaner aesthetic; however, leaving the skins on adds texture and nutrients. Cut them into sticks—around 3-4 inches long and about half an inch thick is ideal. This size not only ensures they pickle well but also makes for easy snacking later on!
Now here’s where patience comes into play again: don’t rush this step! Take your time as you cut; think of each slice as a moment in this culinary journey we are sharing together. Once they’re all cut up, give them a quick rinse under cold water to remove any dirt or debris. This little wash helps ensure that each carrot stick will absorb every ounce of that delicious brine we’ve created. Trust me on this—clean ingredients lead to clean flavors!
Step 7: The Coating Dance
With your brine still warm and ready for action, it’s time for our star ingredient—the carrots—to join the party! Carefully add those beautifully chopped carrot sticks into the simmering mixture. I want you to think of this as an embrace; both the brine and carrots need to gently hug each other for maximum flavor absorption. Use a wooden spoon or spatula to stir them gently but thoroughly; just be careful not to break them apart!
As you stir, watch how quickly the brine coats these crunchy sticks—it’s almost mesmerizing! The warmth of the mixture acts like a magnet for those vibrant carrot pieces, encouraging them to soak up all that sweet yet spicy goodness. It’s during this brief moment that things start getting exciting; every stir contributes layers upon layers of flavor waiting to be unlocked later when you dive in for a taste. Keep everything on low heat for about another minute before removing it from heat altogether—you want those carrots slightly cooked but still crisp enough that they maintain their delightful crunch.
Step 8: Cooling Down and Marinating Magic
After stirring in those gorgeous carrot sticks, it’s time for some cooling magic! Transfer everything—the glorious mixture of carrots and brine—into a clean jar or an airtight container if that’s what you’ve got handy. Make sure each carrot piece is fully submerged in that sweet-and-spicy elixir; this is non-negotiable because every inch needs to soak up those flavors beautifully over time! If necessary, consider using something clean (like a small plate) pressed down against the carrots inside the jar—this keeps them submerged while they chill.
Now comes one of my favorite parts: waiting patiently while these Hot Honey Pickled Carrots transform into something truly special! Allow them to cool at room temperature for about 10 minutes before sealing up that container tightly and placing it in your fridge. Here’s where time becomes an ingredient itself—it’s crucial not just for flavor but also texture! For best results (and trust me on this), allow them at least 24 hours in the fridge before digging in; I promise you won’t regret letting those flavors mingle longer! However, if you can stand it—and I know it’s tough—waiting several days will elevate your pickled carrots from deliciously good to absolutely unforgettable!
Next Major Phase: Enjoying Your Sweet and Spicy Creations
Once you’ve allowed those Hot Honey Pickled Carrots their well-deserved marination period in your refrigerator, it’s finally time for a taste test—a rite of passage after all this hard work! You’ll notice how they’ve transformed into vibrant bites filled with color and flavor that sings harmoniously with every crunch.
Step 9: The Grand Taste Test
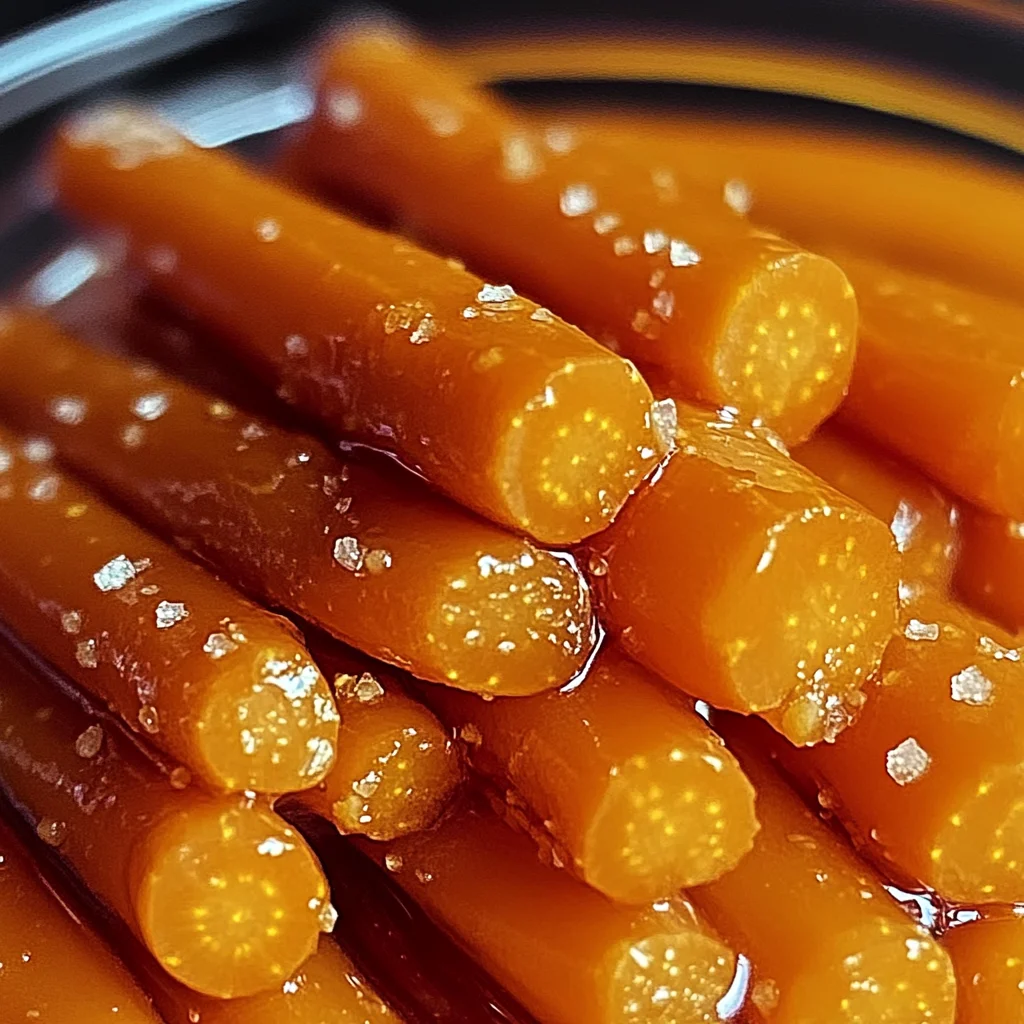
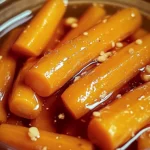
As you pop open that jar filled with beautiful orange jewels glistening in their syrupy bath, take a moment just to admire what you’ve created—the colors are stunningly vivid against the backdrop of golden liquid! Grab a fork or simply use your fingers (because let’s be real—sometimes food is meant to be enjoyed without utensils).
Take one delightful bite and let it linger on your palate; feel how sweet honey dances alongside fiery red pepper flakes before being grounded by tangy apple cider vinegar—the balance is nothing short of extraordinary! You might find yourself savoring each bite slowly as memories flood back; perhaps serving these at dinners with friends or packing them away as snacks during busy workdays are moments worth cherishing forever.
These Hot Honey Pickled Carrots aren’t just snacks—they’re stories waiting to be shared around tables filled with laughter or enjoyed quietly while contemplating life’s little joys. You’ve poured love into every step of this recipe; now relish in its culmination because nothing brings people together quite like good food made with passion!
So there you have it—a journey of flavors wrapped up nicely in jars waiting eagerly for their debut on your table or as quick bites throughout bustling days ahead! Happy pickling!
Storage and Enjoyment Tips for Your Hot Honey Pickled Carrots: A Sweet and Spicy Delight!
Oh, my friends, the moment you’ve been waiting for is finally here! Your Hot Honey Pickled Carrots are ready to shine in all their vibrant glory. Just picture that crunchy texture combined with a delightful burst of sweet and spicy flavors dancing on your palate – it’s nothing short of magical! Now, let’s talk about how to best enjoy these beauties and make sure they stay fresh and fabulous for as long as possible.
Storing Leftover Hot Honey Pickled Carrots: A Sweet and Spicy Delight!
To keep your Hot Honey Pickled Carrots at their peak, transfer them into a clean glass jar or an airtight container. This is absolutely paramount, as glass allows you to see the colorful carrots while also keeping them fresh without any unwanted odors seeping in. When stored properly in the refrigerator, these pickled marvels can last for up to three weeks. Trust me when I say that they only get better with time! As they marinate further, the flavor deepens and becomes even more intoxicatingly delicious. If you want to maintain their crispness, consider placing a slice of bread in the jar; this little trick helps absorb excess moisture. When you’re ready to serve them again, simply pull them out of the fridge and enjoy them chilled or at room temperature—no reheating required!
Freezing Hot Honey Pickled Carrots for Later
If you’re thinking about making a big batch of these enticing pickles (and who wouldn’t want that?), freezing is a fantastic option! To do this correctly, let your pickled carrots cool completely before transferring them into freezer-safe bags or containers. Make sure to leave some space at the top of your container since liquids expand when frozen. These delightful carrots can be kept frozen for up to six months without losing their flavor or crunch! When you’re ready to indulge again, simply thaw them overnight in the refrigerator before using them in salads, sandwiches, or as a fabulous topping for tacos. The convenience of having these vibrant little gems on hand is simply too good to pass up!
Hot Honey Pickled Carrots: A Sweet and Spicy Delight!
Bring a burst of flavor to your meals with these Hot Honey Pickled Carrots! This quick and easy recipe marries the sweetness of honey with the heat of red pepper flakes, resulting in a crunchy, tangy treat that’s perfect for snacking, salads, or as a vibrant side dish. Each crisp carrot stick absorbs the delightful brine made from apple cider vinegar and garlic, creating a pickle that tantalizes your taste buds. With their bright color and zesty flavor, these pickled carrots are not only delicious but also incredibly versatile. Whether enjoyed straight from the jar or added to your favorite dishes, they promise to elevate any meal!
- Prep Time: 15 minutes
- Cook Time: 10 minutes
- Total Time: 25 minutes
- Yield: Approximately 8 servings 1x
- Category: Snack
- Method: Pickling
- Cuisine: American
Ingredients
- 1 pound fresh carrots
- 1 cup apple cider vinegar
- 1/2 cup honey
- 1 teaspoon red pepper flakes
- 1 teaspoon salt
- 1 teaspoon black peppercorns
- 2 cloves garlic
Instructions
- In a saucepan over medium heat, combine apple cider vinegar and honey. Stir in red pepper flakes, salt, black peppercorns, and garlic. Simmer for 5 minutes until well mixed.
- Add carrot sticks to the saucepan and simmer for an additional 3-5 minutes until slightly tender but still crisp.
- Remove from heat and let cool for about 10 minutes.
- Transfer the carrots and brine into a clean jar or airtight container ensuring the carrots are submerged in liquid.
- Cool completely before sealing and refrigerating for at least 24 hours for optimal flavor.
Nutrition
- Serving Size: 1/4 cup (60g)
- Calories: 55
- Sugar: 11g
- Sodium: 290mg
- Fat: 0g
- Saturated Fat: 0g
- Unsaturated Fat: 0g
- Trans Fat: 0g
- Carbohydrates: 14g
- Fiber: 2g
- Protein: 0g
- Cholesterol: 0mg