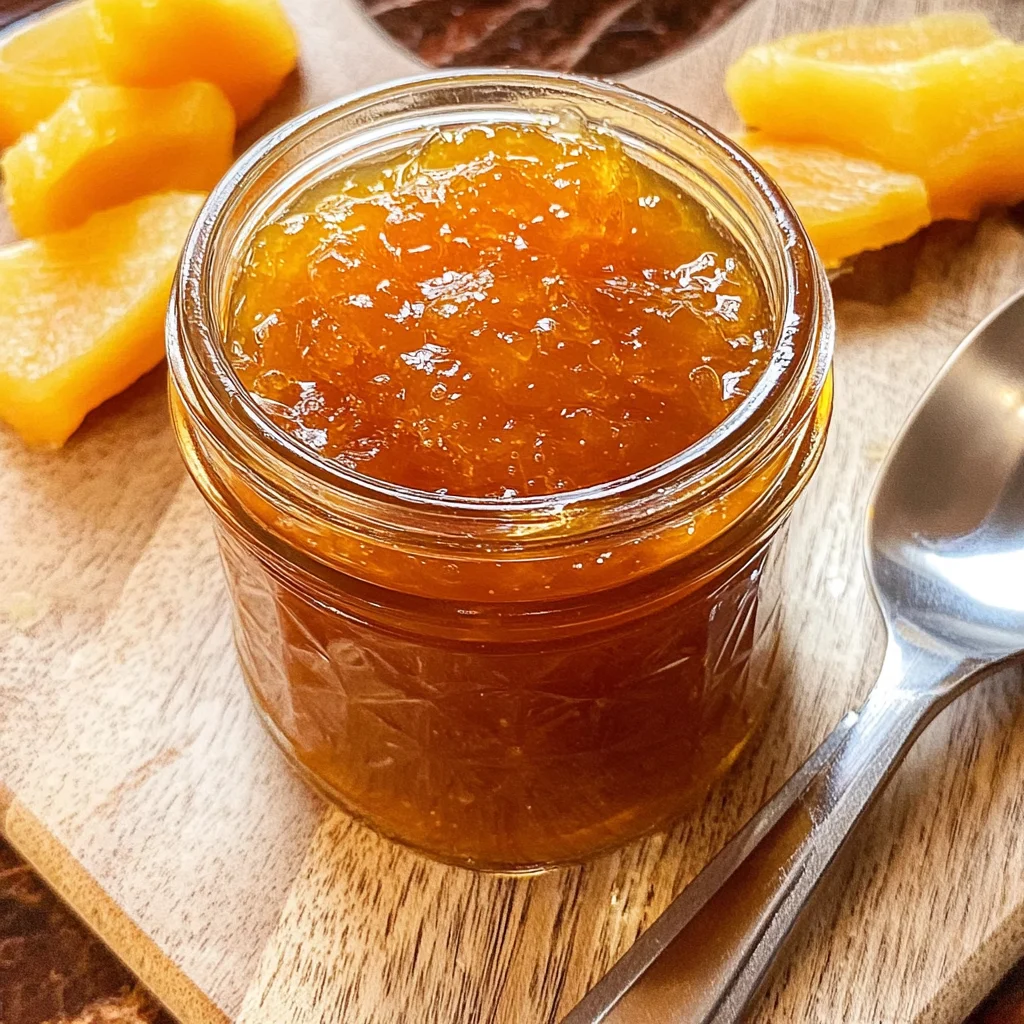
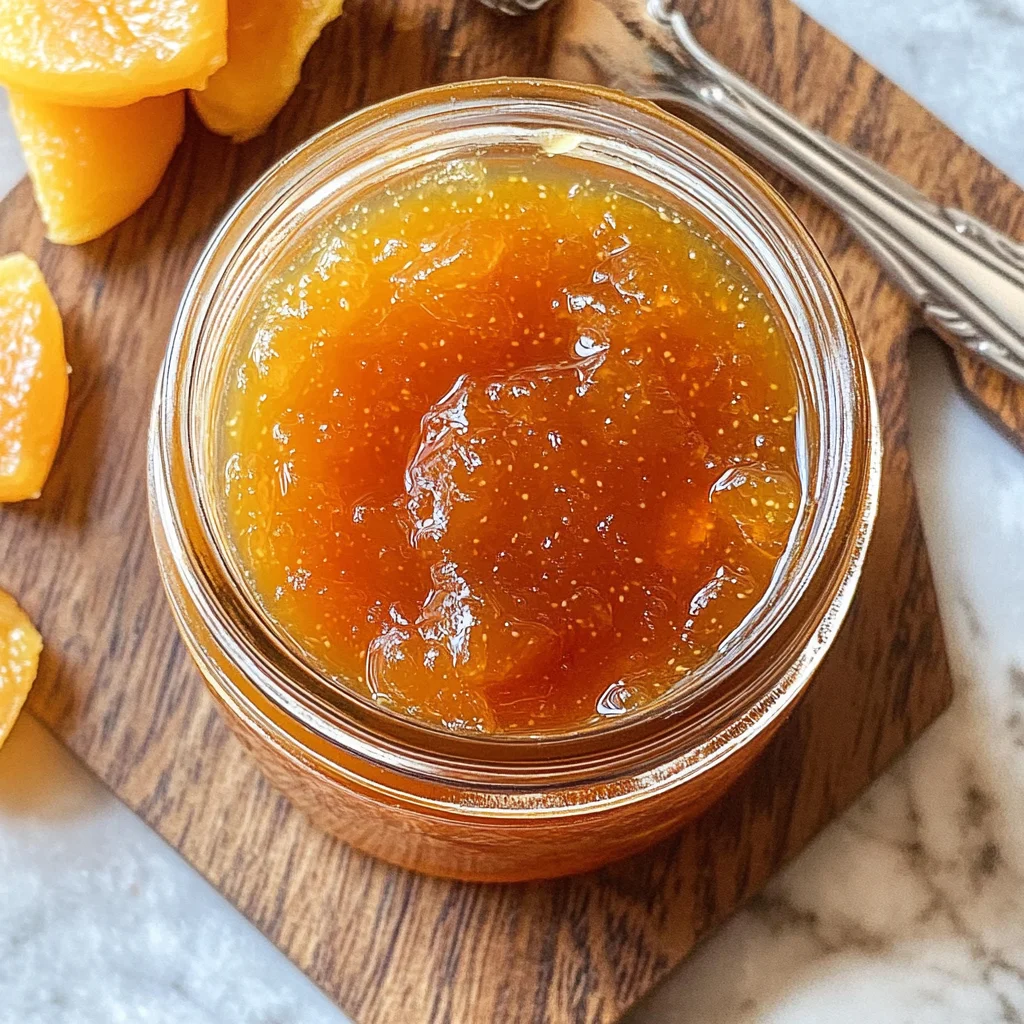
Easy Apricot Jam
There’s something undeniably magical about making your own Easy Apricot Jam. As you stand in the kitchen, surrounded by the sweet, intoxicating aroma of ripe apricots, it feels like time slows down just a little. This isn’t just a recipe; it’s a beautiful dance between the vibrant fruit and sugar, harmonized with a splash of lemon juice that brightens everything up. You’re not merely creating jam; you’re preserving a moment, capturing the essence of summer in a jar that can be savored all year long. I promise you, there’s nothing quite like spreading this golden delight on fresh bread or stirring it into yogurt—it’s like sunshine on a spoon!
Each step in this process is an invitation to connect with your ingredients and the tradition of making jam at home. It’s a gentle reminder that good food takes time and care—a lesson our ancestors knew well when they’d gather around to preserve the bounty of their fruit trees. And let me tell you, as the apricots bubble away on your stovetop, releasing their sweetness into the air, you’ll find yourself utterly captivated by what you’re creating. So grab your apron and let’s dive into this adventure together! Trust me, once you taste your homemade Easy Apricot Jam, you’ll never want to go back to store-bought.
Easy Apricot Jam: A Sweet Symphony of Summer
Let’s embark on this delightful journey of crafting Easy Apricot Jam together! This recipe is straightforward yet rewarding—perfect for both novice cooks and seasoned pros looking for a fun project. With just a handful of ingredients and a bit of patience, you’ll find yourself with jars filled with liquid gold that screams summer. So roll up your sleeves; it’s time to get jammin’!
Ingredients:
As we start this culinary adventure, let’s talk about what you’ll need to bring this sweet symphony to life. Each ingredient plays its part in creating something truly extraordinary.
- 8 cups apricots (or 2 quarts) – The star of our show! Ripe apricots are sweet and fragrant; they’re truly nature’s candy. When selecting apricots, look for ones that are slightly soft to the touch but not mushy—this indicates they are perfectly ripe and bursting with flavor. If they are too firm, they will lack sweetness and flavor depth in our finished jam. The beauty of apricots is that you don’t even have to peel them; just de-stone them and embrace their natural goodness! Their delicate sweetness pairs beautifully with our other ingredients, making them an ideal choice for jam.
- 1/3 cup lemon juice – This ingredient might seem small but it plays an absolutely crucial role in our recipe! Lemon juice adds brightness and balances out the sweetness from the apricots and sugar. It also helps preserve color and flavor in our jam while providing the necessary acidity needed for safe canning practices. Freshly squeezed lemon juice is best—trust me on this! The zing will elevate your jam from simply sweet to truly refreshing.
- 7 cups white sugar – Ah, sugar—the secret behind that luscious texture we all adore in jams. Sugar doesn’t just sweeten; it helps create the gel-like consistency we crave when spreading jam on toast or dolloping it over desserts. During cooking, sugar works its magic by drawing out moisture from the fruit which transforms into that perfectly spreadable delight we desire when enjoying homemade preserves. While some may consider alternatives or reduce sugar for health reasons, I encourage you to embrace this traditional amount for optimal results—this is non-negotiable if you want that classic jam texture!
- 5 canning jars (1 pint each) – These humble jars are essential partners in our jam-making journey! They serve as vessels for storing our sweet creation while ensuring freshness and longevity. When choosing jars, make sure they are specifically designed for canning—these are sturdier than regular glass jars and can withstand high temperatures during processing. Don’t forget to also have matching lids ready; these ensure an airtight seal so your jam stays delicious for months on end.
Equipment You’ll Need:
Having the right tools can make all the difference in how smoothly your cooking experience goes! Sure, they aren’t ingredients, but these trusty companions will help us create something wonderful together.
- Large pot – A sturdy large pot is essential for cooking down those juicy apricots into deliciousness! Look for one with thick bottoms to ensure even heat distribution which prevents burning—nobody wants scorched jam! A heavy-duty pot will allow us to cook our mixture thoroughly without fear of sticking or scorching.
- Soup ladle – This tool will be your best friend when it comes time to scoop your beautifully thickened jam into jars! A ladle allows you to transfer your concoction easily without spilling too much—a real blessing when working with sticky mixtures like this one.
- Paring knife – This little gem will help us de-stone those apricots with precision and care. A small knife allows you to get into every nook without damaging too much fruit flesh—which is key because we want every bit of sweetness preserved!
- Canning jar holder – Safety first! This handy tool lets you handle hot jars without burning yourself or dropping them—a must-have when lowering jars into boiling water during processing.
- Rack for boiling water bath – A rack keeps your jars elevated during processing so they won’t touch the bottom of the pot where heat is most intense—this ensures even heating throughout while avoiding any potential breakage!
Preparing the Easy Apricot Jam
Step 1: De-Stoning Those Juicy Apricots
First things first—we need to prepare our beautiful apricots! Begin by breaking each apricot in half gently; you’ll notice how easily they open up since they’re perfectly ripe. Use your trusty paring knife to remove each pit carefully—and here’s where I share a little secret: if any blemishes or bruises appear on the fruit’s surface, simply cut those away before moving forward! This step ensures you’re left with only the finest portions of fruit which contributes directly to that delightful flavor we’re aiming for.
Step 2: Sterilizing Your Jars
While you’re getting those apricots ready, let’s take care of our jars too—they need a good sterilization before holding all that glorious jam! Start by washing each jar and lid thoroughly (I like using hot soapy water), then place them into a large pot filled with boiling water for about ten minutes—this ensures any bacteria lurking around gets eliminated completely. Keep them submerged until you’re ready to fill them; this keeps everything clean and safe as we move forward.
Step 3: Cook Up That Sweet Mixture
Now comes one of my favorite parts—bringing everything together in one glorious pot! Add those prepared apricots into a large pot along with your measured lemon juice and sugar (don’t skimp here!). Over medium-high heat, stir occasionally until it reaches a bubbly boil—oh my goodness, that aroma will fill every corner of your kitchen! As everything heats up together, flavors meld beautifully while juices start releasing from those succulent fruits—you’ll see how satisfying this process becomes as it transforms right before your eyes!
Step 4: The Gentle Boil
Once you’ve reached boiling point (and trust me—you’ll know!), reduce heat slightly so it’s gently bubbling away without being too aggressive—that’s what we call “a gentle boil.” Allow this mixture to simmer away for about 25 minutes while stirring regularly; during cooking time keep an eye out for any white foam rising at top—it’s normal but do scoop it off gently using a spoon as it forms since it can affect clarity later on! You’ll notice how wonderfully thickened our mixture becomes—and oh boy—the color deepens into a rich sunset hue that makes my heart sing!
As we work through these steps together towards crafting delicious Easy Apricot Jam filled with love & nostalgia—I hope you’re feeling inspired already because trust me…we’re just getting started here! Stay tuned as we continue through this delightful journey where every moment brings us closer towards indulging in homemade bliss unlike anything else you’ve tasted before…
Step 5: Ladling the Liquid Gold into Jars
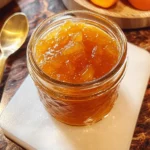
Now comes one of the most satisfying parts of making your Easy Apricot Jam—the transfer of that shimmering, golden nectar from pot to jar. Using a soup ladle, gently scoop the jam and pour it into your sterilized jars. It’s essential to leave about a ¼-inch space at the top of the jar; this small allowance is crucial because it creates a proper seal during canning. If you fill them too high, you risk overflow during processing, which not only makes a mess but can compromise the seal and lead to spoilage. As you ladle, take a moment to appreciate the vibrant color and intoxicating aroma that fills your kitchen—trust me, it’s a preview of the joy that awaits when you finally spread this jam on your morning toast!
Before sealing everything up tight, grab a butter knife and run it around the inside edges of each jar. This step might seem minor, but it serves an important purpose: it releases any trapped air bubbles that could interfere with the preservation process. You want your jam to be as perfect as possible, both in flavor and texture! After you’ve cleaned those edges with care, place the lids on top snugly—but not too tightly. Since we’ll be processing these jars in boiling water shortly, they need a little room to breathe.
Step 6: The Art of Water Bath Canning
With our jars lovingly filled and ready for preservation, it’s time for what’s known as water bath canning—a technique that ensures your Easy Apricot Jam stays fresh for months (if it lasts that long!). Begin by filling a large stockpot halfway with water and placing a rack at the bottom. Why rack? This allows water to circulate freely around each jar while preventing them from touching or clanging together during boiling—important factors that could lead to cracking glass or uneven cooking.
Bring the water up to a rolling boil before gently lowering each jar into the pot using jar tongs; take care not to splash hot water on yourself! Once all jars are submerged, ensure they’re covered by at least an inch of boiling water—this is non-negotiable as it ensures even heat distribution for effective sealing. Cover your pot with a lid and let everything simmer for about 15 minutes. During this time, I often find myself daydreaming about how delightful breakfast will be with my homemade apricot jam; trust me when I say it’s worth every minute spent waiting!
Step 7: Cooling Down – The Calm After The Storm
Once those 15 minutes are up, it’s time to turn off the heat and carefully remove each jar from the hot water bath. Use your jar tongs again—safety first! Place them on a clean cloth-covered bench or cooling rack. This step is incredibly important as allowing them to cool gradually prevents any sudden temperature changes that could cause breakage or unwanted thermal shock.
As they cool, listen closely for that magical ping sound—the unmistakable confirmation that your jars have sealed properly! You may notice some bubbling or boiling inside the jars; this is completely normal and part of the canning magic where flavors meld beautifully into one another during cooling. Let them sit undisturbed for at least 12 hours before moving them into storage. Patience is key here; during this resting period, the flavor develops further and deepens in richness.
Step 8: Storing Your Homemade Treasure
Once cooled completely, check each lid by pressing down in the center; if it doesn’t pop back up, congratulations—you’ve successfully sealed your Easy Apricot Jam! If any lids remain popped after this test, simply refrigerate those jars immediately and enjoy their contents within a few weeks. For all sealed jars, store them in a cool dark place such as your pantry or kitchen cupboard—avoid direct sunlight as it can affect both flavor and quality over time.
What’s even more exciting is that this jam isn’t just for slathering on toast; think beyond breakfast! Use it in yogurt parfaits for a sweet morning treat or swirl it into oatmeal for added depth of flavor. It also makes an exquisite topping for cheesecakes or ice creams—a versatile gem ready to enhance many dishes! So every time you reach for that jar of golden bliss, let it remind you of your hard work and passion poured into crafting something truly extraordinary.
Conclusion:
As we wrap up our delightful journey through this Easy Apricot Jam recipe, I hope you feel as excited as I do about creating something utterly extraordinary in your own kitchen! There’s something so profoundly satisfying about transforming simple apricots into liquid gold that captures their essence beautifully. The balance of sweetness and tartness from those luscious fruits paired with zesty lemon juice makes this jam not just a condiment but rather an experience—a true celebration of flavor that invites joy into each bite.
This recipe is an absolute must-try for anyone who loves both the process of cooking and indulging in delightful treats. Imagine gathering with friends and family around a breakfast table adorned with warm pastries and fresh fruit—your homemade apricot jam steals the spotlight with its vibrant color and intoxicating aroma. It’s versatile enough for any occasion—be it a cozy brunch or an elegant afternoon tea—and each spoonful tells a story of love and creativity from your very own kitchen.
When it comes to serving suggestions, let your imagination lead you! Imagine savoring one with fluffy pancakes drizzled with maple syrup or layering it between sponge cakes for an unforgettable dessert. For an afternoon pick-me-up, spread some jam on crackers topped with cream cheese or goat cheese—a combination that creates an absolutely divine contrast of flavors! And if you’re feeling adventurous on a weekend morning, why not swirl some into oatmeal or mix it into smoothies? The options are limitless!
Feeling adventurous? This recipe is wonderfully adaptable! You could try swapping apricots with peaches or nectarines for a slightly different flavor profile—each will bring its unique charm while still delivering that comforting homemade essence we all adore. Maybe even add some spices like cinnamon or ginger during cooking for an unexpected twist! I invite you wholeheartedly to dive into this delicious world yourself—make this Easy Apricot Jam, share your journey with loved ones, and connect over food made with love!
Easy Apricot Jam
Indulging in homemade Easy Apricot Jam is like bottling sunshine—sweet, fragrant, and bursting with flavor. This simple recipe allows you to transform fresh apricots into a delightful spread that’s perfect for toast, yogurt, or even desserts. With minimal ingredients and straightforward steps, you’ll be savoring the taste of summer year-round. As you stir together ripe apricots, sugar, and a splash of lemon juice, the kitchen fills with an inviting aroma that promises joy in every jar. Let’s embark on this delicious journey together!
- Prep Time: 30 minutes
- Cook Time: 25 minutes
- Total Time: 55 minutes
- Yield: Approximately 40 servings 1x
- Category: Dessert
- Method: Canning
- Cuisine: Homemade
Ingredients
- 8 cups ripe apricots (or 2 quarts), pitted
- 1/3 cup freshly squeezed lemon juice
- 7 cups white sugar
- 5 sterilized canning jars (1 pint each)
Instructions
- De-stone the apricots by gently halving them and removing the pits.
- Sterilize your jars by boiling them in water for about 10 minutes.
- In a large pot, combine the prepared apricots, lemon juice, and sugar over medium-high heat. Stir until bubbling.
- Reduce heat to a gentle boil, stirring regularly for about 25 minutes until thickened.
- Using a ladle, fill each sterilized jar with jam, leaving a ¼-inch space at the top. Wipe the edges to remove any residue.
- Process jars in a boiling water bath for 15 minutes to seal.
- Allow jars to cool on a clean surface and check seals after 12 hours.
Nutrition
- Serving Size: 1 tablespoon (20g)
- Calories: 50
- Sugar: 13g
- Sodium: 0mg
- Fat: 0g
- Saturated Fat: 0g
- Unsaturated Fat: 0g
- Trans Fat: 0g
- Carbohydrates: 13g
- Fiber: 0g
- Protein: <1g
- Cholesterol: 0mg