Korean Strawberry Milk
From the moment the sun peaks over the horizon, casting a golden glow across the kitchen, I can’t help but feel an exhilarating rush of inspiration. It’s in these quiet yet vibrant moments that I often find myself dreaming up recipes that bring warmth and joy to my heart. Today, I’m thrilled to share with you a delightful drink that has captured my soul—Korean Strawberry Milk. This isn’t just any beverage; it’s a luscious concoction that marries the sweet, fragrant notes of ripe strawberries with the creamy goodness of non-dairy milk. Trust me when I say that every sip feels like a celebration of life itself, vibrant and refreshing, as if each glass is a toast to summer—a season full of promise.
The beauty of this Korean Strawberry Milk lies not only in its flavors but also in its simplicity. With just four humble ingredients, you can whip up a drink that transports you straight to a bustling café in Seoul or perhaps your own backyard on a sunny afternoon. The technique is surprisingly easy, yet the results are nothing short of extraordinary. Each ingredient plays a pivotal role; from the succulent strawberries bursting with juiciness to the sprinkle of sugar that enhances their natural sweetness, everything comes together harmoniously. As you embark on this culinary adventure with me, get ready for an experience that is both deliciously satisfying and profoundly comforting.
Korean Strawberry Milk: A Whimsical Delight for All Ages
As we dive into the world of Korean Strawberry Milk, think of it as an invitation to indulge your senses while creating something beautiful. This recipe is perfect for lazy afternoons or as a refreshing treat after an evening meal—whatever occasion you choose, I promise it will be met with smiles all around! Imagine pouring tall glasses filled with this stunning pink elixir; it’s like liquid sunshine on your table! So grab those strawberries and let’s make some memories together!
Ingredients:
Starting our journey begins with gathering our key ingredients—each one is vital in creating this delightful drink. Let’s take a closer look at what we need:
- 1 pound strawberries (finely diced) – Divided into 2 cups and ¾ cup. Strawberries are truly the star of our show! When selecting them, look for berries that are bright red, firm to the touch, and have a sweet aroma—these indicators reveal their ripeness and flavor potential. We’ll use two different preparations here: one batch will be macerated to release their juices for texture and flavor contrast, while the other will be cooked down into a syrupy delight that adds depth to our drink. You can even substitute with other berries if you’d like—a mix could be fun too!
- ¼ cup cane/brown sugar – This sugar acts as our flavor enhancer, bringing out the natural sweetness of those beautiful strawberries while balancing their tartness. Cane sugar offers a lovely caramel-like depth compared to regular granulated sugar; however, brown sugar works wonders here too! It brings moisture and richness which perfectly complements our fruity base. Adjust this quantity based on your personal preference; after all, we want it just sweet enough to elevate without overpowering.
- Squeeze of lemon juice – Just a splash goes a long way! This addition is absolutely paramount because it provides brightness and acidity that sharpens flavors beautifully; it’s like adding sunshine to your milkshake! Don’t skip this step—it elevates your drink from ordinary to extraordinary by harmonizing all components together. Fresh lemon juice is ideal; bottled versions can lack vibrancy.
- 2-3 cups unsweetened non-dairy milk – The canvas for our creation! You can use almond milk, oat milk or my personal favorite—unsweetened soy milk—which adds creaminess without overshadowing the strawberry’s natural charm. The key here is ensuring you choose an unsweetened variety so we can control how much sweetness we’re introducing through our other ingredients.
Now that we have everything lined up beautifully on our countertop, let’s make some magic happen!
Equipment You’ll Need:
Having the right tools will make our preparation process smooth and enjoyable! While they aren’t ingredients themselves, these essential partners will help us create something wonderful:
- Cutting board & chef’s knife – A sturdy cutting board paired with a sharp chef’s knife makes slicing those delightful strawberries effortless and safe. Precision is important here because finely dicing allows for better maceration and syrup creation—trust me on this!
- Saucepan – A medium-sized saucepan is crucial for transforming those diced strawberries into syrupy goodness. Make sure it’s large enough so that you can stir freely without making a mess—that’s always my goal when cooking!
- Mixing spoon – Whether it’s wooden or silicone, having a reliable mixing spoon will be your best friend here as you’ll need to stir frequently while cooking down your strawberries into syrupy perfection.
- Glass or pitcher for serving – Choose something pretty because this Korean Strawberry Milk deserves to be showcased! A clear glass allows everyone to admire its beautiful pink hue before taking their first sip.
With our ingredients gathered and tools ready at hand, let’s dive right into making this refreshing drink!
Step 1: Macerating Those Sweet Strawberries
First things first: let’s give those lovely berries some love by macerating them! Take roughly ¾ cup of your finely diced strawberries and combine them with about 1 tablespoon of sugar in a small bowl. Gently stir them together until each piece is coated in sugar—it’s important not to crush them too much at this stage as we want some lovely chunks left intact for later! The magic happens now as you let them sit aside for about ten minutes; during this time, the sugar draws out their juices creating an irresistible syrupy concoction that will add both texture and flavor when layered into your drink later on.
Step 2: Creating Our Strawberry Syrup
Now let’s move on to the main event: crafting our strawberry syrup! In your medium-sized saucepan, combine the remaining 2 cups of diced strawberries with about 3 tablespoons of sugar along with a generous squeeze of lemon juice (this elevates everything!). Stir gently until combined before placing over medium heat—it’ll soon start bubbling away beautifully. Bring it just above simmering point for about ten minutes while stirring frequently; you’ll notice how quickly those berries break down into luscious gooeyness! The key here is patience; don’t rush this step because allowing them time will result in rich syrup—a true symphony of flavors waiting patiently at the bottom of your pan.
Step 3: Cooling Down Our Syrup
Once you’ve achieved that thickened delightfulness from cooking down those berries (think syrupy consistency), remove your pan from heat and set aside to cool completely before transferring it into the fridge—this chilling period is crucial since serving it cold amplifies refreshment in contrast with creamy non-dairy milk later on! Plus, wouldn’t it be lovely seeing shimmering droplets forming inside chilled glasses?
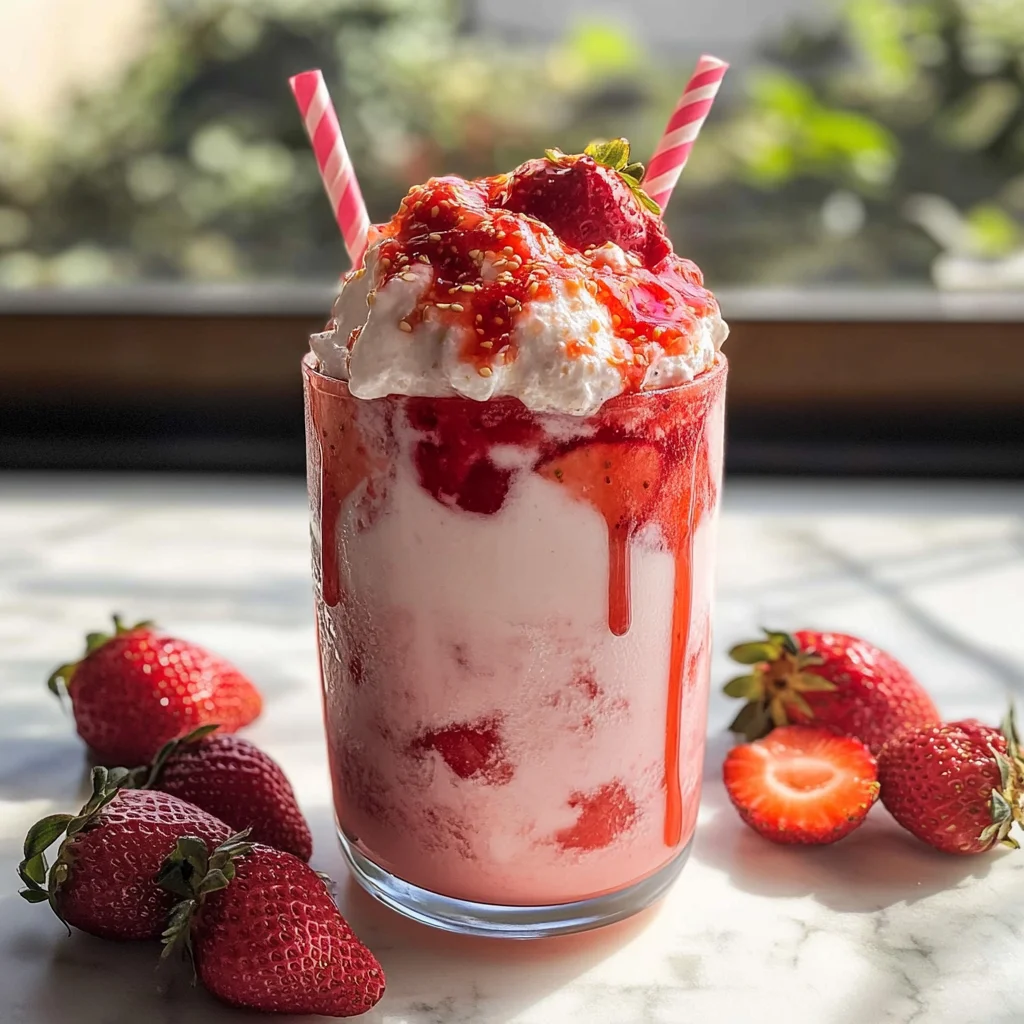
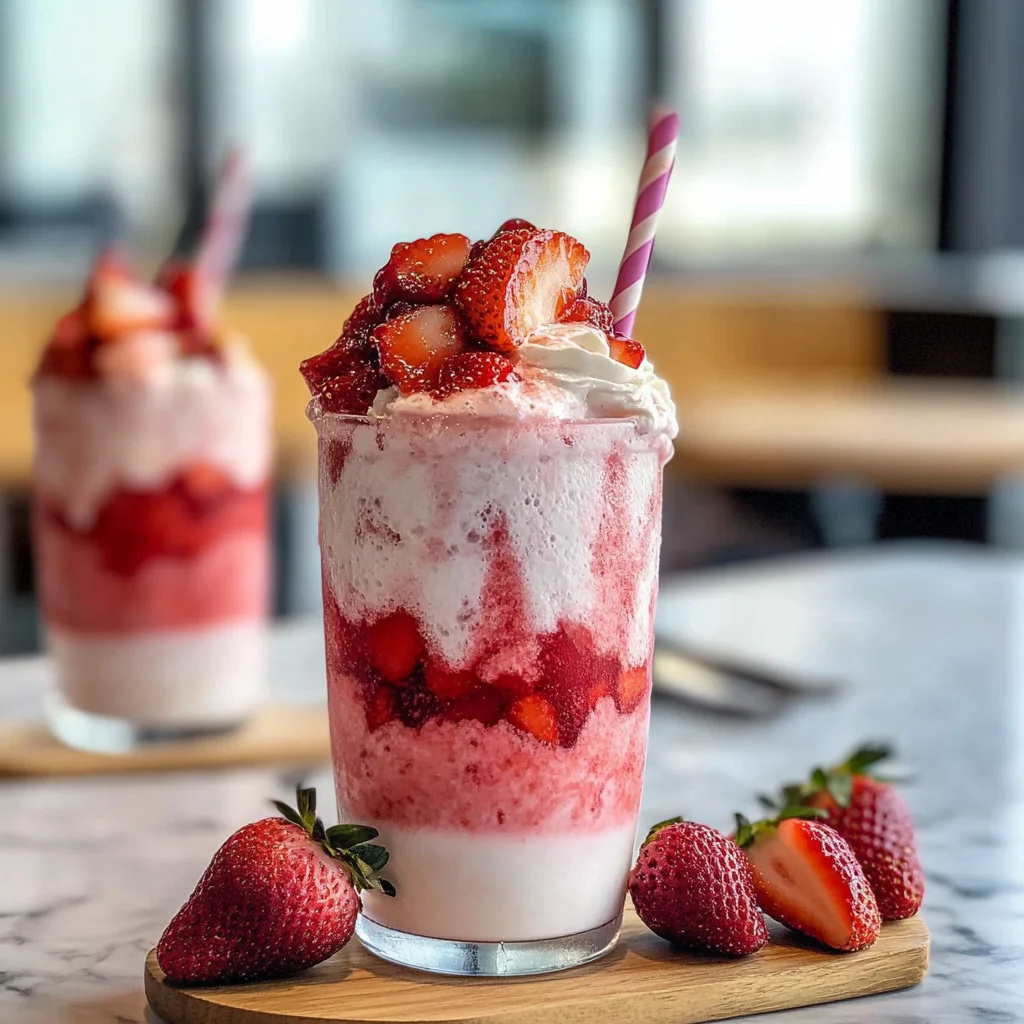
Step 4: Assembling Your Korean Strawberry Milk
Finally comes my favorite part—the assembly! Grab yourself a tall glass (or two!) filled halfway with ice cubes; pour around 2-3 tablespoons of chilled strawberry syrup at the bottom before gently pouring about ¾ cup non-dairy milk over top—watch how they swirl together enticingly like clouds meeting sunshine! To finish off perfectly add those gorgeous macerated strawberry pieces from earlier right atop—it creates such visual appeal while enhancing flavor profile too! Now comes one last stir before taking delightfully refreshing sips—you did it!
I hope you’re feeling inspired by these steps as we bring together each element harmoniously into something truly special—a glassful filled not only with delectable flavors but also cherished moments spent sharing stories over delicious drinks made lovingly by hands (your hands!) who care deeply about food. Enjoy every last drop—and don’t forget: store any leftover syrup or macerated strawberries in the fridge for later indulgences throughout warm days ahead!
Step 5: Let the Syrup Chill in Its Sweetness
Now that you’ve created a luscious strawberry syrup, it’s time to let it cool down and develop its flavors further. This step might seem simple, but trust me when I say it’s absolutely paramount for achieving that café-style experience in your homemade Korean Strawberry Milk. After simmering the strawberries with sugar and lemon juice, pour this beautiful concoction into a bowl or jar and place it in the fridge. I recommend letting it chill for at least 30 minutes—ideally longer if you can stand the wait!
Why should we chill the syrup? Well, cooling allows the flavors to intensify and meld together beautifully, creating a symphony of sweet and tart notes that will dance on your taste buds. As it cools, the syrup thickens slightly, making it richer and more decadent. Plus, a cold syrup will help keep your drink refreshingly chilled when we assemble everything later. Keep an eye on it; if you notice any separation as it cools, simply give it a gentle stir before using! Your patience will absolutely be rewarded here.
Step 6: Assembling Your Glass of Joy
Once your syrup has cooled to perfection, it’s time to build your masterpiece! Grab a tall glass—something sturdy that can showcase all those vibrant colors—and get ready to layer in pure delight. Start by adding about 2-3 tablespoons of that gorgeous strawberry syrup to the bottom of your glass. Don’t be shy! This is where all the flavor magic begins. The syrup should glisten like liquid gold, promising an utterly intoxicating flavor experience.
Next up is pouring in about ¾ cup of your choice of unsweetened non-dairy milk; soy milk is my favorite for this recipe due to its creamy texture, but almond or oat milk works beautifully too. Pour slowly and watch as the syrup swirls and dances through the milk—it’s like watching art come alive! Now for a little ice; add just enough to keep things cool and refreshing but not so much that it dilutes the fantastic flavors you’ve worked so hard to create. It’s critical to take each layer seriously; these distinct phases are what make each sip profound and satisfying.
Step 7: The Final Strawberry Flourish
Now comes one of my favorite parts: adding those macerated strawberries on top! You’ve already taken steps to draw out their juices with sugar, which means they’re going to burst with flavor right when you need them most. Using a spoon, gently place about 1 tablespoon of these beautiful strawberries atop your milk mixture. This final touch adds not only flavor but also texture—a delightful contrast between the smoothness of the milk and the chunky sweetness of fresh strawberries.
This step is non-negotiable because those cute little bits will offer bursts of freshness with every sip! As you take your first taste—trust me on this—you’ll appreciate how they elevate your drink from good to truly extraordinary. Don’t hesitate to sprinkle in more strawberries if you want extra fruity goodness; after all, we’re celebrating strawberries here!
Step 8: Stirring Into Bliss
Before diving into this delicious creation, give everything a gentle stir with a straw or spoon. This isn’t just for aesthetics; it’s essential for blending those vibrant flavors together harmoniously. As you mix, watch how the colors meld—the deep red from the sweet syrup mingling with creamy white milk until they form a lovely blush hue that is as visually appealing as it is tasty.
A good stir ensures that every sip captures that perfect balance between sweetness and tartness while allowing all elements—milk, syrup, macerated strawberries—to come together in an exquisite harmony. Take a moment here—inhale deeply and allow yourself to appreciate how delightful this looks and smells before you take that first sip. You’ve earned this joyful moment!
Next Major Phase – Savoring Every Drop
Now that you’ve crafted your homemade Korean Strawberry Milk masterpiece, it’s time for the best part—enjoying every last drop! But before you dive in, let’s talk storage options because we’ve made extra syrup and macerated berries that can keep giving joy beyond just one glass.
Step 9: Storing Your Sweet Creations
If by some miracle you have leftovers (which I doubt!), store your remaining strawberry syrup and macerated strawberries in airtight containers in the fridge—they’ll stay fresh for up to three days! Just imagine waking up tomorrow morning with leftover strawberry joy waiting for you—it’s like having dessert for breakfast! When you’re ready for another round of Korean Strawberry Milk bliss, simply repeat our earlier steps: add some syrup to a new glass of non-dairy milk along with ice and fresh fruit toppings.
And remember: food isn’t just about nourishment; it’s about creating memories around meals shared with loved ones. So whether you’re enjoying this refreshing drink solo or serving it at brunch with friends (it will definitely impress!) I promise you this indulgent treat will bring smiles all around. Cheers to delicious moments ahead!
Storage and Enjoyment Tips for Your Korean Strawberry Milk
Now that you’ve whipped up this delightful concoction of Korean Strawberry Milk, it’s time to revel in your creation! Each glass is a vibrant celebration of flavors and textures, and I can already imagine you savoring every sip as the sweet strawberries dance on your palate. But what if you have some leftover? Fear not, my friend, because I have some fantastic tips for preserving that luscious goodness!
Storing Leftover Korean Strawberry Milk
To keep your Korean Strawberry Milk fresh and delightful, it’s best to store it in an airtight container, preferably glass, which helps maintain its flavor and prevents any unwanted odors from intruding. Pop it into the refrigerator where it will stay delicious for about 2-3 days. One pro tip that I swear by is to place a slice of bread inside the container; this little trick absorbs excess moisture and keeps your milk tasting fresh! Now, while the flavors might mellow slightly after storage, trust me when I say it still retains that wonderful strawberry essence that makes each sip feel like summer. When you’re ready to enjoy it again, just give it a gentle stir or shake—no need to reheat here! Pour it over fresh ice for a refreshing treat or blend with a few fresh strawberries for an invigorating twist.
Freezing Components for Later
If you’re planning ahead or simply want to indulge in this creamy delight at a later date, freezing is an excellent option! You can freeze the strawberry syrup by pouring it into ice cube trays—this way, you’ll have perfectly portioned cubes ready whenever the craving strikes. Just make sure to cover the trays with plastic wrap to prevent freezer burn. The syrup will keep beautifully frozen for up to three months! When you’re ready to use them, just pop a few cubes into a glass, pour over your favorite non-dairy milk, and let them melt away into that creamy bliss. Not only does this save time on busy days but also offers the convenience of enjoying your homemade treat anytime with minimal effort. Isn’t that just wonderful?
Korean Strawberry Milk

Discover how to make delicious Korean Strawberry Milk at home using simple ingredients. Enjoy this refreshing drink today!
- Prep Time: 15 minutes
- Cook Time: 10 minutes
- Total Time: 25 minutes
- Yield: 4 servings 1x
- Category: Dessert
- Method: Mixing
- Cuisine: Korean
Ingredients
- 1 pound strawberries (finely diced)
- ¼ cup cane/brown sugar
- Squeeze of lemon juice
- 2–3 cups unsweetened non-dairy milk (such as almond or oat)
Instructions
- Macerate ¾ cup of diced strawberries with 1 tablespoon of sugar in a bowl. Let sit for 10 minutes to release juices.
- In a saucepan, combine remaining 2 cups of diced strawberries, 3 tablespoons of sugar, and a squeeze of lemon juice. Cook over medium heat for about 10 minutes until syrupy.
- Allow the syrup to cool in the fridge for at least 30 minutes.
- To assemble, fill a tall glass with ice, pour in 2-3 tablespoons of chilled strawberry syrup, then add ¾ cup of non-dairy milk. Top with macerated strawberries and stir gently.
Nutrition
- Serving Size: 1 cup (240ml)
- Calories: 150
- Sugar: 24g
- Sodium: 50mg
- Fat: 4g
- Saturated Fat: 0g
- Unsaturated Fat: 4g
- Trans Fat: 0g
- Carbohydrates: 32g
- Fiber: 2g
- Protein: 2g
- Cholesterol: 0mg