Earl Grey Milk Tea
There’s something truly enchanting about the ritual of making a perfect cup of Earl Grey Milk Tea. It’s not just a beverage; it’s an experience—a warm embrace on a chilly day, a moment of tranquility amidst the chaos of life. As I brew this aromatic tea, I find myself transported to cozy afternoons spent with loved ones, laughter echoing through the air, and the sweet scent of bergamot floating around us like an invisible hug. The way the rich, fragrant tea blends seamlessly with creamy milk creates a symphony of flavors that dances on your palate, transforming each sip into a moment to savor. This Earl Grey Milk Tea isn’t just food; it represents connection, comfort, and joy, reminding us that sometimes the simplest pleasures are the most profound.
When we delve into this recipe for Earl Grey Milk Tea, we aren’t just following steps; we’re honoring tradition while inviting innovation into our kitchens. Earl Grey tea has its roots in British culture but has woven itself beautifully into various culinary landscapes worldwide. The combination of black tea with the distinct essence of bergamot offers not only a delightful flavor but also calming properties that can soothe even the most hectic days. So whether you’re preparing this as an afternoon pick-me-up or as a comforting dessert drink to conclude your meal, trust me when I say it will elevate your dining experience to something truly extraordinary.
Earl Grey Milk Tea: A Warm Embrace in a Cup
Welcome to one of my favorite recipes! Making Earl Grey Milk Tea is like crafting liquid gold in your kitchen—rich, velvety, and utterly intoxicating. Each ingredient plays a vital role in creating that perfect balance between boldness and creaminess. So grab your teapot and let’s embark on this delicious journey together!
Ingredients:
As we begin our culinary adventure, it’s essential to gather our simple yet impactful ingredients that will transform ordinary water and tea into something magical.
- 2 Earl Grey tea bags (or 2 teaspoons loose leaf tea). This is where our enchanting journey starts! Earl Grey tea is renowned for its unique flavor profile thanks to the bergamot oil infused into the black tea leaves. When choosing your tea bags or loose leaf, look for high-quality brands that emphasize natural ingredients—this makes all the difference in flavor. If you’re using loose leaf, I recommend investing in a good infuser so you can fully unleash those aromatic oils during steeping. Trust me; you want every drop of that delightful essence!
- 2 cups water. Water might seem so basic, yet it’s absolutely paramount in extracting those rich flavors from the Earl Grey tea leaves. The quality of water significantly impacts your final cup; always use filtered or spring water for optimal results, as tap water can carry unwanted minerals or chlorine that might dull the taste. Bring it to a rolling boil before adding your tea—this step ensures that you’re drawing out every bit of flavor from those beautiful leaves.
- 1-2 tbsp sugar (adjust to taste). Sweetness is subjective! Just like how we all have different preferences when it comes to comfort food, sugar levels will vary from person to person. Start with one tablespoon if you’re unsure; you can always add more after tasting! Sugar not only sweetens but also balances out any bitterness from the black tea while enhancing its natural flavors.
- 1 tsp vanilla extract (optional). Oh my goodness—this little addition is like adding a sprinkle of magic! Vanilla enhances the overall flavor profile and brings warmth to the drink by complementing both the bergamot and creaminess without overwhelming it. Use pure vanilla extract if possible; artificial vanilla may not give you quite the same depth and richness.
- 1/2 cup whole milk (or milk of choice). Here’s where things get creamy! Whole milk provides a luscious texture that’s undeniably satisfying, enveloping each sip in velvety goodness. However, feel free to switch things up with almond milk for nuttiness or oat milk for its slight sweetness and creaminess—each option brings its own unique twist to this classic drink.
- 1/4 cup heavy cream (optional). This is my little secret for achieving an extra level of indulgence! Adding cream gives your Earl Grey Milk Tea that luxurious mouthfeel reminiscent of café-style beverages while intensifying richness without overpowering the delicate flavors at play here. If you prefer lighter options or dairy-free alternatives, skip this step without worry; your tea will still be delicious!
Equipment You’ll Need:
Having the right tools makes all the difference when embarking on this delightful endeavor! While these items may not be ingredients per se, they are essential partners in crafting your perfect cup of Earl Grey Milk Tea.
- Teapot or saucepan – This will be your trusty vessel for brewing! A classic teapot allows you to steep loose leaf directly or use an infuser if you’re going that route, while a saucepan works just as well if you’re boiling water directly on the stove. Choose one that feels right for you—you’ll want something durable and easy to handle.
- Measuring spoons – Precision matters here! Accurate measurements ensure consistent results every time you whip up this delightful beverage. Invest in good measuring spoons for both dry and liquid ingredients so you’ll never have any guesswork involved.
- Mug or cup – Your chosen vessel should feel inviting because you’ll want to savor every sip! Whether it’s an elegant teacup or your favorite rustic mug doesn’t matter as much as how it makes you feel when holding it filled with warm goodness.
Now that we’ve gathered our ingredients and equipment let’s dive into preparing this comforting brew!
Step 1: Boil Your Water
To start off our process properly, bring two cups of filtered water to a rolling boil in your teapot or saucepan over medium-high heat—this step is crucial as it sets up everything else beautifully! Once boiling, remove from heat immediately so we don’t over-extract any bitterness from our beloved black tea leaves when they steep later on; trust me—it makes all the difference!
Step 2: Steep Your Tea
Once you’ve removed your hot water from heat, gently place two Earl Grey tea bags (or two teaspoons of loose leaf) into your teapot or saucepan filled with hot water; cover it up tightly with a lid if possible! Allow them to steep undisturbed for about 5 minutes—this will give time for all those wonderful flavors released by bergamot oil and black tea leaves come together harmoniously within their safe haven inside warm water.
Step 3: Sweeten It Up
After five minutes have passed (and let me tell you—the aroma wafting through my kitchen at this moment is heavenly!), carefully remove those steeped tea bags or strain out loose leaves using either a fine mesh sieve or dedicated infuser tool—whatever works best for you here! Now comes my favorite part: sweetening! Start by adding one tablespoon sugar directly into steaming hot liquid—you want it dissolved thoroughly while warmth encourages sweetness throughout without clumping together!
Step 4: Add Creamy Goodness
Next up? It’s time for some serious indulgence! Pour half a cup whole milk—or whatever alternative tickles your fancy—into our brewed masterpiece along with optional heavy cream if desired—trust me when I say this will elevate everything tenfold! Stir gently until everything melds beautifully together—a creamy swirl of warmth awaits!
And there you have it—the first few steps toward crafting an exceptional cup of Earl Grey Milk Tea that promises comfort unlike anything else! Continue following these guidelines through final steps until you’ve perfected every last detail tailored perfectly just for YOU…
Brewing the Perfect Earl Grey Milk Tea
Step 5: Infusing the Tea – Unlocking Flavors
Now that your water is at a rolling boil, it’s time for the magic to happen! Gently place your Earl Grey tea bags—or if you’re using loose leaf tea, a trusty tea infuser—into the pot. This part is crucial because the boiling water will extract those captivating oils from the bergamot and the rich black tea leaves. I want you to really take a moment here to appreciate the aroma wafting through your kitchen; it’s like a warm hug on a chilly day. Let this steep for about 3 to 5 minutes, depending on how strong you like your tea. If you’re anything like me, this is where patience pays off—don’t rush this step! The longer you let it steep, the deeper and more complex your flavors will become.
As you watch the color of the water transform into a beautiful amber hue, think about what makes Earl Grey so special—the marriage of floral and citrus notes that dance on your palate. A good rule of thumb is to taste it around the 3-minute mark; trust me when I say that every second counts in this infusion process! You’ll want to keep in mind that over-steeping can lead to bitterness, which we absolutely want to avoid. Once you’ve reached your desired strength, carefully remove the tea bags or infuser—this is non-negotiable, my friends! We don’t want any lingering bitterness ruining our creamy masterpiece.
Step 6: Sweetening and Flavoring – A Touch of Love
With your perfectly brewed Earl Grey in hand, it’s time to introduce sweetness and flavor! Add 1-2 tablespoons of sugar right into your fragrant brew. You might be wondering why we add sugar at this point instead of later; well, it’s all about ensuring that sugar dissolves completely into the hot liquid. Trust me on this one—it creates an even sweetness that beautifully complements the bergamot without overwhelming it. Stir gently until you see those granules disappear completely; I often find myself humming a little tune while doing this—it makes everything feel extra special!
If you’re feeling adventurous or just want to elevate this drink further, now is also when I recommend adding a teaspoon of vanilla extract. This optional ingredient can transform your Earl Grey Milk Tea into something truly extraordinary with its warm undertones mingling seamlessly with the tea’s floral notes. Just imagine how utterly intoxicating that combination will be! After stirring in these delightful additions, take a moment to inhale deeply—let those aromas wash over you and prepare yourself for pure bliss with each sip.
Step 7: Creaming It Up – The Luxurious Touch
Ah, now we arrive at one of my favorite parts: bringing in that creamy goodness! In a separate small saucepan over medium heat, pour in half a cup of milk—or any milk alternative that suits your fancy such as almond, oat, or coconut milk. Remember, this step is all about making it luxuriously creamy! Heat it gently—don’t rush it or bring it to a boil because that could change its texture in ways we don’t want. Instead, look for those delicate bubbles forming around the edges; that’s when you’ll know it’s just about ready.
This gradual warming allows all those rich flavors from earlier to meld beautifully together without burning or curdling your milk. If you’re opting for heavy cream as well (and who wouldn’t?), add about a quarter cup into the mix during this heating process for an ultra-indulgent finish. The creaminess will not only make each sip feel like velvet but also help balance out any bitterness from the tea or sweetness from added sugar. Each element working in harmony creates an experience so profound and satisfying that you might just find yourself lost in thought after every sip!
Step 8: Bringing It All Together – The Final Fusion
Now comes the moment we’ve all been waiting for: combining everything into one glorious cup! Carefully pour that warmed milk directly into your brewed Earl Grey mixture—it’s like watching two worlds collide! Grab a whisk or even just a spoon and give everything a gentle stir; this is where you’ll see magic happen as colors swirl together into creamy perfection. Take another moment here; inhale again deeply because what you’re creating deserves recognition before tasting!
Once everything is combined beautifully, grab your favorite mug because this drink deserves something special—or maybe even two mugs if you’re feeling generous enough to share with someone close! You can also top it off with an extra sprinkle of sugar if that’s how you roll or even some cocoa powder for an added visual flare; presentation matters too! I promise you that as soon as you take that first sip, you’ll be enveloped in warmth both physically and emotionally.
Enjoying Your Earl Grey Milk Tea
Step 9: The Final Touch – Sip and Savor
You did it! You’ve crafted an exquisite cup of Earl Grey Milk Tea that not only warms your body but also nourishes your spirit. Now it’s time to truly indulge yourself—find a cozy corner in your home where you can sit back and relish each extraordinary sip you’ve created with love and care. As you take that first taste, allow yourself to appreciate how all those layers come together—the boldness from the black tea dancing gracefully with hints of bergamot, intertwined with luscious creaminess and just enough sweetness.
I encourage you to savor each mouthful slowly; let each note linger on your palate as if you were attending a symphony concert where every flavor plays its part beautifully. And remember: this isn’t just any beverage; it’s an experience—a ritual if you’d like—that invites warmth and comfort into even the busiest days or rainy afternoons spent inside curled up with good company (or perhaps just a great book). So go ahead—breathe deeply again before diving back in for another sip because you’ve earned it!
I hope sharing this recipe brings as much joy to you as it has brought me over time—not just as something nourishing but also as moments filled with laughter and conversation shared over comforting cups of tea with family and friends alike. Enjoy every drop of your homemade Earl Grey Milk Tea—you’ve created something truly remarkable today!
Storage and Enjoyment Tips for Your Earl Grey Milk Tea
Now that you’ve crafted your very own cup of Earl Grey Milk Tea, it’s time to revel in the joy of savoring this delightful creation! Each sip promises a comforting warmth, a gentle embrace of flavor that can uplift even the cloudiest of days. But let’s face it—sometimes, you may have some leftovers. No worries; I’ve got you covered with fantastic tips on how to store and enjoy what’s left, ensuring you can relive this cozy experience later.
Storing Leftover Earl Grey Milk Tea
When it comes to storing your leftover Earl Grey Milk Tea, the key is to choose the right container. I recommend using an airtight glass jar or a thermos, which helps preserve the flavors beautifully while keeping the tea fresh and aromatic. You can keep it in the refrigerator for up to three days. However, trust me on this: tea can lose its vibrancy over time, so it’s best enjoyed fresh! For optimal quality retention, consider placing a slice of bread in the jar; this little trick helps absorb any excess moisture, keeping your tea from becoming too watery. When you’re ready to indulge once again, simply reheat it gently on the stove or in the microwave—just be careful not to boil it! A quick stir and a dash of extra milk can bring back that creamy goodness you first fell in love with.
Freezing Earl Grey Milk Tea for Later
Now, if you’re looking to save your Earl Grey Milk Tea for an even longer duration, freezing is an excellent option! To freeze it properly, pour your cooled tea into ice cube trays or freezer-safe containers—just leave a little room at the top since liquids expand when frozen. This method allows you to keep it for up to two months without losing its lovely flavor profile. When you’re ready to use your frozen cubes, simply pop them into your favorite mug and pour hot water or warm milk over them; watch as they beautifully melt away while infusing your drink once again with those delightful bergamot notes. The convenience factor here is absolutely fantastic—imagine having a cozy cup of Earl Grey Milk Tea ready in minutes whenever the craving strikes!
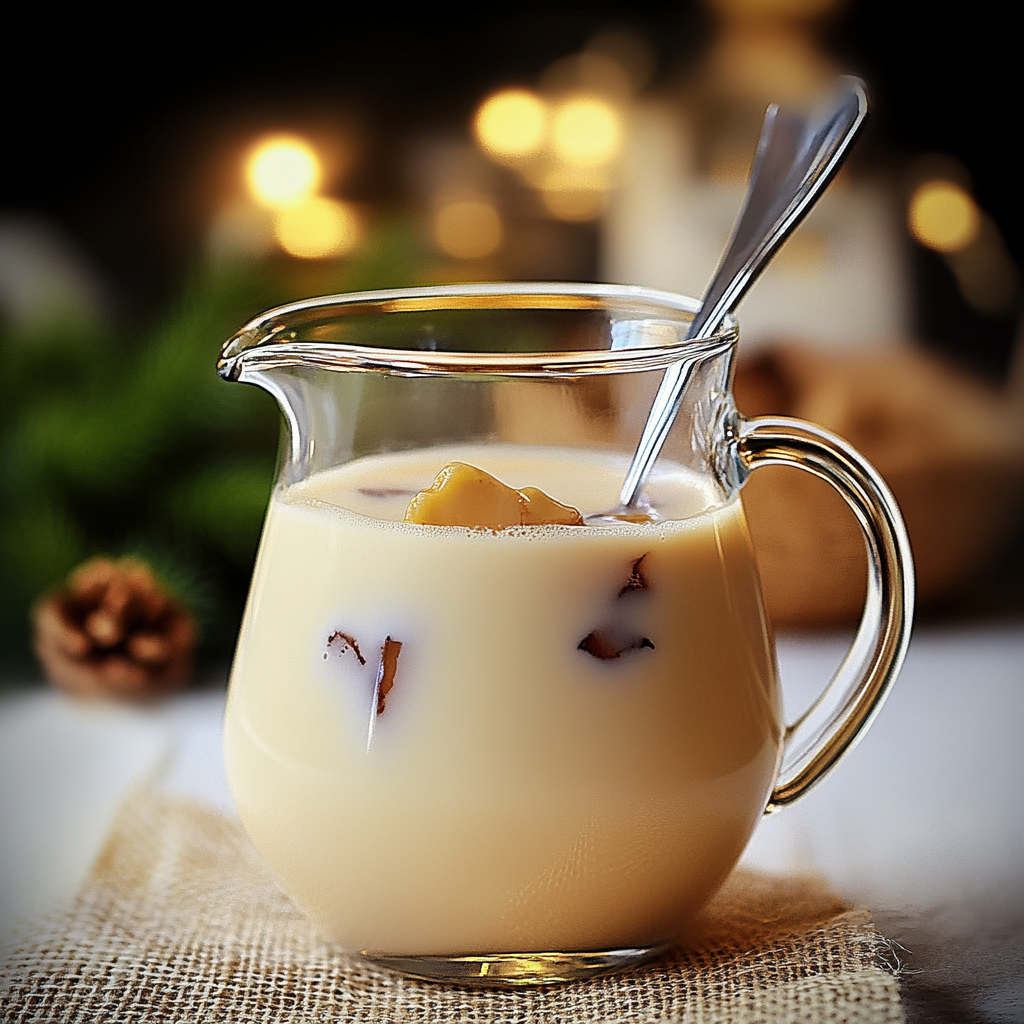
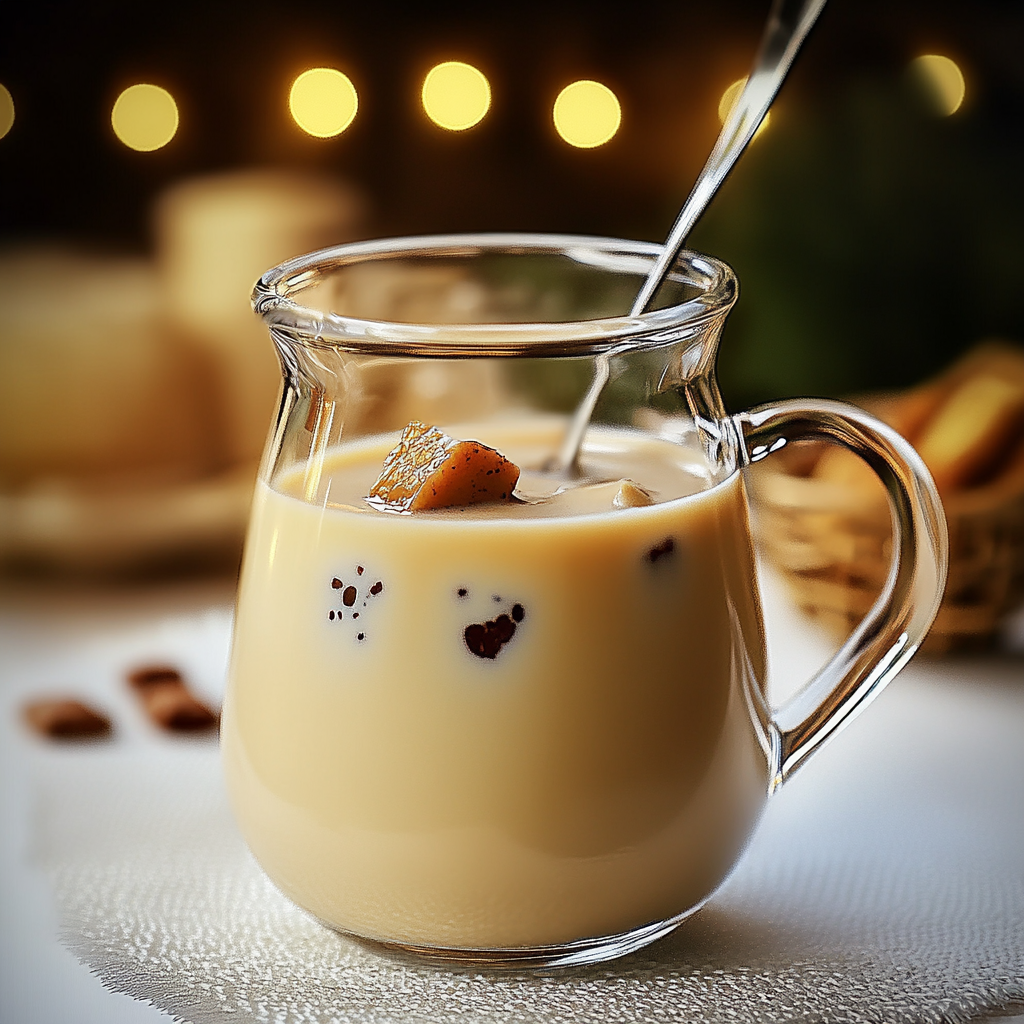
Earl Grey Milk Tea

Earl Grey Milk Tea is a delightful and soothing beverage that combines the robust flavors of black tea with the enchanting aroma of bergamot, topped off with creamy milk for a luxurious experience. This drink transcends mere refreshment; it offers comfort and warmth, making it perfect for chilly afternoons or as a calming treat after a long day. With just a handful of ingredients, you can create this aromatic delight in your own kitchen, transforming an ordinary moment into something magical.
- Prep Time: 5 minutes
- Cook Time: 5 minutes
- Total Time: 10 minutes
- Yield: Makes approximately 2 servings 1x
- Category: Beverage
- Method: Brewing
- Cuisine: British
Ingredients
- 2 Earl Grey tea bags (or 2 teaspoons loose leaf tea)
- 2 cups filtered water
- 1–2 tbsp sugar (adjust to taste)
- 1 tsp vanilla extract (optional)
- 1/2 cup whole milk (or milk alternative)
- 1/4 cup heavy cream (optional)
Instructions
- Boil 2 cups of filtered water in a teapot or saucepan.
- Remove from heat and steep the Earl Grey tea bags or loose leaf for 3-5 minutes.
- Stir in sugar until dissolved and add vanilla extract if desired.
- In another saucepan, gently heat the milk over medium heat until warm but not boiling.
- Pour the warmed milk into the brewed tea mixture and stir to combine.
Nutrition
- Serving Size: 1 cup (240 ml)
- Calories: 215
- Sugar: 12g
- Sodium: 90mg
- Fat: 10g
- Saturated Fat: 6g
- Unsaturated Fat: 4g
- Trans Fat: 0g
- Carbohydrates: 21g
- Fiber: 0g
- Protein: 4g
- Cholesterol: 30mg