Teriyaki Chicken
There’s something utterly magical about cooking that transcends mere sustenance; it becomes a heartfelt expression of love and creativity. When I think of Teriyaki Chicken, I envision the warm glow of evening light filtering through my kitchen window, the tantalizing aroma of garlic and ginger wafting through the air, wrapping around me like a comforting hug. This dish isn’t just food; it’s a beautiful blend of sweet and savory that dances on your palate, evoking memories of shared meals and laughter around the dinner table. Each bite is bathed in a sticky, rich teriyaki sauce that clings to the tender chicken thighs, creating a flavor experience that’s both profoundly satisfying and delightfully indulgent.
This recipe has been a beloved staple in my home for years. Every time I prepare it, I feel like I’m passing down a cherished family tradition, one that bridges cultures and generations. The balance of flavors—the sweetness from brown sugar mingling with the umami richness of soy sauce—creates an almost euphoric experience. And let me tell you, when you grill those marinated chicken thighs to perfection, they transform into juicy morsels that are not only delicious but also deeply nourishing. Trust me on this: once you master this Teriyaki Chicken, you’ll find yourself craving it on weeknights as much as you would for special occasions.
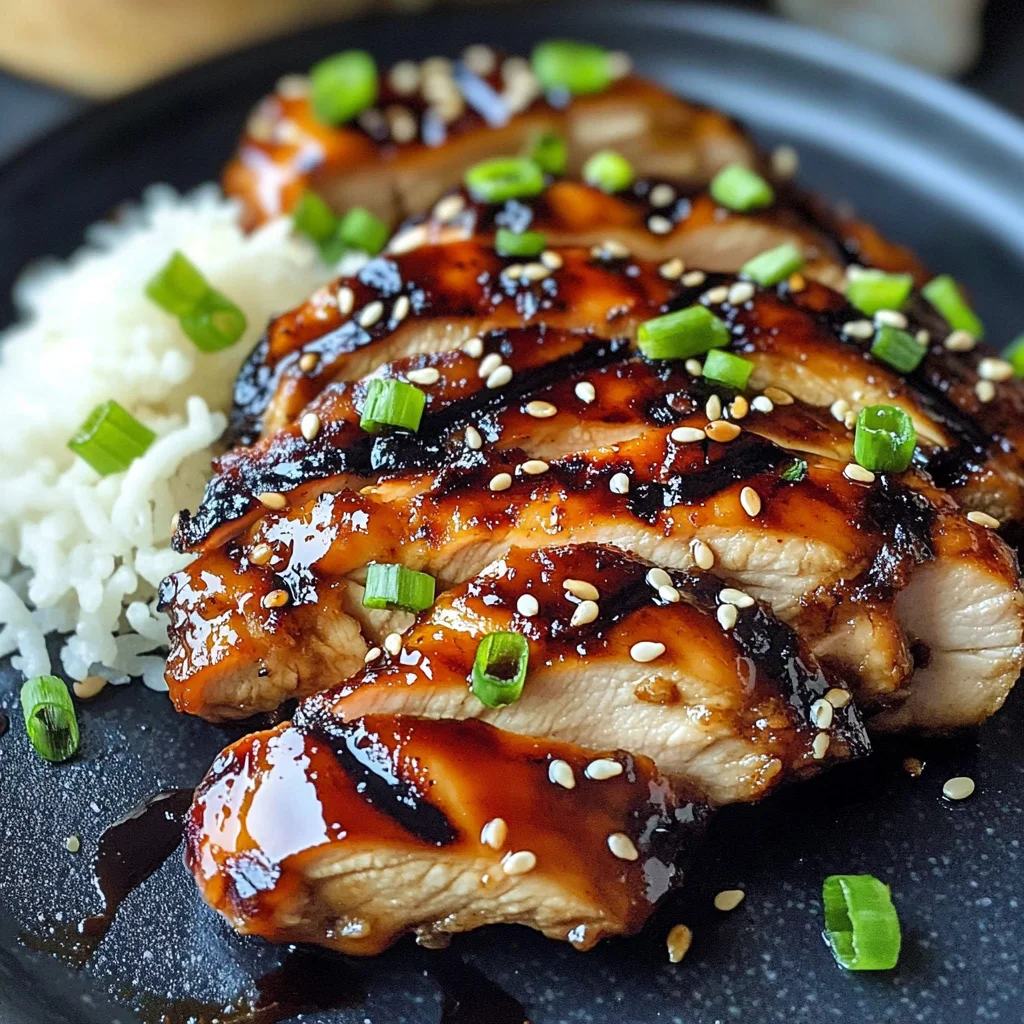
Not only is this dish incredibly flavorful, but it’s also incredibly versatile. It works beautifully for meal prep—think about how delightful it would be to have some ready to go for quick lunches or easy dinners throughout your busy week! Plus, serving it with fluffy rice and a sprinkle of green onions elevates the presentation to something that feels truly special. So grab your apron and let’s dive into this culinary adventure together!
Teriyaki Chicken: A Sweet Symphony of Flavors
I can hardly wait to share this recipe with you! The combination of ingredients creates an experience that’s both comforting and exciting, making it perfect for any day of the week.
Ingredients:
As we embark on this culinary journey together, let’s take a moment to savor each ingredient’s role in crafting our Teriyaki Chicken masterpiece. Each component contributes to the harmonious medley of flavors we’re about to create.
- 8 boneless skinless chicken thighs. The star of our show! Chicken thighs are incredibly forgiving due to their higher fat content compared to breasts, resulting in meat that’s succulent and full of flavor even after grilling. Look for thighs that are plump and firm; they should feel moist but not slimy. If you’re concerned about fat content or prefer white meat, you can certainly substitute with chicken breasts—just keep in mind they may require slightly less cooking time since they’re leaner.
- 1 cup low-sodium soy sauce. This liquid gold serves as the backbone of our teriyaki marinade! By opting for low-sodium soy sauce, we control salt levels while still enjoying that signature umami punch. It’s important for balancing sweetness and providing depth without overwhelming your taste buds. Remember to check the ingredients if you’re gluten-sensitive; there are fantastic gluten-free soy sauces available!
- 1 cup brown sugar. Here’s where we bring in that delightful sweetness! The molasses in brown sugar adds complexity; it enhances caramelization during grilling, creating those beautiful charred bits that add texture and flavor contrast against the tender chicken. If you’re looking for alternatives due to dietary preferences or restrictions, coconut sugar can work wonders here too!
- 1/4 cup rice vinegar. This ingredient provides a gentle acidity that cuts through the sweetness beautifully—it’s like adding an unexpected twist in a dramatic plot! Rice vinegar has a milder flavor than regular vinegar, which is essential for keeping our sauce balanced. If you can’t find rice vinegar, apple cider vinegar can be an acceptable substitute; just use slightly less since it’s more potent.
- 1/2 cup water. Simple yet essential! Water helps dilute the soy sauce slightly so that flavors meld beautifully without being overpoweringly salty or concentrated during the marinating process. It also aids in achieving just the right consistency for our glaze later on.
- 4-5 large cloves garlic, finely minced. Ahh, garlic—the aromatic hero! Its pungent aroma becomes sweet when cooked, infusing our dish with warmth and depth. Don’t skimp on fresh garlic; its bright notes contribute significantly to our marinade’s overall profile.
- 3 tsp freshly grated ginger. Ginger brings such a refreshing zing! Its spiciness complements both sweet and savory elements marvelously while enhancing digestion—a little health bonus never hurt anyone! Using fresh ginger rather than powdered makes all the difference; you’ll get vibrant flavor without any bitterness.
- 2 tablespoons cornstarch. This ingredient is crucial for thickening our leftover marinade into a luscious glaze post-cooking! Cornstarch creates that velvety texture we crave without altering flavor—just remember to dissolve it well before heating!
- 3 green onions, chopped (for garnish). They add not just color but also fresh brightness as a final touch! Their mild oniony flavor contrasts beautifully with our rich teriyaki sauce and elevates presentation from simple to stunning.
- Sesame seeds (optional). These little nuggets add visual appeal along with nutty crunchiness! While optional, I promise sprinkling them over your plated dish makes it feel extra special—plus they’re pretty nutritious too!
Equipment You’ll Need:
Having the right tools at your disposal makes all the difference when cooking—it’s like having trusted friends by your side as you embark on this delicious journey together.
- Mixing bowls – You’ll need at least one large bowl for marinating the chicken and another small bowl for whisking together your marinade ingredients. A glass or ceramic bowl is ideal because they’re non-reactive with acidic ingredients like vinegar.
- Whisk – This little tool is critical for ensuring your marinade blends seamlessly without clumps! A whisk helps incorporate all components evenly so each piece of chicken gets fully coated in those glorious flavors.
- Grill or cast iron pan – Both options are fantastic choices! A grill imparts lovely char marks and smoky flavor while cooking evenly over direct heat; however, if you’re indoors or prefer stovetop convenience, a cast iron pan will give you similar results with excellent searing capability.
- Tongs – These will become indispensable when flipping chicken during grilling or cooking on your stovetop—they allow you precise control while preventing unnecessary mess!
- Saucepan – For thickening up half of your leftover marinade into glaze after marinating—you’ll want something sturdy enough to handle heat without warping!
Now that we’ve gathered our ingredients and tools let’s roll up those sleeves—we’re about to create something truly extraordinary!
Preparing the Teriyaki Chicken
Step 1: Marinate Like You Mean It
In a small mixing bowl (the larger one can be reserved for marinating), whisk together your low-sodium soy sauce, brown sugar, rice vinegar, water, minced garlic cloves, and freshly grated ginger until fully combined—this is where magic begins! Don’t rush this step—let every ingredient mingle together; they need time to infuse their flavors into one another before touching our chicken thighs lovingly placed within their embrace later on. Once you’ve achieved harmony among these components (trust me—the aroma alone will entice anyone nearby!), pour half of this glorious mixture over your boneless skinless chicken thighs placed inside another bowl or zip-top bag—you want them fully submerged if possible so every nook gets coated during marination time.
Now here’s where patience pays off: let those seasoned beauties soak up all those delightful flavors by marinating them in the refrigerator for at least two hours (but ideally overnight). Why chill? Allowing time gives spices ample opportunity to penetrate deeper into meat fibers while breaking down proteins slightly so they’ll become tender when cooked—that’s what makes each bite melt-in-your-mouth goodness!
Step 2: Creating Our Luscious Glaze
While waiting patiently (and resisting temptation), take care of what’s left behind: pour that remaining marinade into a saucepan over medium heat as we elevate its status from simple dressing into something luxurious—a thickened glaze worthy enough for royalty! As it warms gently on stovetop flames’ embrace (be careful not to let things boil over), grab cornstarch measuring spoon then whisk straight in until dissolved completely—it may seem insignificant now but believe me—this step is non-negotiable if we want velvety smooth results later down line once everything comes together!
Bring mixture slowly toward boiling point (you’ll notice bubbles forming)—once reached lower flame allowing simmering action unfold right around three-four minutes until reduced slightly coats back side spoon thickly enough resembling liquid silk before removing from heat entirely—set aside resting peacefully whilst anticipating reunion with grilled golden goodness soon arriving shortly after!
Step 3: Heat Things Up
Once marinating has concluded (and glaze awaits patiently), fire up either outdoor grill or stovetop cast iron pan until sizzling hot temperature greets us happily—it should feel intense beneath fingertips when held inches above surface area provided by either method chosen earlier on because high heat produces lovely sear marks essential making all things visually appealing alongside delectable taste sensations experienced once served up later alongside fluffy white rice garnished brightly colored green onions atop prepared plates finished off dusted lightly sesame seeds if desired too—for added flair make sure everything ready beforehand since timing matters when cooking proteins perfectly!
Carefully lay marinated chicken onto heated surface then allow settling undisturbed initially around six-seven minutes per side—the key here lies patience again: don’t flip too soon since perfect crust forms only through contact between meat surfaces plus hot exterior surfaces working together harmoniously ensuring moist interior remains intact afterward yielding juicy bites filled richness within every mouthful enjoyed blissfully shared among family/friends gathered round table awaiting feast prepared lovingly ahead time spent crafting these culinary treasures worth celebrating joyously together!
Step 4: Savor That Rest
Once grilled thoroughly observed clear juices running freely upon slicing open inner pieces revealing beautiful moisture retained throughout process done right finally remove from heat letting rest undisturbed ten glorious minutes before diving eagerly into serving platters adorned fancifully alongside fluffy rice topped generously green onion slices plus crunchy sesame seeds sprinkled artistically above—oh dear friend how could anyone resist such inviting sight calling forth appetites igniting excitement amongst everyone present eagerly anticipating first bites experiencing symphony flavor dancing across palates blending sweet-savory notes tantalizing taste buds igniting pure joy felt deep within hearts surrounding table bringing loved ones closer together sharing moments made memorable forevermore through simply crafted meals enjoyed lovingly formed connections forged everlasting bonds created through shared experiences savored heartily amongst those gathered around wonderful tables filled laughter echoed warmth friendship extending beyond boundaries created long lasting impressions reminding us why food matters most bringing us back home always…
Stay tuned—I can’t wait to share more steps as we continue crafting this mouthwatering Teriyaki Chicken experience together!
Step 5: A Flavorful Transformation – Bringing the Marinade to Life
After letting your chicken bathe in that glorious marinade for a few hours, it’s time for a little kitchen magic. Take the remaining half of that luscious mixture you set aside and pour it into a small saucepan. As you place it over medium heat, stir in the two tablespoons of cornstarch, whisking until it dissolves completely. This step is absolutely paramount because the cornstarch acts as a thickening agent, transforming the runny marinade into a velvety sauce that clings beautifully to your chicken. Trust me when I say this sauce, once simmered, will become an intoxicating glaze that elevates each bite of your teriyaki chicken.
As you bring the mixture to a gentle boil, keep an eye on it; you’ll see bubbles forming and the sauce thickening into a syrupy consistency within about 3-4 minutes. This is where patience pays off! Allowing it to simmer not only deepens the flavors but also ensures that those delightful garlic and ginger notes meld together beautifully. Once you’ve reached that perfect thickness, remove the saucepan from heat and set it aside; this irresistible sauce will be used later to brush onto your sizzling chicken, creating an utterly mouthwatering finish.
Step 6: Grilling Perfection – Searing Your Chicken
Now comes the moment we’ve all been waiting for—the grilling! If you’re using a grill or cast iron pan, preheat it over high heat until it’s hot enough to make water beads dance across its surface—this is what we call getting that sear. The reason this step is essential can’t be overstated; searing not only locks in moisture but also creates those beautiful grill marks that are both visually stunning and add layers of flavor through caramelization. Place your marinated chicken thighs on the grill or pan and let them cook undisturbed for about 6-7 minutes on one side. As they cook, resist the urge to flip them too soon; you want that gorgeous golden-brown color before turning.
Once you’ve achieved that perfect sear, gently turn the thighs over and brush them generously with your homemade teriyaki glaze. This caramelization process is where science meets art; as those sugars in the sauce heat up, they will create deliciously sticky bits on your chicken, enhancing both flavor and texture. Continue cooking for another 3-4 minutes until juices run clear when pierced with a fork. Remember, chicken should be cooked to an internal temperature of 165°F (75°C) for safety—using a meat thermometer can really help here! You’ll know you’ve reached perfection when each piece looks glistening and inviting, and you can’t resist sneaking bites straight off the grill!
Step 7: The Crucial Resting Period – Letting Your Chicken Relax
Now that your teriyaki chicken is grilled to perfection, it’s time for perhaps one of the most important yet often overlooked steps: resting. Remove your glorious creation from the grill or pan and allow it to rest on a cutting board for at least 10 minutes before slicing into it. I know it’s hard to wait when your kitchen smells so heavenly, but trust me—you want this! By letting the chicken rest, you’re allowing those precious juices trapped inside to redistribute throughout each piece rather than spilling out immediately upon cutting. This simple act transforms every bite into a profoundly satisfying experience.
Imagine cutting into that succulent thigh only to have all its juices rush out—it would be such a tragic loss! During these few moments of anticipation, use this time to prepare some fluffy rice or perhaps even sauté some colorful veggies as sides—anything goes wonderfully with teriyaki! When you finally do slice into your chicken after its well-deserved rest, you’ll find each piece tender and juicy—a testament to the love and care you’ve put into this dish.
Step 8: The Finishing Touches – Plating Your Masterpiece
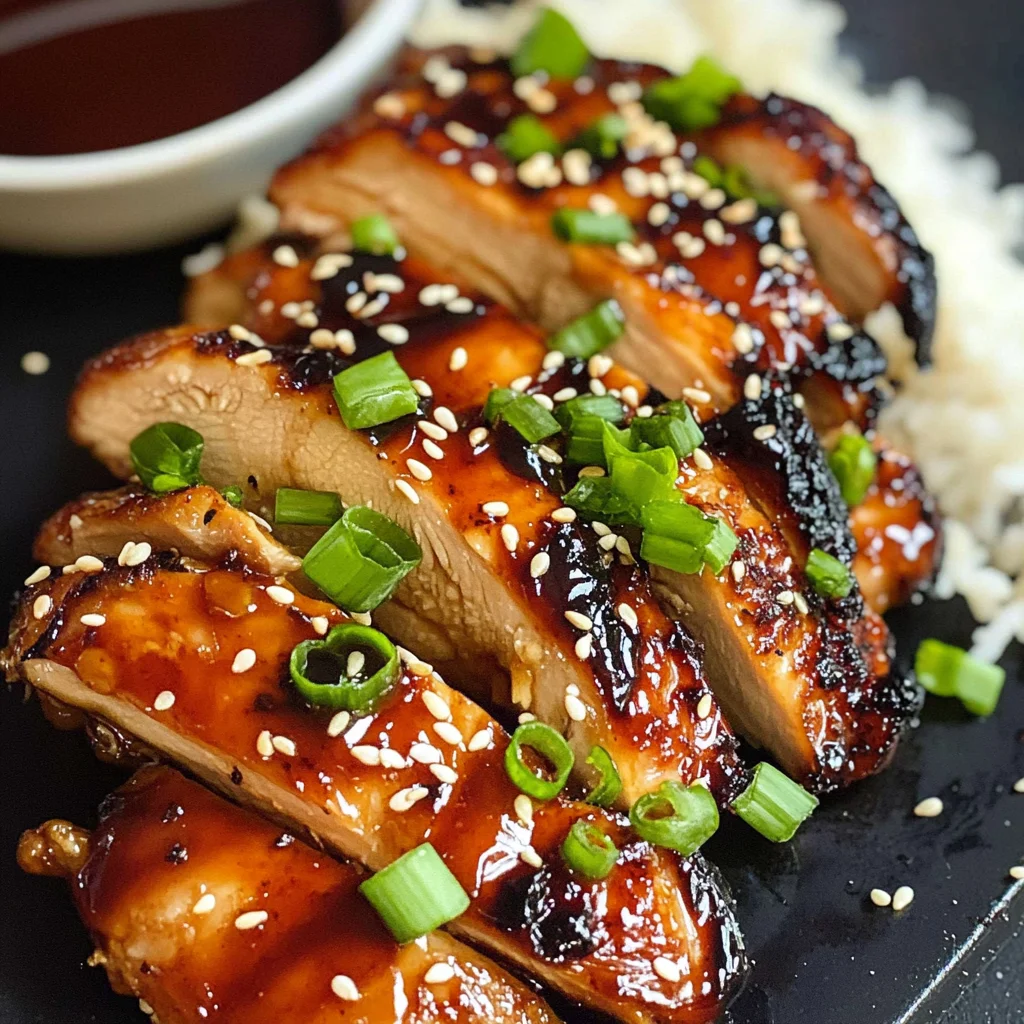
Finally! We’re at the exciting stage where all your hard work culminates in a vibrant presentation worthy of any dinner table. Begin by serving up generous portions of rice on each plate—think of it as a soft bed ready for our star player: teriyaki chicken! Slice those rested thighs into beautiful pieces so everyone can see that juicy interior glistening in all its glory. Now comes my favorite part: drizzling more of that homemade teriyaki glaze over the top. It’s like adding liquid gold atop your already brilliant creation!
To elevate this dish even further (and trust me—you want to do this), sprinkle chopped green onions over everything like confetti at a celebration; their fresh crunch brings an irresistible contrast while enhancing flavor beautifully. And if you’re feeling extra fancy—or just love sesame seeds like I do—scatter some toasted ones on top as well for added texture and nutty flavor. Each bite becomes not just food but an experience—one that’s bursting with warmth and joy!
Don’t forget to take a moment before diving in; inhale deeply and savor those harmonious aromas wafting around you. This dish isn’t merely about sustenance—it’s about connection, enjoyment, and sharing something truly extraordinary with loved ones around your table.
Final Thoughts on Your Teriyaki Chicken Adventure
And there you have it—your very own Teriyaki Chicken masterpiece! I promise you this dish will not only impress anyone who sits down at your table but also fill your home with laughter and stories shared over delicious food. Whether it’s a weeknight meal or a gathering with friends, every bite will remind you why cooking is such an enriching experience. Don’t shy away from experimenting with side dishes or presentation styles; let your creativity shine through!
Remember that cooking is as much about love as it is technique—and I hope this journey through creating mouthwatering teriyaki chicken inspires many more culinary adventures in your kitchen. Happy cooking!
Storage and Enjoyment Tips for Your Teriyaki Chicken
Now that your kitchen is filled with the intoxicating aroma of grilled Teriyaki Chicken, it’s time to savor every bite! This dish is not just a meal; it’s an experience bursting with flavor and warmth, perfect for gathering around the table with loved ones. But what if you find yourself with leftovers? Don’t worry—this dish is just as delightful the next day, and I’m here to share how to store it properly so you can enjoy every last morsel!
Storing Leftover Teriyaki Chicken
To keep your Teriyaki Chicken fresh and flavorful, I recommend storing it in an airtight container. This will shield it from any unwanted air exposure that can lead to dryness or spoilage. If you’re keeping it in the fridge, it will maintain its deliciousness for about 3-4 days. A little pro tip: if you want to ensure the chicken stays moist, throw a slice of bread into the container; this may sound quirky, but it helps absorb any excess moisture and keeps your chicken succulent! When reheating, I suggest using a microwave or oven at a low temperature to gently warm it up without sacrificing its juicy texture. Trust me—there’s nothing quite like biting into that tender chicken again!
Freezing Teriyaki Chicken for Later
If you want to extend the life of your culinary creation even further, freezing is a fantastic option! Simply let your leftover chicken cool completely before transferring it into freezer-safe bags or containers. Squeeze out as much air as possible before sealing—that’s key for preventing freezer burn. Properly stored, your Teriyaki Chicken can stay deliciously intact for up to 3 months in the freezer. When you’re ready to enjoy it again, just thaw it overnight in the refrigerator before reheating. This handy method not only saves time on busy nights but also means you’ll always have a tasty meal waiting for you whenever those cravings strike! What could be more convenient?
Teriyaki Chicken
Indulge in the delightful flavors of homemade Teriyaki Chicken, a dish that transforms simple chicken thighs into a sweet and savory masterpiece. Grilled to perfection, each tender bite is enveloped in a glossy glaze that harmonizes the richness of soy sauce with the sweetness of brown sugar and the aromatic notes of garlic and ginger. This recipe is not only easy to prepare but also versatile enough for busy weeknights or special gatherings. Serve it over fluffy rice and garnish with green onions for a meal that’s sure to impress your family and friends. Get ready to savor a comforting dish that brings warmth and joy to your table!
- Prep Time: 15 minutes
- Cook Time: 20 minutes
- Total Time: 35 minutes
- Yield: Approximately 8 servings 1x
- Category: Main
- Method: Grilling
- Cuisine: Asian
Ingredients
- 8 boneless skinless chicken thighs
- 1 cup low-sodium soy sauce
- 1 cup brown sugar
- 1/4 cup rice vinegar
- 4–5 large cloves garlic, minced
- 3 tsp freshly grated ginger
- 2 tablespoons cornstarch
- 3 green onions, chopped (for garnish)
Instructions
- In a bowl, whisk together soy sauce, brown sugar, rice vinegar, water, garlic, and ginger until combined.
- Marinate chicken thighs in half of the mixture for at least 2 hours (ideally overnight).
- In a saucepan over medium heat, combine remaining marinade with cornstarch and simmer until thickened.
- Preheat grill or cast iron pan; cook marinated chicken on high heat for about 6-7 minutes per side.
- Brush grilled chicken with thickened glaze during the last few minutes of cooking.
- Let chicken rest for 10 minutes before slicing; serve over rice garnished with green onions.
Nutrition
- Serving Size: 1 chicken thigh (approximately 85g)
- Calories: 210
- Sugar: 12g
- Sodium: 830mg
- Fat: 11g
- Saturated Fat: 3g
- Unsaturated Fat: 8g
- Trans Fat: 0g
- Carbohydrates: 14g
- Fiber: 0g
- Protein: 19g
- Cholesterol: 80mg