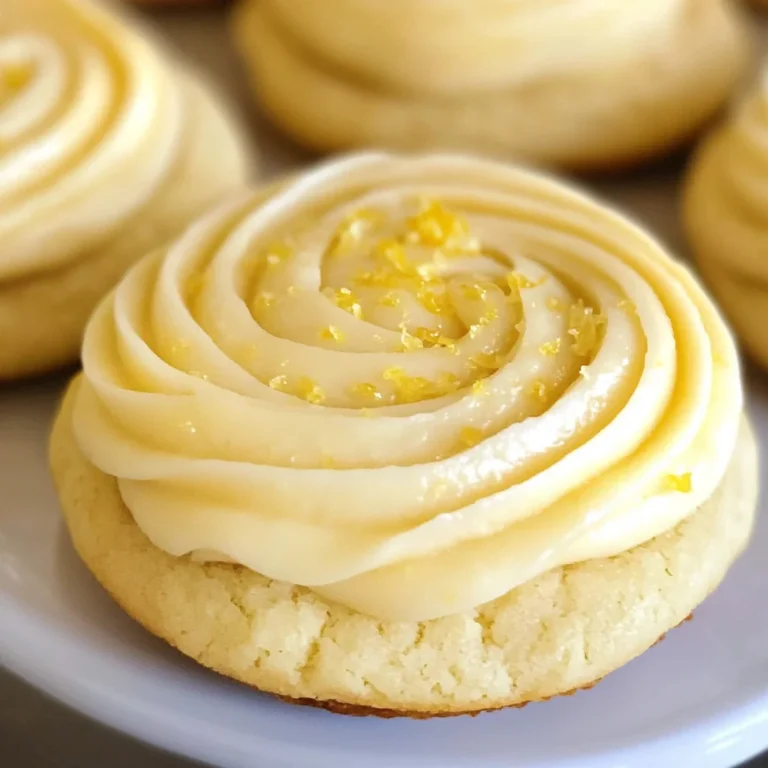
Buttery Spritz Cookies
When it comes to holiday baking, few things evoke the same warmth and nostalgia as the smell of fresh cookies wafting through the house. Imagine the soft, buttery scent mingling with the sweetness of sugar, a symphony of flavors that dances around you like an embrace from a loved one. Buttery Spritz Cookies are not just a treat; they are a bridge between generations, an expression of love and creativity that brings people together. With their delicate shapes and melt-in-your-mouth texture, these cookies have a special place in my heart—and I can’t wait to share all the little secrets that make them truly extraordinary.
As we embark on this culinary journey together, I want you to feel every step of the way. Each ingredient plays its own role, contributing to what makes these Buttery Spritz Cookies so delightful. The joy of pressing each cookie into whimsical shapes takes me back to childhood, when I would help my grandma in her cozy kitchen, marveling at how such simple ingredients could create something so magical. Whether you’re preparing a festive cookie tray or simply indulging on a rainy afternoon, these cookies will undoubtedly bring smiles and sweet memories.
Buttery Spritz Cookies: A Delightful Treat for Every Occasion
Welcome to the world of Buttery Spritz Cookies! These charming little delights are perfect for any occasion—be it holiday gatherings or just a quiet moment at home with a cup of tea. Their soft texture and rich flavor make them irresistible, and trust me when I say that once you start making them, you’ll be hooked!
Ingredients:
As we dive into our ingredient list, think of this as gathering your trusty allies for a delicious adventure. Each component plays an essential role in crafting those scrumptious cookies we’re aiming for.
- 1 cup (2 sticks or 226g) unsalted butter, softened to room temperature. This is crucial for creaming properly and creating that light, airy texture we’re aiming for in our Buttery Spritz Cookies. If your butter is too cold, it won’t cream effectively; if it’s melted, your cookies will spread too much. The quality of butter matters here—European-style butter with higher fat content will give you even richer results.
- 2-1/4 cups confectioners’ sugar, divided. This ingredient brings sweetness while also contributing to the delicate texture of our cookies. Dividing it allows us to cream some into the butter first and use the rest later for glazing. Look for finely sifted sugar; it dissolves more readily and creates that smooth consistency we want in both our dough and glaze.
- 1/2 teaspoon salt. Salt may seem like an afterthought in sweet recipes, but it’s absolutely paramount! It enhances flavors and balances sweetness—think of it as the secret handshake that makes everything taste better.
- 1 large egg, room temperature. Eggs act as binders in baking while also contributing moisture that keeps our cookies tender. Room temperature eggs mix more easily into batters compared to cold ones straight from the fridge—so if you forget to set them out beforehand, just submerge them in warm water for a few minutes!
- 1 teaspoon vanilla extract. Ahh, vanilla—the fragrant elixir of happiness! This extract adds depth and warmth to our cookies. Opt for pure vanilla extract over imitation for an authentic flavor experience; it’s worth every penny!
- 1/2 teaspoon almond extract. This is my little twist! Almond extract imparts an exquisite nuttiness that complements vanilla beautifully while elevating your cookie’s profile from delightful to divine.
- 2-1/2 cups all-purpose flour. Flour provides structure to our cookies without making them dense or heavy. It’s essential not to overmix when incorporating this; overworking flour can lead to tough results—definitely not what we want here!
- 2 to 3 tablespoons water. Water may seem insignificant but helps adjust the dough’s consistency if it’s too dry after mixing in the flour—a great trick if you’re struggling with overly crumbly dough!
- Colored sugar and sprinkles. These delightful decorations add fun flair and whimsy! They’re completely optional but highly recommended—who can resist a sprinkle-covered cookie?
- Melted semisweet chocolate (optional). For those who crave extra indulgence, dipping these cookies in chocolate adds richness and decadence that’s utterly intoxicating!
Equipment You’ll Need:
Now that we have gathered our ingredients like trusted companions on this baking journey, let’s talk about the tools that will help us create magic in the kitchen! Just like having good ingredients is vital for success, so is having the right equipment by your side.
- Mixing bowl: A sturdy mixing bowl is essential as it provides ample space for whipping up our buttery mixture without fear of spilling over—a very real concern when mixing at high speeds!
- Electric mixer: Whether you opt for a hand-held model or a stand mixer, this tool will take care of creaming butter and sugar effortlessly while creating those beautiful air pockets we need for fluffy cookies.
- Cookie press: This magical device is what transforms your dough into charming shapes! Make sure you choose one with interchangeable disks so you can experiment with different designs—just follow its specific instructions closely.
- Baking sheets: Ungreased metal baking sheets are non-negotiable here; they ensure that your cookies grip onto their surface just right during baking so they can hold their shape beautifully as they cool down.
- Wire racks: These allow your freshly baked cookies to cool evenly without getting soggy on one side—a vital step if you want those delightful treats ready for decorating!
With all our ingredients and equipment lined up like eager participants waiting at the starting line, let’s begin preparing these Buttery Spritz Cookies!
Step 1: Creaming Your Way to Success
Preheat your oven to 375°F (190°C), inviting warmth into your kitchen as you begin this delightful process! In a large mixing bowl—or your trusty stand mixer—cream together your softened butter along with 1-1/4 cups of confectioners’ sugar and salt until light and fluffy; this should take about five to seven minutes at medium speed. Why do we spend time on this? Creaming incorporates air into the mixture which leads to lightness—a key characteristic we’re aiming for in these buttery delights! You’ll know it’s ready when it looks pale yellow and has increased significantly in volume; trust me—it’ll be worth every second spent!
Step 2: Adding Flavorful Depth
Once your mixture has reached peak fluffiness, it’s time to introduce flavor by beating in one large room-temperature egg along with one teaspoon of vanilla extract and half a teaspoon of almond extract until everything is well combined. Here’s where magic happens—the egg provides moisture while adding richness; meanwhile, those extracts infuse depth into our batter that will leave taste buds dancing with joy! Take care not to rush through this step; allowing each component time to meld ensures maximum flavor infusion throughout every bite.
Step 3: Gently Incorporating Flour
Now comes perhaps one of the most crucial steps—gradually beat in your all-purpose flour until just combined! This stage needs gentle handling because overmixing develops gluten which can lead us down an undesirable path toward tough cookies instead of tender ones. As soon as no dry flour remains visible within your dough—that’s when you’ve hit perfection! If by chance you’ve ended up with dough that’s too soft or sticky after mixing (which sometimes happens), cover it up tightly with plastic wrap or a lid before chilling it in the refrigerator for about 30 minutes; achieving that ideal consistency where it’s manageable yet still holds its shape is absolutely essential here.
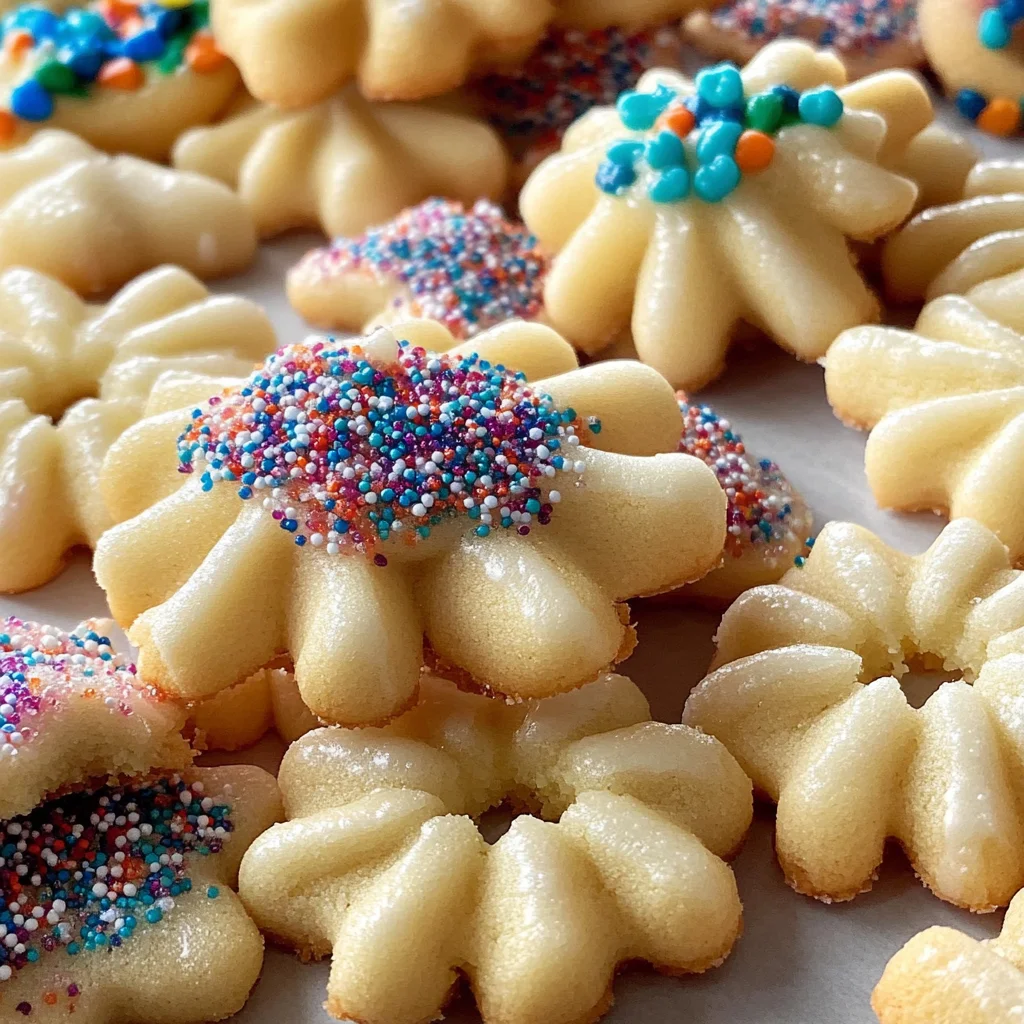
Step 4: Pressing Out Your Cookie Dreams
The next step involves packing your carefully crafted dough into the cookie press fitted with whichever disk design catches your eye today! Press out any air pockets before loading up; ensuring smooth operation will save frustration later on during shaping sessions ahead! As you squeeze out dollops onto ungreased baking sheets spaced two inches apart from each other—you might find yourself reveling in how satisfying this part feels! And don’t worry if some shapes turn out less than perfect initially—it happens even among seasoned bakers! Simply roll back up any misfits before returning them through their transformation process again until you’re left with perfectly shaped masterpieces awaiting their time in oven paradise.
As we prepare these beautiful Buttery Spritz Cookies together through love-filled steps infused with passion—I promise you’ll savor not only every bite but also every moment spent embracing creativity within culinary artistry!
Step 5: Bake to Perfection
Ah, the moment we’ve been waiting for! Once you’ve pressed those delicate shapes onto your ungreased baking sheets, it’s time to slide them into the oven. Preheat your oven to a toasty 375°F, ensuring it’s just right for baking—too hot, and your beautiful cookies may brown before they have a chance to set properly, altering that lovely texture we’re aiming for. These cookies need only about six to eight minutes in the oven, and I promise you, patience is key here. You’ll want to watch them closely—when they look set but are still pale and barely golden at the edges, that’s your cue! If they start to take on color, you’ve gone too far; remember, these cookies should be tender, not crisp.
The magic happens in this step as the heat transforms the dough into those light and airy delights we crave. The moisture in the dough evaporates while the butter melts into that glorious liquid gold we adore. This gentle baking process allows the cookies to puff slightly without browning too much, leaving you with a tender bite that will melt in your mouth. As they finish baking, the aroma will waft through your home—a sweet invitation that makes everyone feel warm and cozy inside. So don’t rush! Allow those spritz cookies the full time they need to reach their perfect state.
Step 6: Glazing Your Cookies
Now comes one of my favorite parts of making Buttery Spritz Cookies—the glaze! This step transforms our simple cookies into truly extraordinary treats that sparkle and shine with excitement. In a small bowl, take that remaining cup of confectioners’ sugar and mix it with just enough water to achieve a smooth consistency—think thick enough to coat but still pourable. You want it silky and glossy like a soft blanket enveloping each cookie. Trust me on this; it’s crucial for giving your cookies that lovely finish and extra touch of sweetness without overwhelming their delicate flavor.
Once you’ve achieved that creamy glaze, it’s time to dip! Take each cooled cookie—oh, how wonderful they look—and gently dip them into this sweet concoction. Make sure each one is well-coated but be careful not to drown them; we want just enough glaze so it clings beautifully without dripping everywhere. Set them aside on a wire rack or parchment paper (if you need a clean-up friend) where they can dry undisturbed for a bit. As they set up, take a moment to appreciate how gorgeous they look—this is where all your hard work pays off!
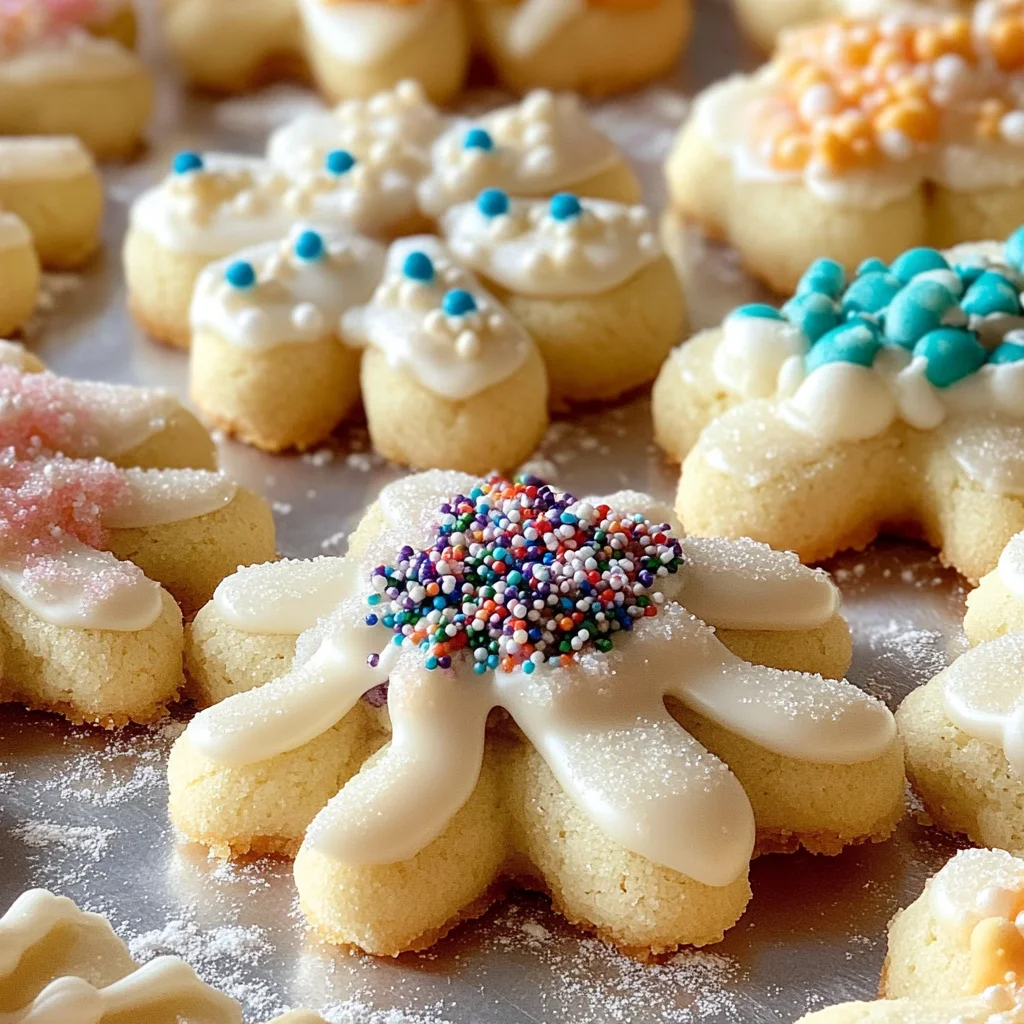
Step 7: Decorating Delightfully
Now for the fun part: decorating! This is where you can let your creativity shine like colored sugar and sprinkles scattered across a festive canvas of cookies. Once your glaze has set slightly but is still tacky (about five minutes should do), grab some colored sugar or sprinkles of your choice and sprinkle them over each cookie generously. How delightful it is to see them transform from simple baked goods into vibrant little jewels!
Why add these toppings? Well, beyond their visual appeal, they bring an additional crunch and burst of sweetness that perfectly complements the tender buttery base of each cookie. When choosing decorations, think about colors that inspire joy or remind you of special occasions—after all, these Buttery Spritz Cookies are perfect for any holiday cookie tray or simply when you need a little treat on any day ending in “y.” And don’t shy away from experimenting; maybe some will get dipped in melted chocolate later on for an extra indulgent twist!
Step 8: The Moment of Truth – Cooling & Enjoying
After all this hard work—and oh boy, what rewarding work it has been—it’s finally time for our Buttery Spritz Cookies to cool completely. Place them on wire racks if you haven’t already done so; letting them rest here allows air circulation around all sides so they won’t get soggy from residual moisture. Cooling typically takes about 15-20 minutes; I know it can feel like an eternity when all you want is one delicious bite! However, trust me when I say this step is absolutely paramount in preserving their lovely texture.
As you wait (imagine all that delightful anticipation!), let yourself savor the aromas lingering in your kitchen—a blend of buttery warmth with hints of vanilla and almond wafting through the air will make anyone eager for dessert! Once cooled completely, grab one (or two!) and take a moment—you deserve it—to enjoy every crumbly bite of these sweet delights. Their rich flavor combined with that satisfying crunch from the sugar topping creates an utterly intoxicating experience worthy of any celebration or quiet evening snack.
Next Major Phase – Final Touches
Step 9: Optional Chocolate Dipping & Final Flourishes
If you’re feeling adventurous (and let’s face it—who wouldn’t be?), consider taking these Buttery Spritz Cookies up another notch by dipping some into melted semisweet chocolate! Simply melt some chocolate chips or chopped chocolate over low heat until smooth and velvety—this adds an absolutely luxurious element that pairs beautifully with our already amazing cookies. Dip half or even three-quarters of each cookie into this luscious chocolate and allow any excess to drip off before placing them back on the wire rack.
This final flourish isn’t just about aesthetics; it deepens the flavor profile significantly by introducing rich cocoa notes alongside the buttery sweetness you’ve crafted so lovingly. The contrast between textures—the crunchiness of sprinkles against smooth chocolate—is like experiencing dessert poetry with every nibble! As these beauties cool down again after dipping (you’ll want those chocolate coatings set), prepare yourself for compliments galore at gatherings or simply during cozy nights at home.
And there you have it! With each step imbued with love and care, you’ve created Buttery Spritz Cookies that not only taste heavenly but also carry with them stories you’ll share around tables filled with laughter and joy. So go ahead—bake up another batch soon because once friends get wind of these treats; they’ll come knocking for more!
Storage and Enjoyment Tips for Your Buttery Spritz Cookies
Now that your kitchen is filled with the heavenly aroma of freshly baked Buttery Spritz Cookies, it’s time to savor every delightful bite! But what happens when there are leftovers? Fear not, my friends! These cookies are just as enjoyable later on, and I’m here to share how to preserve their charm and flavor. Proper storage ensures that you can indulge in these sweet morsels long after the baking spree, keeping each cookie soft and scrumptious.
Storing Leftover Buttery Spritz Cookies
To keep your Buttery Spritz Cookies fresh, store them in an airtight container; this will shield them from air exposure and help retain their delightful texture. If you have a cookie jar made of glass or ceramic, that’s perfect! Just make sure it has a tight-fitting lid. These cookies will stay delicious for about a week at room temperature, but trust me when I say they taste best within the first few days. For an extra tip that has served me well over the years, try popping a slice of bread into the container with your cookies. This little trick keeps them soft as the moisture from the bread seeps into the cookies, creating an utterly intoxicating experience with every bite. When stored properly, they maintain that lovely buttery flavor and melt-in-your-mouth texture that makes them so profoundly satisfying. If you’re feeling indulgent, consider reheating them slightly in the microwave for just a few seconds; this warms them up perfectly and restores some of that fresh-baked magic!
Freezing Buttery Spritz Cookies for Later
Freezing your Buttery Spritz Cookies is a fantastic option if you’ve made a big batch or want to save some treats for another day—trust me, it’s like having a secret stash of joy waiting for you! To freeze them properly, simply place cooled cookies in a single layer on a baking sheet until they’re firm. Then you can transfer them into an airtight freezer bag or container. Be sure to separate layers with parchment paper to prevent sticking. They’ll keep beautifully frozen for up to three months! When you’re ready to enjoy these little delights again, just take out however many you fancy and allow them to thaw at room temperature for about 30 minutes. The convenience factor here is truly wonderful; imagine pulling out a frozen cookie just when you need a sweet treat or surprise guests with homemade cookies without all the last-minute fuss! Isn’t that just fabulous?
Buttery Spritz Cookies

Buttery Spritz Cookies are a delightful treat that evokes the warm nostalgia of holiday baking. These delicate, melt-in-your-mouth cookies are perfect for any occasion, bringing smiles and sweet memories to your gatherings or cozy afternoons at home. Their rich buttery flavor combined with hints of vanilla and almond creates an enchanting taste experience. With whimsical shapes made using a cookie press, these cookies not only taste heavenly but also look charming on any dessert table. Whether decorated with colorful sugar sprinkles or dipped in velvety chocolate, Buttery Spritz Cookies will have everyone coming back for more!
- Prep Time: 15 minutes
- Cook Time: 8 minutes
- Total Time: 23 minutes
- Yield: Approximately 24 cookies 1x
- Category: Dessert
- Method: Baking
- Cuisine: American
Ingredients
- 1 cup (2 sticks) unsalted butter, softened
- 2–1/4 cups confectioners' sugar
- 1/2 teaspoon salt
- 1 large egg, room temperature
- 1 teaspoon vanilla extract
- 1/2 teaspoon almond extract
- 2–1/2 cups all-purpose flour
- 2 to 3 tablespoons water
- Colored sugar and sprinkles for decoration (optional)
Instructions
- Preheat your oven to 375°F (190°C). In a large mixing bowl, cream the softened butter with 1-1/4 cups of confectioners' sugar and salt until light and fluffy.
- Beat in the egg, vanilla extract, and almond extract until well combined.
- Gradually add the flour until just combined; avoid overmixing. If dough is too soft, chill it for about 30 minutes.
- Pack dough into a cookie press and shape onto ungreased baking sheets, spacing them two inches apart.
- Bake for 6 to 8 minutes or until set but still pale at the edges. Let cool before glazing.
- For the glaze, mix remaining confectioners' sugar with water until smooth; dip cooled cookies in glaze and decorate with sprinkles if desired.
Nutrition
- Serving Size: 1 cookie
- Calories: 97
- Sugar: 7g
- Sodium: 28mg
- Fat: 5g
- Saturated Fat: 3g
- Unsaturated Fat: 2g
- Trans Fat: 0g
- Carbohydrates: 11g
- Fiber: <1g
- Protein: <1g
- Cholesterol: 15mg