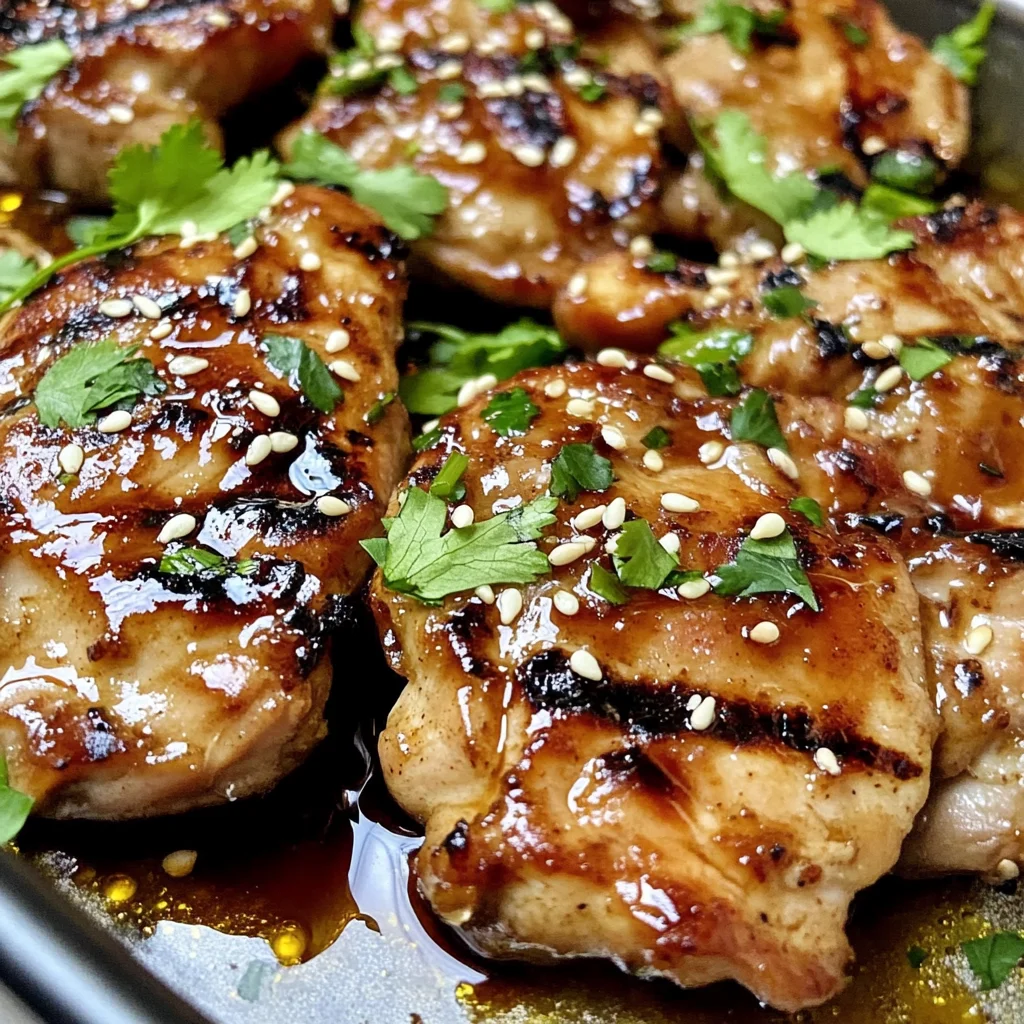
Grilled Asian Chicken
Grilled Asian Chicken is not just a meal; it’s an experience, a delightful journey that brings together smoky flavors and sweet undertones in a way that dances on the palate. As the sun sets and the grill begins to sizzle, you’re not merely cooking; you are creating memories. Imagine the aroma of marinated chicken wafting through the air, mingling with hints of garlic and sesame, inviting everyone to gather around the dining table. This recipe is about more than just food; it’s about connection, joy, and the simple pleasures that come from sharing a beautifully prepared dish with loved ones. I promise you, once you try this Grilled Asian Chicken, it will become a staple in your weeknight dinner rotation.
The beauty of this Grilled Asian Chicken lies in its perfect balance of flavors—sweet, tangy, and umami—all wrapped around succulent pieces of chicken. Let’s take a moment to appreciate the ingredients that bring this dish to life. From brown sugar’s caramel sweetness to rice vinegar’s bright acidity, every element plays a vital role in creating a symphony of flavors that tantalizes your taste buds. Whether it’s for a casual family dinner or an outdoor gathering with friends, this dish effortlessly elevates any occasion. Trust me on this: once grilled to perfection and glistening with that luscious glaze, you’ll find yourself savoring each bite while relishing the satisfied smiles around you.
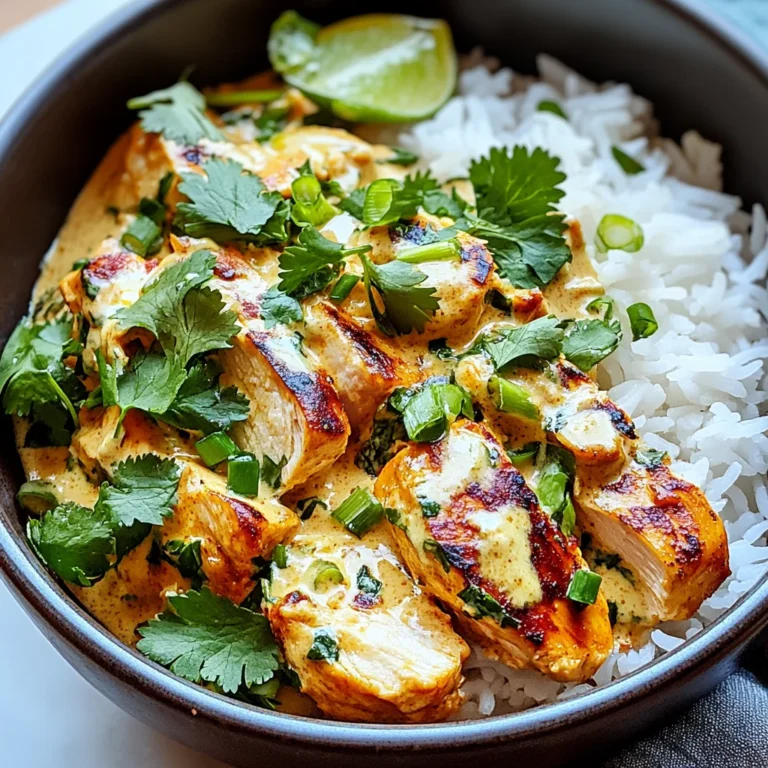
Grilled Asian Chicken: A Flavorful Delight for Any Occasion
Let’s dive into making this delightful dish together! I can’t wait for you to taste how easy and delicious homemade grilled chicken can be.
Ingredients:
As we embark on this culinary adventure together, let’s take a moment to appreciate our ingredients. Each one has its own unique contribution that transforms ordinary chicken into something truly extraordinary.
- 6-8 boneless (skinless chicken thighs or breasts or tenders): The star of our show! Boneless chicken thighs are my absolute favorite for grilling due to their rich flavor and tender texture. They hold up beautifully against the heat without drying out too quickly—unlike breasts which can be more prone to overcooking. If you prefer a leaner option, chicken breasts work just fine; however, I recommend keeping an eye on them during grilling since they cook faster than thighs. Tenders are another fantastic choice if you’re looking for bite-sized pieces that cook rapidly and are perfect for kids!
- 1/2 cup + 3 tablespoons olive oil (divided): Olive oil is our secret weapon here! Not only does it help create a beautiful sear on the chicken when it’s grilled, but it also adds richness and moisture throughout the cooking process. The division of oil is important too; we’ll use some for brushing onto the chicken beforehand—this prevents sticking—and then we’ll incorporate more into our sauce for flavor depth. Always opt for high-quality extra virgin olive oil if possible—it’s worth every penny for its robust flavor.
- 1 teaspoon kosher salt: Salt is an absolute must in any cooking endeavor! It enhances flavors and brings out the natural juiciness of our chicken. Kosher salt is preferred here because its larger crystals make it easier to control how much you’re using when seasoning your meat evenly. Be sure not to skip this step; salting properly ensures every bite of your grilled chicken is bursting with flavor!
- 1 teaspoon fresh ground pepper: Freshly ground black pepper adds warmth and depth to our dish while balancing out the sweetness in our glaze. It’s essential not just for seasoning but also as part of our overall flavor profile. When selecting your pepper, look for whole peppercorns if you can—they pack more punch than pre-ground varieties!
- 1/2 cup brown sugar: Here’s where we introduce that lovely sweetness! Brown sugar provides not only sweetness but also moisture thanks to its molasses content; it helps create that beautiful caramelization on our chicken as it grills. You could use granulated sugar if needed, but brown sugar gives us those rich notes we crave in an Asian-inspired glaze.
- 1/4 cup rice vinegar: Rice vinegar brings brightness and acidity to our sauce—a key player in achieving balance against all those rich flavors we’ve got going on! Its mildness makes it perfect for dressing sauces without overwhelming them with sharpness like other vinegars might do.
- 2 tablespoons soy sauce: This is non-negotiable when crafting an authentic Asian-inspired dish! Soy sauce provides that umami kick we all know and love while enhancing the color of our glaze as well. For a gluten-free alternative, feel free to swap out regular soy sauce with tamari—your grilled chicken will still be delicious!
- 1 teaspoon sesame oil: A little goes a long way with sesame oil! This fragrant oil adds a nutty depth and complexity that’s absolutely intoxicating in combination with our other ingredients. It’s important not to overdo it here; just a teaspoon will infuse our sauce beautifully without overpowering it.
- 2 teaspoons granulated garlic: Granulated garlic offers convenience while delivering robust garlicky goodness throughout our glaze. If you’re feeling adventurous, fresh minced garlic would work too—but remember it might require more careful attention during cooking as it can burn easily!
- 1/2 teaspoon ground ginger: Ginger lends warmth and spice that perfectly complements both sweet and savory notes in this dish—plus it’s known for its wonderful health benefits! Ground ginger is super convenient here; however, fresh ginger would provide even more vibrant flavor if you’re up for grating some into your mix.
- Pinch chili flakes (optional): If you enjoy a bit of heat (and who doesn’t?), feel free to add chili flakes! They’ll provide just enough kick without stealing focus from all those other beautiful flavors at play.
- 2 tablespoons sesame seeds (for garnish): These little gems add both crunch and visual appeal once sprinkled over your finished plate—it’s all about those final touches! Toasting them lightly before garnishing can enhance their nutty aroma even further.
- 1/4 cup chopped cilantro for garnish: Fresh cilantro brings brightness and freshness right at the end—a perfect contrast against smoky grilled meat! If cilantro isn’t your thing (I get it!), feel free to substitute with green onions or parsley instead—the goal is simply adding something vibrant!
Equipment You’ll Need:
Before we jump into preparing this mouthwatering grilled chicken masterpiece, let’s talk about some essential tools you’ll want by your side in the kitchen or outdoors at your grill station. Having these tools ensures everything runs smoothly—and trust me, they’ll make your cooking experience so much more enjoyable!
- Grill (Charcoal or Gas) – This is where the magic happens! Whether you’re using charcoal or gas doesn’t really matter as long as you achieve that lovely smoky flavor we crave in grilled dishes like this one. Make sure your grill has enough space for indirect cooking too!
- Digital Meat Thermometer – A game-changer when ensuring perfectly cooked chicken every time! Trust me; no one wants rubbery overcooked meat or undercooked poultry—that’s why having an accurate thermometer handy allows us peace of mind knowing exactly when our bird has reached safe internal temperatures.
- Basting Brush – This handy tool helps apply sauces evenly onto your grilling proteins without losing precious heat during flips! Opting for silicone brushes helps avoid flaking bristles left behind on food while ensuring smooth application each time.
- Mixing Bowl – Essential for whisking together sauces effortlessly before transferring them onto whatever we’re grilling up next! Make sure it’s large enough so you have room while mixing all those lovely ingredients.
Now that we have everything prepped let’s dive into preparing this incredible Grilled Asian Chicken together!
Step 1: Preparing Your Grill Fire
To start off on the right foot, let’s prepare our grill fire set at 350°F using pecan or hickory wood chips if you’re aiming for added smokiness—trust me on this; nothing beats that alluring aroma wafting through while cooking! If you’re using charcoal, arrange coals on one side of your grill so we have direct vs indirect heat zones established (this helps prevent flare-ups!). For gas grills? Simply turn half burners off after reaching desired temperature—you want consistent heat throughout cooking time without burning anything unnecessarily.
Step 2: Seasoning Your Chicken
Next comes an exciting part where we’ll brush each piece of chicken generously with three tablespoons olive oil generously across both sides before sprinkling kosher salt & fresh ground pepper evenly over top surfaces too—don’t rush through seasoning here because proper salting makes all difference between bland & flavorful results later down line!
Step 3: Creating Our Sauce
Now let’s focus back onto preparing that utterly intoxicating sauce that’ll elevate everything we’ve worked hard towards thus far—you’ll mix together remaining half cup olive oil along brown sugar/rice vinegar/soy sauce/sesame oil/granulated garlic/ground ginger/chili flakes until fully combined within mixing bowl first then transfer mixture into saucepan placed over medium heat directly allowing time bring things boil gently while whisking often until thickened slightly about 3–5 minutes total duration max (this step creates wonderful coating consistency!)
Step 4: Glazing & Cooking Chicken
With both grill ready along marinated chickens awaiting their fate ahead—we’ll place these beauties onto indirect side first letting lid remain closed tightly during initial cooking period lasting approximately six-eight minutes total duration watching carefully until they develop nice golden color forming outside surface layer before flipping halfway through glazing generously again applying thicker coating alongside closing lid yet again continuing cook another four minutes ensuring tenderness achieved throughout entire process finally checking internal temperature reaches safe zone around165°F via trusty digital thermometer previously mentioned earlier…
Oh my goodness—the anticipation builds as we near completion! Just imagine what awaits when these luscious pieces come off hot from grill resting ever so slightly before garnishing…
Stay tuned as we’ll finish assembling all elements together shortly giving full serving instructions soon thereafter!
Step 5: A Glorious Sauce Takes Shape
Now, let’s dive into the heart of our Grilled Asian Chicken: that utterly intoxicating glaze. In a mixing bowl, combine a generous ½ cup of olive oil with the brown sugar, rice vinegar, soy sauce, sesame oil, granulated garlic, ground ginger, and if you’re feeling adventurous, a pinch of chili flakes for that delightful hint of heat. This mixture is not just a collection of ingredients; it’s a symphony of flavors waiting to awaken your taste buds! The olive oil acts as the base and carrier for all these vibrant flavors while the brown sugar contributes not only sweetness but also helps in caramelizing beautifully on the grill.
Once you’ve whisked everything together until smooth, transfer this glossy mixture to a saucepan and place it over medium heat. Here’s where the magic happens! As the sauce heats up, it will begin to thicken, which usually takes about 3 to 5 minutes. Make sure you whisk often during this time; this not only prevents any burning but also ensures that every flavor melds beautifully together. You’ll know it’s ready when you see it bubbling gently and can coat the back of a spoon—this thickening process is absolutely paramount because it creates that luscious glaze that clings perfectly to our chicken. When your sauce reaches that ideal consistency, remove it from the heat and reserve half a cup in a bowl for glazing later—this is your secret weapon for adding layers of flavor right at the end!
Step 6: Prepping Your Grill – The Perfect Temperature
Now that we have our glaze ready to go, it’s time to prepare your grill fire to an ideal temperature of around 350°F. If you’re using charcoal, opt for pecan or hickory wood chips for that extra smoky flavor that pairs so beautifully with these Asian-inspired notes. Trust me on this—the smoke adds an incredible depth that elevates your chicken from ordinary to extraordinary! If you’re using gas, simply preheat your grill with the lid closed for about 10-15 minutes until it reaches that sweet spot.
Before we get cooking, let’s brush our chicken thighs (or breasts or tenders) with those glorious 3 tablespoons of olive oil we set aside earlier. This step is crucial—not only does it help in preventing sticking when grilling, but it also contributes to achieving those beautiful grill marks and enhances overall juiciness. Sprinkle kosher salt and freshly cracked black pepper generously over both sides of each piece; seasoning is key here as it brings out the natural flavors of the chicken while creating a delicious crust when cooked on high heat.
Step 7: Searing Perfection – Indirect Cooking
With your grill prepped and ready, it’s time to lay down those beautifully oiled and seasoned chicken pieces over indirect heat. What does this mean? Well, instead of placing them directly over flames—a method best for quick-cooking items—you’ll arrange them next to the coals (or flame) so they cook through more gently without charring too quickly. Close that lid and let them sizzle away for about 6-8 minutes undisturbed. I know it’s tempting to peek—don’t rush this step! Letting them cook without flipping allows for even cooking and helps develop those gorgeous grill marks.
After 6-8 minutes have passed and you can smell that tantalizing aroma wafting up from the grill (seriously, take a moment; it’s divine!), it’s time to flip these beauties over. Here’s where we introduce our luscious glaze! Using a basting brush or a spoon, generously coat one side with half of your reserved sauce—it should be thick enough to cling beautifully without running off completely. Close the lid again and continue cooking for another 4 minutes; this will allow the glaze to caramelize slightly while penetrating into every juicy bite of chicken.
Step 8: The Final Flip – Building Flavor
After those glorious four minutes have elapsed—oh my goodness—you can lift the lid once more and prepare for another flip! Gently turn each piece over again and brush them with more of that delectable glaze; at this point, they should have developed an enticing golden hue thanks to that wonderful sticky sauce working its magic! It’s all about building layers of flavor here; each turn allows additional glaze to caramelize in those lovely grill marks while maintaining moisture within.
Close the lid one last time and let them cook for an additional 2-3 minutes until they reach an internal temperature of at least 165°F—as measured by your trusty digital meat thermometer—because food safety is non-negotiable! It’s always worth investing in one if you don’t already have one; trust me on this! As they finish cooking, keep an eye out for any sizzling sounds or aromas—these are good signs indicating flavor development happening right before your eyes! When they finally hit that perfect temperature, remove them from the grill and allow them some much-deserved rest time before serving.
Conclusion:
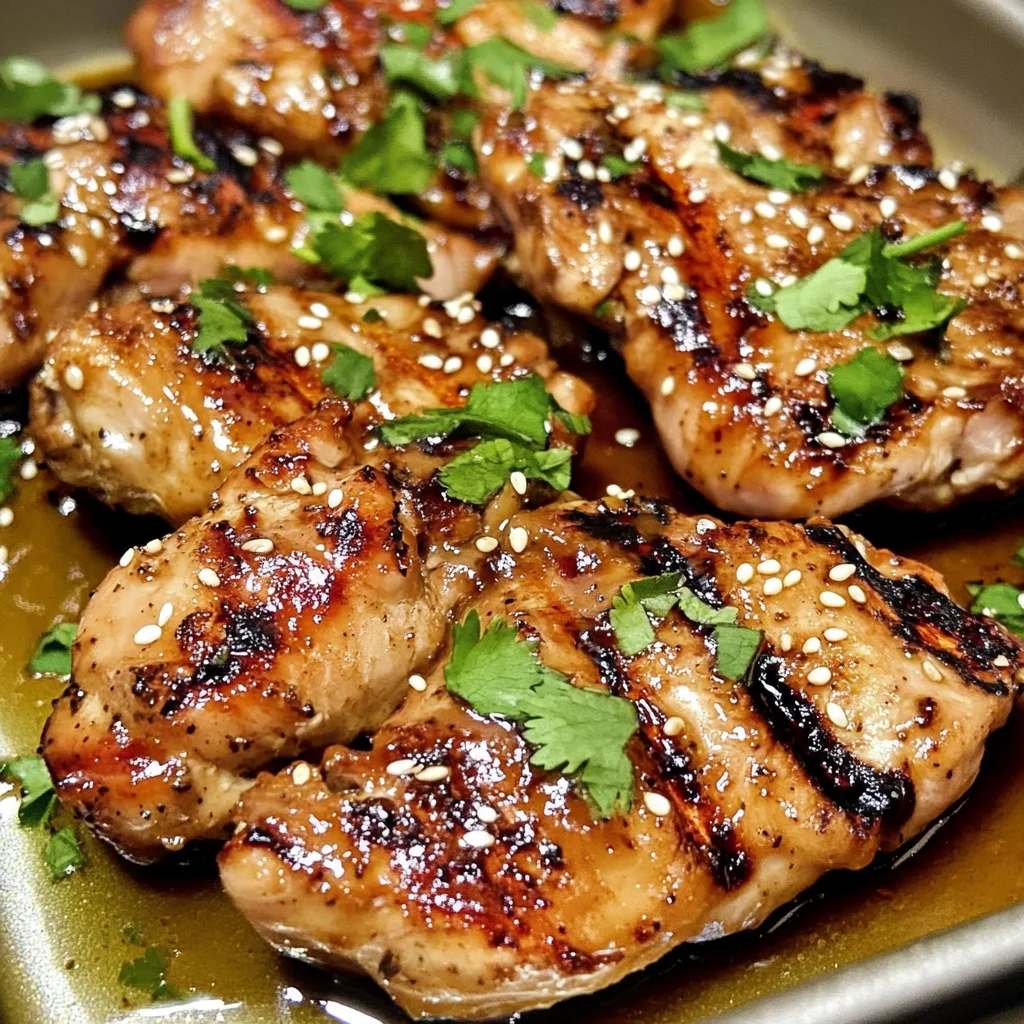
As we wrap up this journey through making Grilled Asian Chicken together, I can’t help but feel an overwhelming sense of joy at sharing this beloved recipe with you. Each step has been infused with not only flavor but also heart; it’s about celebrating simple ingredients that come together harmoniously—a beautiful reminder of what cooking should be all about. The combination of sweet brown sugar with tangy rice vinegar creates an exquisite glaze that dances on your palate while the smoky undertones from the grill bring everything together in an unforgettable way. I truly hope my enthusiasm has inspired you to take this leap into grilling perfection because this dish absolutely deserves a place on your dinner table!
Why is this recipe such a must-try? Well, aside from its crowd-pleasing taste profile, it’s incredibly versatile and accessible for everyone—from seasoned chefs to kitchen novices! Imagine serving this dish at your next gathering; you’ll witness friends’ eyes light up as they take their first bite—a moment filled with sheer delight! Whether it’s a casual family dinner or an outdoor barbecue party with friends, these succulent chicken pieces shine as the star attraction. Picture pulling them off the grill—glazed beautifully under flickering flames—and diving right into those juicy morsels with smiles all around; it’s moments like these that make cooking so rewarding.
When considering how best to serve your grilled masterpiece, let your imagination run wild! Imagine savoring one piece alongside fragrant jasmine rice—each mouthful transporting you straight to an exotic street market! Or how about pairing it with some crunchy vegetable slaw for that perfect contrast? If you’re feeling adventurous, why not whip up some fluffy pancakes drizzled with extra sauce for an unexpected brunch twist? And don’t forget about pairing with grilled veggies or tossing everything into fresh lettuce wraps for vibrant bites bursting with freshness!
Feeling adventurous? This recipe is wonderfully adaptable—you can easily swap out ingredients based on what’s available or even try marinating different proteins like tofu or tempeh if you’re looking for plant-based options! You could incorporate fresh herbs like basil or mint for an aromatic twist or add pineapple juice for added sweetness—each variation opens up new dimensions of flavor waiting for you to explore. I encourage you to make this recipe your own; document your culinary adventure and share your experience because there’s nothing quite like connecting over food we love. Let’s celebrate our kitchens together!
Grilled Asian Chicken
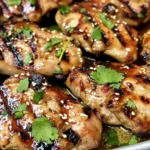
Experience smoky flavors and savory sweetness with our Grilled Asian Chicken recipe—quick and easy dinner that’s sure to impress!
- Prep Time: 15 minutes
- Cook Time: 20 minutes
- Total Time: 35 minutes
- Yield: Serves approximately 4
- Category: Dinner
- Method: Grilling
- Cuisine: Asian
Ingredients
- 6–8 boneless skinless chicken thighs or breasts
- 1/2 cup + 3 tablespoons olive oil (divided)
- 1 teaspoon kosher salt
- 1 teaspoon fresh ground pepper
- 1/2 cup brown sugar
- 1/4 cup rice vinegar
- 2 tablespoons soy sauce
- 1 teaspoon sesame oil
- 2 teaspoons granulated garlic
- 1/2 teaspoon ground ginger
- Optional: Pinch chili flakes, sesame seeds, chopped cilantro for garnish
Instructions
- Preheat your grill to 350°F.
- Brush chicken pieces with three tablespoons of olive oil and season with salt and pepper.
- In a bowl, combine remaining olive oil, brown sugar, rice vinegar, soy sauce, sesame oil, garlic, ginger, and optional chili flakes; mix well.
- Transfer half of the sauce to a saucepan and heat over medium until thickened (about 3–5 minutes). Reserve this for glazing later.
- Grill chicken on indirect heat for 6–8 minutes per side, brushing with glaze during the last few minutes of cooking until they reach an internal temperature of 165°F.
- Let rest for five minutes before garnishing with sesame seeds and cilantro.
Nutrition
- Serving Size: 1 piece (approximately 150g)
- Calories: 320
- Sugar: 10g
- Sodium: 570mg
- Fat: 16g
- Saturated Fat: 2g
- Unsaturated Fat: 12g
- Trans Fat: 0g
- Carbohydrates: 22g
- Fiber: 0g
- Protein: 25g
- Cholesterol: 80mg