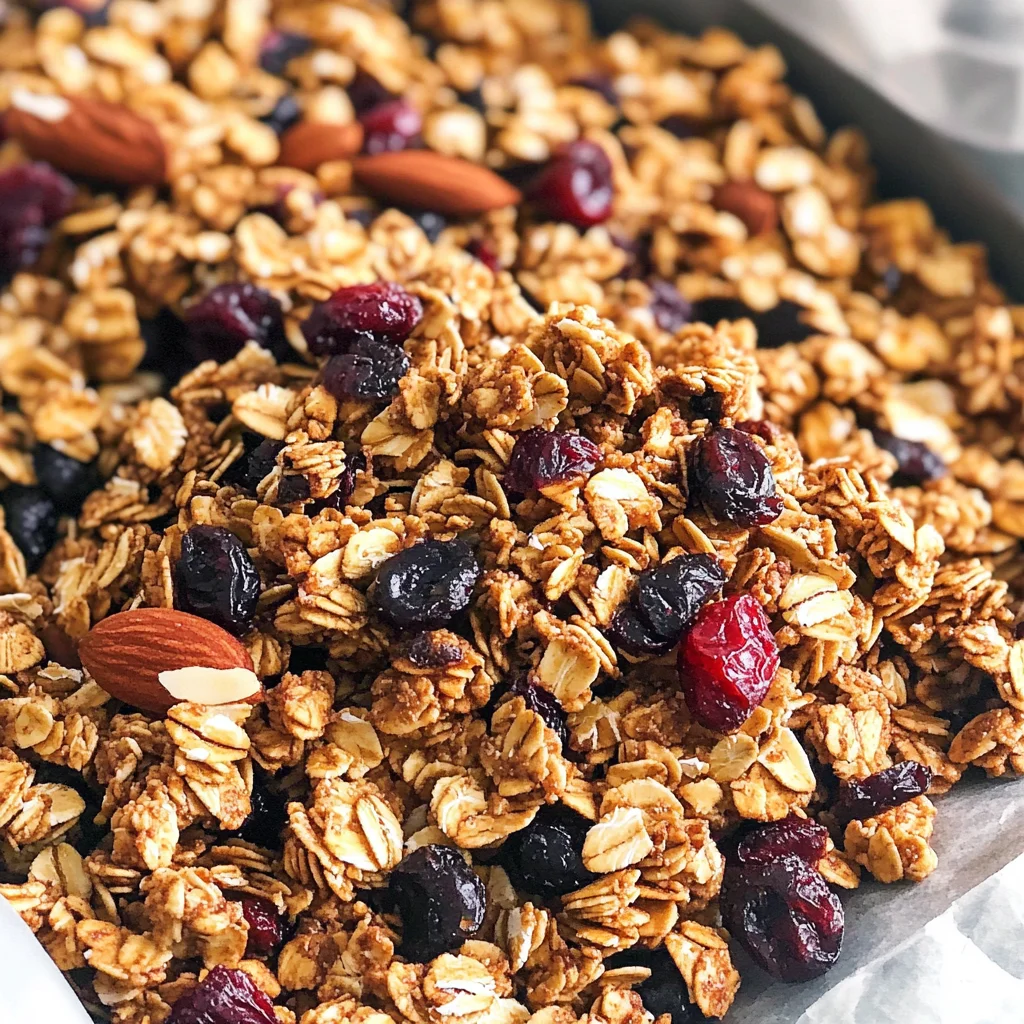
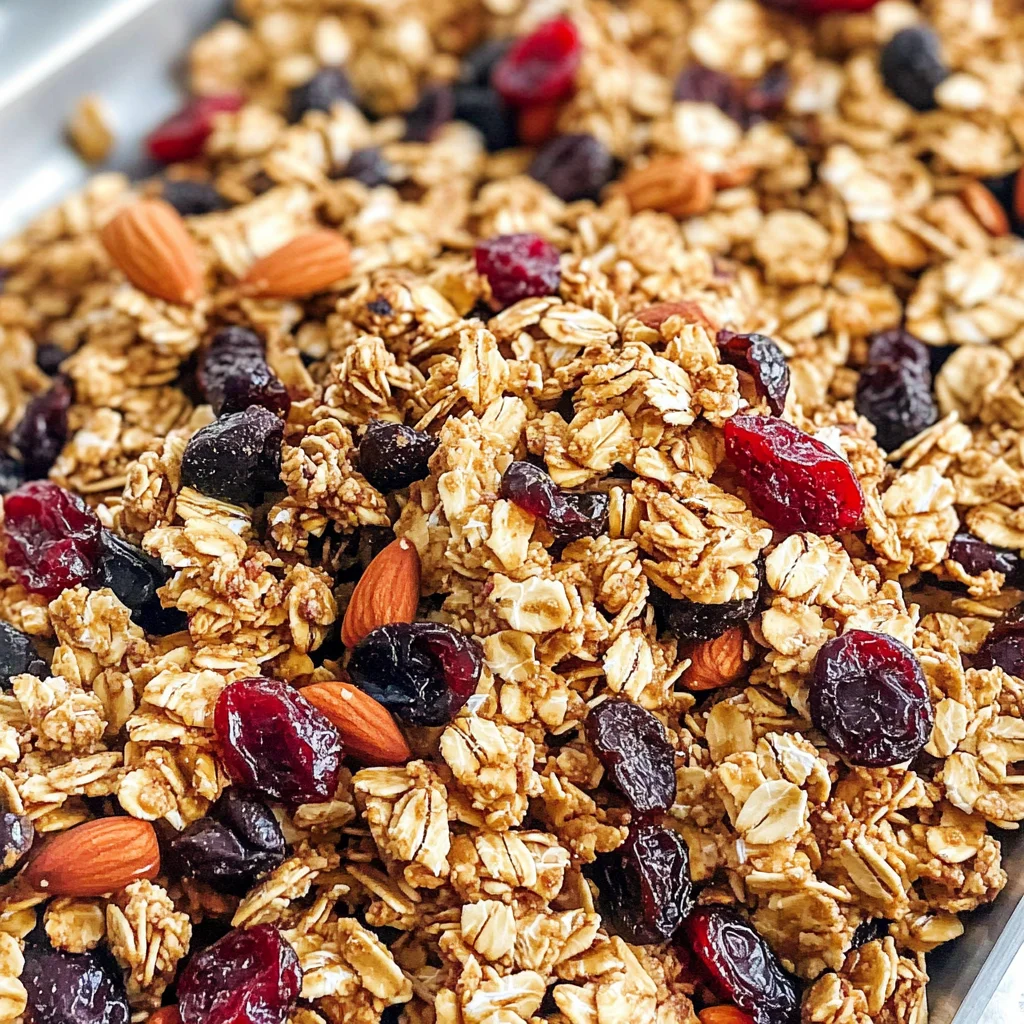
Homemade Maple Cinnamon Granola
There’s something truly magical about the aromas that fill your kitchen when you’re crafting a batch of homemade granola. It’s more than just a recipe; it’s a warm embrace, a moment of comfort that brings back memories of cozy mornings and leisurely breakfasts shared with loved ones. As you mix together oats, nuts, and the sweet liquid gold of pure maple syrup, you’ll find yourself captivated by the transformative process. The comforting scent of cinnamon wafts through the air, promising warmth and nostalgia with every crunchy bite. This Homemade Maple Cinnamon Granola is not just a snack; it’s a delightful celebration of wholesome ingredients that can elevate your day, whether enjoyed on its own or as a delectable topping for yogurt or smoothie bowls.
What I love most about this recipe is its flexibility and simplicity—it allows you to be creative while sticking to healthy choices. Packed with protein and fiber, this granola isn’t just good for your taste buds; it’s good for your body too! The combination of nuts and seeds adds depth and nutrition, while the maple syrup provides just the right amount of sweetness without overwhelming your palate. Every time I make this granola, it feels like a small act of love—an offering to myself and those I care about. Trust me when I say, once you taste this delightful concoction, you’ll want to share it with everyone around you.
Homemade Maple Cinnamon Granola: A Cozy Crunch in Every Bite
Embarking on this culinary journey is like wrapping yourself in a warm blanket on a chilly morning—perfect for fueling your day with goodness. Once you whip up this easy recipe, you’ll have a batch ready to go whenever those snack cravings hit or whenever you’re in need of a little breakfast boost. So grab your mixing bowl and let’s get started!
Ingredients:
As we gather our ingredients for this sumptuous Homemade Maple Cinnamon Granola, think of each element as an essential note in a beautiful symphony. Each component plays its part in creating something truly extraordinary.
- 3 cups Gluten Free Oats. The heart of our granola lies in these gluten-free oats. They provide not only structure but also that delightful chewy texture we all crave when snacking. When selecting oats, make sure they are certified gluten-free if you have sensitivities—this ensures they haven’t been cross-contaminated during processing. Oats are also rich in fiber, which makes them incredibly satisfying and helps keep you full longer—perfect for those busy mornings or afternoons when energy dips!
- ¾ cup Nuts and/or Seeds (Walnuts, pecans, almonds, pumpkin seeds, sunflower seeds). Here’s where we really start to amp up the flavor profile! Nuts and seeds contribute healthy fats, crunchiness, and an array of nutrients like protein and omega-3 fatty acids. You can choose any combination that speaks to you—walnuts bring an earthy richness while pumpkin seeds add a subtle sweetness and vibrant color. Don’t hesitate to experiment! Just remember to chop any larger nuts into smaller pieces so they blend seamlessly with the oats.
- ½ cup Pure Maple Syrup. This liquid gold is what ties everything together with its sweet yet complex flavor profile. Unlike processed sugars that can leave you feeling sluggish, pure maple syrup adds natural sweetness along with minerals like manganese and zinc which support overall health. When purchasing maple syrup, opt for Grade A or B varieties depending on how deep you want that flavor—Grade B has a more robust taste that pairs beautifully with cinnamon.
- ⅓ cup Coconut Oil (melted). Coconut oil is our secret weapon for achieving that coveted crunch! By using melted coconut oil instead of butter or other oils, we not only adhere to our dairy-free requirement but also infuse our granola with a hint of tropical sweetness. Make sure to melt it gently; overheating can alter its flavor profile negatively. Plus, coconut oil solidifies as it cools down which helps create those perfect clumps we all love!
- 1 tsp Pure Vanilla Extract. Vanilla extract isn’t just an added flavor; it’s the magic ingredient that elevates everything else in our granola! It lends warmth and complexity while enhancing the sweetness from the maple syrup without being overpowering. Always go for pure vanilla extract rather than imitation; it’s worth every drop in terms of flavor depth.
- ½ tsp Salt. Now here’s where we bring balance into play! A touch of salt is absolutely paramount as it enhances all other flavors present in our mixture—it really rounds out the sweetness and creates harmony among ingredients.
- 2 tsp Ground Cinnamon. What would homemade granola be without cinnamon? It brings warmth and an unmistakable aroma reminiscent of home-baked goodies! Not only does it elevate the taste but cinnamon also boasts several health benefits including anti-inflammatory properties—a win-win if there ever was one!
- 2 tbsp Chia Seeds or Flax Seeds (optional). These tiny powerhouses are optional but oh-so beneficial! They add extra fiber along with omega-3 fatty acids which are fantastic for heart health. Moreover, they help bind everything together as they absorb moisture during baking—don’t skip them if you have them on hand!
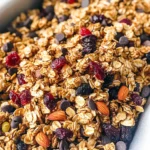
- Dried Cranberries or Cherries (to taste). Adding dried fruits introduces bursts of natural sweetness which contrast beautifully against the crunchiness of oats and nuts—plus they add lovely pops of color too! Choose unsweetened varieties if possible so you maintain control over sugar levels.
- Dark Chocolate Chips (to taste). Who says snacking can’t be indulgent? A handful of dark chocolate chips folded into your cooled granola will create delightful pockets of richness that melt in your mouth—it’s like finding treasure amidst all those wholesome ingredients!
Equipment You’ll Need:
Cooking feels so much more enjoyable when equipped with the right tools! While these may not be ingredients, having quality equipment makes all the difference in achieving delicious results.
- Large Mixing Bowl – A sturdy mixing bowl is essential as it’ll house all our dry ingredients before we combine them with our wet mixture later on. Opt for glass or stainless steel since they’re easy to clean and won’t retain smells over time.
- Baking Sheet – A good-quality baking sheet will ensure even heat distribution while baking our granola to perfection; dark pans tend to brown faster than lighter ones so keep an eye on it as it bakes!
- Silicone Baking Mat or Parchment Paper – Lining your baking sheet is non-negotiable if you want easy cleanup afterward! Silicone mats prevent sticking better than parchment paper while being reusable—an eco-friendly choice!
- Microwave-Safe Bowl – For melting coconut oil quickly without fussing over stovetops! Just be cautious about overheating; stir frequently until fully melted.
Preparing the Homemade Maple Cinnamon Granola
Step 1: Preheat Your Oven to Perfection
First things first: let’s get that oven heating up to 300°F (150°C)! Preheating is crucial because it ensures proper cooking once we pop our granola inside—a step often overlooked but absolutely paramount for achieving the right texture! While waiting for your oven to reach temperature, line your baking sheet with either a silicone mat or parchment paper—you’ll thank yourself later when cleanup time rolls around!
Step 2: Mix Dry Ingredients
In your large mixing bowl, combine those gluten-free oats alongside your choice of nuts or seeds along with any dry spices such as salt and ground cinnamon! Stirring these components together creates an incredible base layer full of texture—the oats provide chewiness while nuts offer delightful crunches throughout each bite! Take care here; aim for even distribution so every mouthful carries forward that familiar comforting blend we crave from homemade granola.
Step 3: Combine Wet Ingredients
Now let’s melt down our luscious coconut oil until silky smooth—about one minute should do nicely in the microwave! Once melted properly (be careful not to overheat), whisk together with pure maple syrup until combined thoroughly before folding in vanilla extract next—it’ll give off such intoxicating aromas as they mingle together beautifully!
Step 4: Bring It All Together
With both mixtures prepared separately at this point—you’re ready to pour that velvety wet concoction over top dry ingredients waiting patiently within their bowl below! Using a spatula works wonders here; fold everything gently until every last oat is coated evenly—the goal? Total coverage ensuring no clumps remain unflavored by sweet notes from maple syrup combined harmoniously alongside warm hints from cinnamon wafting through air around us!
As we continue through this process together making Homemade Maple Cinnamon Granola filled with warmth & love—I promise you’ll find joy awaits hidden within each step leading toward ultimate reward ahead…stay tuned as we wrap things up shortly!
Step 5: Pouring on the Love
Now, it’s time to bring everything together in a glorious union of flavors! Once you’ve mixed your dry ingredients—the oats, nuts, seeds, and warm spices—set that aside and focus on your wet concoction. If you’ve opted for the microwave method, take your bowl with the melted coconut oil and maple syrup mixture. You’ll want to pour this liquid gold over your dry ingredients gently but thoroughly; think of it as a warm embrace for your oats. This step is crucial because the wet ingredients not only add sweetness but also help bind everything together, ensuring that each bite of your granola is bursting with flavor. Trust me, you want every morsel coated!
As you pour, use a spatula to fold the mixture together gently. You aren’t just stirring—you’re coaxing those ingredients into harmony! The goal here is to ensure that every oat flake is lovingly covered in that rich maple syrup and aromatic coconut oil blend—this is what will give you those gorgeous clumps we all love about granola. Don’t rush this step; enjoy the process! Take a moment to breathe in the heavenly aroma of cinnamon and maple wafting up from your bowl. This sensory experience is part of what makes cooking so deeply satisfying.
Step 6: Spreading the Love
Once you’ve achieved a beautifully combined mixture, it’s time for the next important step: spreading out your granola onto your prepared baking sheet. Grab a large baking sheet lined with parchment paper or a silicone mat—this non-stick layer is absolutely paramount because it will prevent any unsightly sticking! Pour all of your beautifully mixed granola onto the sheet, then use that same spatula to spread it out into an even layer. Think of this as creating a canvas for your masterpiece!
The key here is to keep things thin and even; if there are clumps, those will turn into hard little nuggets instead of delightful clusters later on. As you spread, take care to create an even layer without too much overlap. Why is this important? Well, an even layer ensures that every piece bakes uniformly, achieving that perfect balance of crunchiness without any burnt bits lurking in there. It’s like giving each oat its own moment in the spotlight! So take your time here—perfection doesn’t happen overnight.
Step 7: Baking Your Perfect Granola
Now comes one of my favorite moments—the baking! Slide your beautifully spread-out granola into the preheated oven set at 300°F (about 150°C). This temperature is crucial because it allows the granola to bake slowly and evenly; if you go too high too fast, you risk burning those delicate oats before they’ve had a chance to crisp up nicely. Set a timer for 30 minutes, but don’t walk away just yet! About halfway through baking—around the 15-minute mark—give your granola a gentle stir using that trusty spatula.
This stir not only helps promote even browning but also invites all those wonderful aromas back into action as they mingle together more intensely during baking. While you’re stirring, take a moment to check for doneness; you’re looking for that golden brown hue on the edges—that’s when you’ll know it’s almost ready! Keep a watchful eye toward the end because ovens can be quirky; some may need just a tad longer while others might get there sooner than expected. Remember: trust your senses! The smell alone will be utterly intoxicating.
Step 8: Cooling Down – The Transformative Effect
Once your granola has reached that perfect golden color around the edges (and let me tell you, it’s hard not to sneak a taste at this point!), it’s time to pull it from the oven and allow it to cool completely on the baking sheet. Now, this step might seem simple, but I promise you—it’s absolutely transformative! As it cools down from hot and bubbly to room temperature, something magical happens: it firms up and becomes crunchy!
Letting it cool completely is crucial because warm granola can be soft and crumbly—it needs that time out to solidify into those gorgeous clusters we all adore. Resist any urge to touch or break apart those lovely clumps right away; trust me on this one! Give it at least 20-30 minutes before diving in; patience truly pays off here! During this cooling phase, feel free to savor how amazing your kitchen smells—it’s like having an aromatic hug wrapped around you!
Next Major Phase – Final Touches
Now that our Homemade Maple Cinnamon Granola has cooled beautifully and developed its crunchy texture, we can add our final touches that elevate this snack from delightful to extraordinary!
Step 9: Adding Sweet Surprises
Once completely cooled down—you can tell because it’s no longer warm when you touch it—it’s time for my favorite part: mix-ins! At this stage, feel free to toss in some dried cranberries or cherries if you’re looking for a pop of tartness against the sweet backdrop of maple syrup and cinnamon. These fruits not only add vibrant color but also a chewy texture that’ll make every handful feel like an adventure.
And let’s not forget about dark chocolate chips—they’re perfect for indulgence and pair beautifully with those warming spices you’ve incorporated earlier. Just sprinkle them over your granola mixture and give everything another gentle toss—you want these delicious additions evenly distributed throughout so each bowl or handful brings joy with every bite!
As you stand back and admire your creation—a delicious Homemade Maple Cinnamon Granola ready for snacking—I hope you’re filled with pride knowing you’ve crafted something truly special from scratch! Store any leftovers in an airtight container (though I doubt they’ll last long!) where they’ll stay fresh for weeks—if they last that long! You now have a versatile snack that’s perfect on its own or as a topping over yogurt or oatmeal—a delightful way to start any day or enjoy as an afternoon treat.
So there you have it—a recipe infused with love and warmth that’s not only healthy but also incredibly satisfying. I promise you; once you’ve made this Homemade Maple Cinnamon Granola, you’ll never want store-bought again! Enjoy every crunchy bite knowing you’ve made something utterly extraordinary right from home.
Storage and Enjoyment Tips for Your Homemade Maple Cinnamon Granola
Now that your kitchen is filled with the irresistible aroma of freshly baked Homemade Maple Cinnamon Granola, it’s time to dive into the delightful world of enjoyment and preservation! Trust me, you’re going to want to savor every crunchy, sweet morsel of this granola. Whether you’re indulging straight from the jar or sprinkling it atop your morning yogurt, I promise you that this granola will quickly become a cherished staple in your pantry. But let’s talk about how to keep that heavenly goodness fresh for as long as possible!
Storing Leftover Homemade Maple Cinnamon Granola
To ensure your Homemade Maple Cinnamon Granola retains its delightful crunch and flavor, store it in an airtight container. Glass jars work wonderfully, but any sturdy container with a tight seal will do just fine. You can keep it on your kitchen counter away from direct sunlight, where it will stay fresh for about two weeks—though I’d be surprised if it lasts that long! To maintain its quality even longer, consider placing a slice of bread inside the container; this non-negotiable trick helps absorb moisture and keeps your granola perfectly crisp. As the days go by, you’ll notice that the enchanting blend of cinnamon and maple continues to infuse every bite with warmth and comfort. When you’re ready to enjoy more, simply scoop out what you need; there’s no need for reheating unless you want a warm treat to snack on—just pop it in the oven for a few minutes if that’s your heart’s desire!
Freezing for Later
If you find yourself with an abundance of this glorious granola and want to save some for later, freezing is an excellent option! Start by spreading your cooled granola onto a baking sheet lined with parchment paper in an even layer. Once frozen solid—this usually takes about 1-2 hours—transfer it into freezer-safe bags or containers. Frozen granola can last up to three months! When you’re ready to indulge again, simply grab a handful straight from the freezer or allow it to thaw at room temperature for a few minutes. This method not only preserves its delightful texture but also gives you the convenience of having homemade granola on hand whenever those cravings hit. Can you imagine being able to whip up a quick breakfast or snack without any fuss? It’s like having little bags of joy waiting for you!
Homemade Maple Cinnamon Granola
Indulge in the delightful experience of making your own Homemade Maple Cinnamon Granola! This easy recipe combines gluten-free oats, a medley of crunchy nuts and seeds, and the natural sweetness of pure maple syrup. With a touch of aromatic cinnamon, every bite offers a cozy crunch that transforms breakfast or snack time into a nourishing moment of joy. Perfect on its own or as a topping for yogurt and smoothie bowls, this granola is not just delicious but also packed with wholesome ingredients. Simple to prepare and endlessly customizable, it’s an ideal choice for health-conscious eaters looking to elevate their morning routine or satisfy afternoon cravings. Embrace the magic of homemade granola today!
- Prep Time: 10 minutes
- Cook Time: 30 minutes
- Total Time: 40 minutes
- Yield: About 8 servings 1x
- Category: Breakfast
- Method: Baking
- Cuisine: American
Ingredients
- 3 cups gluten-free oats
- ¾ cup mixed nuts and/or seeds (e.g., walnuts, almonds, pumpkin seeds)
- ½ cup pure maple syrup
- ⅓ cup melted coconut oil
- 1 tsp pure vanilla extract
- ½ tsp salt
- 2 tsp ground cinnamon
- Optional: 2 tbsp chia or flax seeds, dried fruits, dark chocolate chips
Instructions
- Preheat your oven to 300°F (150°C) and line a baking sheet with parchment paper.
- In a large mixing bowl, combine gluten-free oats, nuts/seeds, salt, and cinnamon.
- In another bowl, whisk together melted coconut oil, maple syrup, and vanilla extract until well combined.
- Pour the wet mixture over the dry ingredients and fold gently until everything is evenly coated.
- Spread the granola mixture onto the prepared baking sheet in an even layer.
- Bake for 30 minutes, stirring halfway through to ensure even browning.
- Allow the granola to cool completely on the baking sheet before adding any optional mix-ins like dried fruit or chocolate chips.
Nutrition
- Serving Size: 1/4 cup (30g)
- Calories: 140
- Sugar: 6g
- Sodium: 55mg
- Fat: 7g
- Saturated Fat: 6g
- Unsaturated Fat: 1g
- Trans Fat: 0g
- Carbohydrates: 16g
- Fiber: 2g
- Protein: 3g
- Cholesterol: 0mg