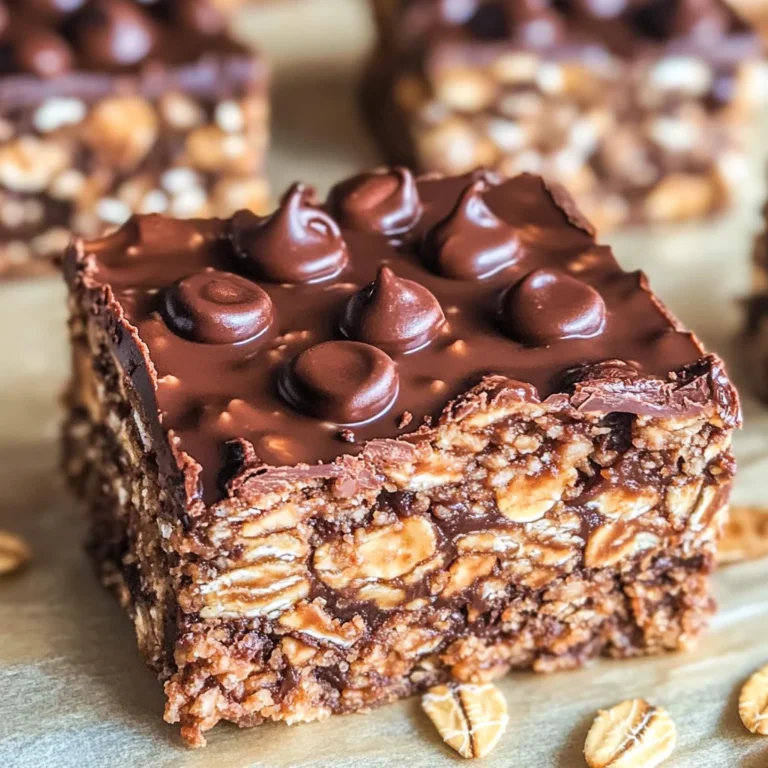
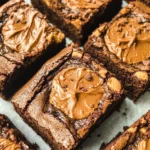
Fudgy Biscoff Brownies
Ah, the magic of baking—there’s something incredibly special about the way it brings us together, right? When I think about a truly comforting dessert, my mind immediately drifts to brownies. They’re more than just a sweet treat; they evoke warm memories of bustling kitchens filled with laughter, the rich aroma of chocolate wafting through the air, and that irresistible moment when you take your first bite and everything feels right in the world. Today, I’m beyond excited to share with you my beloved recipe for Fudgy Biscoff Brownies. These delightful squares are not only rich and decadent but also infused with the unique flavors of Biscoff cookies and creamy cookie butter. Trust me when I say this—the experience of making these brownies is as enjoyable as eating them!
Imagine biting into one of these fudgy delights: the exterior is slightly crisp, giving way to a molten center that’s luxuriously chocolatey, perfectly complemented by the caramelized notes of Biscoff. With each bite, you’re met with swirls of cookie butter that melt into the brownie like liquid gold. This recipe merges tradition with innovative flavors in such a beautiful way; it’s an ode to comfort food while still feeling refreshingly modern. Whether you’re celebrating a special occasion or simply indulging on a quiet evening at home, these brownies are bound to make your heart sing and bring joy to anyone lucky enough to share them with you.
Fudgy Biscoff Brownies: A Decadent Delight
Let’s dive right into this delicious creation! Making Fudgy Biscoff Brownies is not only easy but also an experience filled with joy and anticipation. The best part? You can whip them up in just one bowl! This streamlined approach means fewer dishes to wash—a win-win situation for any home cook. Plus, they come together so quickly that you’ll be savoring your first bite before you know it. So grab your apron and let’s embark on this sweet adventure together!
Ingredients:
As we gather our ingredients, let me emphasize how each one plays a vital role in crafting these fudgy wonders. The quality of your ingredients will shine through in every bite, so choose wisely.
- 250 g (8.8 oz / 1 ½ cups) baking chocolate or semi-sweet chocolate chips. Chocolate is the star of our show here! It provides that rich flavor and fudgy texture we crave in brownies. I highly recommend using high-quality baking chocolate or semi-sweet chocolate chips because their cocoa content will significantly enhance the depth of flavor in your brownies. Look for brands that use real cocoa solids rather than those filled with additives—this choice makes all the difference! If you’re feeling adventurous, try dark chocolate for an even more intense taste.
- 115 g (1 stick) unsalted butter. Butter adds richness and moisture to our brownies while helping them achieve that beautifully fudgy texture we all adore. Using unsalted butter allows us to control the saltiness of our final product—this is absolutely paramount! Make sure your butter is softened to room temperature before starting; if it’s too cold or melted, it won’t blend evenly with your other ingredients.
- 4 large eggs, at room temperature. Eggs are essential not only for binding but also for creating structure within our brownies. Room temperature eggs emulsify better into the batter compared to cold ones, resulting in a smoother mixture that leads to even baking and that lovely gooey center we desire. Remember—don’t skip this step!
- 200 g (1 cup) granulated sugar. Sugar does more than just sweeten; it also helps achieve that wonderful chewy texture by contributing to moisture retention during baking. For these Fudgy Biscoff Brownies, I recommend granulated sugar as it dissolves well into our batter ensuring an even sweetness throughout.
- 1 ½ tsp pure vanilla extract. Vanilla extract is like the secret handshake among flavors—it enhances everything else going on in your brownie batter and adds a warm note that’s utterly intoxicating. Be sure to use pure vanilla extract instead of imitation; you’ll notice how much more vibrant and fragrant your brownies become.
- 90 g (¾ cup) all-purpose or cake flour. Flour provides structure, but since we’re aiming for fudgy textures rather than cakey ones, less flour is ideal here. All-purpose flour works wonderfully; however, cake flour can provide an even softer texture if you’re looking for something extra special.
- 30 g (¼ cup) unsweetened cocoa powder (Dutch-processed preferred). Cocoa powder intensifies the chocolate flavor while adding moisture when mixed into our batter—it’s what makes these brownies feel like a warm hug from inside out! Dutch-processed cocoa powder offers a richer taste and darker color due to its alkalinity; however, regular unsweetened cocoa will work just fine if that’s what you have on hand.
- ½ tsp salt. Salt may seem minor but trust me—it’s absolutely crucial! A pinch of salt elevates sweetness while balancing flavors beautifully; it brings everything together harmoniously so every ingredient shines through without overpowering each other.
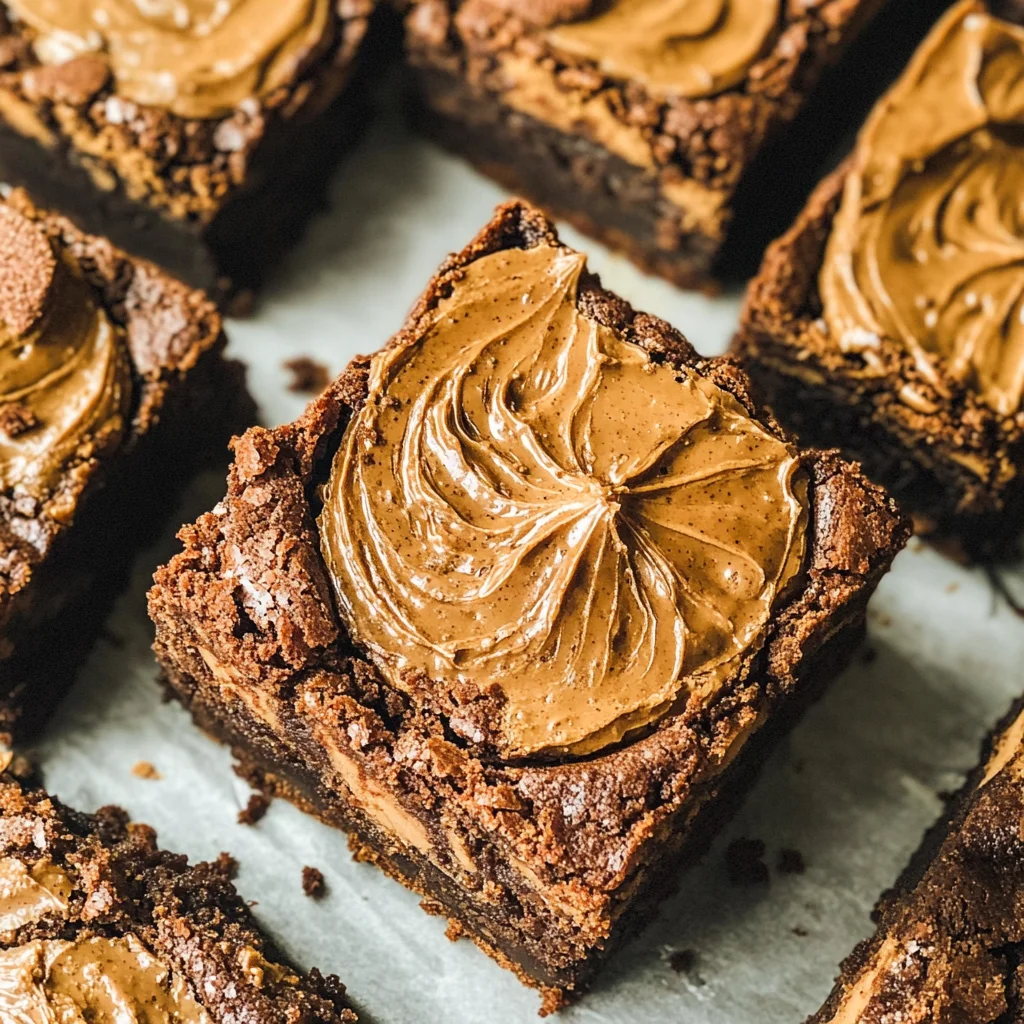
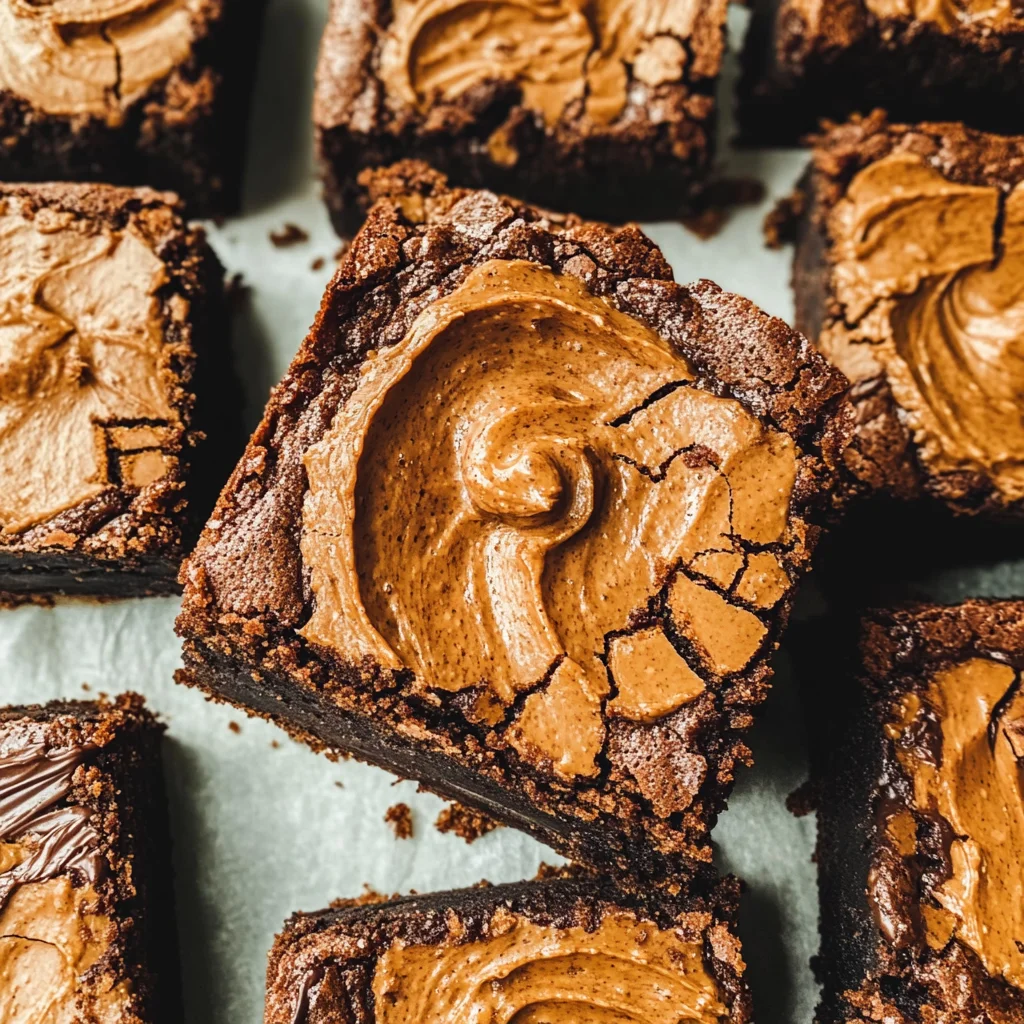
- 10 crushed Lotus Biscoff cookies (plus 4 extra for topping). Ahh—the star players! These cookies bring their delightful caramelized flavor profile and unique crunchiness which pairs perfectly with chocolate creating an extraordinary textural contrast in every bite! The additional cookies on top add visual appeal while enhancing that signature Biscoff taste—we want every element working together!
- 12 tsp Biscoff cookie butter spread. This heavenly spread takes our brownies from great to extraordinary! Its creamy consistency creates luscious pockets within our fudgy base giving bursts of flavor reminiscent of those delightful cookies themselves—a divine addition that truly makes this recipe stand out.
Equipment You’ll Need:
Before we start bringing this delicious creation to life, let’s make sure we have all the necessary tools at hand—having the right equipment helps streamline our process significantly!
- 8-inch (20 cm) square baking pan: A sturdy baking pan ensures even heat distribution which is critical for achieving perfectly baked brownies without any burnt edges or gooey centers left behind! If you don’t have exactly eight inches handy—no worries—just ensure whatever size you choose allows ample space for rising while keeping thickness consistent across batches!
- Parchment paper: Lining your baking pan with parchment paper not only prevents sticking but also allows for easy removal once they’ve cooled down completely—a true lifesaver when it comes time to slice them up into those gorgeous squares!
- Heatproof bowl: A heatproof bowl is essential for melting chocolate safely over simmering water or even in short bursts in microwave ovens without fear of compromising its integrity—you want smooth melted goodness ready for blending seamlessly into other ingredients!
- Whisk: A good whisk is indispensable here—its flexibility allows incorporation air efficiently as we mix eggs and sugar together while ensuring no lumps remain behind during preparation!
- Spatula: A sturdy spatula helps fold dry ingredients gently into wet components preventing overmixing which can lead unwanted results like tough-textured treats instead of blissfully soft bites!
With all these tools gathered around us like friends eager to help create something beautiful together—we’re ready now!
Preparing the Fudgy Biscoff Brownies
Step 1: Preheat & Prepare
First things first—let’s get that oven preheating at 350°F (180°C). While it’s warming up, grab your trusty square baking pan and line it with parchment paper; this step ensures easy removal later on without any sticky mess clinging onto those delicious edges! Take a moment here—trust me—it’s worth it! It sets up everything nicely so we can focus solely on creating magic without worrying about clean-up chaos later down the road.
Step 2: Melt Chocolate & Butter
Now comes one of my favorite parts—the melting process! In a heatproof bowl fitted over a double boiler or using short bursts in the microwave (be cautious!), combine both butter and chopped chocolate until smooth and glossy—it should feel like liquid gold flowing through your fingers as it transforms before your eyes into something utterly intoxicating! Stir often during melting—this ensures even distribution without scorching any precious morsels along their journey toward brownie bliss!
Step 3: Whisk Eggs & Sugar
While waiting patiently for melted goodness let’s turn attention towards eggs—they’re about ready too! In another mixing bowl whisk together four large eggs alongside granulated sugar plus vanilla extract until pale yellow hues emerge along with foamy bubbles forming atop surface area after approximately two minutes’ worth whisking away vigorously—that’s when excitement truly begins building anticipation levels through kitchen atmosphere as aromas mingle delightfully joining forces soon enough!
Step 4: Combine Chocolate Mixture
Once your egg mixture reaches glorious fluffy heights pour melted chocolate mixture directly into its embrace stirring gently yet purposefully until everything unites smoothly forming perfect union where flavors dance harmoniously side by side—it should feel velvety smooth almost invitingly warm against fingertips reminding why we love crafting desserts from scratch so much amidst simple pleasures found therein each step taken forward.
I can’t wait for you to experience how effortlessly these steps come together as we continue crafting these tantalizing Fudgy Biscoff Brownies! Just imagine how incredible they will smell filling up your kitchen soon enough…stay tuned because there’s so much more deliciousness ahead!
Step 5: The Art of Folding – Combining Ingredients with Care
Now comes the truly magical moment when we bring our melted chocolate and butter mixture together with the whipped eggs and sugar. Gently pour the smooth, glossy chocolate into the egg mixture, and use a spatula to fold it in. This process is where the magic happens! Folding is a gentle technique that allows you to combine ingredients without deflating the precious air bubbles you’ve just whipped into your eggs. Trust me on this: achieving that lightness is absolutely paramount for getting that fudgy texture we’re after. As you fold, you’ll notice how the rich chocolate melds seamlessly with the eggs, creating a luscious base that’s utterly intoxicating.
As you continue to fold, keep an eye on your batter—it should be a stunning chocolate brown, thick yet pourable. The goal here is to mix just until everything is combined; overmixing can lead to brownies that are more cake-like than fudgey. You want these brownies to be indulgent and gooey, not dry! So take your time and feel the texture as it transforms from separate elements into one cohesive symphony of flavors. It’s such an exhilarating step—watching your ingredients come together like old friends reuniting for a delicious celebration!
Step 6: The Perfect Blend – Adding Dry Ingredients
Next, it’s time to add our dry ingredients: sift in the flour, cocoa powder, and salt. Sifting isn’t just for show; it breaks up any lumps in your cocoa and flour, ensuring a smooth batter without any unwelcome surprises when biting into your fudgy Biscoff brownies. Sprinkle these ingredients evenly over your chocolate mixture before grabbing your spatula again for another round of folding. This technique helps maintain that heavenly fudgy texture we’re aiming for—too much mixing at this stage can lead to gluten development, which would make our brownies chewy rather than decadently soft.
With each fold, you’ll notice how the dry ingredients start absorbing the moisture from the chocolate mixture—they become part of something greater! Keep folding gently until there are no visible streaks of flour left; however, don’t worry if there are a few small lumps remaining—that’s perfectly normal and will only contribute to the gooey goodness we’re striving for. Remember, this is an art form! Take pride in crafting this beautiful brownie batter; every swirl and fold brings us closer to that decadent payoff.
Step 7: Adding Flavors – Crushed Biscoff Cookies
Now it’s time for one of my favorite parts—the addition of those delightfully spiced crushed Biscoff cookies! These cookies aren’t just a garnish; they bring an incredible depth of flavor that enhances our fudgy brownie base. As you fold them into the batter with care, imagine how those crunchy bits will create little pockets of spiced sweetness throughout each bite. When you’re done folding in those cookie crumbs, take a moment to appreciate how they look against the glossy backdrop of your batter—this visual contrast is what makes baking so satisfying!
Make sure not to overmix at this stage either; we want those cookie pieces distributed evenly but still intact enough to provide that delightful crunch. Each piece of cookie will melt slightly during baking, releasing their aromatic spices into our brownie batter while still providing texture—a truly extraordinary experience! So go ahead and take a breath; let yourself enjoy this moment before we move on.
Step 8: Pouring & Swirling – Creating Magic in Your Pan
Now comes one of my absolute favorite steps—pouring that rich brownie batter into your prepared baking pan! Use your spatula to scrape every last bit from the bowl; trust me when I say that there’s no better feeling than knowing you’ve captured all that deliciousness. Once poured into the lined pan, smooth out the top with your spatula so it’s nice and even—you want every corner filled with brownie goodness!
And now for a special touch: dollops of Biscoff cookie butter spread! Using a teaspoon or small spoon, drop generous swirls across the surface of your brownie batter. Then grab a knife or skewer and gently swirl through those dollops—don’t overdo it! A few gentle strokes will create beautiful marbled patterns while leaving globs of creamy goodness intact. This step is crucial because it adds another layer of flavor and keeps things interesting when you take that first bite—each mouthful should be an adventure!
Final Phase: Baking Your Perfect Fudgy Biscoff Brownies
Preheat your oven as we prepare to give these brownies their final transformation! Bake them at 350°F (180°C) for about 30-35 minutes. Now here’s where patience becomes key—resist the urge to open that oven door too soon! Every minute counts as they bake away, developing their structure while maintaining that luscious gooey center we all crave.
To test for doneness without compromising all your hard work (and let me tell you—it’s hard work!), insert a toothpick or skewer into the center around the 30-minute mark. If it comes out with moist crumbs clinging to it rather than wet batter—voilà! You’re ready to pull those beauties from the oven. Remember: if they look slightly underbaked in the middle—that’s actually perfect! They will continue cooking as they cool down in their pan.
Once baked to perfection, allow them some time to cool down completely in their pan before slicing them into squares—it might feel like torture waiting for those glorious fudgy Biscoff brownies but believe me when I say it’s worth every second! For optimal results (and because good things come to those who wait), refrigerate them for at least an hour before cutting them into generous slices—you’ll be rewarded with clean edges and exquisite layers when you finally dig in.
Now go on—you’ve earned every bite of these fudgy Biscoff brownies! I promise you’ll fall head over heels for their rich flavor and gooey texture—just like I have each time I’ve made them for my friends or family gatherings. Enjoy every moment as you share these treats with loved ones or savor them all on your own—they’re simply irresistible!
Storage and Enjoyment Tips for Your Fudgy Biscoff Brownies
Now that you’ve seen those glorious Fudgy Biscoff Brownies emerge from the oven, your kitchen must feel like a sweet sanctuary, filled with the intoxicating aroma of chocolate and cookie butter. The moment has come to indulge in these rich, fudgy squares of bliss. But what happens if you’re left with a few extras? Trust me, you won’t want to waste a single crumb! Allow me to share how to savor every last bite of this heavenly treat, even when the initial excitement wanes.
Storing Leftover Fudgy Biscoff Brownies
To keep your Fudgy Biscoff Brownies as delicious as they were on day one, store them in an airtight container at room temperature. If you’ve got a little extra time on your hands or want them to last longer, refrigerating them will work wonders too. I promise you these brownies will stay fresh for up to five days at room temperature or even up to a week in the fridge. Now, here’s a pro tip: place a slice of bread in the container with your brownies; it’ll help maintain their moist texture while soaking up any excess air. After just a day or two, you might discover that they taste even better as the flavors meld together into this profoundly satisfying experience! When it’s time to enjoy again, simply let them sit at room temperature for a bit to regain their gooey glory or pop them in the microwave for 10-15 seconds for that fresh-out-of-the-oven sensation.
Freezing Fudgy Biscoff Brownies for Later
If you know you won’t finish all your brownies quickly, freezing is an absolutely fantastic option! To freeze your Fudgy Biscoff Brownies properly, cut them into individual squares once they have cooled completely and layer them between sheets of parchment paper in an airtight freezer-safe container. They can be safely stored in the freezer for up to three months without losing their luxurious texture and flavor. When you’re ready to enjoy one (or two!), simply take out as many as you’d like and let them thaw at room temperature for about 30 minutes — trust me, there’s nothing quite like biting into a thawed brownie that’s still slightly fudgy! This makes stocking up ahead of time incredibly convenient; imagine having a stash ready for surprise guests or those late-night cravings when only something sweet will do!
CATEGORY_NAME
Fudgy Biscoff Brownies
Fudgy Biscoff Brownies are an indulgent treat that blends rich chocolate and creamy cookie butter into a delightful dessert experience. These brownies feature a slightly crisp exterior that gives way to a gooey, chocolatey center, enhanced by the unique flavors of crushed Biscoff cookies. Perfect for any occasion, whether it’s a cozy night in or a gathering with friends, these brownies are sure to impress. With just one bowl required for preparation, they are easy to make and even easier to enjoy. Each bite is a celebration of sweet and decadent goodness, making them your new favorite treat.
- Prep Time: 15 minutes
- Cook Time: 35 minutes
- Total Time: 50 minutes
- Yield: Makes approximately 16 servings 1x
- Category: Dessert
- Method: Baking
- Cuisine: American
Ingredients
- 250 g baking chocolate or semi-sweet chocolate chips
- 115 g unsalted butter
- 4 large eggs
- 200 g granulated sugar
- 1 ½ tsp pure vanilla extract
- 90 g all-purpose flour
- 30 g unsweetened cocoa powder
- ½ tsp salt
- 10 crushed Lotus Biscoff cookies (plus extra for topping)
- 12 tsp Biscoff cookie butter spread
Instructions
- Preheat your oven to 350°F (180°C) and line an 8-inch square baking pan with parchment paper.
- Melt the chocolate and butter together in a heatproof bowl until smooth.
- In a separate bowl, whisk together eggs, sugar, and vanilla until pale and frothy.
- Slowly combine the melted chocolate mixture with the egg mixture, stirring gently.
- Fold in sifted flour, cocoa powder, and salt until just combined.
- Gently mix in the crushed Biscoff cookies.
- Pour the batter into the prepared pan and swirl in dollops of Biscoff cookie butter.
- Bake for 30-35 minutes or until a toothpick comes out with moist crumbs.
- Allow cooling completely before slicing into squares.
Nutrition
- Serving Size: 1 brownie (57g)
- Calories: 220
- Sugar: 18g
- Sodium: 75mg
- Fat: 11g
- Saturated Fat: 7g
- Unsaturated Fat: 4g
- Trans Fat: 0g
- Carbohydrates: 28g
- Fiber: 1g
- Protein: 3g
- Cholesterol: 50mg