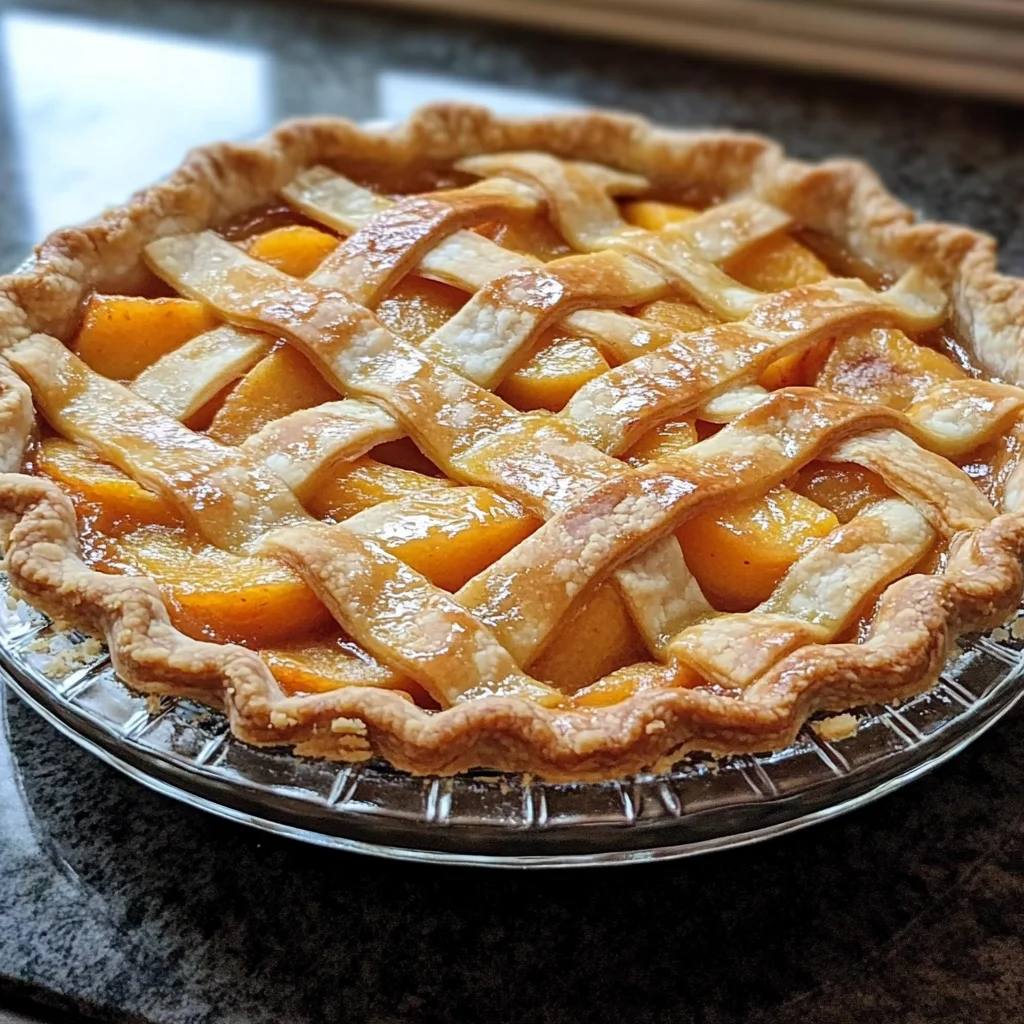
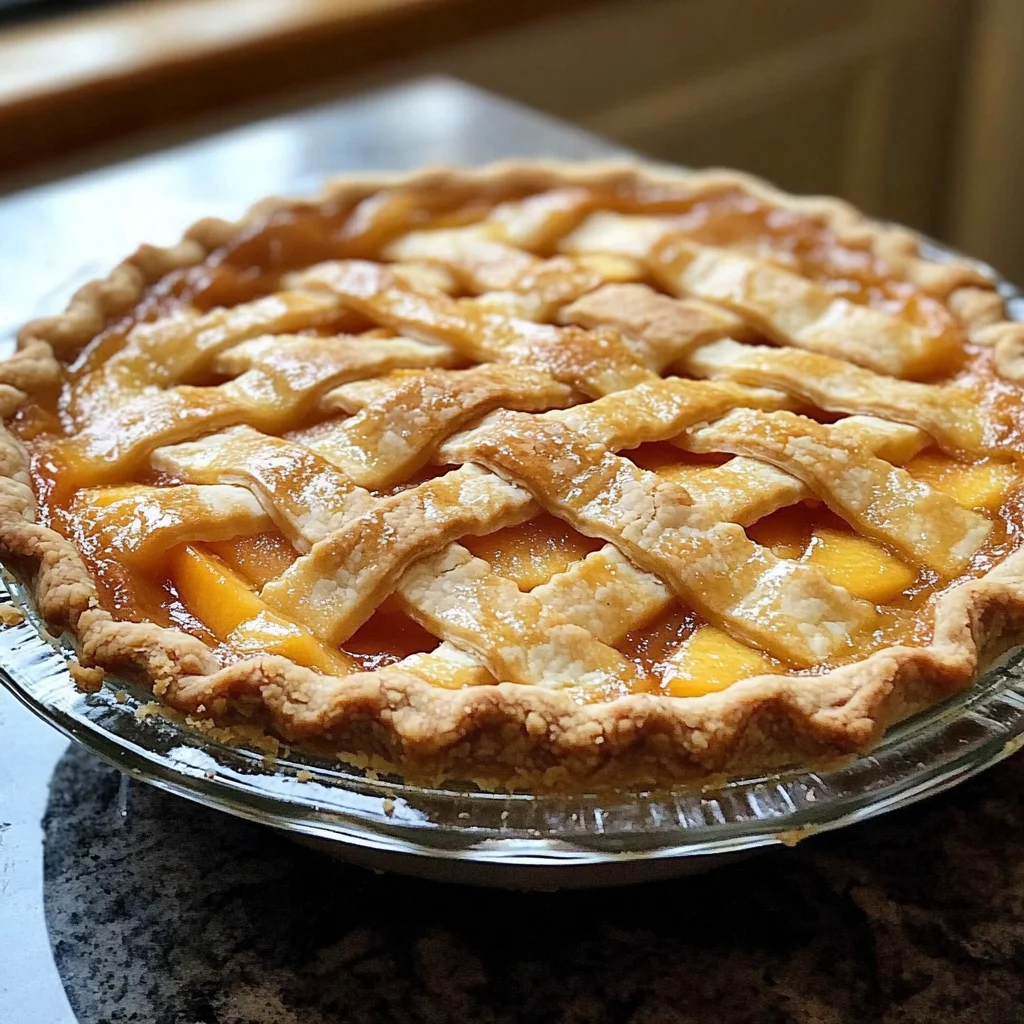
Ina Garten’s Perfect Peach Pie
There’s something truly magical about a homemade pie, isn’t there? It goes beyond mere food; it’s a heartfelt experience that connects us with our roots, memories, and the sweet essence of summer. When you take that first bite of Ina Garten’s Perfect Peach Pie, you’re not just tasting tender peaches enveloped in a buttery crust; you’re savoring the warmth of family gatherings, the laughter of friends, and the blissful simplicity of nature’s bounty. The way the golden crust crumbles beneath your fork and the luscious peach filling bursts with flavor creates a symphony of sensations that dance on your palate. This recipe encapsulates all that and more—trust me when I say it is an absolute must-try!
This pie isn’t just any dessert; it’s a celebration of summer’s finest peaches, elevated by a delicate balance of sweetness and citrusy brightness from orange juice and zest. Each ingredient plays its part in crafting an utterly intoxicating experience that transports you to sun-drenched orchards with every slice. As you stand over your kitchen counter, rolling out dough and preparing to fill your pie crust with those juicy slices, you are engaging in a time-honored tradition that has been passed down through generations. You might even find yourself smiling as you think about who you’ll share this delightful creation with—perhaps at a summer picnic or during a cozy evening at home.
Ina Garten’s Perfect Peach Pie: A Slice of Summer Bliss
Let’s dive into this delightful recipe! The combination of fresh peaches enveloped in a flaky double-crust pie is enough to make anyone swoon. With each step, you’ll feel more connected to the art of baking, and I’m here to guide you through every detail so that your pie turns out flawlessly. Are you ready to embark on this delicious journey with me? Let’s make some magic happen!
Ingredients:
Embarking on this culinary adventure means gathering some beautiful ingredients that will transform into something extraordinary. Each component is essential for achieving that perfect balance of flavors and textures, so let’s take a moment to appreciate what we’ll be using.
- 2 1/2 lb. ripe peaches (6-7 large peaches, peeled): These vibrant jewels are the star of our show! Choosing ripe peaches is crucial; look for ones that yield slightly when pressed and have a fragrant aroma—that means they’re bursting with flavor. Peeling them might seem daunting, but don’t worry! You can easily do this by blanching them in boiling water for just 15 seconds before transferring them to an ice bath. This little trick makes removing the skins a breeze while preserving their juicy goodness for our filling.
- 1/2 C. sugar, plus extra for sprinkling on lattice: Sugar does more than sweeten; it brings out the natural flavors in our peaches, creating a heavenly syrup as they bake together. This amount strikes the perfect balance without overwhelming the fruit’s inherent sweetness. And don’t forget to sprinkle some extra sugar on top of the lattice crust before baking—it’ll give your pie that gorgeous golden sparkle we all love.
- 2 tbsp. cornstarch: Cornstarch acts as our thickening agent here, ensuring our peach juices create a lovely syrup without making everything too runny. It’s important because we want that luscious filling to stay beautifully intact when we slice into our pie—nobody wants a soupy mess when serving!
- 1/2 tsp. grated orange zest: A touch of orange zest adds depth to our filling by providing a bright citrus note that complements the sweetness of the peaches perfectly. When grating zest, be mindful only to get the vibrant orange part—avoiding white pith is key since it can be bitter.
- 1/4 C. freshly squeezed orange juice: Freshly squeezed juice amplifies those bright flavors we’ve added through zesting while also contributing acidity to balance out sweetness—the result is pure bliss! Opt for fresh oranges whenever possible; bottled juice simply doesn’t capture the same vibrant essence.
- 1 tbsp. unsalted butter: Butter adds richness and flavor to our syrupy peach mixture as it melts down during baking—think liquid gold seeping into those sweet peach slices! Using unsalted butter allows us control over salt levels throughout our dish.
- All-purpose flour: Flour is essential for both our pie crust and thickening our filling slightly alongside cornstarch. When selecting flour for this recipe, stick with all-purpose—it strikes an ideal balance between structure and tenderness in baked goods.
- 1 recipe of double-crust pie crust (Perfect Pie Crust recipe follows): The foundation of any great pie starts with its crust! A flaky double-crust enhances every bite by providing texture against luscious fillings while supporting those beautiful lattice patterns on top—a true masterpiece!
- 1 egg beaten with 1 tablespoon water, for egg wash: An egg wash creates that stunning golden sheen we all adore on pastries! The water helps thin out the egg so it spreads easily across surfaces—this step not only adds beauty but also encourages any toppings like sugar to adhere beautifully.
For the Pie Crust:
– 12 tbsp. very cold butter: Cold butter is non-negotiable here! It creates pockets within your dough as it bakes, resulting in delightful flakiness rather than toughness—a texture we all crave in pies!
- 3 C. all-purpose flour: Similar to earlier mentions regarding flour’s role—it also forms the backbone structure necessary for holding everything together nicely.
- 1 tsp. kosher salt: Salt enhances flavors across dishes; trust me when I say don’t skip this step! It brings out sweetness while balancing flavors overall—a small amount goes such a long way!
- 1 tbsp. sugar: Just like its role elsewhere in this recipe—sugar helps brighten up flavors while lending additional browning qualities during baking.
- 1/3 C. very cold vegetable shortening: Shortening contributes even further tenderness without adding flavor—using both butter AND shortening leads towards achieving perfect flaky layers throughout!
- 1/2 C. ice water: Water binds everything together; using it ice-cold prevents premature melting during mixing processes ensuring optimal flakiness later on—trust me here!
Equipment You’ll Need:
Having the right tools makes baking not only easier but also more enjoyable! Think of these items as your trusty companions guiding you through each step toward creating something wonderful.
- Food processor – A food processor streamlines your dough-making process tremendously; by cutting cold butter quickly into flour without warming it up too much ensures flakiness remains intact—a crucial factor in crafting outstanding pies!
- Rolling pin – This simple tool helps roll out dough evenly across surfaces allowing precise thicknesses needed for successful pies—a must-have item ensuring uniformity throughout.
- 9 or 10-inch pie dish – Choose one made from glass or ceramic if possible—these materials distribute heat evenly promoting consistent browning across crusts without burning edges prematurely.
- Sharp knife or pastry cutter – For trimming excess dough effortlessly after fitting into pans while also cutting strips from rolled-out portions—keep these handy since precision matters greatly here!
Now that we’ve gathered our ingredients and tools together let’s begin preparing this masterpiece—you’re going to love every bite!
Preparing Ina Garten’s Perfect Peach Pie / Making the Perfect Pie Crust
Step 1: Crafting Your Perfect Pie Crust
To kick things off right away, let’s focus on making that irresistible double-crust—the heart and soul behind any great pie lies within its base! Start by dicing up those very cold sticks of butter into small cubes; then return them back into your refrigerator until ready use again later (keeping everything chilled is absolutely paramount). In another bowl or preferably using your food processor (the method I recommend), combine flour, kosher salt & sugar together until mixed well—this should only take just a few pulses at most before moving onto next steps where magic begins happening soon thereafter!
Next comes adding both diced cold butter along with shortening straight into processor bowl—you’ll want pulse about eight-to-ten times until mixture resembles coarse crumbs with pea-sized bits remaining visible throughout—that texture indicates success thus far folks! Now comes pouring ice-cold water gradually while simultaneously running machine until dough begins forming itself into cohesive ball shape inside bowl—that’s how you’ll know it’s ready for next phase ahead!
Step 2: Chilling Is Key
Once you’ve got your dough formed nicely together dump mixture gently onto floured work surface before rolling gently into rounded ball shape again wrap securely using plastic wrap so it’ll chill inside refrigerator resting comfortably around thirty minutes max—but keep an eye on time here because if left sitting too much longer may become toughened up making rolling process harder later down road which is something none want happening here at all whatsoever trust me okay?
Step 3: Rolling Out Dough
After patiently waiting thirty minutes (I know it feels like forever!), flour counter generously then cut chilled disk evenly in half giving one half back into refrigerator while working other half towards desired size needed—remember aim for circle slightly larger than diameter pan used since easier control edges afterwards when fitting snugly inside once rolled out properly… Rolling pin should glide smoothly over surface applying gentle pressure consistently throughout ensuring uniform thickness achieved everywhere without tearing dough apart (that would be heartbreaking!).
Step 4: Fitting Into Pan
With rolled-out piece laid carefully upon rolling pin now lift over towards awaiting prepared dish making sure not stretch anything unnecessarily during transfer—that could compromise structural integrity later on resulting ugly cracks appearing during bake time instead wanting smooth seamless edges instead right? So tuck edges nicely under themselves overlapping slightly above rim level before trimming excess hanging off sides using sharp knife technique which leaves clean finish afterwards looking professional & polished…
As each stage unfolds here remember patience matters equally as much along dedication put forth throughout entire process reflecting love poured directly into creation itself—you got this friend!!
Keep tuning in—I promise there’s plenty more amazing steps ahead leading towards ultimate fragrant indulgence soon coming alive right inside kitchen shortly thereafter!!
Step 5: Prepping the Fruity Filling
Now that your crust is prepped and resting beautifully in the refrigerator, it’s time to dive into the heart of this recipe: the peach filling. Preheat your oven to a warm 400 degrees Fahrenheit, which is essential because this high temperature will create that irresistible golden crust and ensure your pie bakes evenly. While the oven heats up, grab a large bowl and prepare for the sweet aroma of summer. You’ll need to peel and slice all but one of your ripe peaches—this step is where you can really connect with your ingredients. There’s something magical about handling fresh produce; feel the soft skin under your fingers, smell their fragrant sweetness, and let that anticipation build!
To make peeling a breeze, I recommend using Ina Garten’s clever tip: bring a pot of water to a rolling boil and gently slip those peaches in for just 15 seconds to 2 minutes. This brief dunk in boiling water loosens the skin, making it slide off like a dream! Once you’ve peeled them, slice them into juicy wedges and place them lovingly in your bowl. Now, take that last peach you’ve set aside and chop it into tiny pieces; this will help create a thick syrup that clings to the other peach slices when baked. Trust me on this—each bite of your pie will burst with flavor!
Step 6: Crafting the Perfect Syrup
Next up is creating that luscious syrup that binds everything together—this is absolutely paramount for achieving that perfect texture and flavor balance in Ina Garten’s Perfect Peach Pie. In a small saucepan over medium heat, whisk together the half cup of sugar, cornstarch, grated orange zest, freshly squeezed orange juice, and a tablespoon of butter. The sugar acts as a sweetener while cornstarch is our secret weapon here—it thickens the syrup beautifully as it cooks. As you whisk these ingredients together, pay attention to how they transform from a powdery mixture into a cohesive sauce. This process usually takes just a few minutes.
Bring this mixture to a gentle boil while stirring frequently; you’ll notice it starting to bubble with excitement! Once it’s bubbling away, add in those chopped peach pieces you prepared earlier. This addition will not only enhance the flavor but also help thicken our syrup even further as it simmers for about 2-3 minutes. Keep stirring occasionally—you want to keep an eye on it so nothing sticks or burns at the bottom! What you’re aiming for here is a glossy syrup that lightly coats your spatula; if it’s too thin, let it simmer for another minute or two until it thickens up just right.
Step 7: Marrying Peaches with Syrup
Now comes one of my favorite parts—combining those fresh peach slices with our velvety syrup! Carefully pour this warm syrup over those luscious peach slices sitting in your large bowl. You’ll want to gently fold them together with care; we’re not looking to mash those beautiful peaches! Use a spatula or wooden spoon and fold from underneath rather than stirring vigorously—this technique keeps those slices intact while ensuring every piece gets coated in that intoxicating sauce.
As you do this, you may notice some juices collecting at the bottom of your bowl—that’s perfectly normal and truly delightful because it means you’ve captured all that vibrant peach essence! To help thicken things even more before pouring into your pie crust, sprinkle one or two tablespoons of flour over the mixture and gently incorporate it all together. This step is crucial because it helps prevent any soupy mess when baking—nobody wants their perfect slice sliding off their plate!
Step 8: The Grand Assembly
Now we arrive at one of the most satisfying moments in baking—the assembly! Remove your chilled pie crust from the refrigerator; its rest has made it firm yet pliable enough to roll out without cracking or tearing—a non-negotiable aspect for achieving that flawless finish we strive for in Ina Garten’s Perfect Peach Pie. Flour your surface generously before taking half of your remaining dough and rolling it out into a circle slightly larger than your pie dish—not too thin though; about an eighth-inch thickness should do nicely.
With delicate hands (and maybe some flour on your nose!), carefully transfer this rolled-out dough onto your pie pan without stretching it—which can lead to cracks later when baking. A gentle tuck around the edges is necessary so that you have an even layer throughout once filled with our delicious peach mixture. After pouring in all those juicy peaches draped in syrupy goodness, take a moment to admire what you’ve created! It’s bright, inviting, and bursting with summer flavors.
Final Touches Before Baking
Before we seal this beauty up with its top crust or lattice design—yes, it’s time for creativity! Now would be an excellent moment to brush some egg wash (a simple mix of beaten egg with water) along the edges of our bottom crust where the top will adhere. This gives us not only an attractive shine but also helps bond those layers together during baking; trust me on this shiny detail—it elevates everything aesthetically!
Once you’ve got everything prepped beautifully inside—and I mean truly visually stunning—take out your other half of dough from refrigeration and roll it out again just like before into another circle larger than our pie pan. Whether you’re going for an intricate lattice design or simply want plenty of coverage atop—either way is beautiful! If you’re opting for lattice work (which I adore), cut strips about an inch wide using a sharp knife or pizza cutter before weaving them over each other across the filling like an artful tapestry.
Step 9: Baking Your Piece de Resistance
When you’re satisfied with how your pie looks (because let’s be honest—it deserves admiration!), it’s time for one final brushing of egg wash across all surfaces including those nooks and crannies within any lattice work you’ve created. Generously sprinkle sugar overtop—it adds not only sweetness but creates an enchanting caramelized topping when baked off in the oven.
Carefully place your masterpiece onto that parchment-lined sheet pan (to catch any possible overflow during baking) and slide her into that preheated oven—let her bake away for around 45 minutes until she reaches glorious golden brown perfection! Keep watch as she bakes; halfway through cooking time rotate her gently if necessary so she bakes evenly—that visual cue signals she’s on track toward becoming gloriously bubbly beneath her flaky crust.
And here’s where patience plays its role again—you’ll know it’s done when you see bubbles joyfully bursting through gaps between crusts (what could be more inviting?) But remember: every oven differs slightly so don’t hesitate checking if yours needs additional minutes or perhaps turning down slightly if edges are browning too quickly – simply cover them lightly with foil if needed.
The Moment We’ve Been Waiting For
As you remove this heavenly creation from the oven after its glorious bake-off session has concluded—allow yourself some deep breaths inhaling that intoxicating aroma wafting through your kitchen! Letting her cool is vital; I cannot stress enough how important this step is before cutting into her divine layers.
You may wish to serve warm or let her come down to room temperature—both options are delightful depending on what mood strikes you (or how patient you’ll be!). Just imagine slicing into her crisp shell revealing layers upon layers filled with juicy peaches glistening under rich syrup…pure bliss awaits!
So there you have it—the journey through Ina Garten’s Perfect Peach Pie complete from start to finish! I promise you once you savor each bite; you’ll find yourself reaching back for seconds—and maybe thirds because who could resist such bliss? Enjoy every moment spent making memories around this comforting classic; after all—good food brings us together like nothing else can.
Storage and Enjoyment Tips for Your Ina Garten’s Perfect Peach Pie
Now that your kitchen is filled with the utterly intoxicating aroma of freshly baked peach pie, it’s time to dive into the joy of enjoying your creation! The golden crust, bubbling with sweet, juicy peaches enveloped in a syrup that’s nothing short of liquid gold, is a sight to behold. Trust me when I say that this pie is not just a dessert; it’s an experience that transforms any moment into something special. Whether you’re serving it warm with a scoop of vanilla ice cream or savored on its own as a delightful afternoon treat, this pie is ready to bring smiles to the faces of everyone who gets a slice.
Storing Leftover Ina Garten’s Perfect Peach Pie
If you find yourself with some slices left over (though I can’t imagine how that might happen!), storing them properly will keep that deliciousness intact. First, allow the pie to cool completely at room temperature before covering it—this prevents condensation from forming and making the crust soggy. I recommend using an airtight container or wrapping it tightly in plastic wrap. Stored this way in the fridge, your peach pie will remain fresh for about 3-4 days. Pro tip: place a slice of bread inside the container with the pie; it helps maintain moisture while keeping that beautiful crust crisp! And let me assure you, even after storage, each bite will still be profoundly satisfying—just as rich in flavor and texture as when it first came out of the oven. If you wish to enjoy it warm again, simply pop it in a preheated oven at 350°F for about 10-15 minutes until warmed through.
Freezing Components for Later
Now, if you want to plan ahead and savor this delightful treat later on, freezing is an excellent option! You can freeze either whole pies or individual slices—just make sure they are well wrapped in plastic wrap and then aluminum foil to prevent freezer burn. When stored correctly, they can last up to three months in the freezer without losing their luscious flavor. To use from frozen, simply remove your pie from the freezer and let it thaw overnight in the fridge before reheating as mentioned earlier. How wonderful is it that you can have homemade peach pie on hand anytime? It’s like having a little slice of summer waiting for you whenever you crave something sweet and comforting!
Ina Garten’s Perfect Peach Pie

Indulge in the essence of summer with Ina Garten’s Perfect Peach Pie, a delightful dessert that captures the vibrant flavors of ripe peaches enveloped in a flaky double crust. Each slice reveals juicy, tender peach slices coated in a luscious syrup, perfectly balanced by a hint of orange zest and juice. This pie is not just a treat for your taste buds; it’s an invitation to gather with family and friends, sharing laughter and sweet memories. Ideal for summer picnics or cozy evenings at home, this recipe is a must-try that brings warmth and joy into every bite.
- Prep Time: 30 minutes
- Cook Time: 45 minutes
- Total Time: 1 hour 15 minutes
- Yield: Serves 8
- Category: Dessert
- Method: Baking
- Cuisine: American
Ingredients
- 2 1/2 lbs ripe peaches (6–7 large peaches, peeled)
- 1/2 cup sugar
- 2 tbsp cornstarch
- 1/2 tsp grated orange zest
- 1/4 cup freshly squeezed orange juice
- 1 tbsp unsalted butter
- All-purpose flour (for crust)
- Double-crust pie crust recipe
Instructions
- Preheat your oven to 400°F (200°C).
- Prepare the double-crust pie dough and chill it.
- Peel and slice the peaches; chop one peach into small pieces.
- Combine sugar, cornstarch, orange zest, orange juice, and butter in a saucepan over medium heat until it thickens.
- Fold the syrup into the sliced peaches gently.
- Roll out half of the chilled dough into your pie dish; fill with peach mixture.
- Roll out the remaining dough for the top crust or lattice design.
- Brush with egg wash and sprinkle with sugar before baking for about 45 minutes until golden brown.
Nutrition
- Serving Size: 1 serving
- Calories: 290
- Sugar: 22g
- Sodium: 150mg
- Fat: 12g
- Saturated Fat: 6g
- Unsaturated Fat: 4g
- Trans Fat: 0g
- Carbohydrates: 42g
- Fiber: 3g
- Protein: 3g
- Cholesterol: 20mg