Hawaiian Coleslaw
There’s something truly magical about the way food can transport us, isn’t there? A single bite can whisk you away to sun-drenched shores and backyard barbecues, filling your heart with memories of laughter and connection. Today, I want to share a recipe that embodies this transformative power: Hawaiian Coleslaw. This isn’t just any coleslaw; it’s a vibrant celebration of flavors, where the sweetness of crushed pineapple dances harmoniously with the crunch of fresh cabbage and the zesty brightness of cilantro. Each mouthful is a little piece of paradise that instantly elevates any meal, especially during those warm summer evenings when you’re craving something light yet satisfying.
I’ve always been captivated by how this Hawaiian Coleslaw effortlessly merges tradition with modern flair. As someone who cherishes family gatherings and summer cookouts, this dish has become a staple at my table. The tang from apple cider vinegar adds just the right touch of acidity, cutting through the richness of creamy mayonnaise while allowing the natural sweetness of pineapple to shine through. Whether it’s served alongside grilled veggies or as a refreshing dish at a potluck, every spoonful tells a story—a story of warmth, sunshine, and shared moments that linger long after the last bite.
Hawaiian Coleslaw: A Tropical Twist on a Classic
Let me take you on this culinary journey where we’ll create a Hawaiian Coleslaw that will leave your taste buds singing! This recipe is not only incredibly easy but also remarkably versatile—perfect for weeknight dinners or special occasions alike. So grab your ingredients, roll up your sleeves, and let’s dive into making something truly extraordinary together!
Ingredients:
As we embark on creating our delightful Hawaiian Coleslaw, each ingredient plays a crucial role in crafting that perfect balance of flavor and texture. Let’s explore what we need for this tropical masterpiece!
- 10 ounce bag of coleslaw mix (or 4 cups shredded cabbage and carrot mix). This is the foundation of our coleslaw—crunchy, crisp cabbage paired with sweet carrots for color and texture. Using pre-packaged coleslaw mix saves time and ensures uniformity in shreds, but if you prefer to shred your own vegetables, opt for fresh cabbage heads that feel heavy for their size and have vibrant green leaves. The freshness here is absolutely paramount; wilted cabbage won’t deliver that satisfying crunch we crave.
- 2 TBS chopped cilantro. Cilantro is like sunshine in herb form—it brings brightness to our coleslaw! Its distinctive flavor complements the sweetness from the pineapple beautifully while adding an aromatic freshness that elevates every bite. When choosing cilantro, look for bright green leaves without yellowing; they should smell fresh and invigorating. If you’re not a fan of cilantro, feel free to substitute with fresh parsley for a more mild flavor.
- 1 15-ounce can crushed pineapple, drained. Here comes the star ingredient—the crushed pineapple! This luscious fruit not only infuses our coleslaw with natural sweetness but also contributes moisture that binds everything together beautifully. Always choose canned pineapple packed in juice rather than syrup for a healthier option; draining it well is essential so our slaw doesn’t end up watery. Trust me when I say this touch of tropical sweetness will make all the difference.
- 1 TBS apple cider vinegar. A splash of apple cider vinegar adds an exciting zing to our dressing! It’s crucial because it balances out the richness from the mayo while enhancing all those vibrant flavors in our slaw mixture. When selecting vinegar, look for organic options if possible—they tend to have more nuanced flavors due to less processing.
- 1/2 cup mayonnaise. This creamy element provides richness that makes our coleslaw utterly irresistible! While traditional mayonnaise works wonderfully here, consider using avocado or vegan mayo if you’re looking for lighter alternatives without sacrificing creaminess. A good-quality mayonnaise will meld beautifully with our other ingredients and create that luxurious mouthfeel we all love.
- Salt and pepper. These simple yet essential seasonings are non-negotiable! They bring out all those vibrant flavors lurking within each ingredient—never underestimate their power! Always taste as you go; I promise you’ll find just the right balance that suits your palate perfectly.
Equipment You’ll Need:
Having the right tools makes our cooking experience smoother and more enjoyable—it’s like having trusted companions by your side in this culinary adventure! While these items may not be “ingredients,” they are essential partners in creating something wonderful together.
- Mixing bowl: A large mixing bowl is paramount for combining all your ingredients effectively without spilling over—trust me on this one! Look for one that’s sturdy enough to withstand vigorous mixing but light enough to handle easily.
- Measuring cups and spoons: Precision is key in cooking; having accurate measuring tools ensures consistent results every time! Invest in a set with clear markings so you can measure out everything from mayonnaise to vinegar effortlessly.
- Spatula: A good spatula helps fold ingredients gently without breaking apart delicate components like cabbage or cilantro—it’s vital when tossing everything together harmoniously!
- Tupperware or serving bowl: You’ll want something lovely to present your beautiful creation at gatherings or simply store leftovers if there are any (though I doubt it!). Choose one that’s big enough to hold your slaw comfortably while allowing room for tossing without mess.
Now that we have all our ingredients ready and tools lined up like trusty allies prepared for battle let’s move forward into making this incredible Hawaiian Coleslaw!
Step 1: Whisking Up Our Dressing
In a medium-sized bowl, start by whisking together your apple cider vinegar, mayonnaise, chopped cilantro (the sunshine herb!), and several shakes of salt until smooth—you want it creamy but still pourable! This step might seem simple but trust me: taking time here allows those flavors to meld beautifully before hitting the main event—the coleslaw itself! You’ll notice how vibrant colors emerge as they blend together; it’s utterly intoxicating!
Step 2: Mixing Pineapple & Cabbage
In a large serving bowl—or even Tupperware if you plan on storing leftovers—combine your drained crushed pineapple with either pre-packaged coleslaw mix or freshly shredded cabbage and carrots (if you’ve gone that route). Toss them gently so everything is well-distributed—you want each bite infused with both sweetness from pineapple while retaining crunch from veggies!
Step 3: Dressing Our Slaw
Now comes my favorite part—pouring that luscious dressing over our colorful mixture! Gently toss everything until every shred gets coated evenly; think about how satisfying it’ll be when each forkful bursts with flavor upon biting down! Don’t forget those final touches: add several turns of freshly cracked black pepper atop your creation; trust me when I say they elevate everything further!
Step 4: Letting It Chill
For optimal flavor melding (and let’s be real—this step is crucial), cover your bowl tightly or transfer it into Tupperware before placing it into fridge space where magic happens over hours (or even overnight). While this dish can technically be enjoyed immediately after mixing—and believe me you’ll want to dive right in—I highly recommend letting it sit at least two hours before serving so those tastes deepen even more beautifully!
As we prepare to enjoy this vibrant dish filled with tropical goodness, keep an eye out for my next steps where I’ll guide you through plating ideas or serving suggestions that’ll truly make each gathering unforgettable!
Step 5: Mixing the Dressing with Purpose
Now that you’ve crafted a delightful dressing, it’s time to bring everything together in a harmonious blend. In a medium bowl, take your previously whisked mixture of apple cider vinegar, mayonnaise, chopped cilantro, and those precious shakes of salt. The vinegar is crucial here; it introduces a tangy brightness that cuts through the creaminess of the mayonnaise. This combination not only binds all the elements together but also infuses your Hawaiian coleslaw with layers of flavor that will dance on your palate. Trust me on this! With a sturdy whisk or even a fork, give it another good stir to ensure everything is well incorporated. You want to see a smooth texture – this is the essence of your coleslaw’s dressing.
When you’re satisfied with its consistency, move on to the star of the show! In a large serving bowl or Tupperware-style storage container—because who doesn’t love leftovers?—combine the drained crushed pineapple with the coleslaw mix and any remaining chopped cilantro you might have. The pineapple adds an utterly intoxicating sweetness that pairs beautifully with the crunch of cabbage and carrots, creating a symphony of flavors and textures. As you mix gently with a spatula or wooden spoon, be sure to handle it with care; we want to preserve those lovely shreds of cabbage while ensuring every piece gets coated in that fabulous dressing.
Step 6: Marrying Flavors Through Tossing
With your vibrant mixture ready, it’s time for the pièce de résistance: pouring that beautiful dressing over your coleslaw mix. This step is absolutely paramount because it allows every single shred of cabbage and carrot to soak up that luscious dressing. As you drizzle it over your mixture, visualize how each component will absorb those flavors; it’s like giving them a warm hug before they mingle in the fridge. Gently toss everything together using two large spoons or tongs—this isn’t just about mixing; it’s about uniting all those flavors into one cohesive dish that sings summer.
Once everything is well combined, take a moment to taste your creation. This is where you can adjust seasoning as needed by adding more salt or pepper. I promise you, this small step makes all the difference! If you find yourself wanting just a touch more acidity, feel free to add another splash of apple cider vinegar. Don’t rush this step; let your palate guide you. After all, cooking should be an experience filled with joy and exploration!
Step 7: The Power of Patience — Chilling Your Coleslaw
Now comes one of my favorite parts—the chilling phase! For best results, I highly recommend letting your Hawaiian coleslaw sit in the refrigerator for at least a couple of hours, ideally around four if you can manage it. Why chill? Well, this waiting game allows all those incredible flavors to meld together beautifully. The acids from the vinegar penetrate the vegetables while softening their crunch ever so slightly without losing that essential crispness we adore. It creates an extraordinary depth and complexity in taste that transforms an already delicious dish into something truly memorable.
While it’s tempting to dive right in after mixing, resist that urge! Think about how marinating works for meats or vegetables; it’s no different here! You’ll notice that after some time in the fridge, each bite becomes profoundly satisfying as flavors deepen and blend harmoniously. During this period, keep an eye out for any excess liquid accumulation from the pineapple – if there’s too much once you’re ready to serve, simply drain off some before tossing again for optimal texture.
Step 8: The Final Flourish — Serving Your Hawaiian Coleslaw
After allowing those flavors to meld for several hours (or even overnight!), it’s finally time for the grand unveiling of your Hawaiian coleslaw! When you’re ready to serve, pull out your bowl from its cool resting place and give it one last gentle toss; this redistributes any dressing that may have settled at the bottom while maintaining its delightful crunch. As you scoop out portions onto plates or into smaller bowls for serving, consider garnishing with extra cilantro leaves for added color and freshness—this simple touch elevates presentation and invites everyone to dig in.
Take a moment now to truly appreciate what you’ve created—a vibrant salad bursting with tropical flair that’s perfect alongside grilled fish or chicken dishes at summer cookouts or simply as a refreshing side at weeknight dinners. Each bite will transport you straight to sandy beaches and sunny skies; I guarantee it will become an instant favorite among friends and family alike! Enjoy every mouthful knowing you’ve crafted something special from start to finish.
Celebrating Your Creation — Enjoying Hawaiian Coleslaw!
As we wrap up this delightful journey into making Hawaiian coleslaw together, remember that cooking is not just about following recipes but weaving stories through ingredients and techniques passed down over generations. Each serving reflects love poured into preparing food from scratch—a tradition worth celebrating! So whether you’re sharing plates during gatherings or savoring leftovers as lunch throughout the week—relish these moments filled with flavor and connection.
Don’t hesitate to experiment next time by adding other fruits like diced mango or even some toasted coconut flakes for extra texture; after all, culinary adventures are meant to be explored! I hope this Hawaiian coleslaw brings joy and deliciousness into your kitchen as much as it has mine—happy cooking!
Storage and Enjoyment Tips for Your Hawaiian Coleslaw
Now that your Hawaiian Coleslaw is ready to dazzle your taste buds, let’s talk about how to keep this tropical delight fresh and enjoyable! As you look at the vibrant colors mingling in your bowl, I can almost hear the gentle waves lapping at a sandy beach, reminding you just how special this dish really is. Whether you’re preparing for a summer cookout or simply want a refreshing side for dinner, this coleslaw is truly something to be savored and shared with friends and family.
Storing Leftover Hawaiian Coleslaw
To preserve the delightful crunch and flavors of your Hawaiian Coleslaw, store any leftovers in an airtight container—this is absolutely paramount! I recommend using a glass container with a tight-fitting lid, as it helps to maintain the crispness of the cabbage while also avoiding any potential plastic leaching into your food. When stored properly in the refrigerator, this coleslaw will stay fresh for about 3 to 5 days. But here’s a little pro tip: if you want to keep that delightful texture intact for even longer, consider placing a slice of bread inside the container; it acts as a moisture absorber, keeping your coleslaw crispier! And trust me on this—you’ll find that even after a day or two in the fridge, those flavors continue to meld beautifully. Just give it a quick toss before serving again and enjoy that symphony of flavors; I promise you’ll be pleasantly surprised!
Freezing Hawaiian Coleslaw for Later
If you’re looking to extend the life of your Hawaiian Coleslaw even further, freezing is an option! However, I must emphasize that while the slaw can be frozen, it’s best enjoyed fresh due to its crunchy texture. If you do decide to freeze it, make sure to use a freezer-safe container or heavy-duty freezer bags. Squeeze out as much air as possible before sealing—this ensures no frost will compromise your delicious creation. When properly frozen, it can last up to three months. When you’re ready to use it from frozen, simply transfer it to the refrigerator overnight to thaw; however, keep in mind that some textural changes may occur due to the moisture from the pineapple. Still, the sweet-tangy flavor will remain captivating! The convenience of having a batch ready at your fingertips makes this such an exciting option—imagine pulling out a taste of summer on a chilly winter’s day!
With these storage tips in mind, you’re all set for enjoyment now and later!
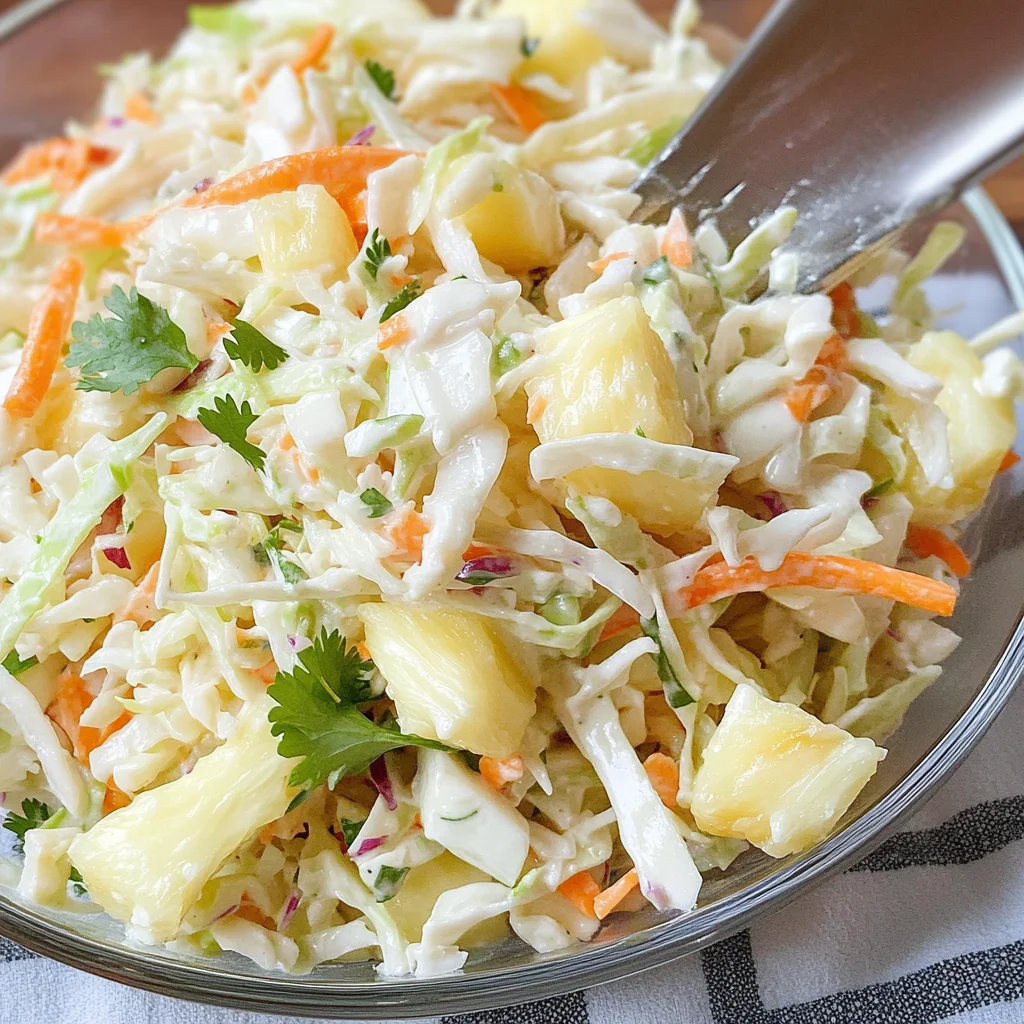
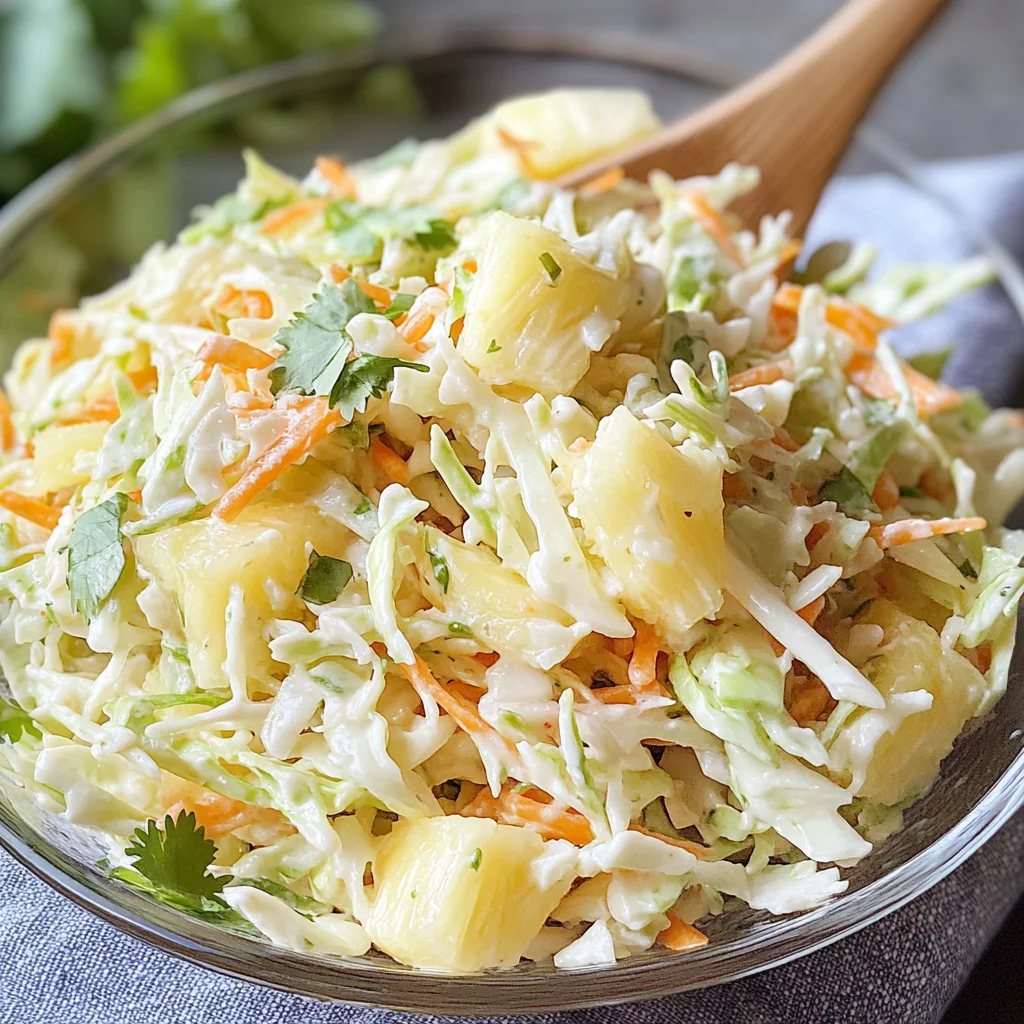
Hawaiian Coleslaw
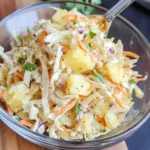
Hawaiian Coleslaw is a vibrant and refreshing twist on the classic side dish, perfect for summer gatherings and barbecues. This delightful recipe combines the sweetness of crushed pineapple with the crunch of fresh cabbage and carrots, all brought together by a creamy dressing that has a zingy kick from apple cider vinegar. Each bite transports you to a tropical paradise, making it an ideal complement to grilled meats or as a stand-alone salad. Easy to prepare and utterly delicious, this coleslaw is not just a dish; it’s an experience that fosters connection and joy at any meal.
- Prep Time: 15 minutes
- Cook Time: N/A
- Total Time: 0 hours
- Yield: Serves approximately 6
- Category: Side Dish
- Method: Mixing
- Cuisine: Tropical
Ingredients
- 10 oz bag coleslaw mix (or 4 cups shredded cabbage and carrot mix)
- 2 tbsp chopped cilantro
- 1 15-ounce can crushed pineapple, drained
- 1 tbsp apple cider vinegar
- 1/2 cup mayonnaise
- Salt and pepper to taste
Instructions
- In a medium bowl, whisk together the apple cider vinegar, mayonnaise, chopped cilantro, and salt until smooth.
- In a large serving bowl, combine the drained crushed pineapple with the coleslaw mix.
- Pour the dressing over the mixture. Gently toss until everything is evenly coated.
- Cover and refrigerate for at least 2 hours before serving to allow flavors to meld.
Nutrition
- Serving Size: 1 cup (150g)
- Calories: 180
- Sugar: 6g
- Sodium: 250mg
- Fat: 12g
- Saturated Fat: 2g
- Unsaturated Fat: 8g
- Trans Fat: 0g
- Carbohydrates: 18g
- Fiber: 2g
- Protein: 2g
- Cholesterol: 5mg